- Encryption got so many improvements that we are writing a separate post (stay tuned).
- Refactored Network on its way to Tumbleweed.
- When you fix a corner case, automatic tests will break in a different corner.
- Not only in flight simulators but also in storage device graphs it matters which way is up and which is down.
Refactored Network on its way to Tumbleweed
A few weeks ago we submitted the first round of changes to the network module to Tumbleweed. At that point, it was still using the old data model for most operations (except routing and DNS handling) and a lot of work remained to be done.
We have been working hard on improving the overall quality of this module and we will submit an updated (and much improved) version in the upcoming days. To summarize, here are some highlights:
- Completed the new data model (support for TUN/TAP, bridges, bonding, VLANs, etc.).
- New wireless configuration workflow.
- Revamped support for interface renaming and driver assignment, including better udev rule handling.
- Fixed
/etc/hostshandling when switching from static to DHCP based configuration. - Many small fixes in several areas.
Are we done with the refactoring? No, we are still working on improving S390 support and fixing small issues, but most of the work is already done.
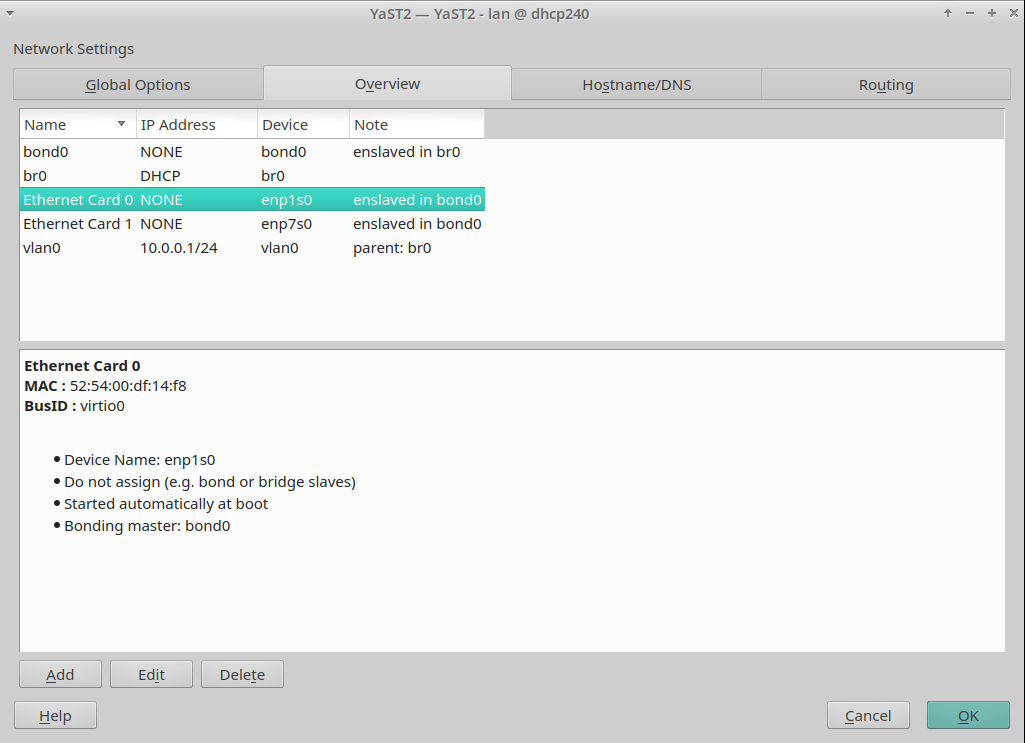
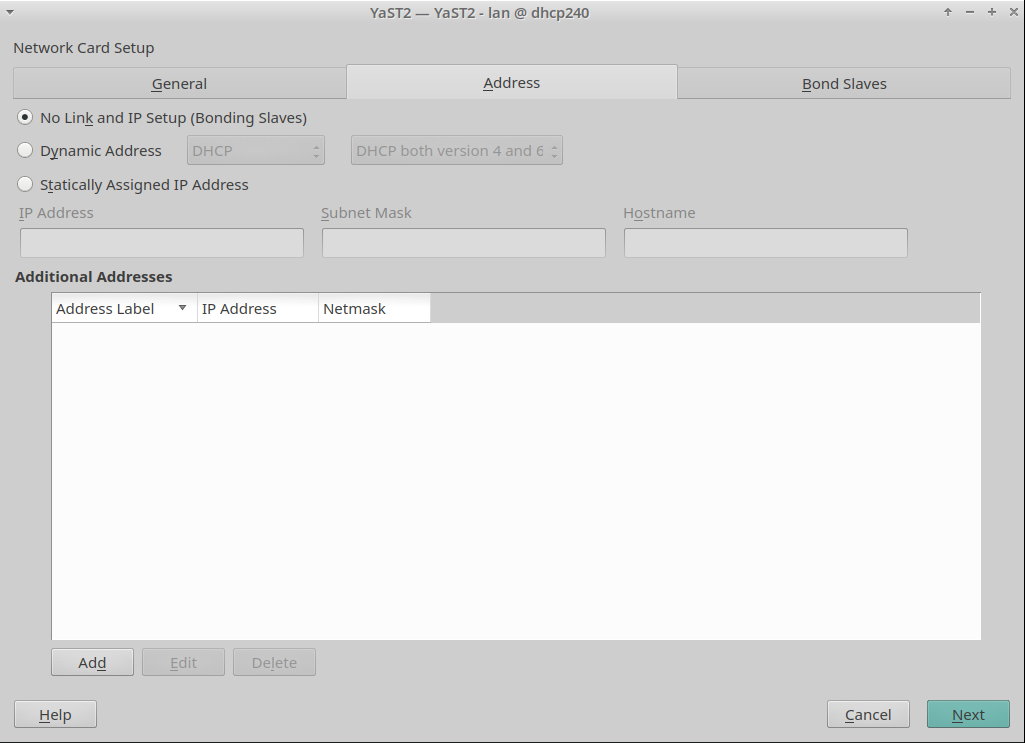
Of course, as soon as we finish, we will publish a blog entry with the gory details. But, as we know that you love screenshots, let us show you a handful of them.
Although we have not introduced big user interface changes, we have tried to improve small things, like properly displaying whether an interface belongs to a VLAN or hiding the "Hardware" tab for virtual interfaces.
DNS resolution not working during installation, or: openQA is different
When we got a bug report that DNS resolution was not working during installation (since SLE-15 apparently), a solution seemed straightforward: /run/netconfig/resolv.conf was missing because the /run directory was not mirrored (bind-mounted) into the target system. That’s a task that used to be done by yast-storage in times before SLE-15 and was for some unknown reason forgotten when we implemented yast-storage-ng. A one-line fix was easily done, tested, and submitted.
Or so it seemed.
A few days later we got reports from SLE openQA that tests started to fail with this patch. Nothing networking related but the installation did not finish because the 10 seconds countdown dialog (‘going to reboot’) at the very end of the installation was frozen. The UI didn’t accept any input whatsoever. But whatever we tried, the issue was not reproducible outside openQA. YaST logs from openQA showed that /run got mounted as planned and was cleanly unmounted at the end of the installation – before that frozen dialog. So no clue so far and the issue was set aside for a while. Until the same reports came in from Tumbleweed testing. It was clearly linked to this one-line patch. But how?
It stayed a mystery until a chat with an openQA expert shed some light on the issue. What we thought was happening was: openQA stopped the dialog (by pressing a button) and when it tried to go on the OK button did not respond anymore. What we learned does actually happen is this: openQA stops the dialog, then switches from X to the text console, collects logs, switches back to X, and then the UI does not respond anymore. So that was quite an essential point missing.
And with this it was easily reproduced outside openQA: the X logs showed that the X server lost all its input devices after the switch. And that was because someone had deleted the whole /run directory. The YaST logs didn’t contain a hint (of course not, would have been too easy) but grepping the sources found the place where YaST deleted the directory.
The code had been added after complaints that the installation left a cluttered /run directory – of course the installation did leave files there, since it was forgotten to bind-mount the directory. So once the mentioned patch bind-mounted it again the deletion code cleaned up not /run in the installation target system but the real /run as well – cutting off the X server from the outside world resulting in freezing the openQA test.
And the moral of the story is: probably none. But it highlights again that the automated test setup can have unexpected feedback on the test itself. Luckily in this case, as the issue would not have been noticed otherwise.
Computer, Enlarge the Device Graph
The partitioner module has a graphical view to help you see the relations in more complex storage setups:

If you turn the mouse scroll wheel up or down, we will zoom the view in or out. Now the direction matches the behavior in web browsers and online maps, previously we had it the wrong way around.
Update: during proofreading, a team mate told me: "A device graph? That’s not a device graph. THAT’s a device graph:"
