Home Home > 2016 > 12
Sign up | Login

Deprecation notice: openSUSE Lizards user blog platform is deprecated, and will remain read only for the time being. Learn more...

Archive for December, 2016

Watching 360 video on openSUSE

December 29th, 2016 by

In this post, there how to watch 360 videos on the Linux platform without the need for special technical magic. To do this, just use the package QMPlay 2, A player based on QT that fulfills its function very well. In addition to being versatile and effective, bringing an incredible amount of features for you to use, including touchscreen monitor recognition to navigate the video preview.

To watch 360 video, first press PLAYBACK the main menu, then choose VIDEO FILTERS, and finally enable the SPHERICAL VIEW option to use the 360 viewing function.

For testing, I provide my 360 video on the link below for download. And to finalize at the end a demonstration video of the software running as the installation links ONE CLICK INSTALL in my openSUSE repository.

Video example for download AQUI!

Source in Brazilian Portuguese (Alessandro de Oliveira Faria A.K.A. CABELO): https://assuntonerd.com.br/2016/12/29/assistindo-video-360-no-linux/


How to build OS images without kiwi

December 26th, 2016 by

kiwi has long been the one standard way of building images in openSUSE, but even though there exist extensive writings on how to use it, for many it is still an arcane thing better left to the Great Magicians.

Thus, I started to use a simpler alternative image building method, named altimagebuild when I built our first working Raspberry Pi images in 2013 and now I re-used that to build x86_64 VM images at
https://build.opensuse.org/package/show/home:bmwiedemann/altimagebuild
after I found out that it even works in OBS, including publishing the result to our mirror infrastructure.
It is still in rpm format because of how it is produced, so you have to use unrpm to get to the image file.

This method uses 3 parts.

  • a .spec file that lists packages to be pulled into the image
  • a mkrootfs.sh that converts the build system into the future root filesystem you want
  • a mkimage.sh that converts the rootfs into a filesystem image

The good thing about it is that you do not need specialized external tools, because everything is hard-coded in the scripts.
And the bad thing about it is that everything is hard-coded in the scripts, so it is hard to share general improvements over a wider range of images.

In the current version, it builds cloud-enabled partitionless images (which is nice for VMs because you can just use resize2fs to get a larger filesystem and if you later want to access your VM’s data from outside, you simply use mount -o loop)
But it can build anything you want.

To make your own build, do osc checkout home:bmwiedemann/altimagebuild && cd $_ && osc build openSUSE_Leap_42.2

So what images would you want to build?

Highlights of YaST development sprint 29

December 22nd, 2016 by

It’s Christmas time and since (open)SUSE users have been nice, the YaST team brings some gifts for them. This is the result of the last development sprint of 2016.

As you may have noticed, in the latest sprints we have been focusing more and more in making SUSE CASP possible. That’s even more obvious in this last sprint of the year. For those that have not been following this blog recently, it’s probably worth to remember that SUSE CASP will be a Kubernetes based Container As a Service Platform.

But our daily work goes beyond CASP, so let’s take a look to all the highlights.

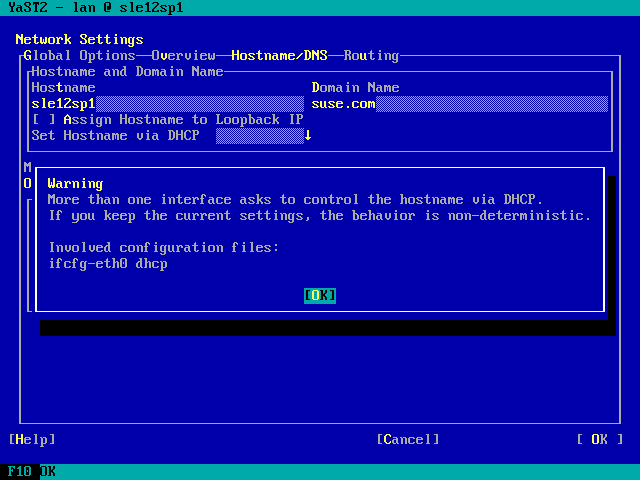
More improvements in the management of DHCLIENT_SET_HOSTNAME

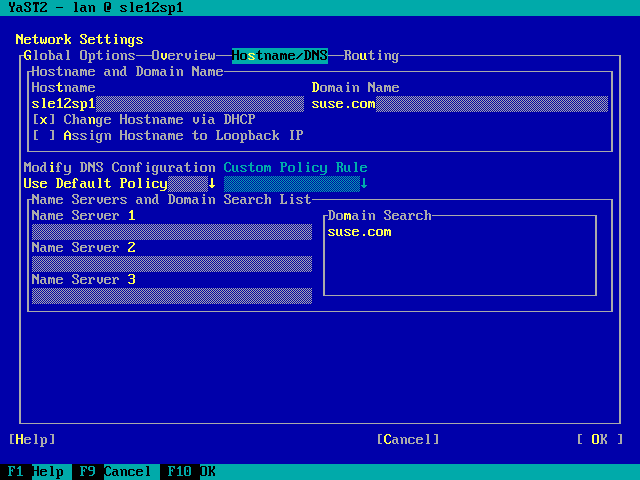
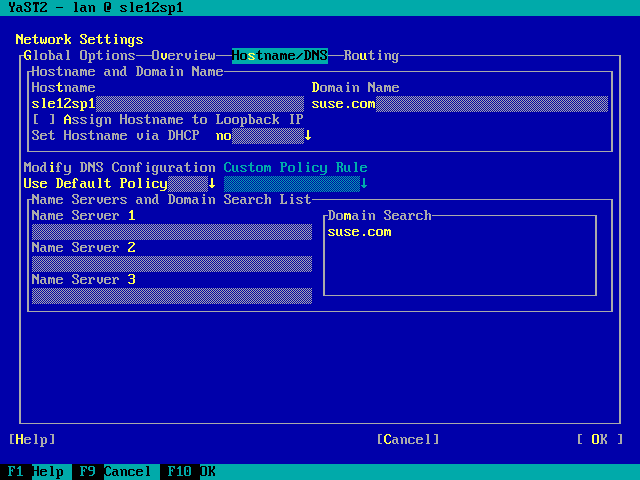
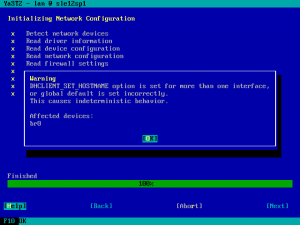
In the previous report we presented the changes introduced in yast2-network to make the configuration parameter DHCLIENT_SET_HOSTNAME configurable in a per-interface basis.

One of the great things about working in an agile an iterative way, presenting and evaluating the result every three weeks, is that it allows us to detect room for improvements in our work. In this case we noticed some discrepancy in the expectations of Linuxrc and yast2-network and also some room for improvement in the code documentation and in the help texts.

Thus, we used this sprint to refine the work done in the previous one and tackle those problems down.

Improved error message

Ensure installation of needed packages

Another example of iterative development. We already presented in the report of the 26th development sprint a new mechanism to detect when the user had deselected during installation some package that was previously pre-selected by YaST in order to install the bootloader. Since the new functionality proved to work nicely, we decided to extend it to cover other parts of the system beyond the bootloader.

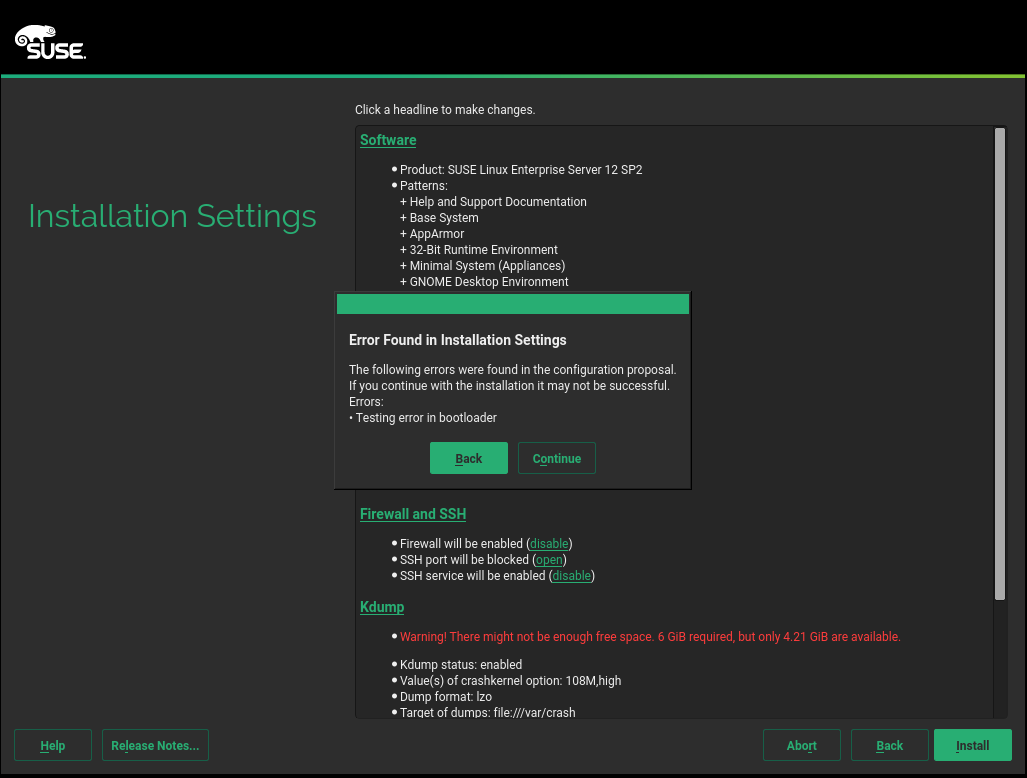
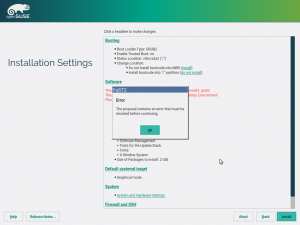
The software proposal now contains an error message including a list of missing packages or patterns, in case the user deselects some needed items.

Warning about missing packages

After clicking the Install button the installation is blocked, the user must resolve the problem either by selecting the packages back or by adjusting the respective YaST configuration (e.g. do not install any bootloader and disable the firewall).

Blocking an incomplete installation

Rethinking the expert partitioner

May we insist one more time on the topic of using Scrum to organize our work in an iterative way? 😉 As our usual readers should already know, we structure the work into minimal units that produce a valuable outcome called PBIs in Scrum jargon. That valuable outcome doesn’t always have to be a piece of software, an implemented feature or a fixed bug. Sometimes a document adds value to YaST, specially if it can be used as base to collaborate with people outside the team.

Our readers also know that we are putting a lot of effort in rewriting the whole storage layer of YaST. That also implies rewriting the most powerful tool known by humanity to define partitions, volumes, RAIDs and similar stuff – the YaST expert partitioner.

It would be great if we could use the opportunity to make it both more powerful and more usable. You can take the first part for granted, but we are not so sure about our UI design skills. That’s why we wanted to have a base to discuss possible changes and alternative approaches with UX (user experience) experts. And we decided that it was worth to invest some time to create a document collecting the state of the art and some ideas for the future and to send that to SUSE experts in UX and to anybody with some interest in the topic.

Here you can find that fine piece of documentation. Take a look to that document if you want to peek into YaST developers’ mind. That’s the kind of stuff we discuss when we are about to start rewriting something… specially something that need to serve hundreds of different use cases.

And of course we would like to know your ideas or thoughts. We usually discuss this stuff at the public #yast IRC channel and at the yast-devel mailing list. But if you prefer so, you can simply open an issue at the repository hosting the document. Whatever works for you.

Rethinking yast2-network

But that was not the only documentation PBI finished during this sprint. Inspired by the first fruits of the storage layer reimplementation, we decided yast2-network also deserves a reincarnation.

As we did in the past with yast2-storage and libstorage, the first step is to collect as much information as possible about what can be currently done with the module and how it behaves in several situations, specially in tricky or complex scenarios. The outcome was three documents, one about the behavior during installation (installation.md), a second one about AutoYaST (autoinstallation.md) and another collecting general features (features.md).

CASP: merged dialogs for root password and keyboard layout

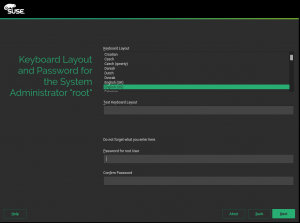
CASP is a product targeted to a quite specific use case with simplicity as a main priority. The installation process has been streamlined to a minimal set of dialogs to configure just the very basic stuff. Among other removed things, there is no step to configure the system language. That can be a problem when entering the root password (the only user that will be created during installation), since the language settings screen is normally also used to select the keyboard layout.

The implemented solution is shown in the screenshot below. As you can see, the keyboard layout and root passwords selections are merged into a single step. As a bonus, we made both widgets more reusable, opening the possibility to place the root password widget or the keyboard layout selection anywhere.

Keyboard layout and root password screen

Storage reimplementation: handling GPT disks in the installation proposal

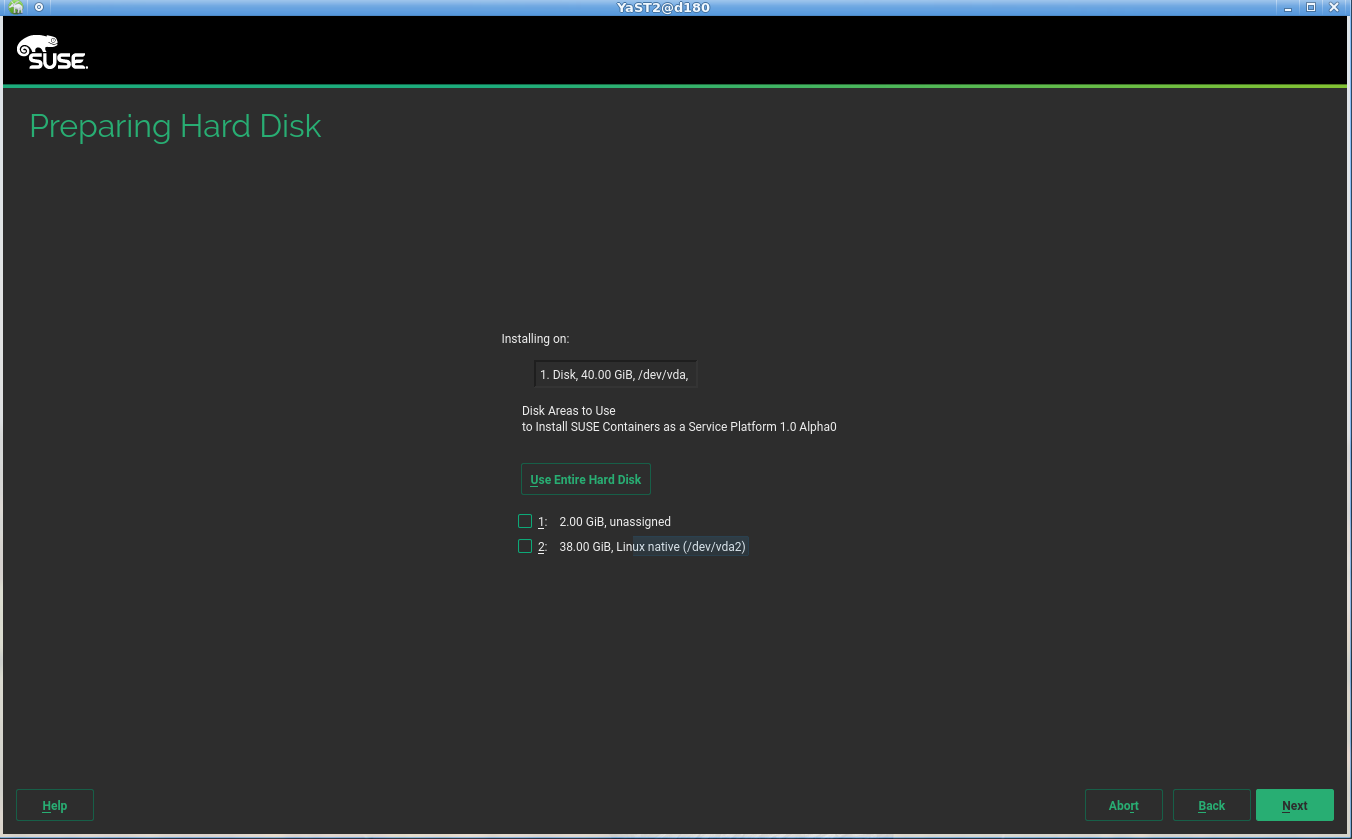
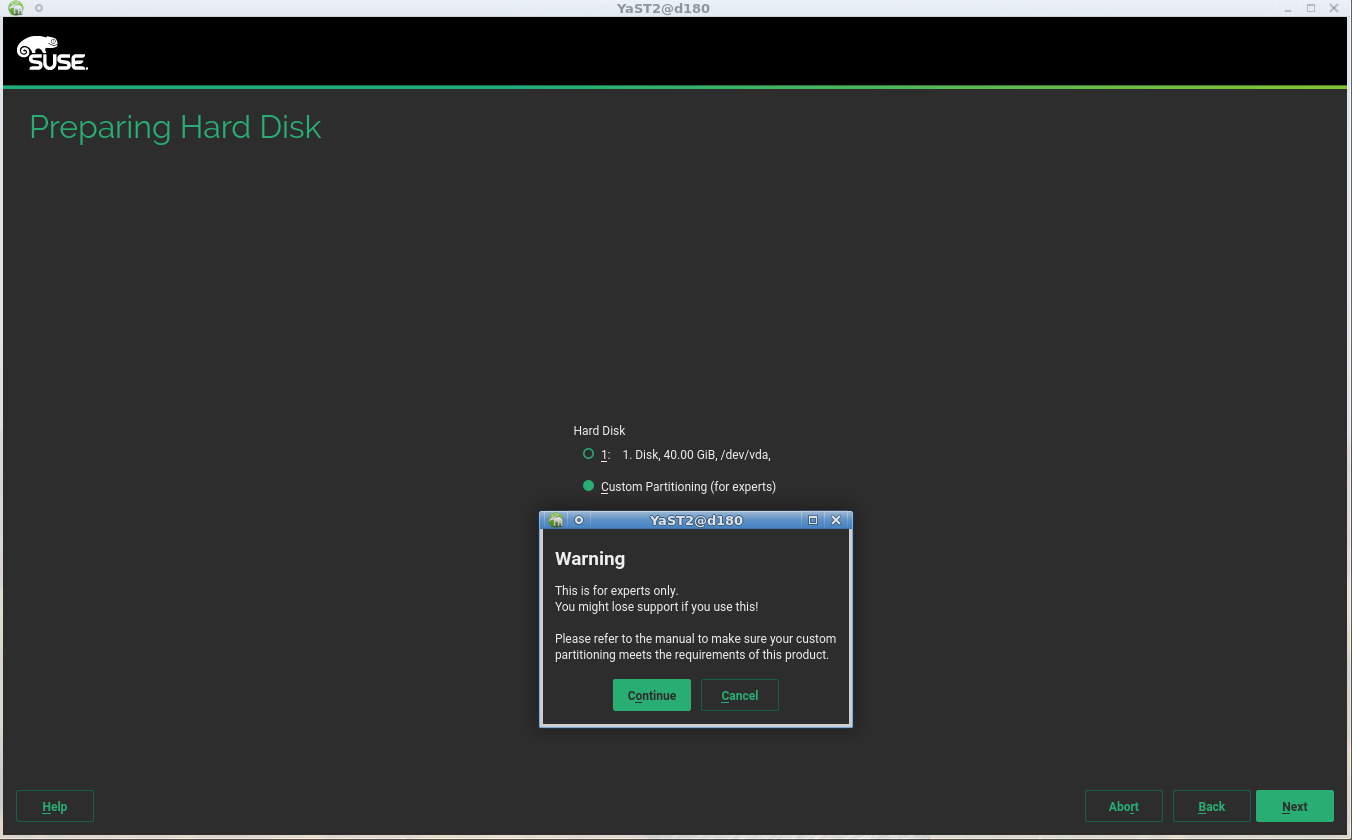
After several sprints reporting small steps forward, in the 27th sprint we were happy to announce that our testing ISO for the new storage stack was fully installable under certain circumstances. As we reported, it worked in UEFI or legacy systems with the only requirement of having a pre-existing MBR partition table in the disk.

Now we can say it also works with GPT partition tables and even with systems with a mixture of both technologies.

Making the GPT scenario work was much harder that it sounds due to several factors, like the strange way in which parted handles partition types in GPT or some peculiarities in the way the space is distributed in such partition tables.

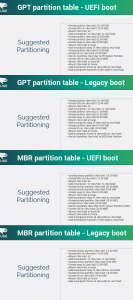
But now our test ISO can install a fully functional system in the four combinations of MBR/GPT partition table and UEFI/Legacy boot, as it can be seen in the next image.

Storage proposal in several scenarios

The storage reimplementation gets its own openQA instance

But there are better ways than screenshots to prove that something is working, even to prove it keeps working after future modifications. And in (open)SUSE we have one of the best tools for that – openQA.

We have always considered having the new stack tested in openQA as the first big milestone in its development (and we are finally there!) but we are aware that openQA.opensuse.org is already quite busy testing a huge combination of products, architectures and scenarios… even testing releases of openQA itself. Fortunately openQA is free software and can be installed anywhere so we created our own instance of openQA to test YaST stuff, specially the new storage layer.

So far, that instance is hosted in the internal SUSE network, which is enough for us to get continuous feedback about the changes we introduce. In addition to installing the new instance and configuring it to continuously grab and check the latest testing ISO, we had to introduce several changes in the ISO itself with the goal of keeping our tests as aligned as possible with the tests performed in the current Tumbleweed version by openQA.opensuse.org.

For example, we made sure the ISO was properly signed to avoid the need to always pass the insecure=1 boot argument. We also included several packages that were missing in order to make sure the ISO included all the software checked during the so-called MinimalX test and to make sure it shared the look and feel with a regular Tumbleweed, since many openQA checks are screenshot-based.

From now on, we can back every new feature with the corresponding integration tests, something crucial to ensure the quality of a piece of software meant to handle storage hardware.

Making Snapper work without DBus

As you may know, some YaST team members are also the main developers and maintainers of Snapper, the ultimate file-system snapshot tool for GNU/Linux systems.

Normally the snapper command line tool uses DBus to connect to snapperd which does most of the actual work. This allows non-root users to work with snapper.

There are however situations when using DBus is not possible and not being able to work in those situations was limiting Snapper’s usefulness. Now with the latest version all snapper commands support the –no-dbus option. This evolution is worth a blog post by itself… and, of course, we have it. To know all the details check this post at Snapper’s blog.

CASP (and beyond): improved roles

Do you remember the system roles feature introduced during development sprint 16 and improved in subsequent sprints? In case you don’t, let us remind you that system roles allow to define many settings of the installation just by choosing one of the offered roles. That’s only possible, of course, in products making use of that feature, like SLES.

For CASP we will have 3 different roles, as shown in the following screenshot.

CASP system roles

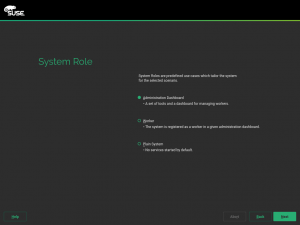
The main difference between these three roles is the selection of patterns to be installed. But apart from that, the Worker role will offer an extra step during installation allowing the user to specify the address of the so-called Administration Dashboard.

Configuration screen for the Worker role

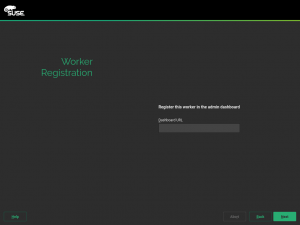
That relatively small detail implied the development of a full new feature in the installer – the ability of a given role to define it’s own specific configuration, including the dialog to interact with the user. As expected from any other installation dialog, you can go back and forward without loosing the entered information. If the user goes back and selects a different role, then this additional dialog is not run again.

That new feature is, of course, not specific to CASP and could eventually be used in other products and roles. Just as a crazy example, openSUSE could decide to introduce a role called “NTP server”, running the YaST NTP server configuration right after the user selecting the role.

Other CASP related features

As already said, we have been focusing quite a lot on introducing features that are needed for CASP. It’s worth mentioning, in case it’s still unclear, that CASP will NOT ship its own adapted version of YaST. All the features introduced in the installer are in fact configurable and available for all other products as well. There is only one YaST codebase to rule them all.

Let’s briefly describe some of the introduced CASP-specific (at least for the time being) features.

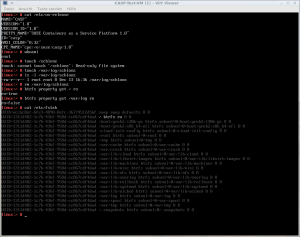
CASP always uses Btrfs as filesystem for the root partition. At the end of the installation, the root btrfs subvolume will become read-only. All the other subvolumes will stay as read-write, as shown in this screenshot taken right after rebooting at the end of the installation process.

CASP subvolumes

It makes no sense to update from any existing product to CASP. Thus, CASP media should not show an “update” option when booting, even if it’s still possible for advanced users to pass the UPDATE boot parameter. Since we needed to modify the installation-images package, we took the opportunity to make the “update” option and other settings configurable in a per product basis and we unified SLES and openSUSE packages, so now they share a single branch in the source code repository.

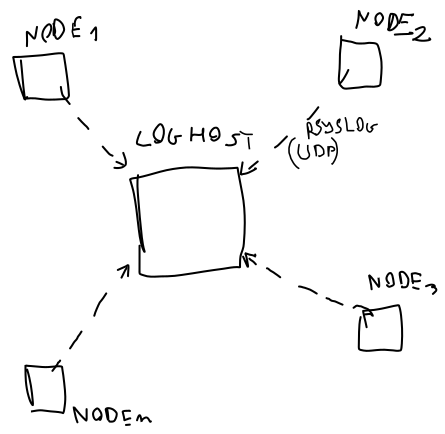
CASP is targeted to big deployments extended all over the world. To make possible the synchronization of geographically distributed nodes, the UTC timezone is enforced in every CASP installation. Thus, we implemented support for products to enforce a given timezone in the installer. Take into account this is different from a default timezone.

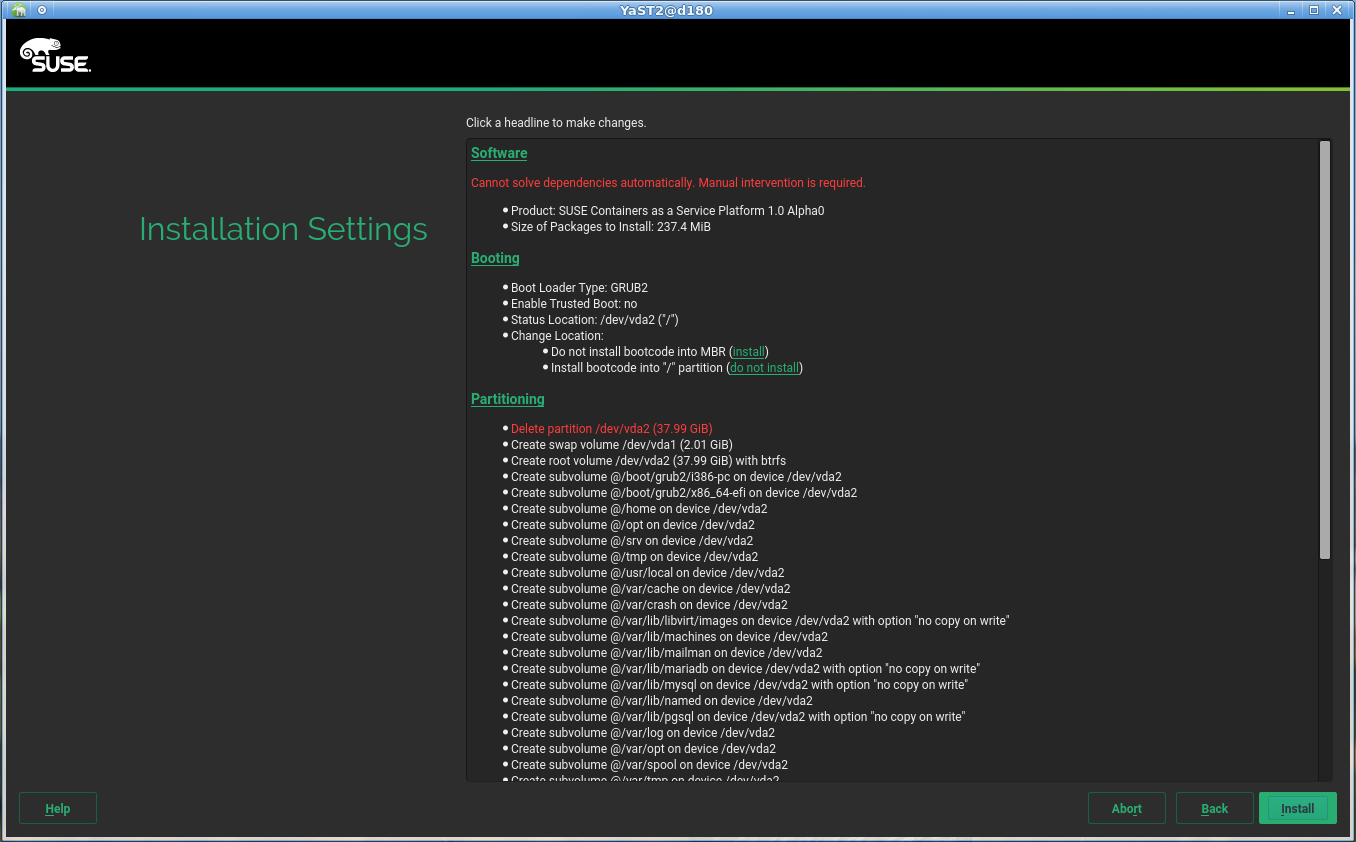
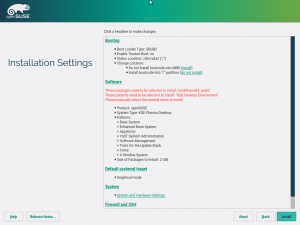
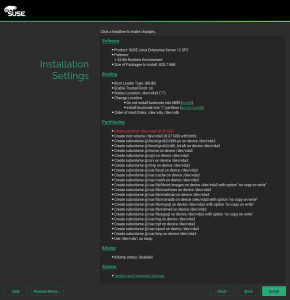
Last but not least, it has already been mentioned that the CASP installation workflow will have very few steps. That also affects the screen displaying the installations settings summary. In comparison to a regular SLES, some options must disappear because they are not configurable and some other sections must be added because they are not longer presented as a separate previous step. So far, this is the appearance of the installation settings screen in the current CASP prototype.

Installation settings in CASP prototype

…and a surprise about the blog

We also prepared a Christmas gift related to the blog. The technical aspects are solved, but we are ironing out the administrative details. So you will have to wait until the next sprint report to see it in full glory. But, as the Spanish proverb says, “good things are worth waiting for”.

See you next year

That’s enough to report from our December sprint, we don’t want to bore you with every small bug fix. And talking about things that are worth waiting for, our next report will very likely be published at the beginning of February 2017.

That’s because we will put our Scrum process on hold during the Christmas session. We will restart it on the second week of the year, after the visit of the Three Wise Men. In several countries, it’s a tradition that the Three Kings bring gifts to the kids that have been nice, so let’s expect they bring us some new members for the team!

AMD/ATI Catalyst fglrx rpms, end of an era!

December 7th, 2016 by

Long time not talking about fglrx rpm, mostly because they’ve got no update since last December 2015.

Short Summary

In a word as hundred, fglrx is now a dead horse!

Dead horse

We had the hope of getting it working for Leap 42.2 in October, but except freezing kernel and xorg, you will not get what you would expect: a stable xorg session

Say goodbye fglrx!, repeat after me, goodbye fglrx.

If you are locked down and forced for any reasons to use fglrx with your gpu, and are still using 42.1, then don’t upgrade to 42.2, without a plan B

It has no more support from AMD upstream, and that’s it!, if someone want to break its computer, it’s still possible to pick the last files and try it by yourself, but the repository will never contain it for 42.2 (see below how-to)

That’s said, I’m not still sure, to keep for a long time the repository, I’ve been managing since 6 years now.

A bit of history

In 2010, when we were working hard to get 11.1 out, the news that no supported ATI (at that time) will be available for end-users, as we have for nvidia gpu

I didn’t check back the irc log, but we were a few, that would like to have this still available, by pure commodity. Especially that I’ve just exchanged a non working gpu by my new hd5750.

I remember the first chaotic steps, how to build that, and create repeating builds, what about the license? Did we have the right to offer a pre-build rpm etc. I spent some time fixing all of this stuff.
And start the build on real hardware. Hey afterward kvm was really in infancy stage.

Release after release amd/ati and openSUSE, the driver was build, on hardware for each supported distribution. When beginning of 2013 Sebastian Siebert, who got some direct contacts with AMD, release
his own script, we collaborate to have the possibility to build on virtual machines, which allow me to simplify the build process, as having on kvm for each openSUSE release supported.

Afterward, AMD start to split fglrx with the fglrx for HD5xx and above, and fglrx-legacy. So 2 drivers to maintain, but as always with proprietary software, the legacy version became rapidly obsolete,
and non usable. Not that bad, in the meantime the AMD effort on the free and open source radeon driver, quickly overcome the performance of legacy.

Still from 2013, to 2016 I’ve been able to propose ready to use rpm for several version of openSUSE’s distributions. I think the repository serve quite well end users, and I never got big flames.

I can’t avoid to mention the openSUSE powered server and sponsored by Ioda-Net Sàrl that has serve this objective so well during that time frame.

Future of the repository

Now that fglrx is becoming obsolete, I think seriously about why the repository online should stay online.

At openSUSE project level, we still have 13.1, 13.2, 42.1 and 42.2 that are mostly active. 13.1 is already almost out of the game of evergreen,
13.2 will follow soon, and I don’t know yet the exact plan for 42.1, but it will certainly go out of maintenance in less than a year.

If you feel or have the need of the repository, please express that in the comments below.

Wait there’s amd-gpu-pro, no?

Yeap there’s a closed driver, called amd-gpu-pro, available, for newer cards. But there’s two things that bring me out of the game, first I don’t have those newer gpu,
and don’t have the need to replace my hd5750 for the moment. The second and certainly the most important, those drivers are only available for Ubuntu or at least in .deb format.

I will certainly not help proprietary crap, if I don’t have a solid base to work with, and a bit of help from their side. I wish good luck to those who want to try those drivers,
I’ve got a look inside, and got a blame face.

For crazy, and those who don’t love their computer

So you want to loose your time? you can! I’ve kept in raw-src directory all the script used to build the driver.
They differ a bit compared to Sebastian Siebert last version in the sense of making Leap 422 as a possible target.
If you dig a bit around, you should be able to build them, but you’re alone on that way, you’ve been warned!

I’m not against a republished version, if someone find a way to make them working, just drop me a message.

That’s all for this journey, Have Fun! 🙂

Highlights of YaST development sprint 28

December 2nd, 2016 by

November is over, Santa Claus elves start to stress and the YaST team brings you one of the last reports of 2016. Let’s see what’s new in YaSTland.

Harder to ignore installation warning

The “installation settings” summary screen usually reports some non-critical errors displayed as a red text. Although the installation can proceed despite those errors, they are usually serious enough to lead to problems. That’s why we decided to introduce a change to highlight them a little bit more, making them harder to overlook.

The following screenshot shows the newly introduced confirmation dialog, presented before proceeding with installation.

Preventing users to shoot their feet

Make DHCLIENT_SET_HOSTNAME configurable on a per-interface basis

But that’s not the only usability-oriented enhancement on this sprint. We also reworked a bit the network configuration dialog.

For home users is very common to use a fixed hostname -set during installation- for our beloved linux box. But in some circumstances it’s better to set the hostname of the machine dynamically using DHCP, something YaST has always allowed to do by just ticking a checkbox that used to be in the network configuration screen. See “Change Hostname via DHCP” below.

The old network settings screen

That checkbox used to modify the system-wide variable DHCLIENT_SET_HOSTNAME, which was fine in scenarios in which only one of the network interfaces was configured via DHCP. But with several network interfaces connected to different DHCP-enabled networks, some problems arose.

During installation, if network configuration is used, Linuxrc creates the ifcfg files with DHCLIENT_SET_HOSTNAME='yes' for all of the enabled or configured interfaces and this value has precedence over the global one.

So the main problem was that YaST only allowed us to modify the global variable and setting it to ‘no’ did nothing because it was enabled for some interface.

During this sprint we have fixed that and now the user interface offers the possibility of choosing which DHCP interface will be used to decide the hostname.

The new network settings screen

Apart from choosing one of the existing interfaces, the new setting can also be set to ‘no’ or to ‘any’. In any case, YaST will always configure the system-wide options and the interface specific ones in a consistent way, so the behavior is always predictable.

But YaST is not the only way of configuring the network, so it’s always possible to have an unpredictable configuration. Fortunately, those potentially problematic scenarios will be detected by YaST and reported to the user.

Detecting dangerous scenarios in network settings

Partitioning in CASP

In the previous report we already explained how are we improving the installer to support the definition of the ultra-streamlined installation process of SUSE CASP, the new Kubernetes based member of the SUSE family.

In this sprint we introduced several additional changes to enable a different partitioning approach, more guided and automatic than ever. In a CASP node it makes no sense to use the advanced settings offered by our storage proposal, like encryption or LVM. Moreover, CASP relies on Btrfs to provide some of its cool and advanced features, like transactional updates.

As a result, although the regular SUSE and openSUSE releases will keep offering all the current possibilities in the same way than ever, in CASP the partitioning step will be skipped and the automatically calculated proposal will be simply displayed in the installation summary.

The new CASP installation summary

Clicking on the proposal will allow to re-target the installation to a different disk (or disks) in a similar way than the regular installer, but the options will be more limited. Again, no easy way to use LVM, encryption, separate home or any file system type other than Btrfs.

Selecting the partitions in CASP, no proposal settings button

The expert partitioner is still available during CASP installation, but using it will show an extra warning, since it implies a much bigger risk than using it in a regular SUSE or openSUSE system.

Expert partitioner warning in CASP

Improved debugger integration

We have improved the Ruby debugger integration in YaST. So far you could start the debugger using the y2debugger=1 boot option or by setting the Y2DEBUGGER=1 environment variable. The new feature allows starting the Ruby debugger also later when the YaST module is already running.

Simply press the Shift+Ctrl+Alt+D keyboard shortcut (D as debug) and it will start the Ruby debugger. It works during installation and also in installed system (just make sure the byebug Ruby gem is installed).

Unfortunately this new feature works only in the Qt UI, the ncurses UI is not supported (currently it does not handle the debugging keyboard shortcut at all).

After pressing the keyboard shortcut the debugger window will pop up:

New debugger integration

Storage reimplementation: it’s alive!

It took us one more sprint than originally expected, but finally we can say the testing ISO for the new storage stack is fully installable.

We fixed the UEFI + MBR partition table scenario we already had almost working in the previous sprint (turns out it was not that broken in Tumbleweed after all) and we adapted yast2-bootloader to be also able to deal with legacy (i.e. no UEFI) booting using the new storage stack.

As a nice result, our testing ISO can be used to install a perfectly functional system in both UEFI or legacy systems with the only requirement of having a pre-existing MBR partition table in the disk. It only shows a couple of error pop-ups related to the calculation of the proposal of software to be installed, but nothing that would prevent you from replacing whatever operating system you have with a new shiny openSUSE-based experiment.

This milestone opens the door to start testing the new stack with openQA, the same system that helps to guarantee the robustness of all the recent SUSE and openSUSE versions.

Storage reimplementation: preparations for the storage proposal

Now that yast2-bootloader starts to be ready to work with the new storage stack in more and more scenarios, it’s time to adapt the only component that still complains during the installation.

In order to make that task doable during the next sprint, we invested some time in this sprint analyzing the interaction between the software proposal calculator and the old storage layer. The outcome was a small document detailing what needs to be adapted in the proposal and in the new stack. The perfect input for a task in the next sprint.

Help for power-users with short memory

Our beloved YaST is packed with magic tricks below the surface. Many of them are very useful to debug installation problems or to better understand how the YaST internals work. Unfortunately developers tend to not be that good at blindly memorizing stuff and the functionality is so well hidden that most newcomers would have hard times finding it… until now.

We have added a couple of new keyboard shortcuts to show a summary of all the advanced hotkeys, so now you only have to remember one key combination instead of a dozen of them. In both text (ncurses) and graphical (Qt) mode, it will be enough to press shift+F1 to get the advanced help displayed below. Since some terminal emulators could already use that combination, ctrl+D F1 can also be used in the ncurses interface as an alternative.

Advanced Hotkeys help dialog

Contributions keep coming!

As we have already mentioned in previous sprint reports, an important part of our daily job as open source developers is helping casual (and not so casual) contributors to bring their ideas and code into YaST and related projects.

This time that (hopefully not casual) contributor was Devin Waas, who wanted to improve the installation to make the life of cloud-lovers easier.

For cloud guys out there retrieving logs of a failed installation is was a huge problem. Now, thanks to Devin, all you need is a running a rsyslog server and you’ll be able to easily access your installation logs from there.

A drawing is worth a thousand words

As a matter of fact, the newest Tumbleweed release allows us to specify the IP address of a remote server from the bootloader through the “Loghost flag”. Linuxrc will take care of setting up a UDP broadcast for dmesg contents and YaST installation logs.

This is just a first step. Devin promised further improvements of our newly implemented remote logging system. And he codes better than he draws, so stay tuned!

Storage reimplementation: LVM-based proposal

As we already mentioned in previous reports, when we started to develop the partitioning proposal we first focused in the scenario of a partition-based proposal with one or several MBR-style partition tables. That looked like the most complex scenario due to the limited number of primary partitions, the alignment problems, the overhead introduced by the EBR (extended boot record) of every logical partition and so on.

A couple of sprints ago, we got that working so we started to work on the LVM-based proposal. It took a little bit longer than expected but now we are able to generate LVM-based proposals for almost every possible scenario. The goal was to have them working in our mocked test cases. So probably the new LVM-based proposal cannot still be used to install a fully functional system, but it is backed by a full load of tests that prove we can handle many situations, from trivial to really tricky ones… and believe us, things can get quite tricky if you mix logical partitions with their EBR overhead and LVM volumes with their PE size rounding and their metadata overhead.

Bugs, bugs, bugs

In this sprint we kept the already commented approach of making the fix of low-priority and small bugs part of the Scrum process. As a result we accounted for approximately 50 deaths of those annoying creatures.

Conclusion

Looking at the report, we could say it was a quite successful sprint. But to be honest we were aiming even higher. Quite some interesting PBIs (features or bug-fixes in Scrum jargon) were almost done at the end of the sprint. But following Scrum philosophy, we never blog about almost-done stuff.

Thus, if nothing goes wrong things will be even better in the next report in three weeks. So have a lot of fun trying the new stuff and stay tuned for more!