May and June have been, so far, interesting months for the YaST Team. We worked hard to polish the last details of the recently released openSUSE Leap 15.1, we attended the openSUSE Conference 2019 (with many fruitful conversations), we shared quite some time together around a table without computers (most of the time, we are a geographically distributed team), many team members enjoyed vacations (it’s spring time in Europe), we organized a Leap 15.1 launch party with technical talks in Gran Canaria… and we ran out of energy to also publish our traditional sprint reports in this blog.
We will try to fix that with this blog post in which we will try to summarize some highlights from the latest three development sprints, namely the 77th, 78th and 79th. So be warned, this is going to be a loooong post.
Support for Multi-device Btrfs File Systems
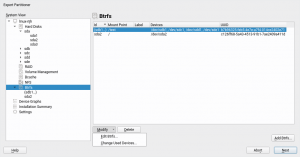
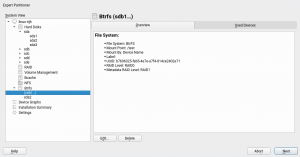
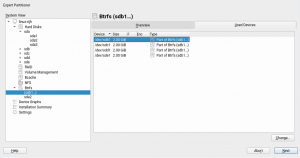
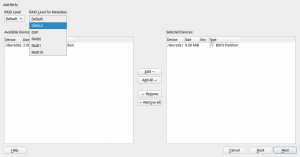
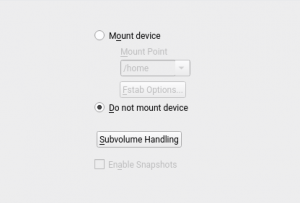
We have been working steadily during the three sprints in implementing all the necessary bits to offer a good experience installing and upgrading an (open)SUSE system on top of several block devices by means of Btrfs RAID capabilities. That includes support in the Partitioner, in AutoYaST, in the storage guided setup and more.
We decided that all that deserved a separate blog post. You can find here: Getting Further with Btrfs in YaST.
More Improvements for the Partitioner
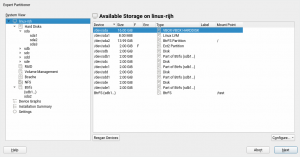
That blog post mentions a couple of changes in the Partitioner that, although initially motivated by the introduction of multi-device Btrfs, go beyond that scope and are aimed to make the all the lists of devices more useful and informative.
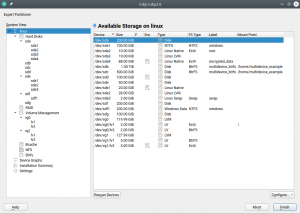
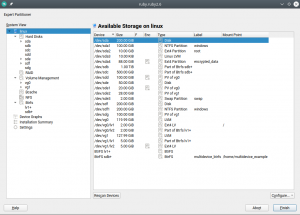
Traditionally the Partitioner used two separate columns “Type” and “FS Type” to describe the function of every device. That was sometimes hard to understand. Moreover, quite often the important information (like the relationship between a partition and its RAID or LVM) was simply missing in those tables.
We have merged those columns into a more informative one that identifies the devices and also gives an overview of the relationship between them at first glance. In addition, the table displaying all the system devices now includes multi-device file systems.
Mitigating CPU vulnerabilities from YaST
If you are interested in security (or simply if you have not been living under a rock) you probably have heard about CPU based attacks like Spectre or Meltdown. The last year has seen a number of these CPU issues, all of them coming along with their own kernel options to change the Linux behavior in order to mitigate the security risks at a price of some performance loss.
However, not all users know what affects their architectures or particular models of CPU and which kernel parameters to use to gain more performance if the security risk is acceptable for them.
For that purpose, a new meta-option called “mitigations” was added to the Linux kernel. It allows to enable and disable at once several of those mitigations that prevent CPU attacks. See more information at this document published by SUSE.
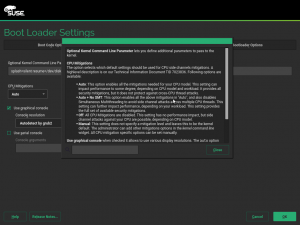
We find that kernel option very useful, so we decided to provide an easy way for users to adjust it. Now the YaST bootloader screen contains a new setting which offers three pre-defined options and even a fourth one to let the users fine-tune the settings on their own. As you can see in the screenshot below, we have included extensive documentation in the help dialog, so you will not need to search for this blog post in the future.
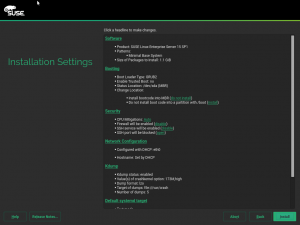
It is also possible to modify this option directly from the installation summary. For that purpose, the “Firewall” section was renamed to “Security” and it now includes the possibility to tweak the CPU mitigation options, alongside the traditional settings for firewall and opening the SSH port.
Another success story of (open)SUSE offering a promptly solution for our users to easily adapt their systems to ever-changing complex needs.
Memory Optimizations during Installation
While the release of openSUSE Leap 15.1 was approaching, we got several bug reports stating the YaST installer used to freeze when using only 1GB RAM with online repositories (see bug#1136051).
It turned out that at some point YaST loads the details of all available packages. And that needs a lot of memory if you enable the online repositories during installation. For example the OSS Leap repository contains more than 35.000 binary packages!
The problem was in the YaST internal API accessing the package manager library (libzypp). It did not allow to filter the objects, YaST had to read all objects and then do the filtering in the code. And for each object it returned all attributes, even those which were not needed (like the package description, full RPM name, etc…). All that data required a lot of memory.
To fix that we have introduced new API calls that allow specifying more filters (like return all selected packages, packages from specific repository,…) and you can set which attributes should be returned. If you need to know only the name and the version then you will not get the other useless attributes. And to ease the usage of the new API in YaST we provided a nice object oriented wrapper written in Ruby.
This optimization saves a lot of memory, 1GB of RAM should be enough for future installations with the online repositories, even if they grow even more.
Unfortunately, we were only able to diagnose the problem and provide a solution a couple of weeks before the official release of Leap 15.1. Introducing a change in such a sensitive part of the installer was considered too risky (it would have invalidated many of the tests that had been already performed) so the installer included in openSUSE Leap 15.1 is still memory hungry if online repositories are used. For that release, we simply increased the official memory requirements to 1.5 GiB.
Online Migration from openSUSE Leap 15.1 to SLES15-SP1
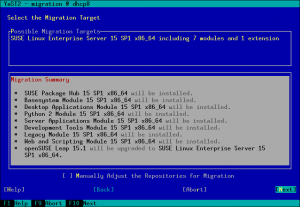
For openSUSE Leap 15.0 it was only possible to migrate from Leap to SLES (SUSE Linux Enterprise Server) manually (see the documentation). With Leap 15.1 the goal was to also support a migration using YaST. But we got a bug report saying the online migration from openSUSE Leap 15.1 to SLES15-SP1 displayed a wrong migration summary and didn’t work well.
It turned out that YaST needed some small fixes to support this properly. The main problem was that YaST did not expect that the base product or the package vendor can be changed during online migration, so far it was only possible to upgrade to the next SLE service pack level. But that is fixed now.
Wanna try the migration from openSUSE Leap 15.1 to SLES15-SP1? Then follow these steps.
- Install the
yast2-registrationandyast2-migrationpackages in the Leap 15.1 installation - Make sure the latest online updates are installed (to install the fixes mentioned above)
- Start the YaST registration module and register the openSUSE Leap 15.1 product using your registration key
- Then start the YaST migration module, select the migration to SLES15-SP1
- (There might be reported some package dependency issues in the migration summary, go to the package manager and resolve them. Usually removing the old openSUSE package is the right solution.)
- Start the migration, the SLES packages will be downloaded and installed
- At the end the system will be rebooted to start the freshly installed SLES, enjoy! 🙂
- (It is recommended to review the orphaned packages, leftovers from the Leap installation, with the command
zypper packages --orphanedand possibly remove them.)
Please note that only minimal server installations of Leap are supported for upgrade, full installations especially with third party packages might not work correctly.
Why Cannot I Read the Logs?
Long time ago, the logs of any Linux system were spread over several files living under the /var/log subdirectory. YaST offers its “System Log” module to inspect those files in a convenient way. Since the introduction of Systemd and its journal, that information has been gradually moved to this new mechanism by default. And YaST offers its “Systemd Journal” module to inspect and query that journal.
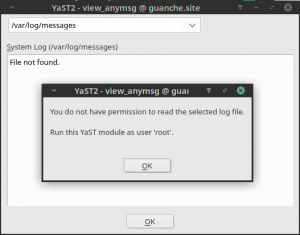
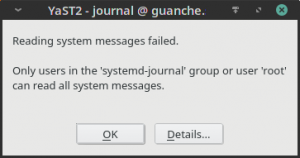
Both YaST modules can be executed by any user in the system, not only by root. That’s intentional because both the Systemd journal and the traditional Linux log files can register information targeted to unprivileged users. But there was some room for improvement in the error message displayed by both modules when such users were trying to access to protected information.
This is how the new more explanatory message looks in the “System Log” module.
And this is the extended message for “Systemd Journal”, that now mentions the systemd-journal user’s group.
Another Day at the YaST Office: Adapting to Changes
As we usually remark in our blog posts, a significant part of the work of the YaST Team consist in keeping YaST in sync with the constant changes in the underlying system. Of course, these sprints were not an exception in that regard. Without trying to do an exhaustive list, let’s take a look to some of those adaptations since the mentioned underlying changes may be interesting for some readers.
Turns out Systemd developers has decided to change the list of possible states for Systemd services. The systemd-sigabrt state is obsolete and a new systemd-watchdog one was added. In the YaST team we learned some time ago that the list of Systemd states changes more often than what most people would expect. As a consequence we have an automated check to detect these situations. The bell ringed, we adapted the code and everything keeps working.
Systemd is not the only technology that keeps evolving. Quite some time ago, RMT replaced SMT as the default proxy technologies for the SUSE Customer Center. Although both has coexisted for quite some time, from SLE-15 onward only RMT is offered. Thus we have adapted all the references to SMT that still existed in YaST. From now on, only RMT is mentioned to avoid confusion.
Another common adaptation we have to perform in YaST is adjusting some module when the output of the command it runs under the hood has changed. Recently we found out the developers of the command iscsiadm has decided to use more than one exit code to indicate a successful execution (traditionally, only zero should mean that). After a long discussion, we decided to adapt YaST iSCSI to also be happy with the error code 21. What means for you? That future versions of YaST iSCSI should work faster in some situations, since the confusion will not longer result in a timeout.
YaST Firstboot: a Better Example File
Those were just some example of the many adaptations we did lately for changes in the system. But not all adjustments are motivated by external changes. We also realized the example configuration file provided by YaST Firstboot (at /etc/YaST2/firstboot.xml) needed some love. Due to the nature of YaST Firstboot, that file should be customized before using YaST Firstboot. But providing an example file with three different steps about acceptance of licenses (two of them enabled and the third one disabled) and other inconsistencies was definitely not helping anyone to understand how to use the module.
In fact, the status of that default example configuration and of the documentation managed to confuse even SUSE’s quality assurance team. So we improved the example file shipped in the package to make it more realistic and we also updated the YaST Firstboot documentation to clarify how to use that file. Because not all improvements are always done by coding.
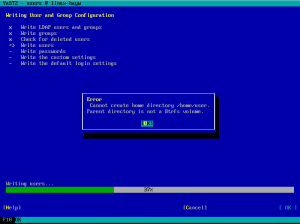
Leap 15.1’s Most Annoying Bug: Create Home as Btrfs Subvolume
As all openSUSE users should know, for every Leap release a page is created in the openSUSE wiki listing the so-called Most Annoying Bugs. Leap 15.1 was a very smooth release and this time the corresponding list contains only one bug… and it’s a YaST one. 🙁
In an installed system, when YaST was creating a new user it was always trying to create its home directory as a Btrfs subvolume. Even in cases in which that was impossible. For example, if the directory to be created was not in a Btrfs file system.
Fortunately, the bug didn’t affect the installation process or AutoYaST. We created a fix that was quickly available as a maintenance update. So make sure your openSUSE system is updated before trying to create new users with YaST.
YaST Network refactoring: status report
Since we submitted the first bits of the yast2-network refactoring by the end of April, we have made quite some progress in this area. Although it is still an ongoing effort, we would like you to give you an update on the current state.
We might say that we have been working on two different areas the user interface implementation and the future data model.
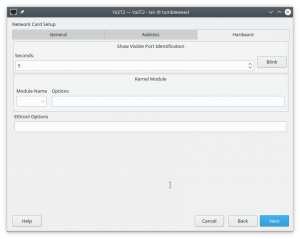
About the user interface, the team has improved the code quite a lot to make it easier to maintain and extend. We have introduced some classes to de-couple the widgets from the data, and it pays off. Additionally, we have fixed some bugs (many of them related to validations), simplified the process of adding new devices and reorganized the hardware tab.
Regarding the internal data model, we have been thinking about the best way to represent network configuration in an agnostic way so, in the future, we can not only support Wicked but other options too (for the time being, the NetworkManager support is quite limited). If you are curious about the details, we have added a document describing the approach to the repository.
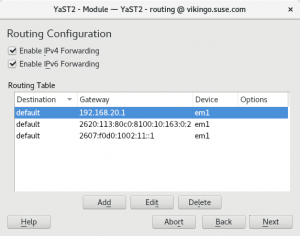
The new data model is already being used to handle DNS and Routing configuration. So if you are using Tumbleweed you have been already using the new network code for some weeks, including the UI enhancements presented in our latest post.
Although the data model is so far only used in the mentioned parts, the plan is to submit to Tumbleweed a heavily refactored UI layer during next sprint. So stay tuned.
Added Appstream Metadata to the YaST Packages
The YaST package manager is not the only software manager in the (open)SUSE distributions. There are some more, like Discover in KDE or the GNOME software manager, not to mention the online openSUSE appstore.
While the YaST manager is package oriented, those other software managers are application oriented. That makes a huge difference, especially for the beginner users.
The full list of packages does not only include the applications (basically anything a user can start from the desktop), but also shared libraries, pieces that provide functionality for other applications or basic components needed for the system to work. With so many software packages (the openSUSE OSS repository contains over 35.000 of them!) it’s sometimes hard to find the software you need unless you know what you are looking for.
To offer an application-oriented view on top of all that, the application managers need some special data describing the applications inside the packages. The data are located in the /usr/share/metainfo/*.xml files, if you are interested in the technical details check the AppStream documentation provided by the Freedesktop.org.
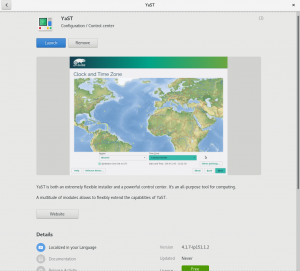
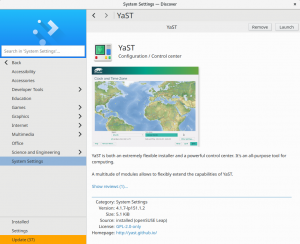
Our absolutely awesome community contributor Stasiek Michalski (more famous by his nickname lcp) realized YaST was not offered in those application managers and decided to fix it. So he created an XML generator which collects the data from YaST packages and automagically generates the metainfo XML file needed by the other software managers.
As a result, the Gnome Software Manager, Discover and other software managers will offer YaST in Tumbleweed just as any user-oriented application. Thanks lcp!
AutoYaST Pre-install Scripts & Storage
AutoYaST has a special feature to allow users to customize the installation process and take control in different stages of the installation. For that, the AutoYaST profile offers a section where you can insert your custom scripts. There are four types of scripts: pre-scripts, postpartitioning-scripts, chroot-scripts, post-scripts and init-scripts.
For the particular case of pre-scripts, the documentation states that “It is also possible to change the partitioning in your pre-script“. That means, for example, you could use a script to create a new partition or to configure some kind of technology. Therefore, it would be very convenient to re-analyze the storage devices after running the user pre-scripts. In fact, that was the default behavior in the old storage stack, but the new one was slightly modified to only re-analyze the system under certain conditions.
But turns out some SLE customers were using pre-scripts to configure the behavior of multipath and those changes were not being noticed by AutoYaST.
The solution was quite trivial. We simply decided to always perform a new storage re-analysis after the AutoYaST pre-scripts. We did not find strong reasons to not do it and there should not be significant performance penalty.
And, for the specific case of multipath, YaST now copies some configuration files (e.g., /etc/multipath.conf and /etc/multipath/bindings) to the target system when performing a new installation. Otherwise, the installed system would not contain the configuration applied during the installation.
Clarifying the Usage of Software Management Options
Our software manager is one of the most complex YaST modules, which makes some aspects of its usage not fully obvious for some users. You may have even notice that is the only YaST module in which the interface is clearly different when executed in text and graphical mode. Specially the menu at the top of the interface, which is organized in different sections.
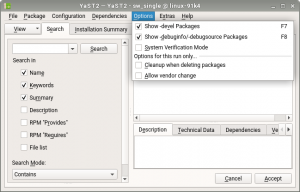
Some users where confused by the fact of some options not being persisted between different executions of the module. Those options are there to modify the current operation of the module, not to change the configuration of package management in the system.
When executed in text mode that was clear because such options where labeled as “temporary change” but the graphical mode didn’t have any indication about it. As you can see in the following screenshot, that’s fixed now.
Product License Hard to Understand? Try Another Language!
Some user reported that in the text-mode installation it was impossible to switch the language of a product license. Although during graphical installation everything works flawlessly, in text mode the language switching widget was there… but disabled.
The point is that such behavior was not exactly a bug. It was in fact done on purpose. We decided to prevent such language change some time ago because on the Linux console we’re not able to display the characters of many languages. Hopefully some of our usual reader have just shout “that’s not true!” 😉 Those users remember that in the report of our 67th sprint we explained that now we always use fbiterm when installing in text mode in order to be able to display characters of almost every language.
We are now able to display all languages that currently have license translations, so we have enabled the language switching widget and now both graphical installation and text-based one deliver an equivalent user experience.
More about languages
This is not the only change related to internationalization we did in these sprints. We also added a specific warning message for situations in which YaST is used to change the language of the system but there is no repository containing the needed translation packages. Something that obviously only affects users configuring system in very restricted environments.
As you can see in this and other recent reports, we have to deal relatively often with difficulties related to translation and internationalization. To reduce the effect of those problems on our final users, we also added some extra mechanisms to detect internationalization errors introduced during development. Hopefully that will mean that in future reports the space dedicated to comment language-related problems gets shorter and shorter. 🙂
And that was just a summary!
As long as this post looks, there are many interesting things we have done in these weeks we left out, intentionally or not. We definitely should avoid skipping three reports in a row in the future!
This week it’s Hack Week at SUSE, which means regular YaST development will be put on hold… or will turn into something completely different. You never know what the result of a Hack Week can be!
But in any case we will go back to our sprint-based pace in August. So expect a new blog post in three weeks. See you then!
