Home Home
Sign up | Login

Deprecation notice: openSUSE Lizards user blog platform is deprecated, and will remain read only for the time being. Learn more...

Author Archive

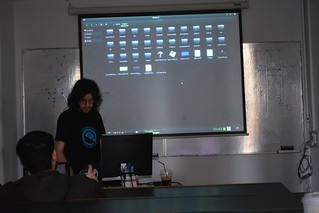
openSUSE project presentation at school, Nov 24th, 2016

November 29th, 2016 by

On November 16th there was the release of openSUSE Leap 42.2. On November 24th, I had the opportunity to present openSUSE Project at school.

I was asked to make an introduction to FLOSS in general and more specific about openSUSE Project. The school was for middle aged people, for persons who quited school to work and conftibute financially to their families. There were 3 classes that they taught something computer related. It was a great opportunity for them to learn what FLOSS is and what makes openSUSE great Linux distro.
(more…)

Basic Nextcloud installation on openSUSE Leap

October 28th, 2016 by

Nextcloud Logo

I see the official documentation has full tutorial for RHEL 6 or CentOS 6 and RHEL 7 or CentOS 7. The main documentation covers Ubuntu 14.04 LTS

openSUSE already has the Nextcloud client packaged in Tumbelweed and the Server is in the PHP extra repo! Personally, I prefer to install eveything from official repository, so when an update is available, I can have it without a glitch. This tutorial describes how to install Nextcloud using command line. I followed the official documentation of Ubuntu 14.04 LTS installation.

Why choose openSUSE Leap? openSUSE Leap is a brand new way of building openSUSE and is new type of hybrid Linux distribution. Leap uses source from SUSE Linux Enterprise (SLE), which gives Leap a level of stability unmatched by other Linux distributions, and combines that with community developments to give users, developers and sysadmins the best stable Linux experience available. Contributor and enterprise efforts for Leap bridge a gap between matured packages and newer packages found in openSUSE’s other distribution Tumbleweed. You can download openSUSE Leap from the site https://software.opensuse.org/.
(more…)

What happened @ FOSSCOMM 2015, Athens Nov 6-8

November 12th, 2015 by

DSC_0746

The 8th Free and Open Source Software Communities Meeting (FOSSCOMM) took place in Athens (Greece), November 6-8th 2015 at the Technical Educational Institute of Athens.

The Conference started early on Saturday morning welcoming the participants and with the key note. Various presentations about open source software, hardware constructions and some workshops took place. Presentations such as Raspberry Pi arcade, openstack, OSGeo, ownCloud, Bitcoin and many more were quite interested by the visitors.

DSC_0716

Greek openSUSE community was there with a booth and some presentations. On Saturday Alex P. Natsios presented “Enlightment on openSUSE”, an alternative GUI, and the other presentation was about “openQA”. Since openSUSE Leap 42.1 was very fresh, Alexandros Vennos took the opportunity to present what are openSUSE Leap 42.1 and Tumbleweed, the differences and what to install on what occasions. Presentation had title “openSUSE – Leaping Ahead”.

DSC_0709

The booth was quite crowded. We had some left over DVDs of 13.2 but we proposed the visitors to install Leap 42.1. The question we were asked most was what is the difference between openSUSE Leap and Tubleweed and why to install and on what ocasion. We even created couple of bootable USBs from the ISOs of Leap. We had a Banana Pi running Tumbleweed with MATE playing a video loop of openSUSE Leap 42.1 KDE review. We gave almost all of our promo materials to the visitors since they were interested on openSUSE.

For more pictures check Flickr

DSC_0736

How to create an openSUSE Banana Pi M1 image with MATE Desktop

September 17th, 2015 by

I won a Banana Pi from ownCloud. So I tried to install openSUSE.

There are 3 options:

1. According to the wiki page, you can download the image they provide but there’s no kernel support for Mali400MP2 GPU (who knows if it’s fixed by now). No Mali mean no GUI. The link to image is http://download.opensuse.org/ports/armv7hl/tumbleweed/images/.

2. Download the image from http://www.lemaker.org. The GUI used is XFCE.

3. Do it the hard way, build it yourself. I would like to install MATE. I know, I could use the lemaker image.
I followed the page HowTo Build Banana Pi Image.

This post has 2 sections. The first is how to create the SD card and the next one is how to install MATE.
(more…)

Create multi liveUSB with openSUSE

May 30th, 2015 by

I was trying to create a liveUSB with many distros. The reason is simple. All of my USB sticks were quite big for only one distro. So the rest of the USB space is wasted. For example, the openSUSE USBs I got from conferences, are 8GB. If I use installation DVD, I’m going to use only 4GB. LiveGNOME is only 1GB (the rest would be persistent drive for storage but personally, I don’t use it.

For that reason, I used 2 programs.

1. Multisystem.

I translated to Greek. Unfortunately, this software is installed only on Ubuntu/Debian distros. I used it also on Arch Linux but there was a problem lately and didn’t work correctly. On Ubuntu, I managed to insert 13.1 successfully and lately this was difficult to do. At the end of each time, there were some strange symbols running for a quite long time with a sound (I muted the sound for that reason). I think persistent drive for 13.2 and Tumbleweed wasn’t something that the creators of the program added.
DVD ISO and NET install ISO wasn’t at their list either.

2. YUMI

This works on Windows. At the end of the page there’s a version for Ubuntu/Debian (and source code). I didn’t test them.
I tested this tool and I inserted NET install ISOs to an old 512MB USB I had. The only “negative” is that there wasn’t room left for the ISOs I wanted. 90MB x 4 = 360MB. It adds syslinux stuff. Anyways, at least I can use a very old USB.
(more…)

Install ddclient on your openSUSE Raspberry Pi

May 25th, 2015 by

We’ve seen two Dynamic DNS clients. We’ll see another one here.

1. First of all, install the program.

$ zypper in ddclient

2. Create the confing file

$ nano /etc/ddclient.conf

with the following content

daemon=5m
timeout=10
syslog=no # log update msgs to syslog
#mail=root # mail all msgs to root
#mail-failure=root # mail failed update msgs to root
pid=/var/run/ddclient.pid # record PID in file.
ssl=yes # use ssl-support. Works with
# ssl-library

use=if, if=eth0
server=freedns.afraid.org
protocol=freedns
login=login_name
password=the_password
somedomain.mooo.com

Change the ones that are in bold letters.

3. Start the service

$ systemctl enable ddclient

Reboot

Upgrade your openSUSE Raspberry Pi from 13.1 to 13.2

May 24th, 2015 by

We’ve seen how to create an SD card. I used the 13.1 version. The wiki page https://en.opensuse.org/HCL:Raspberry_Pi is not very clear (to me) about resize partitions. So I tried to upgrade the version 13.1. Here what I did.

1. Check if the update repository already exists and is enabled.

$ zypper repos –uri

You should have the following enabled

3 | openSUSE-13.1-repo-update | openSUSE-13.1-repo-update | Yes | Yes | http://download.opensuse.org/ports/update/13.1/

If not, then add it

$ zypper addrepo –check –refresh –name ‘openSUSE-13.1-Update’ http://download.opensuse.org/update/13.1/ repo-update

2. Refresh and update your system

$ zypper ref && zypper update

3. Remove all third party/OBS repos you no longer need.

$ zypper lr

# Remove with

$ zypper rr (alias or number)

4. Change all remaining repo URLs to the new version of the distribution (needs to be run as root).

$ cp -Rv /etc/zypp/repos.d /etc/zypp/repos.d.Old

5. Change the repos.

$ sed -i ‘s/13\.1/13.2/g’ /etc/zypp/repos.d/*

6. Refresh new repositories (you might be asked to accept new gpg key)

$ zypper ref

If you haven’t removed third party/OBS repositories you may encounter some errors as these repositories may not exist yet or they may have different unguessable URL. It is always recommended to remove them and add their newer version after upgrade.

7. Upgrade

$ zypper dup

Now you have to wait. Reboot at the end, just to be sure that everything went smooth.

Run copy.com on your openSUSE Raspberry Pi

May 23rd, 2015 by

A good question is why do you want to sync a folder on your Raspberry Pi with a cloud service. The answer is little complicated. It’s a subproject that I’m working on right now. I want to upload some data I’ll create on a Raspberry Pi (with limited size of SD card). The uploaded data will be saved on other computer and the SD will be clear again to create new data.

The cloud service I prefer is always ownCloud.
Here I used http://www.copy.com. It provides 15GB of disk but you can increase it.

First of all download the file

$ wget http://copy.com/install/linux/Copy.tgz

Then extract it

$ tar xzvf Copy* copy/armv6h/

This will create a folder called “copy,” and in it there will be three sub-folders: “armv6h,” “x86,” and “x86_64.” The first one contains the Copy client binaries for the Raspberry Pi, the second contains the Copy client for 32-bit Linux on a PC, and the third the same client but for 64-bit Linux PCs.

$ cd /copy/armv6h

Now there are 2 ways of using copy. The CopyCmd tool and CopyConsole.

CopyCmd

List of the directories

$ ./CopyCmd Cloud -username=user@gmail.com -password=’mypass’ ls

Upload all content of local /home/user/directory/ to remote /directory

$ ./CopyCmd Cloud -username=user@gmail.com -password=’mypass’ put -r /home/user/directory/ /directory

CopyConsole

The CopyConsole tool keeps a folder on your Raspberry Pi synchronized with the data on Copy.com.
The sync app runs in the background and is started like this:

$ ./CopyConsole -daemon -username=user@gmail.com -password=’mypass’ -root=/home/user/directory

This will sync the local /home/user/directory to copy.com. If you delete something from there, it’ll delete from local folder as well.

Remeber to run this command everytime you restart your pi. It’s better to run it manually because there is username and password that are personal (unless you created an account just for your raspberry pi).

Make your openSUSE Raspberry Pi a seedbox

May 22nd, 2015 by

Raspberry Pi is a quite slow ARM board, compared to other boards. Even if you compare Raspberry Pi B+ against Raspberry Pi 2. So maybe one of the best use of RasPi is to make it seedbox. Let’s say you’re at the office and a friend tells you to test a distro. You can login to your home Raspberry Pi seedbox and add the torrent file there.

Here I will show you how to setup Transmission, vftpd and suggestions for Android programs.
First of all, download and create the openSUSE SD card (resize your SD card to full size or you can mount the extra size as extra partition. Since it’s not something important, then you can use full size of your SD card).
Then setup the dynamic dns service (see previous posts).
Finally set a static IP (to use it with port forward of your router).

INSTALL TRANSMISSION

First install transmission:

$ zypper in transmission transmission-daemon

Create 2 folders for incomplete torrents and completed torrents:

$ mkdir -p /torrents/incomplete && mkdir /torrents/complete

Configure proper permissions for transmission:

$ chgrp transmission /torrents/incomplete
$ chgrp transmission /torrents/complete
$ chmod 770 /torrents/incomplete
$ chmod 777 /torrents/complete

(more…)

Set static IP on your openSUSE Raspberry Pi

May 21st, 2015 by

To set a static IP in Debian based distros is easy. Just change a file (/etc/network/interfaces).
In openSUSE is easier. Everything can be done under YaST.

1. Open YaST and go to Network Devices>Network Settings.

2. Then choose Statically Assigned IP Address (move with tab button and click on space button). Give the static IP you want and as Subnet Mask, 255.255.255.0. Press Next (press enter).

3. You’ll see an overview of the ethernet card.

4. Go to Hostname/DNS and add Google’s DNS servers (optional).

5. Next, go to Routing and add your router ip (usually 192.168.1.1).

Now press OK, reboot and try to login again with SSH.