Home Home > Distribution > Factory
Sign up | Login

Deprecation notice: openSUSE Lizards user blog platform is deprecated, and will remain read only for the time being. Learn more...

Archive for the ‘Factory’ Category

Highlights of YaST Development Sprint 67

November 20th, 2018 by

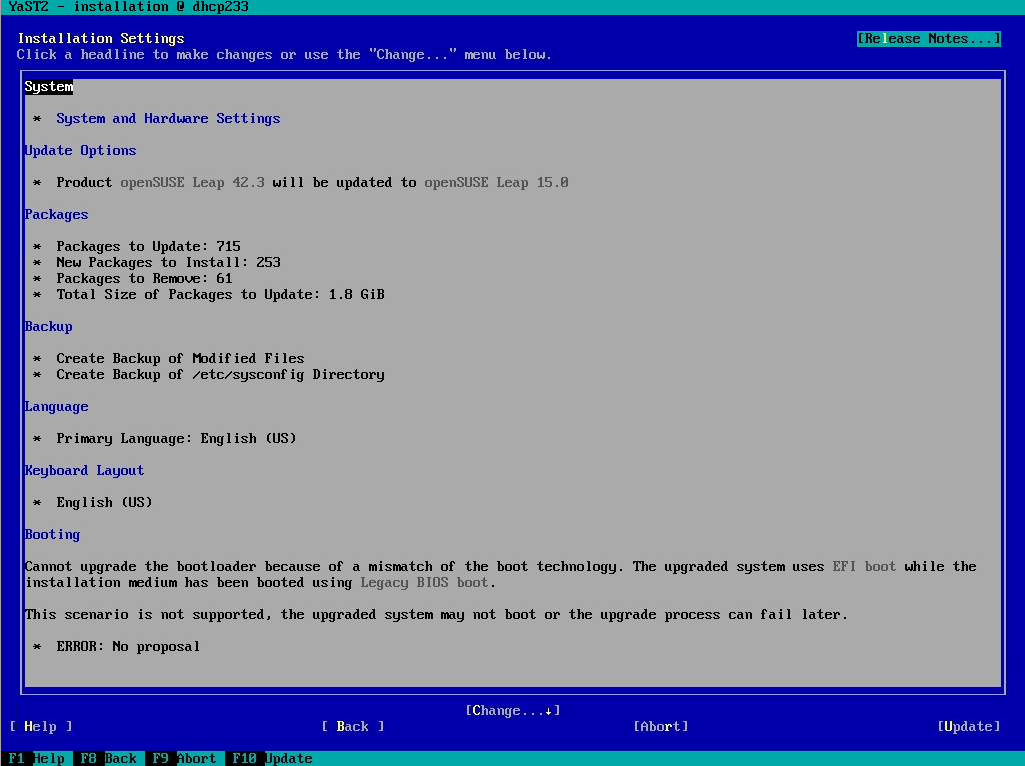
Time flies and another development sprint has finished for the YaST team. During it we have focused on improving the installation process, refining it and adding new features to unleash new possibilities. That includes:

  • More options to configure Kubic during installation.
  • Several improvements in the storage proposal.
  • Easing the network configuration and the usage of online repositories in openSUSE.
  • Improving installation in text mode for CJK and other languages.
  • Configuring SSH access during installation and in a running system.
  • And many other small fixes here and there!
  • Many of these features will be already available in openSUSE Tumbleweed during November (the sprint just finished November 16th and the integration process usually takes some days), others will be visible for the first time in the next SLE-15-SP1 and Leap 15.1 Alpha versions.

    New Dialogs in the openSUSE Kubic Installation

    The SUSE CaaSP and the openSUSE Kubic products got a new installation workflow some time ago. Originally they used a specific installation workflow (a single all-in-one configuration dialog), but the problem was that many openSUSE/SLE installation features were missing because the installer code was completely different.

    That has been changed some time ago to use the usual installation as in standard SLE or openSUSE products. You can read the details about the new installation workflow at the Kubic wiki page.

    However, the CaaSP or Kubic products required some more specific settings depending on the selected role. During this sprint we have added the corresponding steps to the installation.

    New installation steps for openSUSE Kubic

    Currently the extra dialog only asks for the NTP server address, but some more options can be added later.

    Improve Textmode Support for CJK and Other Languages

    YaST is able to cope with many languages even when running in textmode. When a user wants to run the installer in textmode using some specific languages -like Chinese, Japanese or Korean-, YaST will use a special terminal emulator called fbiterm which is able to display the characters which are needed in those languages.

    Now, instead of keeping two different approaches depending on the language, YaST will try to use this special terminal emulator whenever is possible for all text based installations. Unfortunately, there is a small set of languages that are not properly handled by fbiterm. In those cases, YaST will inform the user about the problem and it will fall back to English.

    YaST installing SLE-15-SP1 in Japanese

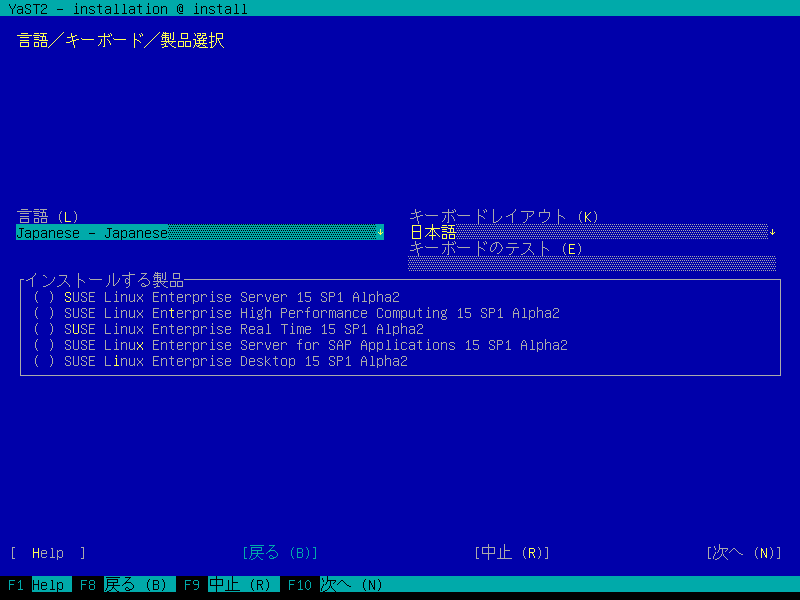
    As a side effect of this unification, the font used during the textmode installation has changed for all the languages that didn’t used fbiterm in the past. So your SUSE or openSUSE installation may now look slightly different.

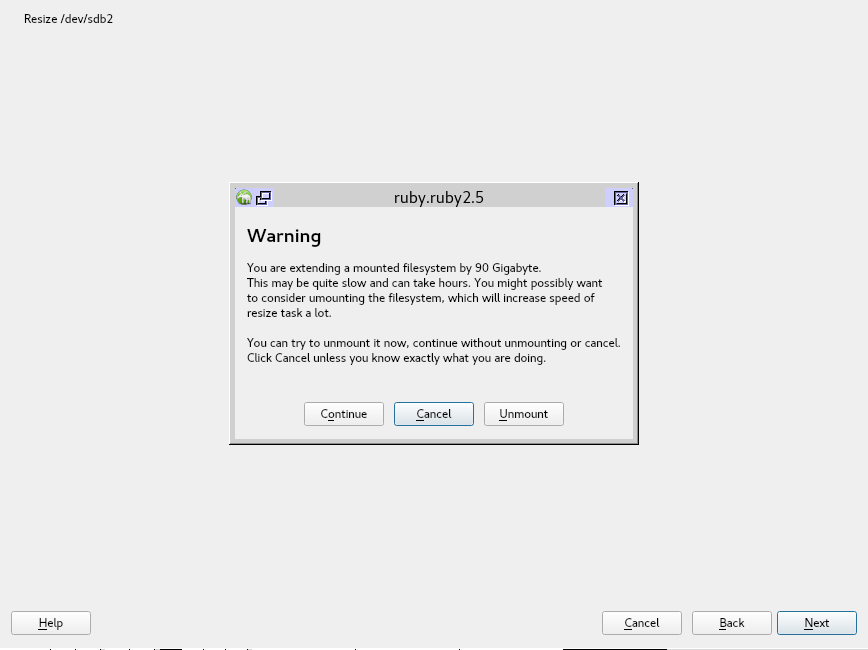
    Storage proposal: playing nicely with Intel Rapid Start Technology

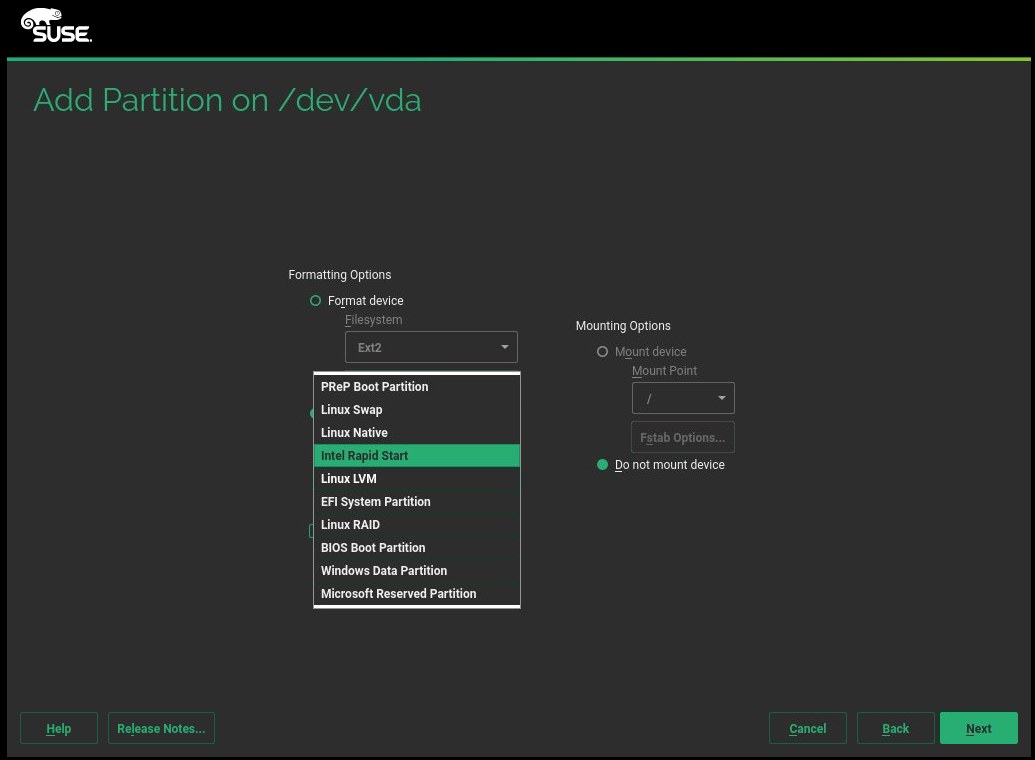
    Intel Rapid Start Technology (shorted as IRST) enables systems to quickly resume from deep sleep (e.g. if your battery runs out). It’s a firmware-driven technology that relies on the existence of a special partition located on a SSD (solid state device).

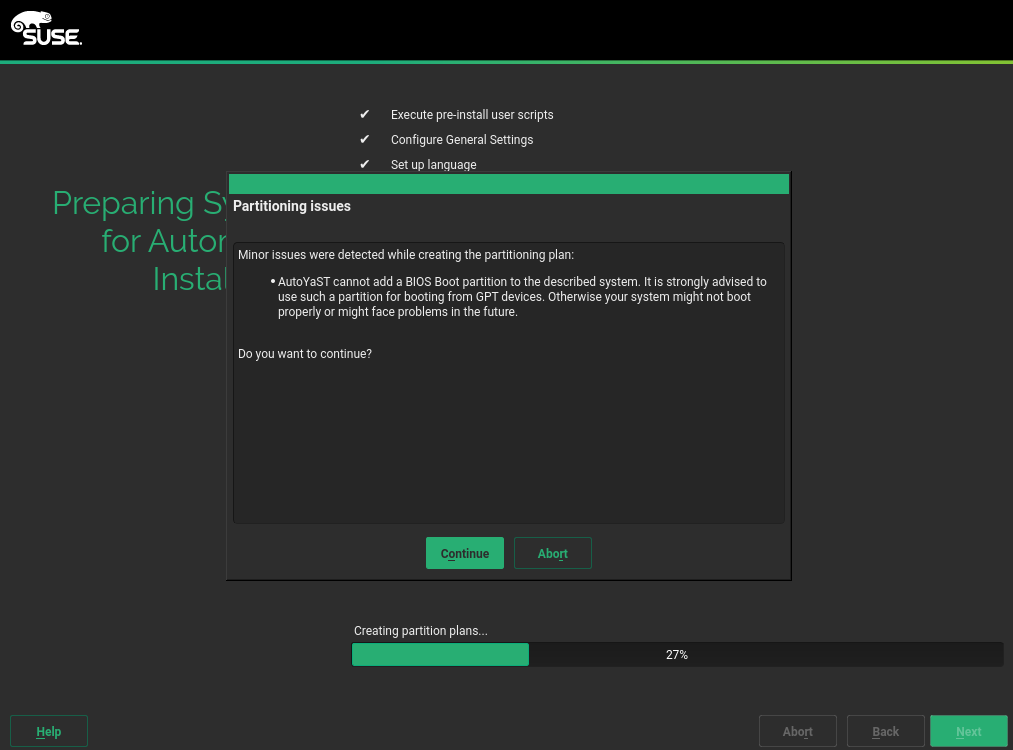
    But our partitioning proposal (the so-called Guided Setup) was not aware of the important role of such partition, so it sometimes proposed to delete it in order to use the freed space for installing (open)SUSE on top.

    We have improved that and now the IRST partition will only be deleted as a last resort, if deleting all other allowed partitions in the disk is still not enough to make the new system fit. Moreover, an IRST partition located in the same disk than a Windows system will only be deleted if the user explicitly allows the storage proposal to delete that Windows installation.

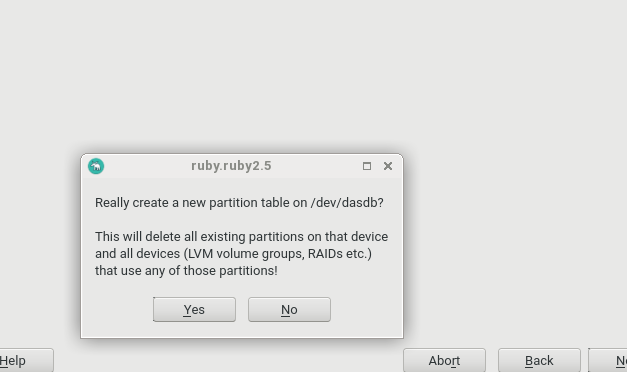
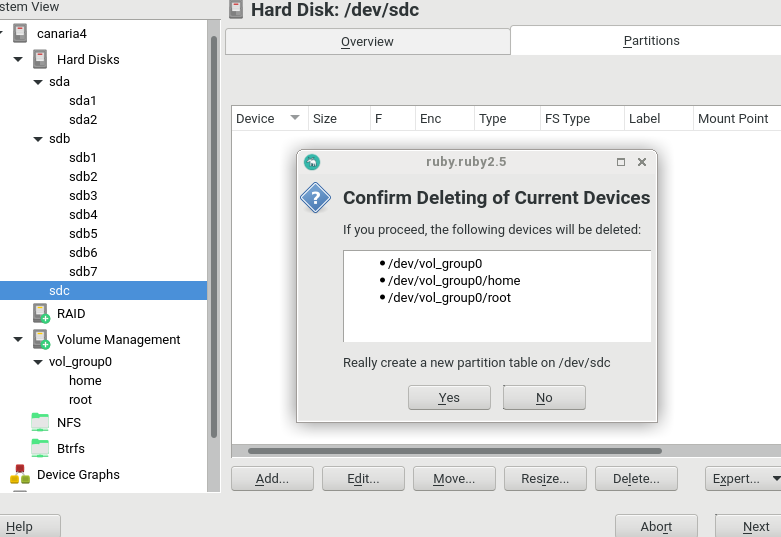
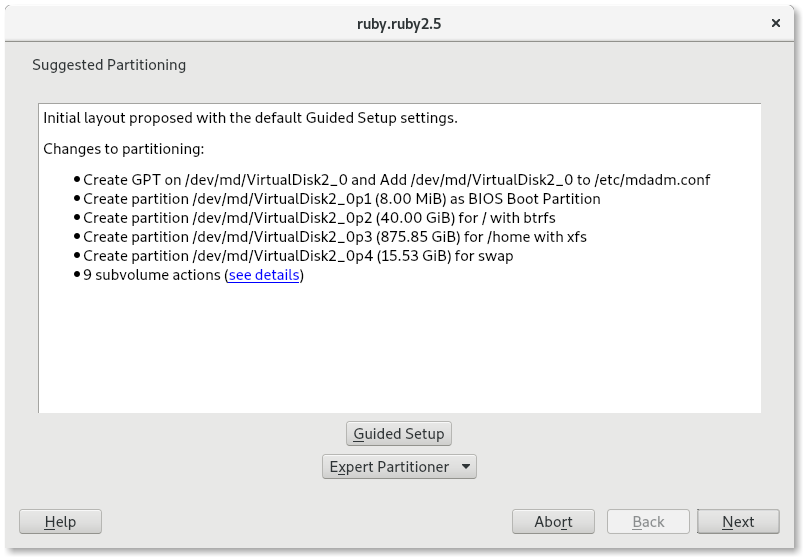
    Running the storage proposal on top of software RAIDs and USB devices

    But that’s not the only improvement done in the area of the partitioning guided setup. We have also broadened its usefulness by allowing it to be used on top of new kinds of devices.

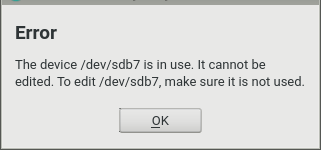
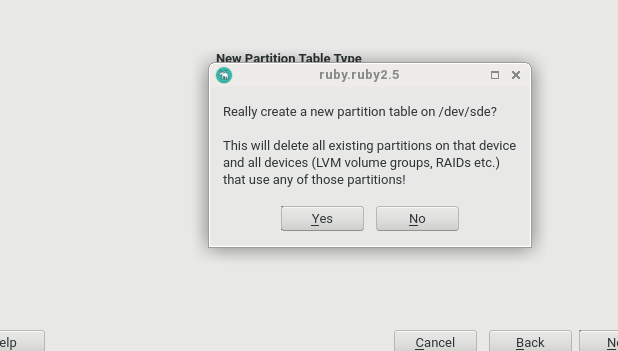
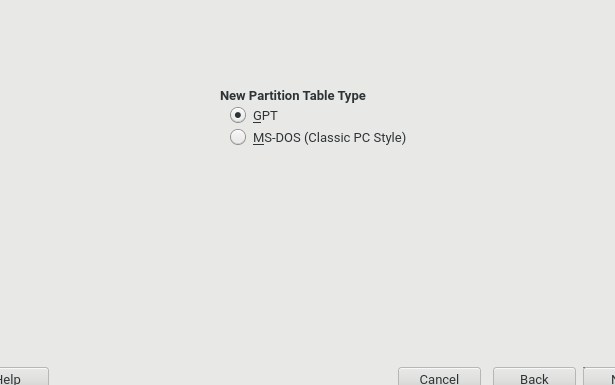
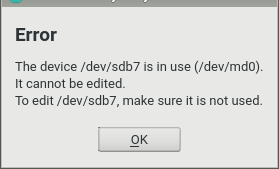
    First of all, it’s now possible to execute the guided setup on top of a software MD RAID. For that, the candidate RAIDs has to fulfill one of two conditions: to contain a partition table or to be completely empty (which includes not being formatted, encrypted or used for any other purpose). That is not only another step to take advantage of the relatively recent capability of YaST to partition software RAIDs (thanks to libstorage-ng) but also a very natural way to support the usage of Dell EMC PowerEdge RAID controllers S130 and S140, which offer an hybrid solution based on software RAIDs but backed up by a firmware-driven configuration.

    Partitioning proposal on top of a software MD RAID

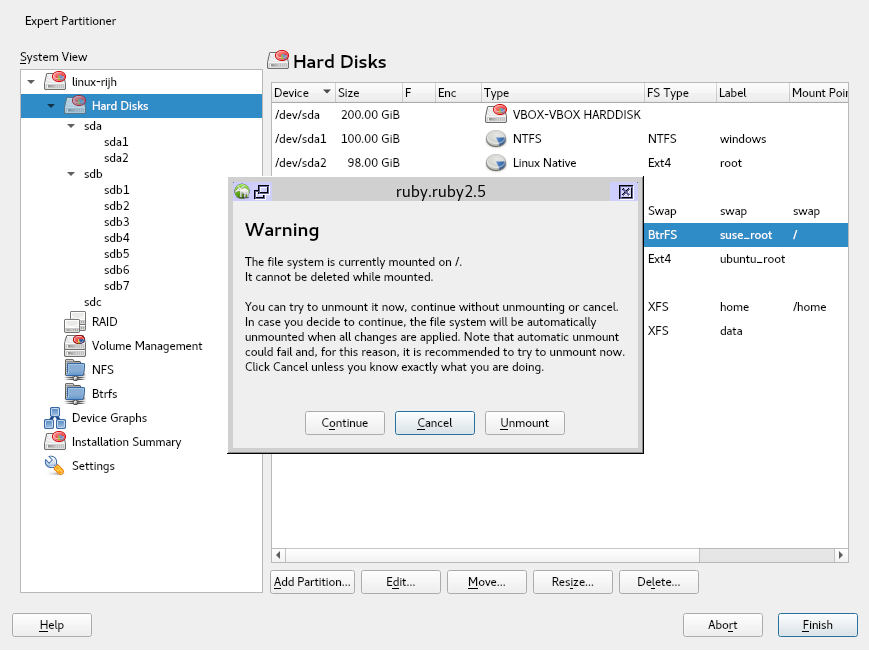
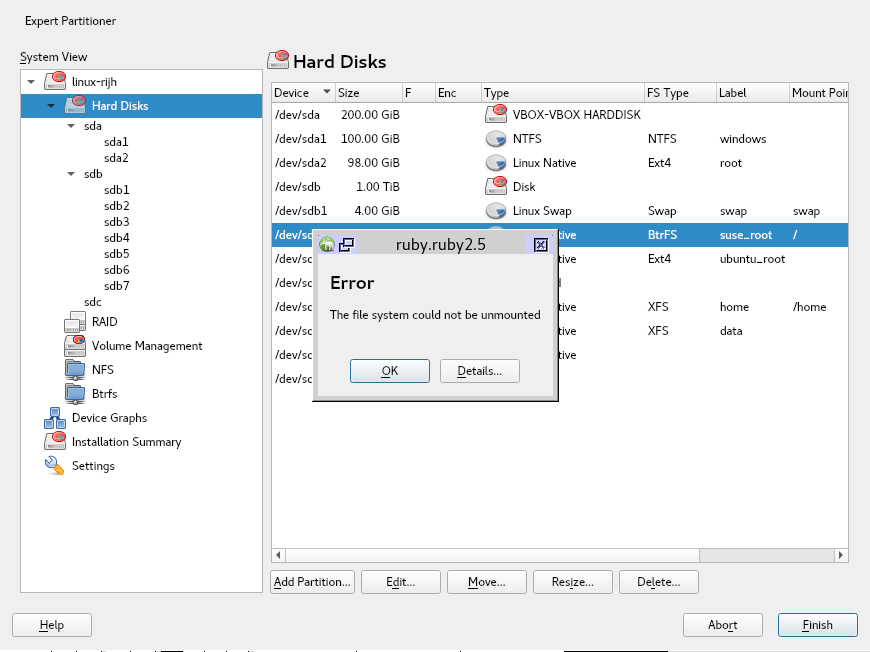
    Almost for the same price, we decided that it was time to offer the available USB devices as candidates for the guided setup, even when there are also non-USB candidates. Excluding, of course, the installation media (except when performing a network-based installation, in that case the USB device can be reused to install the system).

    As usual, these features will be soon available in openSUSE Tumbleweed, as well as in the next stable versions of openSUSE Leap (15.1) and SUSE Linux Enterprise (SLE-15-SP1).

    Fine-tuning the initial storage proposal

    All the described changes open new possibilities for the users to decide where to execute the storage proposal. But as our users already know, when the installer reaches the storage proposal step for first time (before the user has had the chance to run the Guided Setup or the Expert Partitioner), an initial proposal is automatically calculated and displayed. This proposal is performed without user intervention, and all necessary information is taken from the control file of the current product. For example, whether to create a separate home, or whether to enable snapshots for root, etc.

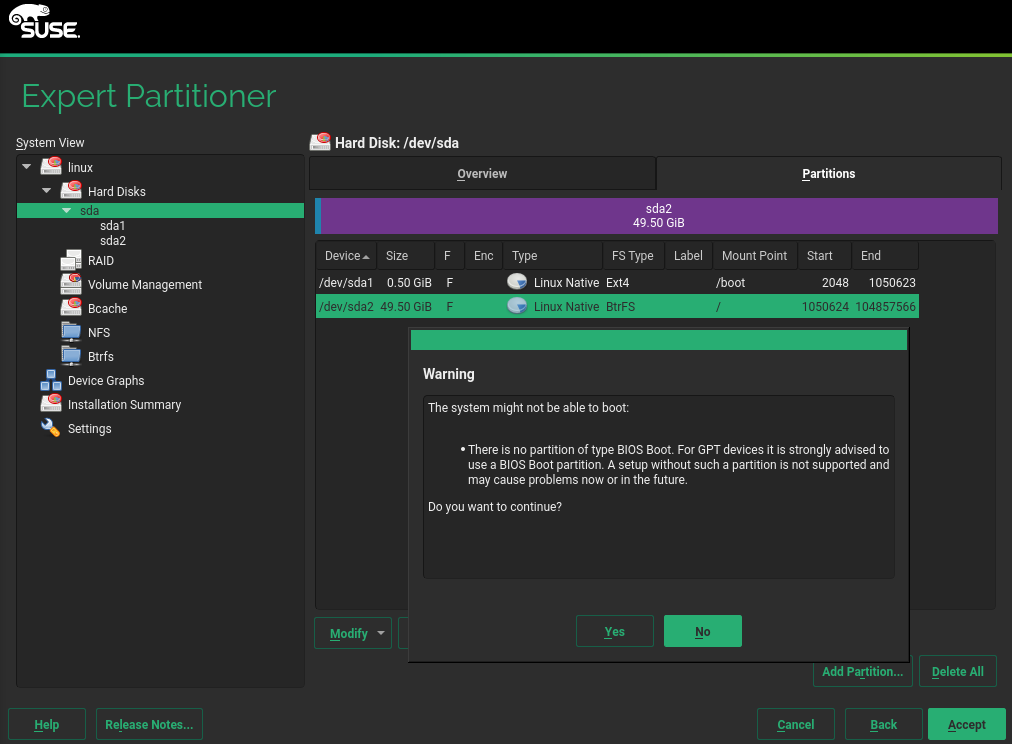
    During the previous sprint, this initial proposal was already improved to make an attempt over each individual disk instead of considering all disks together. Now we have improved this behavior to not discard the first disk so early, even if that means getting a smaller (open)SUSE system.

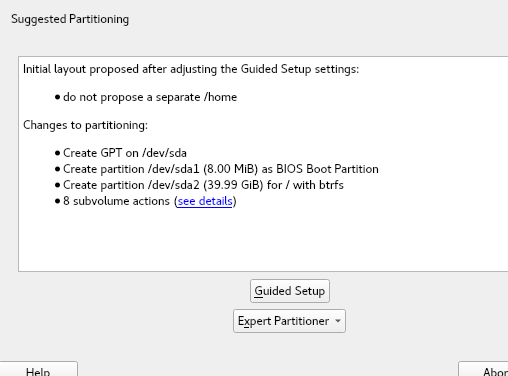
    For example, let’s image we have a system with a first small SSD disk of 40 GiB and a second big Hard Disk of 1 TiB, which is a relatively common configuration for laptops. Since the first disk is too small to allocate a system with the optimal partition sizes and a separate /home partition, the installer used to switch to the second disk, in which it could propose a root partition of the recommended size to use Btrfs snapshots (50 GiB) and a partition for /home bigger than the 40GiB specified as minimum for it in the product description.

    Initial storage proposal before the latest change

    Now, more attempts will be performed in the first disk before giving up and moving to the next one. So, when the proposal is not possible with the desired sizes and with all the optional devices enabled, it will try to disable some optional settings and to relax the size requirements (using the minimum sizes instead of the recommended ones). In the following screenshot you can see the result of this adjusted initial proposal.

    Initial storage proposal after the latest change

    Tumbleweed: Add Online Repositories during Installation

    We added a step in the installation workflow to enable online repositories. This means you can now get the latest packages installed immediately during installation instead of installing older versions from the installation media first and later updating them to the latest versions from the openSUSE servers.

    Also, because of disk space limitations, the installation media don’t contain all the packages that openSUSE provides and thus not all system roles; some of the less frequently used desktops, for example, had not been available in the role selection (formerly desktop selection) dialog. With online repositories, they are now available immediately during installation.

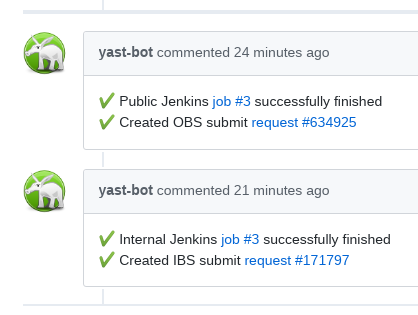
    For details, see the corresponding pull request.

    Choosing the network backend

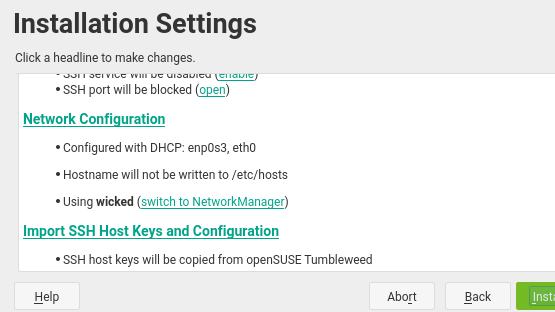
    And more changes to the installer you will be able to enjoy very soon in openSUSE Tumbleweed and also in the upcoming openSUSE Leap 15.1. Now it’s possible to choose the network backend, wicked or NetworkManager, to be used in the final installed system from the Network proposal.

    As easy as a click on a hyperlink, as you can see in the images below.

    New shortcut to change the network backend

    Managing SSH public keys

    When you want to access to a system via SSH, it is a good practice to use public key based authentication instead of the common password-based approach. For that reason, we have added support to handle authorized SSH public keys in the user and group management module, also known as the users module.

    Configuring SSH in yast2-users

    Additionally, you will be able to set up a public key for the root user at installation time, something that can be especially handy for products like the SUSE CaaS Platform.

    And it keeps moving!

    The YaST crew keeps working hard on fixing bugs and, specially, on building new features for everybody to enjoy in the upcoming versions of all the products of the SLE and openSUSE families. So, as much as we would like to keep talking to you all about all the improvements… it’s time to go back to coding! See you again in two weeks with a new report.

Highlights of YaST Development Sprint 66

November 7th, 2018 by

The YaST team is working hard in order to extend the installer, improve the new storage layer and get rid of some bugs. So after this sprint, there is quite some unfinished work that will be ready within two weeks.

However, we have some stuff that we would like you to check out:

  • Snapper takes the free space into account when cleaning up snapshots.
  • The partitioning proposal tries to use just a single disk first.
  • The description of those actions that are related to BCache and MD-RAID devices have been greatly improved.
  • YaST is now able to handle repository variables properly.
  • The log viewer displays a helpful message when no logs are found.
  • And last but not least, yast2-sshd got a new maintainer outside of the YaST team. Let’s celebrate!

Extended Snapshots Clean-up Mechanisms in Snapper

So far snapper would delete snapshots if the overall spaced used for them was above a given limit. Now, snapper is able to take the free space into account too, so it will delete snapshots when the free space of the filesystem drops below a given threshold.

Of course, the threshold can be adjusted by the user through the snapper configuration files.

Better Actions Descriptions in Storage-ng

When describing what actions will be performed for storage actions, we already collapsed related actions to one to make it better readable. Instead of:

- Create  partition /dev/sda1 (40.00 GiB)
- Set ID of partition /dev/sda1 to "Linux" (0x83)
- Create ext4 on /dev/sda1
- Add mount point /home for /dev/sda1
- Add entry for /dev/sda1 to /etc/fstab

we report:

- Create partition /dev/sda1 (40.00 GiB) with ext4 for /home

However, actions related to BCache and MD-RAID devices were not taken into account, which produced quite long (and confusing) descriptions. Fortunately, these cases are now properly handled and the description is now quite informative and concise:

Create encrypted RAID1 /dev/md0 (511.87 GiB) for /secret with xfs
from /dev/sda (512.00 GiB), /dev/sdb (512.00 GiB)

Properly Handling Repository Variables

libzypp supports variable substitution in the name and the URLs of repositories and services. So a .repo file might contain something like this (notice the $releasever variable):

[repo-oss]
name=openSUSE-Leap-$releasever
baseurl=http://download.opensuse.org/distribution/leap/$releasever/repo/oss/

libzypp will take care of injecting the correct value but the user could override those values too. So in the example above, upgrading to Leap 15.1 might be as easy as:

zypper --releasever 15.1 dup

However, YaST2 had some problems in these situations that, hopefully, have been fixed during this sprint. Now openSUSE release managers can adjust the list of online repositories in order to take advantage of such a feature. If you want to know more about variable substitution, please check libzypp documentation.

Partitioning Proposal Uses a Single Disk

Until now, the partitioning proposal that is calculated during the installation uses all available disks by default. However, according to the feedback that we have received from our users, most people simply expect the system to be installed in just one disk. So, from now on, this initial proposal will consider each candidate disk in isolation before falling back to a multi-disk approach.

A picture is worth a thousand words, so just compare the images below to see the difference on a system which has three hard disks.

Initial Multi-Disk Partitioning Proposal

Initial Single Disk Partitioning Proposal

Improve Log Viewer Usability

YaST has featured a log viewer for a long time which allows the user to inspect files under /var/log like messages, boot.log or even YaST logs (YaST2/y2log). However, we are already in the Systemd times and most of your system services will log relevant information to the Systemd journal.

For that reason, YaST2 offers a really nice log viewer for (yast2-journal) which includes interesting filtering capabilities.

The problem is that, as one of our users stated in a rather old bug report, having two different tools to check logs can be confusing. Of course, they are getting information from different places so we decided to keep both of them. However, now the old log viewer will show a hint when no information is found in those old-style logs.

Use yast2-journal instead

yast2-sshd Has a New Maintainer

We would like to finish this report announcing that yast2-sshd has a new maintainer outside of the YaST team. This module was dropped back in 2013 and it was shipped in openSUSE 12.3 for the last time.

However, YaST is open source and Caleb Woodbine has built fresh RPM packages after fixing a problem he found in the firewalld integration. So if you are interested in such a module, check out Caleb’s work.

Thanks a lot, Caleb!

Conclusions

As we mentioned at the beginning of this post, there is quite some work in progress but, sadly, you will need to wait for another two weeks to get more details 🙂

Stay tunned!

Highlights of YaST Development Sprint 65

October 23rd, 2018 by
  • Snapper: list indicates special snapshots; what is snapper anyway?
  • Bcache: configuring attributes
  • AutoYaST: whole disks; partitioned RAIDs; Xen virtual partitions; better merging
  • Booting: "warning, everything is fine!"
  • CaaSP/Kubic: proposing NTP servers according to DHCP response
  • Partitioner UI is a bit faster now

Snapper: Show Currently Mounted and Next to be Mounted Snapshot

Btrfs has some special snapshots: The snapshot currently mounted, and the snapshot that will be mounted next time (unless a snapshot is selected in grub). Now snapper informs the user about these two special snapshot when listing snapshots by a special sign after the number:

# snapper --iso list --disable-used-space
 # | Type   | Pre # | Date                | User | Cleanup | Description           | Userdata     
---+--------+-------+---------------------+------+---------+-----------------------+--------------
0  | single |       |                     | root |         | current               |              
1+ | single |       | 2018-10-18 10:33:50 | root |         | first root filesystem |              
2  | single |       | 2018-10-18 10:43:45 | root | number  | after installation    | important=yes
3- | pre    |       | 2018-10-18 11:03:11 | root |         | ruin system           |              
4  | post   |     3 | 2018-10-18 11:03:11 | root |         | ruin system           |              

For more details visit http://snapper.io/2018/10/18/show-special-snapshots.html.

More Descriptive Name for Snapper Module in YaST Control Center

Previously, the module was called just "Snapper", but users who don’t know that Snapper is could not make any sense of that. We changed it to "Filesystem Snapshots".

Funny anecdote: One team member asked if Snapper really supports LVM when he read the subtitle "Manage Btrfs / LVM filesystem snapshots". Yes, it does! (It has been doing that for a long time). You don’t need Btrfs for snapshots; LVM can also do that, albeit a little differently than Btrfs.

More Bcache Improvements

As you can see in the previous blog post, we are currently working on adding support for Bcache into the YaST partitioner. This time we allow to configure the cache mode for a new bcache device. If you are not sure what a particular cache mode means, we provide also a quite extensive help text. Beside this configuration we also limit operations to prevent data loss or operations that can result in unreliable results. Here with a couple of screenshots:

Using whole disks in AutoYaST

On one hand, now it is possible to format and mount a whole disk without creating any partition. In order to do so, you only need to set the <disklabel> element to none and AutoYaST will understand that you do not want to partition the drive but to use the whole disk as a filesystem.

<drive>
  <device>/dev/sdb</device>
  <disklabel>none</disklabel>
  <partitions config:type="list">
    <partition>
      <mount>/home</mount>
      <filesystem config:type="symbol">xfs</filesystem>
    </partition>
  </partitions>
</drive>

Given the definition above, AutoYaST will format the whole /dev/sdb disk mounting it at /home. But that is not all: it is even possible to use a whole disk as an LVM physical volume or as a software RAID member. The support for the first case was already present in previous AutoYaST versions, but it was not working correctly in SUSE Linux Enterprise 15 and openSUSE Leap 15.

<drive>
  <device>/dev/sdb</device>
  <disklabel>none</disklabel>
  <partitions config:type="list">
    <partition>
      <lvm_group>system</lvm_group>
    </partition>
  </partitions>
</drive>

AutoYaST and partitioned software RAIDs

AutoYaST is now able to create partitioned software RAIDs, something that was not possible in pre-storage-ng times. However, in order to support such a scenario, we needed to change the way in which software RAIDs are described in AutoYaST profiles, although the old format is still supported. So let’s have a look at how a RAID looks like now.

Instead of grouping all RAIDs in a single and special <drive> section, now each RAID is defined in its own section:

<drive>
  <device>/dev/md0</device>
  <raid_options>
    <raid_type>raid0</raid_type>
  </raid_options>
  <partitions config:type="list">
    <partition>
      <mount>/</mount>
      <filesystem config:type="symbol">btrfs</filesystem>
    </partition>
    <partition>
      <mount>/home</mount>
      <filesystem config:type="symbol">xfs</filesystem>
    </partition>
  </partitions>
</drive>

Of course, if you do not want the RAID to be partitioned, just set the <disklabel> element to none, as for any other device.

Better Xen Virtual Partitions support

Analogous to how software RAIDs were defined in AutoYaST until now, Xen virtual partitions with a similar name were grouped in the same <drive> section. It means the /dev/xvda1, /dev/xvda2, etc. were defined within the <drive> section for xvda, which does not exist at all.

To make things clearer, we have decided to use a separate drive section for partition:

<drive>
  <type config:type="symbol">CT_DISK</type>
  <device>/dev/xvdd1</device>
  <disklabel>none</disklabel> <!-- not really needed -->
  <use>all</use>
  <partitions config:type="list">
    <partition>
      <format config:type="boolean">true</format>
      <mount>/home</mount>
      <size>max</size>
    </partition>
  </partitions>
</drive>

AutoYaST Rules: Cleaning the profiles before being merged

AutoYaST rules offer the possibility to configure a system depending on system attributes by merging multiple control files during installation. Check the Rules and Classes section for further documentation.

The merging process is often confusing for people, and the sections in the merged XML files must be in alphabetical order for the merge to succeed.

AutoYaST was cleaning the profiles after a merge, but if the resultant profile was merged with another profiles that profiles were not cleaned before the merge. That was confusing and error prone, so we have fixed it cleaning also them before the merge.

Better explanation of the requirements to boot with GPT

As our readers know, one of the main goals of yast-storage-ng was to offer a more reliable and precise diagnosis on what partitions need to be created in order to ensure that a new system being installed will be able to boot. If something doesn’t fit with such diagnosis, the installer shows a warning message.

In the case of booting a system installed in a GPT device, using the legacy BIOS system (as opposed to EFI), that means SLE-15 and openSUSE Leap 15.0 will warn the user if there is no partition of type BIOS Boot. But there are two problems with that.

  • The warning messages from the Partitioner and, specially, from AutoYaST don’t do a great job in explaining what is wrong.
  • Some users have reported they have GPT systems booting fine in legacy mode without a BIOS Boot partition and, thus, our diagnosis in such cases may be wrong.

We even had a comment in our source code reinforcing the second point!

So we tried to fix our wrong diagnosis… just to end up realizing it was in fact right. After carefully evaluating all the possible setups, checking the different specifications, the Grub2 documentation and even checking the Grub2 source code, we found that layouts without a BIOS Boot partition could get broken (resulting in a non-bootable system) by some file-system level operations. So only the configurations including a BIOS Boot partition can be considered to be 100% safe, both in the short term and against future changes in the system.

We simply cannot allow our users to fall into traps without, at least, a warning message. So we kept the behavior as it was and we focused on improving the messages. After all, advanced users knowing the risks can ignore such warnings. This is how the new warning look in the Partitioner of the upcoming SLE-15-SP1 (and, thus, in openSUSE Leap 15.1).

And this is what AutoYaST will report if the profile doesn’t specify a BIOS Boot partition and it’s not possible to add one to the layout described by such profile.

CaaSP / Kubic: Propose NTP servers according to DHCP response

All-in-one dialog of CaaSP installer asks for NTP Servers. Up to now it searched for NTP servers using SLP only. Otherwise only manual configuration was possible.

Since now CaaSP installer parses DHCP response and fetches NTP servers if any was provided. NTP Servers obtained from DHCP are preferred over those discovered via SLP.

Partitioner UI is a bit faster now

We noticed that clicking around the partitioner UI feels slow. So we used the built-in (Y2PROFILER=1) as well as an external (rbspy) profiler to pinpoint the places that need optimization (mostly caching). Can you see a difference in the following screencast?

Highlights of YaST Development Sprint 64

October 9th, 2018 by

Another two weeks of development, another report from the YaST team. During this sprint, we have been working to improve the usage and installation experience in many areas, including but not limited to the following.

  • Improvements in several areas of the Partitioner.
  • More informative Snapper.
  • Better integration of the new Firewall UI with AutoYaST.
  • Improvements in roles management and in the roles description.
  • Better support in YaST Firstboot for devices with no hardware clock, like Raspberry Pi.

Let’s dive into the details

Changes in the Partitioner UI to Unleash the Storage-ng Power

We have explained already in several previous posts how we were struggling to come up with a set of changes to the user interface of the Partitioner that would allow to expose all the new functionality brought by storage-ng, while still being familiar to our users and fitting in a text console with 80 columns and 24 lines.

We finally implemented the interface described in this gist, which fits into a 80×24 text console and allows all kind of operations. Check that document for more info about the behavior and its rationale.

But what does “all kind of operations” mean? For example, it means it’s possible to start with three empty disks and end up creating this complex setup using only the Partitioner.

Complex storage setup

  • In that example, /dev/md0 is an MD RAID defined on top of two partitions and formatted as “/”. Nothing impressive here so far.
  • /dev/md1 is an MD RAID defined on top of a combination of full disks and partitions. Using disks as base for a RAID was not possible in the old Partitioner.
  • Even more, /dev/md1 contains partitions like /dev/md1p1 and /dev/md1p2, another thing that the old Partitioner didn’t allow to configure.
  • /dev/volgroup0 is an LVM VG based on one of those MD partitions, allowing to combine the best of the MD and LVM technologies in a new way.
  • Last but not least, /dev/sdc is a disk formatted to host a file-system directly, with no partitions in between (also a new possibility).

The general approach of the new UI is described in the linked document. But since an image is worth a thousand words (and an animation is probably worth two thousands), let’s see how some part of the process to create the complex setup described about would look in a text console.

This is how you can now directly format a disk with no partitions.

Formatting a disk

Playing with the partitions of a disk is also a good way to get a feeling on how the buttons are now organized and how they dynamically change based on which row is selected in each table. Click on the following image to animate it and see those views in action.

Playing with partitions

And for a full experience of completely new stuff. Click on the image below to see an animation showing the whole process of creating an MD RAID on top of two full disks and then creating partitions within the resulting RAID.

Creating a partitioned RAID

But although the text mode is the limiting factor to design a YaST UI, many users install their systems and use the Partitioner in graphical mode. For those wondering how the reorganized buttons look in that case, here are some screenshots of the installation process of the upcoming SLE-15-SP1 (static screenshots this time, we already had enough animations for one post).

Managing RAIDs with the new Partitioner UI

Managing Partitions with the new Partitioner UI

Displaying Bcache Devices Consistently in the Device Graphs

Surely most Partitioner users have recognized the style of the visual representation used above for the complex example setup. As you know, the Partitioner offers similar representations in the “Device Graphs” section, both for the original layout of the system and for the target one.

After adding support for Bcache to the Partitioner we detected a small but annoying problem in those graphs. The caching devices were using their UUID as labels, which had two drawbacks.

  • It was too long.
  • It’s not known in advance for “planned” cache sets (i.e. sets that will be created after going forward in the Partitioner), which resulted in boxes with no labels

So know we use a fixed “bcache cache” label for all cache sets, which looks like this.

New label for cache sets in the Device Graph

As opposed to the old way with empty boxes.

Lack of labels in the old Device Graphs

Adding and removing Bcache devices

And since we mention the Bcache support in the Partitioner, it’s worth noticing that the implementation continues moving forward at good pace. During this sprint we implemented a first version of the operations to add a new Bcache device and to delete it.

When adding a new device, the only options that can currently be defined is which devices to use to construct it. But the next sprint has started and you can expect more options to be supported in the near future.

Creating a new Bcache device

When the Bcache device is created, then it can be formatted, mounted or partitioned with the same level of flexibility than other devices in the system. So soon (after the usual integration and automated testing phases) Tumbleweed users will be able to use the YaST Partitioner to test this exciting technology.

Of course the operation to delete a Bcache device offers the usual checks and information available in other parts of the Partitioner, like shown in the following screenshot.

Deleting a bcache device

Both screenshots are taken with an updated version of the installer of the upcoming SLE-15-SP1, since this functionality will be available in such distribution and, of course, also in openSUSE Leap 15.1.

Snapper: Show Used Space for each Snapshot

As those following our blog already know, the YaST Team is also somehow responsible for the development and maintenance of Snapper, the ultimate file-system snapshot tool for Linux. And Snapper has also received some usability improvements during this sprint.

For systems with btrfs and quota enabled, the output of “snapper list” now shows the used space for each snapshot. The used space in this case is the exclusive space of the btrfs quota group corresponding to the snapshot.

# snapper --iso list
Type   | # | Pre # | Date                | User | Used Space | Cleanup | Description      | Userdata     
-------+---+-------+---------------------+------+------------+---------+------------------+--------------
single | 0 |       |                     | root |            |         | current          |              
single | 1 |       | 2018-10-04 21:00:11 | root | 15.77 MiB  |         | first filesystem |              
single | 2 |       | 2018-10-04 21:19:47 | root | 13.78 MiB  | number  | after install    | important=yes

For more details about this change, its advantages and limitations, check the new post at the Snapper blog.

Simplified Role Selection

The role selection dialog in SLE-15 is always displayed in the installation workflow. However, it does not make much sense to display it if there is only one role to select. When you do not register the system and do not use any additional installation repository then in the default SLES-15 installation you can see only the minimal system role.

Selecting one out of one roles

In such case you cannot actually change anything as the only role is pre-selected by default and the only thing which you can do is to press the Next button.

Therefore we improved in for SLE15-SP1, if there is only one role to select then the role is selected automatically and the dialog is skipped.

In addition to that, many of the role descriptions have been adapted and simplified to, hopefully, be more clear.

YaST Firstboot in devices with no hardware clock

SLE and openSUSE can be installed on a great variety of devices, including some system that doesn’t include a hardware Real Time Clock, like the popular Raspberry Pi. That means the usual mechanism to establish the current date and time (using the hwclock command) fails in such devices. That general problem was detected during the usage of YaST Firstboot to configure new devices.

So now YaST detects situations in which there is no Real Time Clock and uses the date as an alternative to set the date and time. This fix, already submitted to openSUSE Tumbleweed, will be available in all upcoming versions of SLE (like SLE-12-SP4 and SLE-15-SP1) and openSUSE Leap.

Better integration of the new Firewall UI with AutoYaST

On the previous report we anticipated the new UI we are building for configuring Firewalld from YaST. During this sprint we have been focusing on some aspects that need to be finished before we can release this new functionality.

Now this UI can be invoked from the AutoYaST module in YaST, meaning it can be used to import and then fine tune the current configuration of the system so it can be exported to an AutoYaST profile.

And since we are already in animation mood, check how the new UI can be used to define an AutoYaST profile.

Using the Firewalld UI from the AutoYaST module

Very soon the whole functionality will be ready for prime time and we will release it together with a separate blog post to explain all the details.

Stay tuned

We are already working on the next sprint, with special focus on AutoYaST, on Snapper and on improving the installation experience in several scenarios. As mentioned above, it’s likely that you will get more news from us (about the new Firewalld support) even before that sprint is finished.

But if you can’t wait for more news, don’t hesitate to visit us on our Irc #yast channel on Freenode. Otherwise, see you here again soon.

YaST Squad Sprint 63

October 1st, 2018 by

Another YaST sprint is over and it is our pleasure to offer a report which includes a wide ranging of topics:

  • The partitioner continues getting more love and attention: now you can partition your RAID devices and we have started to work on supporting Bcache.
  • A new YaST2 firewall UI is around the corner.
  • The self-update feature has been extended to cover more cases.
  • YaST supports now your brand new 4K display during installation.

And, of course, some bugfixes (like proper handling of problems when trying to deactivate a DASD channel) and infrastructure improvements (check out our take on Travis caching).

Managing partitions within MD RAID devices

Our beloved Partitioner was one of the stars of the previous report, with news about several improvements and refinements. During this sprint it also received some love, not only with the addition of a couple of new features but also with more discussions and prototypes about the reorganization of the UI needed to bring even more improvements.

One of those features introduced in the previous sprint was the ability to create a RAID based on whole disks with no partitions. Now we have closed the circle by allowing to manage partitions within a RAID. So now it’s possible to create RAID arrays based on any combination of disks and partitions and then either use those arrays directly to host a file system (or to act as LVM physical volume) or create partitions inside the array. Partitions that can be, of course, formatted, encrypted, used as LVM physical volumes, etc. With that, we can now say the Partitioner support every possible MD RAID setup.

In the following animated screenshot you can see how the partitions of an MD RAID are listed in the left-hand tree of the Partitioner and in the table of devices of the RAID section, similar to how partitions of a hard disk are displayed.

As you may have noticed, the main difference with other views is that, as already anticipated by the UI discussions summarized in our previous sprint report, the set of buttons adapts dynamically to the selected item on the table offering a different set of actions for MD arrays and for partitions.

Another step to define the future of the Partitioner user interface

The interface showed in the previous screenshot, with its dynamic behavior, is just the first step in the direction already defined in the document that resulted from the previous sprint. Having that first fully functional prototype enabled us to rekindle the discussion about the best way to offer all the new possibilities of storage-ng in the Partitioner while keeping the user interface recognizable and familiar to the YaST users.

After another round of discussions and several iterations of mock-ups, we ended up with the idea documented at this gist. That will be the guide for the UI changes we are already implementing as part of the next sprint as a way to unleash even more of the underlying power of storage-ng.

Initial support for Bcache in the Partitioner

But apart from revamping and improving the support for existing technologies with new possibilities, we also want the Partitioner to grow in scope, putting the new kernel technologies into the hands of our users. One of such technologies is Bcache.

Bcache allows to improve the performance of any big but relative slow storage device (so-called “backing device” in Bcache terminology) by using a faster and smaller device (so-called caching device) to speed up read and write operations. The resulting Bcache device has then the size of the backing device and (almost) the effective speed of the caching one.

As a first step to offer full Bcache support, the Partitioner can visualize all the Bcache devices and allows to manipulate its partitions. Broader support, like creating new Bcache devices, will follow in upcoming sprints.

Initial Bcache support in the Partitioner

A New YaST2 Firewall UI is Coming

firewalld replaced the venerable SuSEfirewall2 as the default firewall solution in SUSE Linux Enterprise 15 and openSUSE Leap 15.0. And there is high chance that you have noticed that YaST does not offer a user interface to manage the firewall configuration anymore. Instead, it asks the user to use firewall-config, the official firewalld UI.

But, fortunately, that’s about to change. During recent sprints we have been working in a new UI to manage firewalld configuration. It is still a work in progress, but it is capable of assigning interfaces to zones and opening services/ports for a given zone.

Allowed services in a firewall's zone

We plan to release a first version as soon as we finish the integration with the AutoYaST user interface. So stay tunned!

Better HiDPI (4k Display) Support

What is better than a high screen resolution? Simple: a higher screen resolution. 4k displays are arriving in the consumer mainstream, and 8k displays are the next big thing.

But there are some real-world problems with that: with that large resolution, texts and graphics may become tiny – too tiny to read, too small to fill the available space on the screen.

On your desktop, you can tweak those things – select larger fonts or larger icon sizes. But for the installer that’s another matter; it needs to autodetect the presence of such a display and then auto-scale the user interface so it is actually usable.

We had a number of such issues in YaST; one was the font size, another the size of pixel graphics such as the time zone selection map. Those are now fixed.

For backwards compatibility, the Qt library which we are using for the graphical UI of YaST does not do that completely automatically but we needed to explicitly enable a HiDPI mode. But now it does it all automagically for YaST.

Updating Additional Installation Data

As you may know, YaST is able to update itself during system installation, which enables us to fix the installer by releasing updated packages even after the official release.

However, sometimes we need to fix packages which are not part of the installer but they provide some additional data for it like installation defaults, system role definitions, etc.

In order to support those scenarios, we have extended the installer to use the self-update repository as a regular (but temporary) one during the installation process. So with the next SUSE Linux Enterprise release we will be able to update that data too.

Fixing DASD Channel Deactivation Support

Recently we discovered that YaST was getting frozen in s390 architecture when the user tried to deactivate a DASD channel in use. The problem was that dasd_configure, the underlying tool which takes care of deactivating the channel, was waiting for user confirmation.

Definitely, losing user data is not an option so, from now on, the operation will be just canceled and YaST will report the problem, including all the details, so the user can solve the issue before trying to deactivate the channel again.

DASD deactivation details

Faster Travis Rebuilds using ccache

For continuous integration at GitHub we use Travis which is easy to configure and use. Unfortunately, building there a big project like libstorage-ng takes a lot of time. In this case it is almost half an hour.

Waiting so long to see the result after doing a small change in the code is quite annoying and unconvenient. And this is exactly the scenario where using the ccache tool helps a lot. ccache is a small wrapper around the standard C/C++ compiler which saves the compilation result for later. So if the same file is compiled later again then the cached result is returned immediately without calling the real compiler.

Together with the Travis caching mechanism, which we use for storing and restoring the ccache files for each build, we reached a significant speed up. From 29 minutes to about 6 minutes, that is about four times faster!

Of course, it highly depends how much the environment (compiler, libraries) or the source files have been changed since the last build. The bigger changes the more recompilation is needed, so in reality the speedup might be smaller.

Check the related pull request if you are interested in the implementation details.

More to come

The following sprint is already running and the team is working in really interesting stuff: finishing the bcache support, releasing a first version of the new firewall UI, proper support to use a whole disk as an LVM PV in AutoYaST, several improvements to the installer for CaaSP/Kubic, etc.

So stay tunned!

YaST Squad Sprint 62

September 12th, 2018 by
  • Jenkins commenting in GitHub pull requests
  • Intel Rapid Start Technology for better sleeping
  • Consistent storage proposal in SLE-12
  • Partitioner: designing the UI for its full potential
  • Partitioner: entire disks as members of a software MD RAID
  • Partitioner: better explanation of unusual conditions
  • A sample of bug fixes

Improved Jenkins Integration

It happened quite often that our Jenkins job failed for some reason after merging a pull request at GitHub. And because the Jenkins is supposed to submit the changes to the build service it happened that the fixes from Git were not released in the RPM packages if nobody noticed the failure. That was a bit confusing because we closed a bug at Bugzilla but the fix was not available anywhere.

To avoid this we have added a wrapper script which runs the original Jenkins command (rake osc:sr in this case) and writes the result as a comment to the respective pull request at GitHub. If a submit request is created it additionally adds a link to it.

Since now you should keep the pull request page open after merging it and wait for the Jenkins status result. If it fails for some reason then try fixing it or ask for help on IRC or the YaST mailing list.

Note: This automation works only for the code branches which are in active development and for packages which have an Jenkins job assigned (most of the YaST packages have).

Intel Rapid Start Technology Support

The Intel Rapid Start Technology allows to use a fast disk (SSD) for suspend-to-RAM to save energy. The idea is that after a given time the contents of RAM will be moved to SSD so that the system can power itself off. When powered on, RAM will be read back. So it’s something like a dynamic changing of suspend-to-RAM to suspend-to-fast-disk.

What does this technology need from the installer? It needs its own dedicated partition where it can store the contents of RAM. To support this technology we added in this sprint the ability to create and recognize such a partition. It looks like this:

Consistent Storage Proposal (SLE-12-SP4 / yast2-storage-old)

We fixed a bug where the behavior was inconsistent if you switched the storage proposal between partition-based and LVM-based / encrypted LVM-based: bsc#1085169.

The behavior was pretty irritating: Initially, it would propose to create a separate “/home” partition, but when you changed the proposal parameters and simply kept that checkbox “[x] separate /home” checked, it would complain that with the current settings a separate “/home” was not possible.

The two code paths did the calculations differently: One accounted for the other partitions that were also proposed like “swap” and “boot” (or “PrEP” or “/efi-boot”), the other did not. We unified that as much as reasonably possible without breaking things, but since calculating when and how to use any boot partitions is quite complex in that old legacy storage stack, we did not go all the way; boot partitions are pretty small, so their size matters only in very pathological fringe cases. We try not to overengineer things, in particular not with the 4th service pack for a business product.

More details in the pull request with the fix.

The Partitioner looks to the future

We have blogged a lot about Storage-NG and the possibilities and features it will bring to the users. But a significant part of its power remain dormant under the surface because we decided to clone the user interface and the functionality of the classical YaST Partitioner for the deadline marked by SLE 15 (and Leap 15.0). But now we are finally able to start exposing those long-awaited features and to bring new ones for the current Tumbleweed and for the future SLE-15-SP1 and Leap 15.1.

The user interface of the Partitioner is already rather packed with functionality, but we want to avoid a too disruptive redesign. So it was time to some pen and paper sessions, trying to find and draw a good way to add exciting new stuff to the Partitioner, including all of the following:

  • Allow entire disks (no partition table) to be added as members of a software MD RAID.
  • Manage (create, modify and delete) partitions within a software MD RAID device.
  • Make possible to format an entire disk (no partition table) and/or define a mount point for it (just as we do with partitions or LVM logical volumes).
  • Manage Bcache so the user can set and configure which devices will be used to speed up others.

As usual, we consulted some UI experts in the process and the result is this first version of a document, which summarizes how to incorporate all that to the Partitioner, including some alternatives we are considering for the near future.

That document will become the cornerstone of future developments. Sometimes you need to spend a sprint doing other stuff (like researching and documenting) before you can go ahead with writing code.

Partitioner: full disks as members of a software MD RAID

The first of the features described in the previous document is already available for Tumbleweed users (or it will be as soon as the integration process concludes) and, thus, ready for the upcoming releases of SLE and Leap. Now the Partitioner offers full disks as “Available Devices” in the RAID screen, following the criteria and considerations explained at the document.

That brings even more ways of combining devices together (disks, partitions, software RAIDs, you name it) to create a storage setup. As a result, we decided it was important to explain the situation when some combinations are not possible right away, likely because they need some previous step. Which brings us to…

Partitioner: more specific errors when a device is in use

In general, most of the checks already present in the Partitioner were already able to correctly handle situations in which the disk was a direct member of an MD RAID or an LVM volume group. But the message about the device being in use was not informative enough.

Now the message includes the name of the device that is making the operation impossible (it’s usually one, but there are corner cases in which it can be more than one), so the user has some clue about how to fix it.

Partitioner: improved creation of partition table

One part of the Partitioner that was specially bad at explaining the current situation and the possible consequences was the workflow of “Create New Partition Table”, which also used to exhibit a behavior quite inconsistent with the rest of the Partitioner actions.

In SLE-15 and openSUSE Leap 15.0, the “Create New Partition Table” button immediately presents a form to select the partition table type in case the device supports more than one.

And after the user selects one type it always shows a warning about all kind of devices to be destroyed, no matter if some device is really affected or not.

Even better, if only one partition table type is possible, it still shows the form but with no question. So creating a partition table in a completely empty DASD device result in a misleading warning (nothing is going to be destroyed) on top of an empty wizard.

So the whole action was reimplemented to display the warning only if some devices are indeed going to be affected (including the list of affected devices) and to display that warning as soon as the user clicks the button (as any other Partitioner action).

As seen in the screenshot, the check handles correctly situations in which the disk as a whole (no partitions) is part of an MD RAID or an LVM setup. And, of course, there are no empty wizard steps in the case of DASD or nothing like that. Now the workflow works in the expected way on each situation.

In short, the Storage-NG Partitioner is moving away, step by step, from being a 1:1 clone of the historical Partitioner to offer more functionality and usability. And there are more improvements to come in that area.

Partitioner: Unmounting devices in advance

The Partitioner allows to extensively configure your system storage devices. You can perform a lot of different kind of actions, from changing the label of a file system to creating a complex configuration by using LVM or RAIDs. Each modification you perform is stored in memory, so the real system is not altered at all until you confirm to apply the changes as last step. But in some circumstances, the Partitioner could not be able to perform some of the required actions, and it would fail when trying to modify the real system. One action that sometimes might fail is unmounting a device. This action might fail for several reasons, but the most common is because the file system is busy. And moreover, sometimes there are actions that require the device to be unmounted, for example, for deleting a partition, so the Partitioner would try to automatically unmount it.

During this sprint, the Partitioner has recovered its ability of unmounting devices on the fly to avoid possible failures when applying the changes. Now, if you want to delete a currently mounted device (e.g., a LVM Logical Volume) you will be asked in advance to unmount it. If you accept, the Partitioner will try to unmount the device on the fly without waiting to apply all the changes. In case the unmount action fails, you will be informed about the problem and you might try to manually solve the problem before the Partitioner applies the changes in your system. Of course, you can also continue without unmounting the device and the Partitioner will try to automatically unmount it after accepting all the changes.

Another task that might require unmounting the device is resizing the filesystem. The Partitioner will ask you about unmounting the device when the filesystem does not support resizing while being mounted. And, even when the filesystem does support it, you still might be requested to unmount the device. For example when you want to extend a device by more than 50 GiB. That task might be quite slow and it is highly recommended to unmount the device to speed up the resizing time, otherwise it could take hours.

Bug Fixes

Of course, we continue fighting against bugs. Thus, from this sprint on, alongside other minor stuff, the system

YaST Squad Sprint 61

August 29th, 2018 by

We have to admit that lately we have not been exactly regular and reliable in delivering our blog posts. But with the vacation season coming to an end, we are determined to recover the good pace. Since the proof is in the pudding, here is our latest report, just one week after the previous one.

Improving the user experience in the Services Manager

And talking about the previous report, we presented there several improvements in the YaST Services Manager module, including the new “Apply” and “Show Log” buttons. With the “Apply” button, all changes performed over the services are applied without closing the Services Manager, which allows you to continue using it and to inspect the logs of a service without relaunching the Services Manager again. But this new “Apply” button only makes sense when there is something to save, so during this sprint we have improved the UI to disable the button when nothing has been changed yet. In addition, now it is easier to know what we have edited so far in the Services Manager. For every change over a service, the new value is explicitly highlighted by using the special mark (*). For example, when you change the start mode of a service from “On boot” to “On demand”, you will see “(*) On Demand” in the corresponding column, see example.

https://lizards.opensuse.org/2018/08/22/yast-squad-sprint-59-60/

The list of services and the changes performed on them can be quite long. So in addition to the new mark, now a confirmation popup is shown up when using the “Apply” or “OK” button. This popup will present a summary with all changes that will be applied, that is, what services will be started or stopped, what services will change its start mode to “on boot”, “on demand” or “manually”, and even which will be the new default Systemd Target in case you have modified it. See an example in the following screenshot.

New summary of changes in the Services Manager

These improvements will reach openSUSE Tumbleweed soon and will be available in the upcoming versions of SLE (SLE-15-SP1) and openSUSE Leap (15.1).

Yast2 Systemd classes reorganized

Related to the changes in the Service Manager and in a more developer-oriented note. Yast2 Systemd (the set of YaST components that handle Systemd units under the hood) also has been completely reorganized in a more Ruby compliant way. Moving from YCP-style modules to a set of classes that behave like nice citizens of the Ruby ecosystem in their own proper namespace.

AutoYaST support for Xen virtual partitions

And to continue with refinements over the features introduced in the previous sprint, we have also improved the support for the so-called Xen virtual partitions that we presented in our previous post. As explained there, the old storage stack used to represent the Xen devices like /dev/xvda1 as partitions of a non-existing /dev/xvda hard disk. In the new stack, those devices are treated as they deserve, as independent block devices on themselves with no made-up disks coming from nowhere.

But AutoYaST profiles from a SLE-12 or Leap 42.x still pretend there are hard disks grouping the Xen virtual partitions. So in addition to the fixes introduced in the Partitioner during the previous sprint, we also had to teach the new storage stack how to handle fanciful AutoYaST <drive> sections like this, used to describe groups of Xen devices (xvda1 and xvda2 really exist in the system, xvda doesn’t).

 <drive>
    <device>/dev/xvda</device>

    <partition>
      <partition_nr>1</partition_nr>
      ...information about /dev/xvda1...
    </partition>

    <partition>
      <partition_nr>2</partition_nr>
      ...information about /dev/xvda2...
    </partition>

  </drive>
</pre>

The fix will be released as an installer self-update patch so users installing SLE-15 (with access to a self-update repository) can take advantage of it. In the mid term we will have to come up with a more realistic format to represent such devices in the AutoYaST profiles, but so far the limitations of the current AutoYaST format enforces us to keep the current approach.

Ignoring inactive RAID arrays

But that’s not the only new skill of Storage-ng for this sprint. It also learned how to better manage inactive RAID arrays. MD RAID arrays are built to handle failures of the underlying physical devices. When some of the devices fail, the RAID becomes “degraded” which means the data is still accessible but it’s time to fix things. When too many devices suffer a fault, the RAID becomes inactive and it cannot operate any longer until it’s repaired. Our Partitioner was not handling this situation well, popping up a generic “unexpected situation” error message.

Generic error message in Storage-ng

We have fixed that, and the storage stack doesn’t go nuts any longer if an inactive RAID array is found. Even more, it now shows an “Active: Yes/No” field under the RAID heading to inform the user in case the RAID is in such bad shape.

Partitioner displaying an inactive RAID array

All that will be soon available as a maintenance update for SLE-15 and Leap 15.0. So far, no mechanisms have been introduced to stop the user from modifying an inactive RAID array with the Partitioner. That will come in the future, together with other MD RAID improvements in Storage-ng targeting future releases of SLE and openSUSE Leap.

Media support in the Installation Server module

It’s quite embarrassing but it turned out that the Installation Server YaST module in SLE15 and openSUSE Leap 15.0 is not able to add the SLE15/Leap15 installation media. The reason is that the new media use a different repository format and the Installation Server module crashed when trying to add a new repository.

Fortunately the fix was small and allows adding the new media correctly. We plan to release a maintenance update for SLE15, openSUSE Leap 15.0 and SLE12-SP3. It turned out that the code in SLE11-SP4 is more robust and does not crash so we do not need an update there.

Improved help text for system roles

We recently got a bug report about how hard was to read the help text in the installation screen explaining the system roles. So we took it as an opportunity to try how flexible our help text system is. Adding some richtext format made it look much better in graphical mode and also surprisingly well text mode. Let’s see some screenshots from Leap 15.0, although the fix applies to as well to openSUSE Tumbleweed and the SLE15 family.

This is how it looked before the fix.

The poorly formatted help of the System Roles screen

And that how it looks now, in both Qt and Ncurses, with the new format.

The properly formatted text of the System Roles screen

Proper format even in text mode

Fixed PHP support in the YaST HTTP server module

The YaST HTTP server module allows enabling the PHP support in the Apache web server configuration. However, as the module is not actively developed it turned out that the PHP support was broken. YaST wanted to install the apache2-mod_php5 package which is not available in openSUSE Leap 15.0 or SLE15, there is a newer apache2-mod_php7 package.

After checking the other required packages it turned out that a similar problem exists for some other Apache modules. To avoid this issue in the future again we have added an additional test which checks the availability of all potentially installed packages. If there is a new version or a package is dropped we should be notified earlier by continuous integration instead of an user bug report later.

Stay tuned

Of course, in addition to the mentioned highlights we have fixed several small and medium bugs. And we plan to continue improving YaST in many ways… and to keep you punctually updated. So don’t go too far away.

YaST Squad Sprint 59 & 60

August 22nd, 2018 by

We know, we know… we owed you a report for the 59th sprint! But you know what? We are now delivering this summary which covers sprints 59 and 60 so we are now up to date again.

During these weeks, we have been working mainly in two different areas. On one hand, we have improved YaST services management capabilities, adding support for on demand services and making the user experience slightly better. On the other hand, we are still working in the new storage layer, extending it to support Xen virtual partitions and fixing BIOS MD devices handling, among other things.

Last but not least, our bug fighting squad (do you remember squads, right?) have fixed quite some bugs accross our full stack.

So let’s have a tour to recap some highlights from these sprints.

Services Management Gets Some Love

The team is investing quite some time improving the services management area. In the past, YaST was adapted to play nicely with Systemd (which replaced the old runlevel-based init system). However, there was a lot of room for improvement, as Systemd added some new features when it comes to services management that were not supported in YaST at all.

To explore these changes, let’s start by having a look at the new services manager user interface.

Services Manager UI with On Demand Activation Support

At first sight, you may have spotted some changes: there is an Start Mode menu button where the Enable/Disable used to be; new Apply or Show Logs buttons have been added; the Start/Stop button has been replaced by an Start (or Stop) one… Ok, let’s describe these changes one by one.

Perhaps the most relevant update is the support for socket activated services. But you may be asking what a “socket activated service” is, right? In a nutshell, these are services that are started on demand. For instance, the printing service could be started only when you want to use the printer. And that’s what the Start Mode button is all about. For instance, you may want the printing services to be started only when needed (On Demand) and YaST will take care of setting up Systemd units in order to do so.

Another interesting feature is browsing services logs. Beware that this button will be available only if yast2-journal is installed because it uses the browser provided by this package.

And browsing the logs brings us to the new Apply button. Sometimes, it may be useful to Start a service and check the logs looking for potential problems. In the past, the changes were applied when the OK button was pressed but, unfortunately, the services manager was then closed. Now, with the Apply button, you can ask YaST to made those changes for real without closing the services manager (and check the logs or keep adjusting services).

But that’s not all! Among other small changes (like fixing bug #1080738) we are still improving the UX for this services manager.

Make the Xen virtual partitions great again

Rewriting a piece of YaST that is 20 years old is a never-ending source of surprises. When we though that Storage-ng did already support all the storage technologies handled by the old storage stack, we just found that we had left something behind.

When setting a Xen virtualization environment, it’s possible to define block devices that are seen and named like partitions in the Xen guest, but are in fact disks (or almost-disks, since they cannot be partitioned by regular methods). In other words, the Xen guest can see some block devices called e.g. /dev/xvda1 and /dev/xvda2 without a corresponding /dev/xvda.

From the YaST point of view, you can do whatever you can do with a partition (format it, mount it, etc.), except you can’t delete them or create more (since they are not backed by a disk, from the perspective of the Xen guest). We call those devices “Xen virtual partitions”. The old storage stack used to pretend those devices were just plain partitions of a made-up /dev/xda disk that was not there in the system but still appeared in the Partitioner and in the AutoYaST profile. The new stack simply contained no support at all for Xen virtual partitions.

We fixed that during the last sprint, making the feature available on the SLE-15 installation process thanks to the installer self-update feature. So either if your Xen guest runs a fully up-to-date version of SLE-15, Leap 15.0 or Tumbleweed or if you are installing SLE-15 with access to the installer self-update repositories, virtual partitions are visible in the Hard Disks section of the Partitioner.

It works in a in a similar way to the old (pre Storage-NG) Partitioner, but without artificial disks to group the virtual partitions. See the following screenshots in which xvda is a DVD, xvdb a real disk and xvdc1 a XEN virtual partition (there is no bogus xvdc added by YaST).

Handling Xen Virtual Partitions

Only the Edit button really works as expected, allowing the user to mount and/or format the virtual partition. The other buttons just show the appropriate error for the different unsupported operations.

Handling Xen Virtual Partitions Error Message

I want that on my Leap 15.0 installer

As a side note on the Xen partitions topic, it’s worth mentioning that the self-update feature of the installer is always available for all YaST-based distributions. But, unlike SLE, openSUSE doesn’t offer an official self-update repository, implying the feature is effectively disabled by default in openSUSE Leap. Does it mean that if you want to install Leap on top of a Xen virtual partition you will have to wait for Leap 15.1 or switch to Tumbleweed? Not exactly.

If you really want to use the latest YaST features during the openSUSE Leap 15.0 installation process, there are a couple of ways to achieve it. For example, to install (or upgrade) using the Leap 15.0 Live images. The live images are refreshed once in a while, so they can contain an installer that is more up-to-date than the installer in the Leap 15.0 normal ISO. There are also ways to use the self-update feature with unofficial (and unsupported) repositories. For a summary of all the options, check this comment at Bugzilla. Users of SLE should not need any of these hacks, since there is an official repository for the installer self-update mechanism ensuring SLE15 can always be installed with updated version of all the crucial packages.

A New Widget To Manage Services

Did you think that services management were confined to the services manager? Of course no 🙂 As you may know, there are serveral YaST modules that allow our users to set up several services like DNS, DHCP, Samba, etc. All these modules offer a way to configure how and when those services should be started.

So as part of the effort to improve the services management experience, we have rolled out a new widget which offers some benefits:

  • Allows setting a service to be started On Demand.
  • Offers a consistent an unified interface accross all modules.
  • It is able to handle cases where several services are involved (like yast2-samba-server or yast2-iscsi-client).

By the way, we have adapted all these modules to use the new and shiny widget.

Better Handle Large File Systems in libyui

We fixed an issue with disks larger than 8EiB in the last sprint. However, the fix was intended for SLE12 and SLE15 maintenance update so we could not do big changes and we fixed only the most important parts.

For SLE15-SP1/Leap 15.1 and openSUSE Tumbleweed we can do more changes so we did some backward incompatible improvements.

Originally the size was implemented using long long data type which is a 64-bit signed integer (with the maximum value 8EiB). We switched to the Boost multiprecision C++ library which implements arbitrary precision integers. It works like the Integer class in Ruby which adds more bits to the data when needed.

Of course, it still depends on the limits in the underlying libzypp library which uses a 64-bit signed integer but with 1KiB unit, so the limit should be 8ZiB. With this change we are prepared even for more.

Additionally we added more units for converting to a string representation. Originally it used TiB units which resulted in too big numbers, now the EiB sizes are displayed using the EiB units as expected.

Large filesystems support in Libyui

Moreover we added support for writing unit tests, evaluating the code coverage and reporting the it to coveralls.io. With this support we were able to write the very first unit test in libyui! The code coverage is now at the embarrassing 2% but we have just started!

Rubocop Check Speed Up

In the previous blog post we reported that we had improved running the unit tests in the yast2-storage-ng package. The speed up was based on parallelizing the execution and using all processors. This time we have improved the Rubocop check.

Normally Rubocop scans the directory for the files to check and then processes found files sequentially. And this might take very long time if there are hundreds of files to check.

Similarly as in the previous speed up we take advantage of the available processors and run multiple Rubocop instances in parallel. The implementation is a bit more complicated as Rubocop itself does not support parallel scan at all. But it is possible to evaluate the checked files, split them into the groups according to the number of processors and start a separate Rubocop instance for each group in parallel.

If you are interested in the details or you want to use parallel Rubocop also in your project then check the implementation in the yast-rake Ruby gem.

Of course, this improvement has an important impact in the yast2-storage-ng package where Rubocop needs to check over 600 files. Here you are the numbers:

  • Running Rubocop locally (with hyperthreading enabled):
    • ~3.6x faster on an older quad core CPU (from 44s to 12s)
    • ~6x faster on a new eight core CPU (from 35s to 6s)
  • At Travis: ~1.5x faster (from 69s to 47s), that’s the maximum possible because Travis has about 1.5x CPU build power
  • .

As you can see, for big projects the speed up is very good on local system and even at Travis it is still nice.

What’s next?

Sprint 61 is already running and the new storage layer and services management are again the areas where we are focusing an important part of our resources. Hopefully, in around two weeks, we will publish what we have achieved this time.

Stay tunned!

YaST Squad Sprint 58

July 23rd, 2018 by

Squads in the Team

In the previous post we explained the squads idea and said we would tell more in this report. Thus, we should mention that we finally did three squads for this sprint:

  • The Sockets & Services Squad working on supporting systemd sockets properly and other systemd related tasks (all in the YaST context, of course).
  • The Qt and UI Squad working on user interface things like adding a new view to the package selection to show packages managed by a service, and also some control center improvements.
  • The Bug Fighting Squad handling bugs that are coming in on a daily basis and in our backlog.

Fixed Issues with Disks Larger than 8EiB

It’s quite unlikely that you have at home a disk storage larger than 8EiB (eight exbibytes, 263). But in enterprise or cloud world it might be possible.

And it turned out that the YaST package manager does not handle such large disks well. At the start you would see this false error message:

The Problems


There are two problems:

  • There definitely is a lot of free space on the disk, the error telling the user the space is running out is simply lying.
  • The disk sizes are displayed as wrong negative values.

It turned out that the problem was caused by using the signed 64-bit integer data type which overflows for values bigger than 8EiB and the number becomes negative.

The Fix

We had to fix several places, each required some different solution.

  • Use unsigned 64-bit integers where possible, that obviously avoids overflow.
  • The numbers from libzypp use KiB units, at some places we need to convert that number to MiB. But first we converted to plain bytes (by multiplying by 1024) and then divide by 1MiB. And this first multiply step might cause overflow. Instead we simply convert KiB to MiB directly by dividing by 1024 without risk of overflow in the middle.
  • Use floating point double data type for converting the values to a human readable text or to percents. The double has wider range and in these cases we do not need exact precision so rounding in floating point operations does not matter.
  • Ignore a negative number in the free space check. At one place the value goes through the YaST component system which uses signed integer and this cannot be easily changed. In that case we consider negative free space as enough for installing any package, more than 8EiB free space should be enough for any package™.


There is still some minor issue with the large numbers. The highest supported unit is TiB so even very big numbers are displayed in TiB units as on the screenshot above. The fix is planned to be released as a maintenance update and this change would break the backward compatibility so we will improve it later but only for the future releases.

Testing

But the problem was how to test the behavior? You could fake some numbers in the code but for full testing or QA validation it would be nice to test on a real disk. But you usually do not have such a large storage for testing…

Fortunately in Linux it is possible to fake such large file system quite easily using sparse files and loop devices. Here is a short how to:

# create two big sparse files
truncate -s 6E /tmp/huge_file1
truncate -s 6E /tmp/huge_file2

# create block devices via loopback
losetup -f /tmp/huge_file1
losetup -f /tmp/huge_file2

# get the loop back device names, the names might be different
# if the system already uses some other loop back devices
losetup -a
/dev/loop1: [0056]:1171324 (/tmp/huge_file2)
/dev/loop0: [0056]:1171323 (/tmp/huge_file1)

# create a btrfs file system over both "disks"
mkfs.btrfs -K /dev/loop0 /dev/loop1

# mount it on /mnt2 (or whatever else, do no use /mnt, that is ignored by libzypp!)
mkdir /mnt2
mount /dev/loop0 /mnt2

# verify the size
df -h /mnt2
Filesystem      Size  Used Avail Use% Mounted on
/dev/loop0       12E   17M   12E   1% /mnt2
# voila! you have a 12EiB file system! enjoy 😉

Note: Obviously even if you have a 12EiB filesystem you cannot save there more data than in the real file system below (in /tmp in this case). If you try you will get write errors, there is no prepetuum mobile…

Speeding Up Unit Tests and Travis Builds in yast2-storage-ng

The new yast2-storage-ng package has a quite large set of unit tests. That’s good, it allows to have less buggy code and make sure the features work as expected.

On the other hand the drawback is that running the tests take too much time. If you have to wait for 3 or 4 minutes after any small change in the code then either you waste too much time or you do not run the tests at all. So we looked into speeding up the tests.

Running Tests in Parallel

The main problem was that all tests were executed sequentially one by one. Even if you have a multi CPU system only one processor was used. It turned out that using the parallel_test Ruby gem allows easily running the tests in parallel utilizing all available processors.

The only possible problem is that there must not be any dependencies or conflicts between the tests otherwise running them in parallel would fail. Fortunately there was only one small issue in the yast2-storage-ng tests and we could enable the parallel tests without much work.

Running Travis Jobs in Parallel

Also the Travis job took quite a lot of time. Running the tests in parallel helped a bit at Travis but still was not good enough.

Fortunately Travis allows running multiple jobs in parallel. Therefore we split the single CI job which runs the tests, builds the package, runs syntax check, etc… into three independent groups which can be started in parallel.

Documentation

If you are interested in details you might check our updated Travis documentation and the Parallel tests documentation. Or check the announcement on the YaST mailing list.

Results

Here are some real numbers to see the speedup:

  • Running the test suite locally (rake test:unit): from 2:44 to 0:38 (4.3x speed up on a quad core CPU with hyper-threading enabled)
  • Building the package locally (rake osc:build): from 137s to 49s (with cached RPM packages but includes chroot installation)
  • Package build in OBS: from 323s-505s to 102s-235s (it highly depends on the speed of the used worker)
  • Travis speed up: from 8-10 minutes to 3-4minutes (using both parallel Travis jobs and parallel tests)

This allows us to continue with adding even more tests into the package. :smiley:

What Packages are Provided by a Product Extension/Module?

In the Software Management module we have a Repositories view where you can see the packages grouped by the repository that provides them. But this is not really helpful if you want to see what is delivered with a product Extension or Module, because each product module is composed of several repositories: the originally released packages, the updates, the sources, the debuginfos.

Fortunately, the repositories for each product module are grouped together in a repository Service, and we have added a Services filter to Software Management.

Qt Service filter:

ncurses Service filter:

(Reference: https://fate.suse.com/320573)

Update on YaST Development Status

July 5th, 2018 by

Five weeks without blogging is certainly a quite an hiatus for the YaST Team. But fear no more, we are back! This is the first time in quite a while in which our post is not titled “Highlights of YaST Development Sprint” and there are good reasons for that.

Adapting the YaST Team Structure the Agile Way

Now that openSUSE Leap 15.0 is out and SUSE Enterprise Linux 15 is ready to be shipped, we felt it was time to rethink our activities. For the duration of the storage-ng development, we had split the YaST team into two sub-teams: Team S for Storage and Team R for the Rest. But now new challenges await us; there are some things that were pushed aside because getting storage-ng into an acceptable state had top priority.

We decided we’d try an approach that other development teams in SUSE have already been using successfully: split up the YaST team into “squads” of 3-5 people each for the duration of a couple of sprints. Each squad is centered around a big topic that needs to be addressed. There is no long-term fixed assignment of anyone to any squad; the idea is to shuffle people and thus know-how around as needed, of course taking each developer’s interests into account. So the squads and the topics will change every few weeks.

Is this the pure spirit of Scrum and the agile bible? We don’t know. And we don’t care. The agile spirit is to adapt your work based on what makes sense in every moment. We work the agile way, so the way of working also has to be agile.

The next sprint’s report will contain more information about the first set of squads and the results they are delivering. But meanwhile we have done much more than just reorganizing our forces. While the sprint-based work was suspended (thus the blog title not containing the word “sprint”), the YaST team still managed to put out of the door quite some features, improvements and bug fixes targeting mainly Tumbleweed.

Expert Partitioner: Moving Partitions

After quite some effort, the YaST team has completely rewritten the Expert Partitioner from scratch using the new storage stack (a.k.a. storage-ng). And although this new Expert Partitioner already offers practically all the same features than the old one, some last options are still coming. One them in the button for moving partitions, which saves us of a lot unnecessary work in many cases. For example, imagine you are installing openSUSE Tumbleweed and the installer automatically proposes you to create a partition for root and, just following it, a second partition for home. In case you don’t like the default proposed sizes (e.g. because you want a bigger root), you have to use the Expert Partitioner to fix the situation. You have to completely remove the home partition, resize root for enlarging it and then create home again with the same options than before.

Now, with the “Move” button, this kind of modifications are much easier. For that example, you can accomplish exactly the same by simply resizing home (without deleting it completely) and moving the resized home closer to the end of the disk (by using Move button). After moving the home partition, you have enough free space for enlarging the root partition. In the following screenshot you can see this dialog for moving partitions.

Moving partitions

One important thing to take into account is that the movement of partitions is only possible for new partitions, that is, it is not possible to move partitions that already exist on disk.

Trying to move an existing partition

YaST Masking Systemd Mount and Swap Units

And speaking about the Partitioner and its relationship with the rest of the system, the transition from SysVinit to Systemd changed the behavior of (open)SUSE concerning mounting devices. Systemd generates mount units for various file systems, e.g. those listed in /etc/fstab. The result is that Systemd may automatically mount any file system, even if that file system has been manually unmounted before. This can be problematic when the user needs the file system to be unmounted for certain operations, like resizing or unplugging.

Thus, now the Partitioner uses a new mechanism to prevent that to happen during its execution. Starting with version 4.0.194, the yast2-storage-ng package includes and uses the script /usr/lib/YaST2/bin/mask-systemd-units to mask all mount and swap units one by one. The script might also be useful for direct use of system administrators. So… profit!

Showing Logs the Systemd Way

And since we speak about how Systemd has changed the way the overall system works, it’s also worth noticing how more and more services has been adopting the Systemd journal for its logging purposes.

Some of the existing YaST modules to configure a given service include a button to show the logs of such service. In the past, they used to display the content of /var/log/messages with some basic filtering to ensure only the information relative to the service (e.g. tftp) was shown. But that didn’t work out of the box for services already using the Systemd journal, and we had gotten quite some bug reports about it.

Fortunately, the solution is really at our fingertips. You surely know by now that there is a YaST module for viewing the journal content with powerful queries for filtering, searching and so so on. The obvious solution is to use that YaST journal module also within other YaST modules, in order to show domain specific logs.

So far we adapted the YaST tftp module, but it will be easy to fix also other places that use the old approach that no longer works. And this is how it looks when you click the “Show Logs” button in the YaST module to configure tftp.

Journal entries for the tftp module

Usability Improvement in the Repositories Manager

The YaST repositories manager displays the repositories sorted by priority. But some people have a lot of repositories in their system and make no use of the priorities. Since there was not a clear second criteria, the order of the repository list looked quite arbitrary in those cases. Now all the repositories with the same priority are sorted by name, which makes more sense. See how it looked before the improvement.

List of repositories sorted only by priority

And compare to how it looks now.

List of repositories sorted by priority and name

Handling Inconsistent Boot Methods During Upgrade

We got a rather interesting amount of bug reports for openSUSE Leap 15.0 about collisions between the grub2 and grub2-efi bootloaders during the upgrade process. The root cause was that the installation medium used a different booting mode than the installed system being upgraded. For example, the installed system uses EFI boot but the upgrade is executed from a DVD booted via legacy mode (i.e. disabling EFI). In that case, the kernel running from the DVD does not expose some devices that are needed to write to the EFI boot manager. Moreover, it causes troubles to the updater itself, which does not expect this situation.

Looking at the majority of the bug reports, it is obvious that in most cases it happens by accident rather than the user consciously trying to mix both boot modes. So to improve the user experience we added a warning that will be displayed when this situation is detected, before starting the upgrade. That gives the user the possibility to fix the problem or to continue if the situation is really intentional.

Below you can see how it looks, both in graphical and text mode, in a patched openSUSE Leap 15.0 installation media, since the feature was developed too late to be included in the official installation images.

Graphical warning about inconsistent boot mode

Text-mode warning about inconsistent boot mode

What’s Next? Hack Week!

As commented at the beginning of the post, we have restarted the sprint-based work, although with a little twist to try out the squads approach. But before we come back to you to show the results of the first squad-based sprint, we have something else to do – Hack Week 17!.

Again it’s the time of the year for all SUSE Engineers (and any Open Source enthusiast willing to join) to innovate and learn new stuff. So please forgive us if we go too deep into playing and we are less responsive next week. See you again soon!