Home Home
Sign up | Login

Deprecation notice: openSUSE Lizards user blog platform is deprecated, and will remain read only for the time being. Learn more...

Author Archive

Highlights of YaST Development Sprint 56

May 8th, 2018 by

LEAP/SLE 15 is getting more stable and closer to be released, but to keep this process flowing, our team of bug killers is having a lot of work to do!

This last sprint we had several fixes for really special scenarios. The kind of problems that you can find once most of things are working fine! So let’s take a look at some of these cases and how we’re working to stabilize this upcoming release.

Keep predictable network devices settings on S390x

A not well-known feature in YaST is that many specific boot parameters for installation are also used on the target system. However, this approach has one exception: the S390 mainframe. In this case, many installation specific parameters should not go to the target system and, therefore, we ignore all installation parameter for this system.
In the last sprint, we worked on a bug, which reported that at least systemd predictable names for network devices should be also used for S390 systems, otherwise the configuration done during the installation won’t be valid in a running system as network names will differ. So, from SLE15 we start to keep the settings of predictable network names for S390 systems.

Fun with console configuration of GRUB2

Another report that helped us to learn about other not well-known features was the one reporting that bootloader module does not support multiple console outputs of GRUB2. After digging into some code, we found out that YaST bootloader takes only native terminal, gfxterm or serial console in consideration, but not a mix of them.
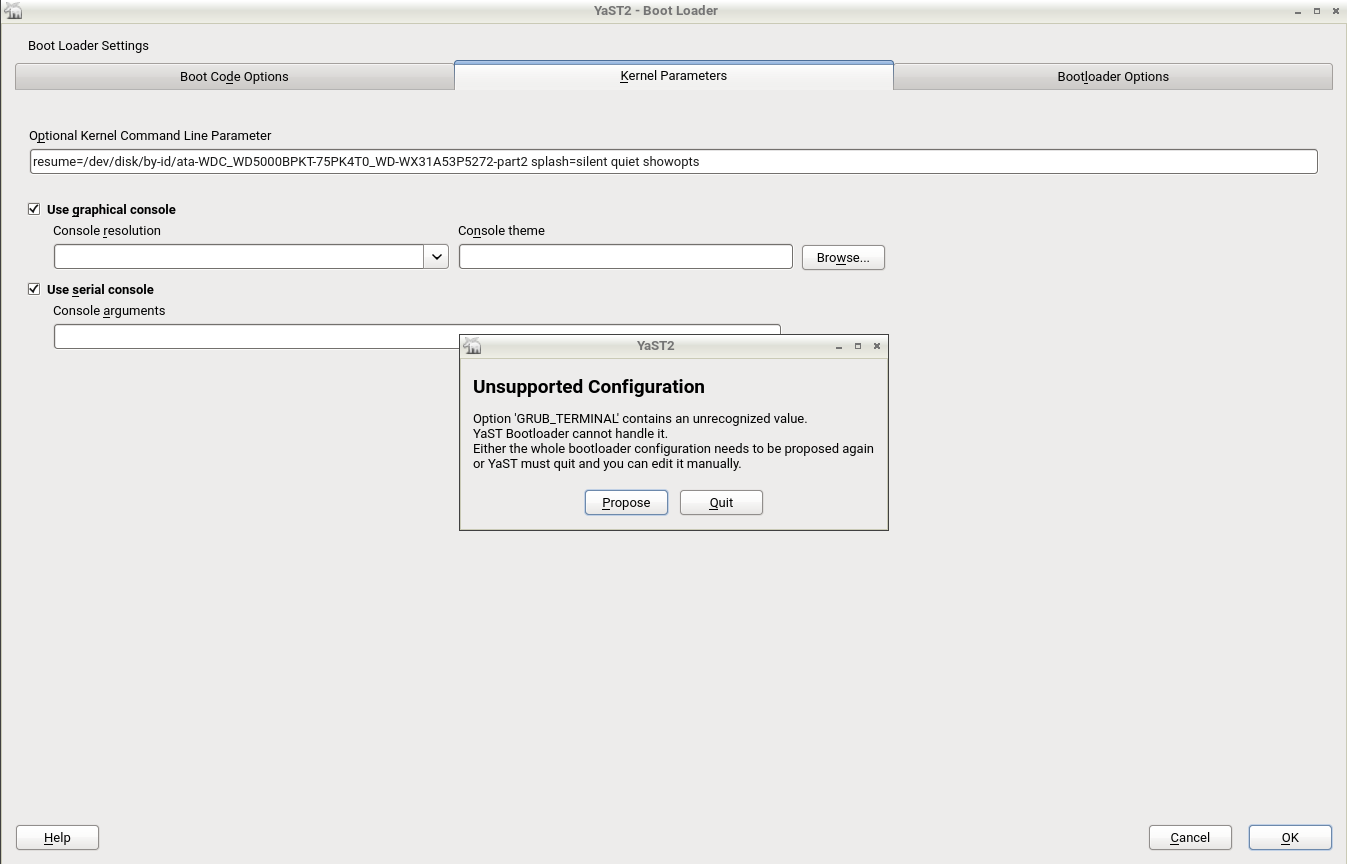
Once we looked at the manual of GRUB2, we learned that it supports some funny outputs such as morse code, PC beeper or simple data protocol using system speaker. Of course, YaST2 bootloader does not support all these options and when it gets one of them, it is treated as an unexpected value and bootloader fails.

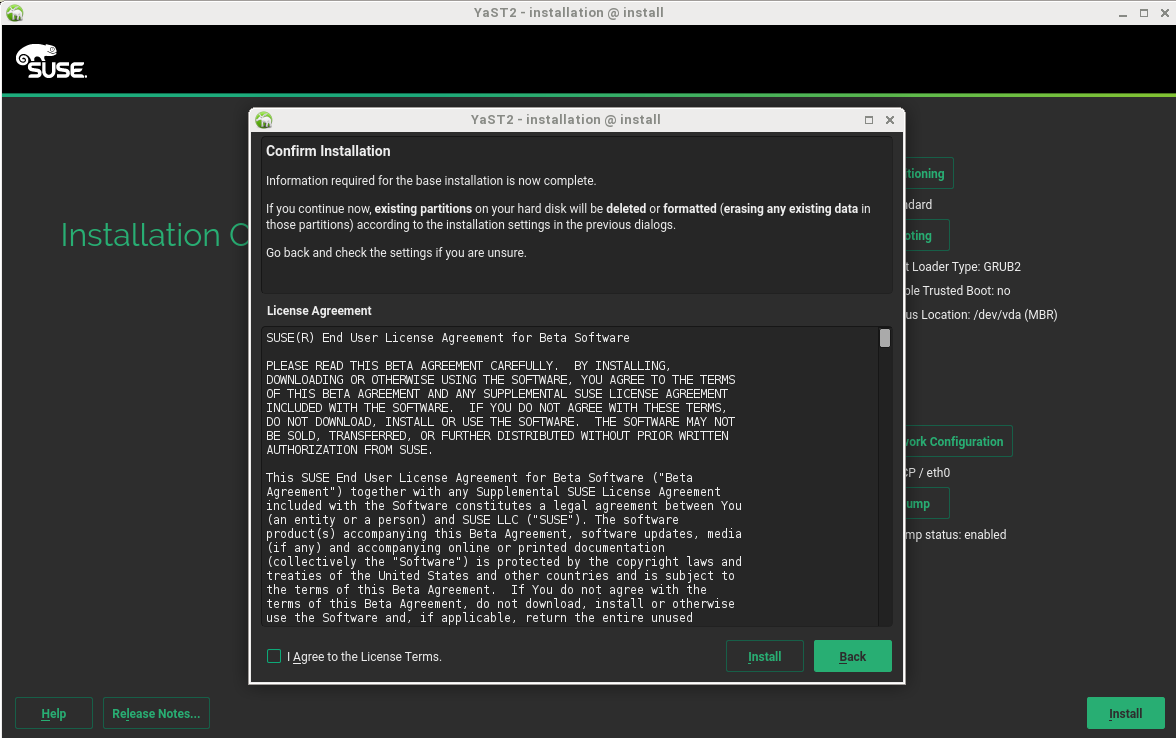
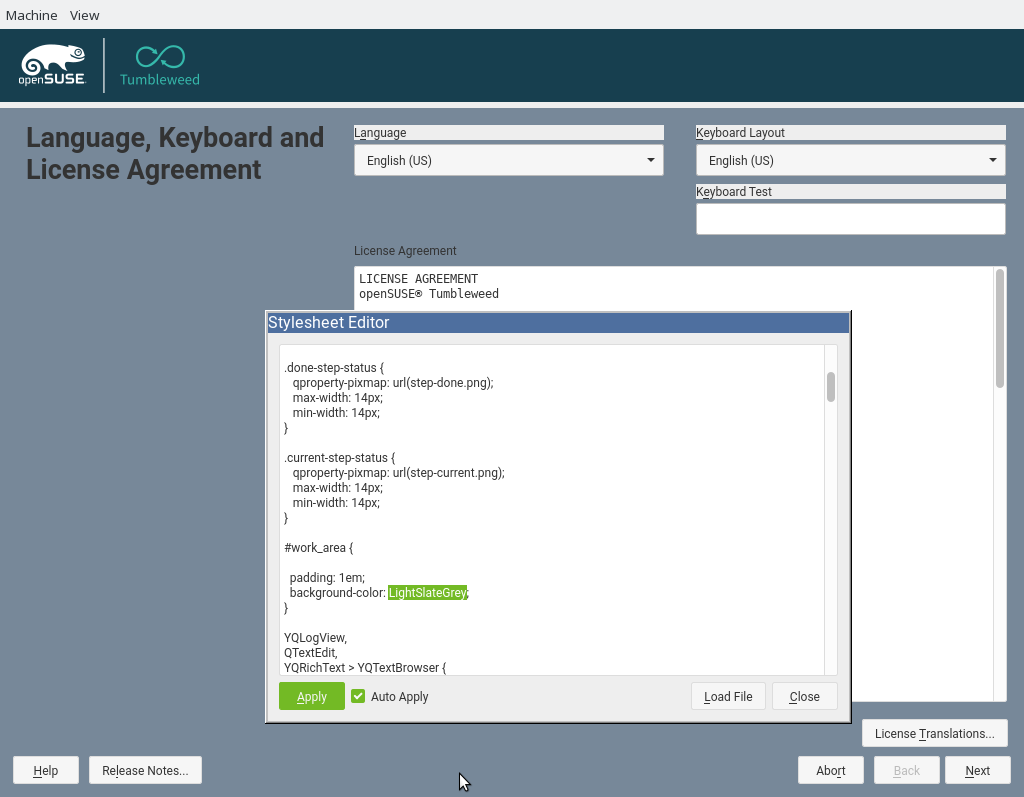
As we are really close to Leap/SLE 15 release, we want to avoid big changes in the system. So we decided to handle this issue by showing a popup, which informs that the configuration contains an unexpected value and asks if the whole proposed configuration should be proposed again or if YaST should quit and let the user edit it manually.

If you are curious about how it looks like:

For Leap 15.1 / SLE 15 SP1 we plan to extend the values that we support to provide a nicer experience for the user.

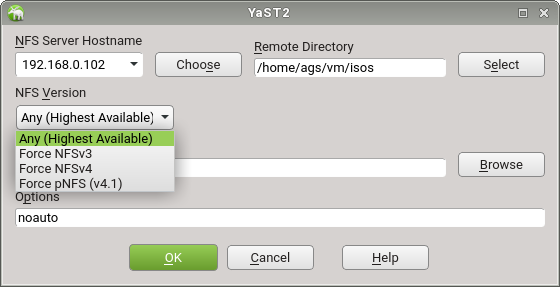
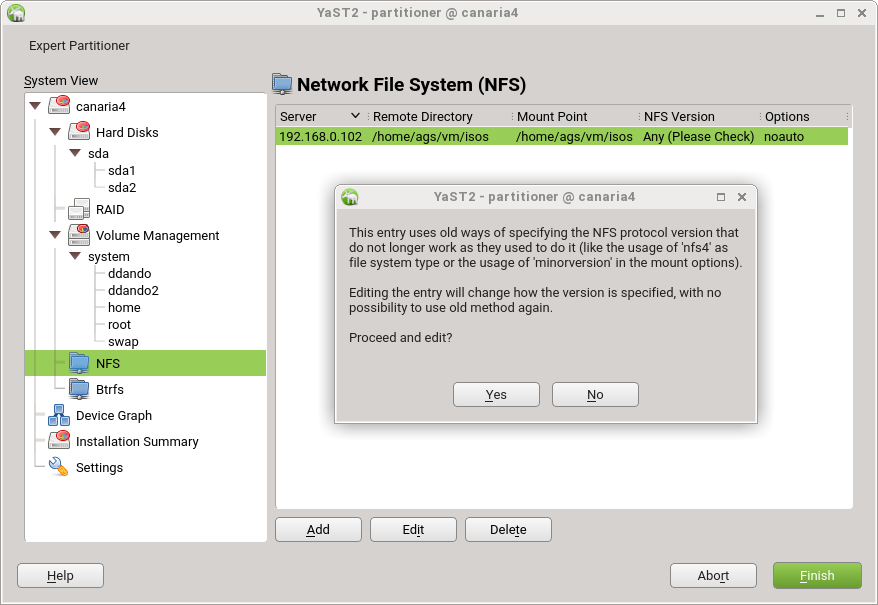
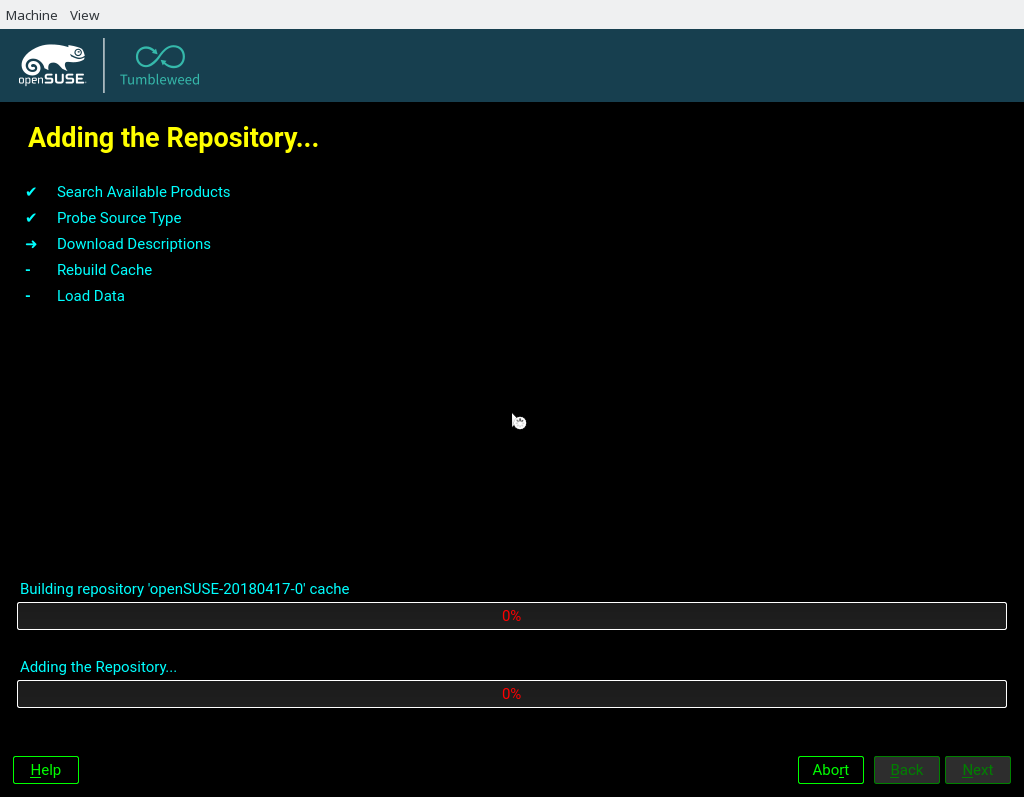
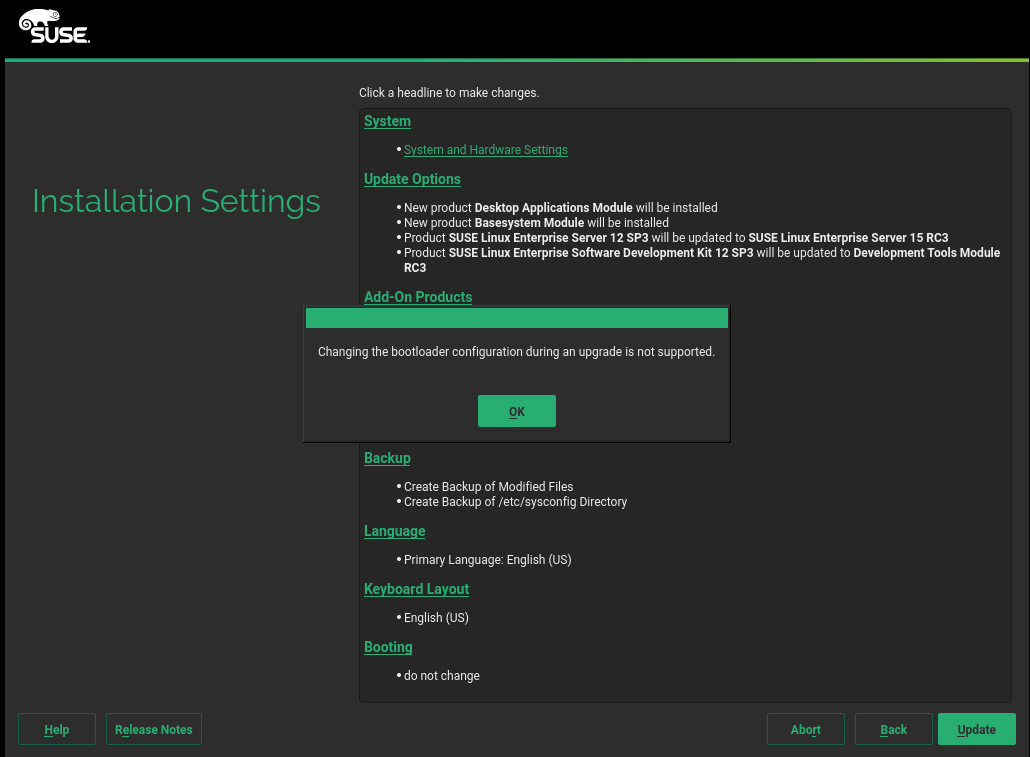
Bootloader configuration during upgrade

Another reported issue in bootloader was also solved this last sprint. When upgrading from Leap 42/SLE 12 to Leap/SLE 15, if the user clicks on booting on the proposal, the system crashes. The reason is that usually on openSUSE 13.2/SLE 11 it needs to repropose bootloader during the upgrade. This is no longer required for the latest upgrade and, therefore, YaST does not expect that the user will click on it. We would like to remove this option completely, but YaST still support upgrade from SLE11 to SLE15, so we still need it there. In the end, the solution is to show a popup informing the user that the modification of bootloader is not supported during upgrade.

In short, take a look at the screenshot:

Fixing kdump on Xen

We got a report about kdump breaking when it is used in Xen. To explain the problem, we need to go back to how we configure a parameter and the reasons we implemented it in this way: In current versions (before this fix) when a user wants to use kdump, we configure the crashkernel kernel parameter for all targets, for the common kernel, Xen PV0 domain and also Xen guests. This approach worked very well in the past because traditional xenlinux ignores crashkernel for PV0 and just pass it to Xen VMs. However, the current pvops implementation of Xen no longer ignores this parameter and consequently, it results in breaking the Xen virtualization. The solution for this issue was pretty simple: YaST stopped to propose using crashkernel for Xen PV0 and everything works again. This is a perfect example to show how to understand the issue, sometimes, takes much more time than to fix it!

Improving the upgrade from SLE11/12 to SLE15

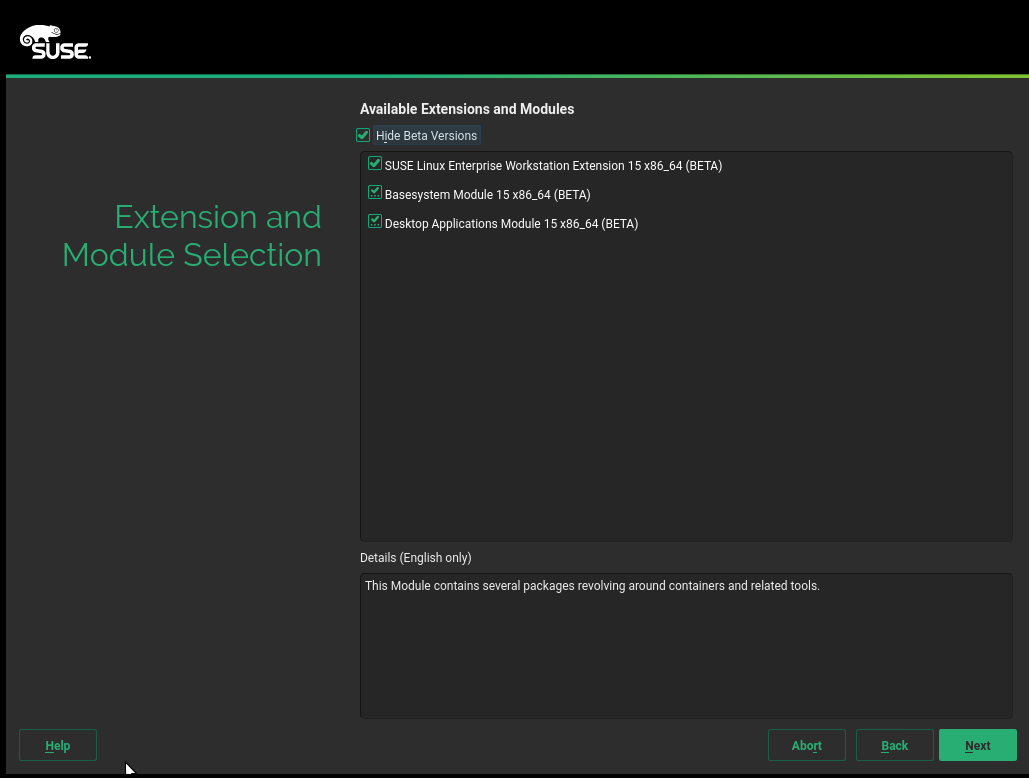
We are still improving the migration from SLE11 or SLE12 to SLE15 and this sprint we were focused on the automated registration upgrade using AutoYaST. If you are not familiar with the autoupgrade feature you can find more details in the documentation.

We already supported manual registration upgrade from the old products, but the automated way was still not adapted to the new SUSE Customer Center (SCC) API and it did not work correctly. This sprint we have adapted the registration upgrade code to correctly work in the interactive mode and also in the automatic upgrade.

The code was adapted to skip the user interaction and do everything manually when running in the autoupgrade mode. The only problematic part was how to handle multiple migration targets, which in the interactive upgrade we ask the user to choose one. To have a simple solution we decided to take the first migration, later (SP1) we might allow configuring this as well. But as now there is only one migration possible anyway, this looks like a good enough solution.

Falling back to the guided proposal

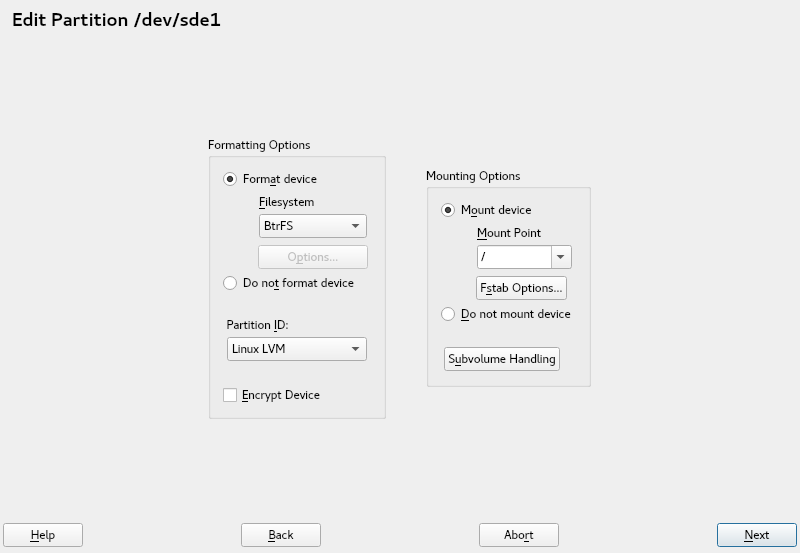
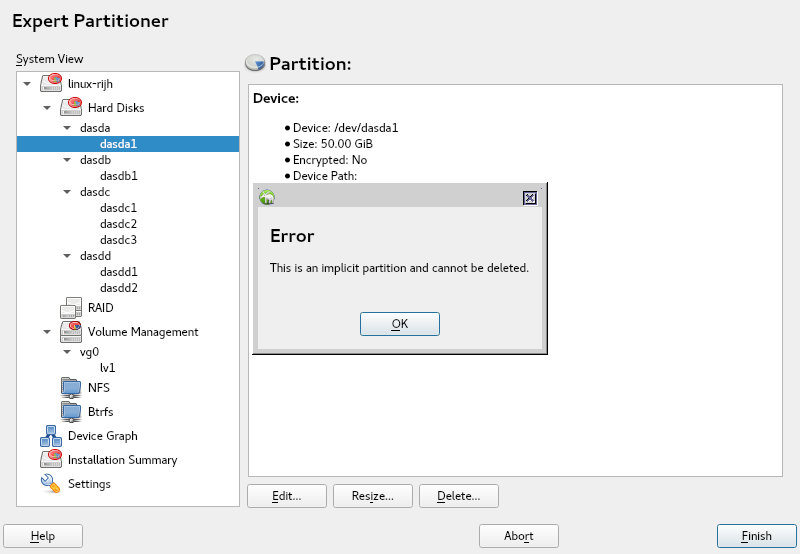
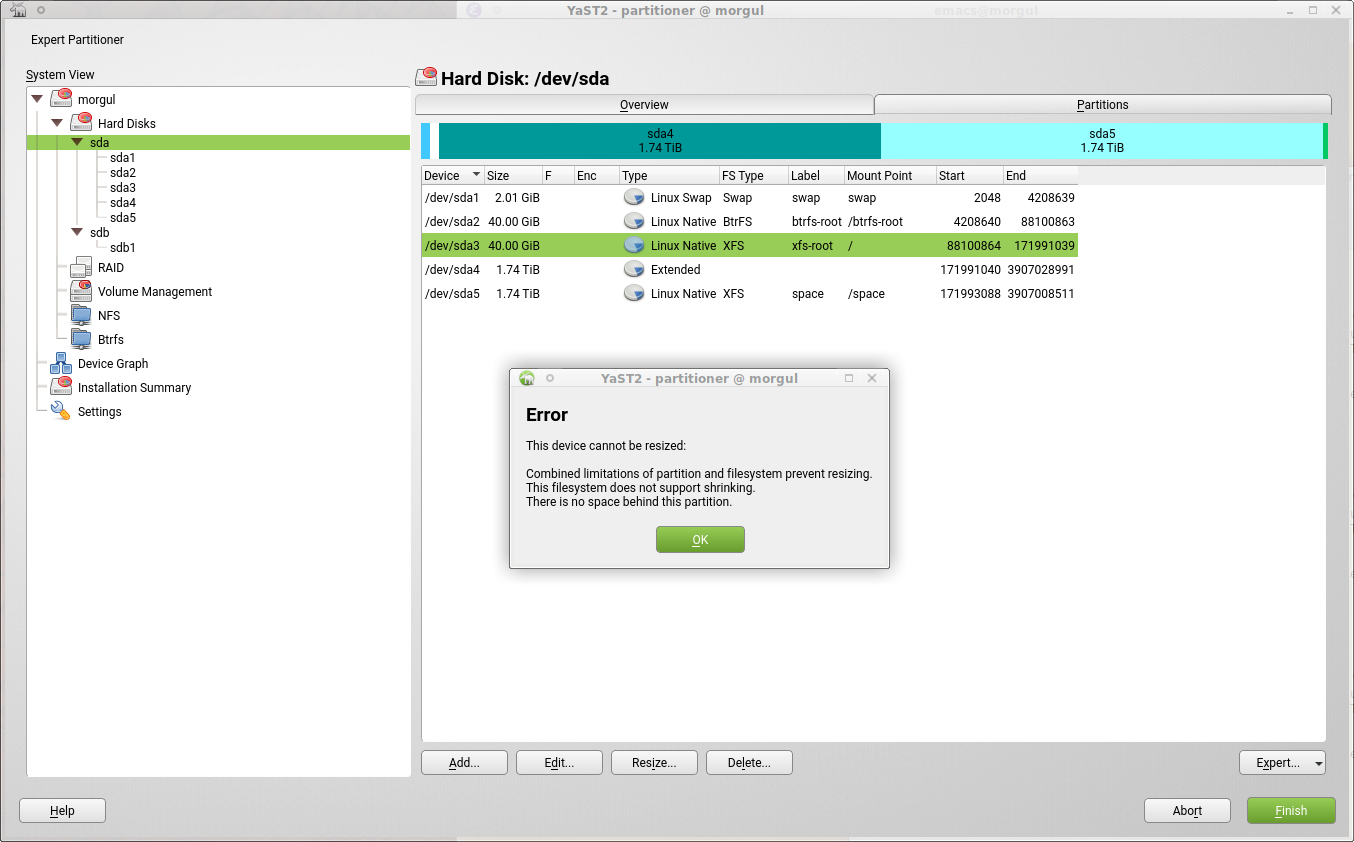
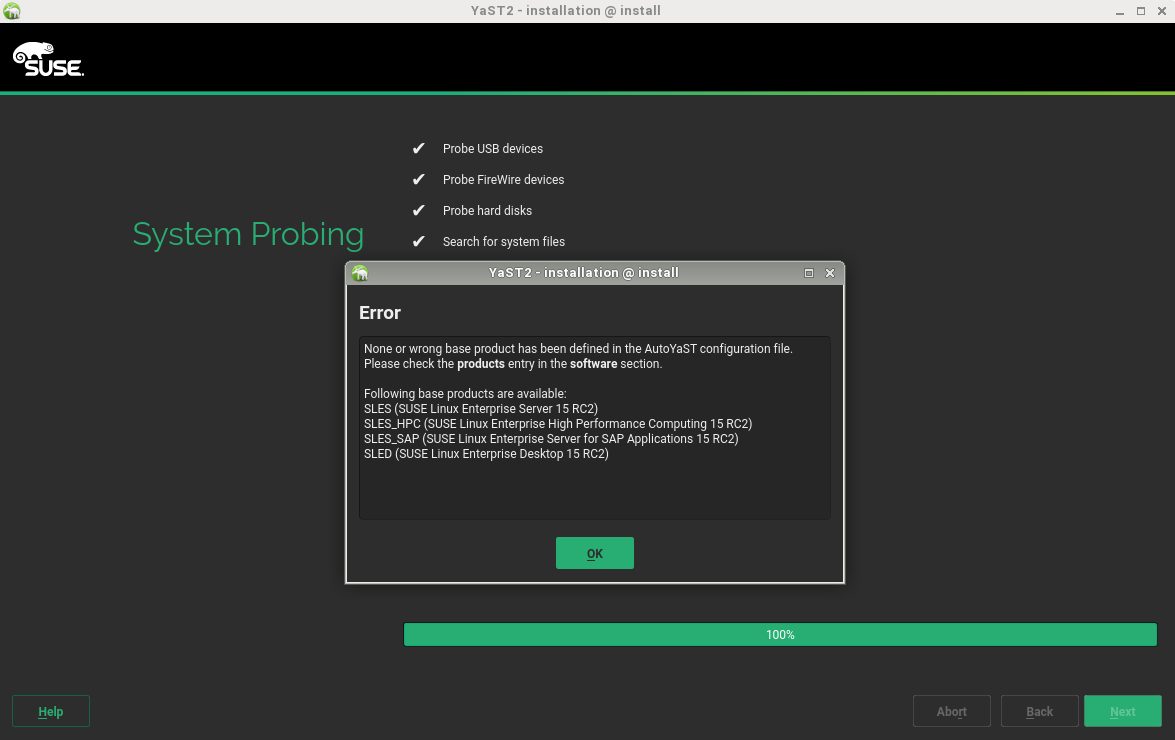
During this sprint, we were informed that AutoYaST was unable to display a proper error message when no partitioning section was specified and there was not enough disk space. The bug was rather easy to solve, but we wanted to take the opportunity to highlight how AutoYaST works when the partitioning section is missing from the profile.

In the past, AutoYaST implemented its own logic, different from the one used during a normal installation. Fortunately, as part of the adaptation to the new storage layer, AutoYaST relies now on the same code than the regular installation in order to propose a partitioning layout when the partitioning section is not specified. What is more, you can override some values which are defined in the product’s control file by setting them in the general/storage section from the AutoYaST profile.

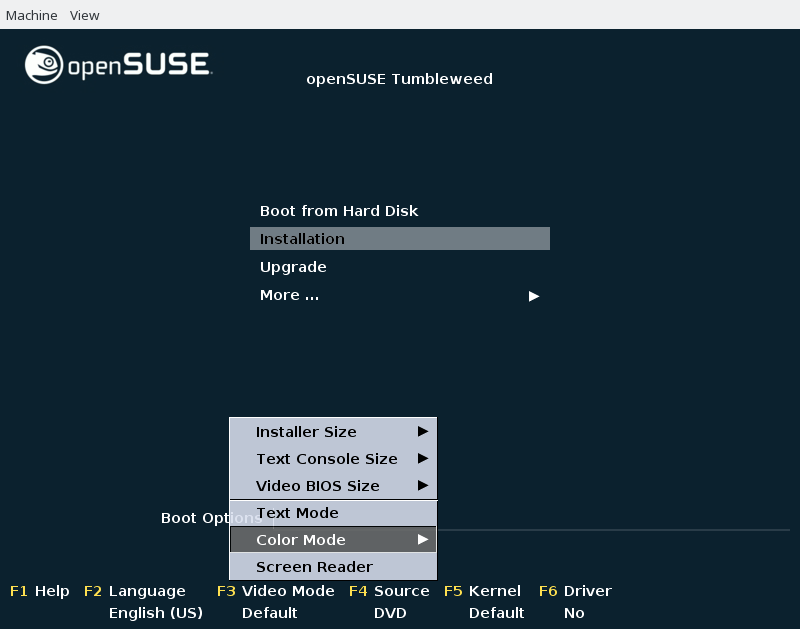
Leap /SLE 15 is closed, but Tumbleweed is still rolling

We are really close to release Leap/SLE 15 and we are more focused on minimal changes that fix only critical stuff. On the other hand, Tumbleweed users are looking always for the latest and greatest features. In order to satisfy both groups, YaST separated Leap 15.1/SLE 15 and Tumbleweed in two different git branches. In this way, we can easily start adding new features, bug fixes and other improvements for Tumbleweed while we keep SLE15 stabilized. Besides that, there is another planned Service Pack for SLE12, and once we start to work at it, we’ll also create a new separated branch to include these changes. We also adapted all related infrastructure around the branches, such as CI, docker testing images, among others.

This way, we are able to allow you to enjoy the stable Leap 15 or the latest and hottest Tumbleweed.

Conclusion

We’re now working on our last sprint before the openSUSE Conference 2018. In two weeks we’ll come back with the highlights of Sprint 57 and until there we hope that you have already everything planned to enjoy the conference that will occur in Prague this year (we hope that you enjoy the city too). We’re looking forward to seeing you there!

Highlights of YaST Development Sprint 55

April 24th, 2018 by

Time flies. We are almost in May and the openSUSE Conference ’18 is around the corner. So after booking your flights (if you need to) and your acommodation, you might want to know what happened in the YaST world during the Development Sprint 55th.

The YaST team is currently polishing the upcoming release, introducing some improvements and fixes. There are no breaking changes but still we have a lot of things to blog about.

Updating NFS Version Handling

Once upon a time, back in 2008 to be precise, the Large Hadron Collider (LHC) was finally ready, Raúl Castro replaced Fidel as President of Cuba, the TV show Phineas and Ferb was previewed… and yast2-nfs-client added support to configure NFSv4 mounts. Back then, the proper way of doing that was using “nfs4” as type for mounting the NFS share, i.e. writing “nfs4” in the vfstype column of the /etc/fstab file. Some time later, NFS4.1 (also known as pNFS) came out, and a new mount option “minorversion=1” was added. Very soon it was clear that such solution was not scaling and was not the way to go.

So at some point “nfs4” was deprecated as acceptable value for vfstype and “minorversion” was ditched in favor of “nfsvers”. Since the old deprecated way of doing things was still working, yast2-nfs-client was never updated to reflect this. But starting with the upcoming Leap 15 and SLE 15, some things will change in NFSland (in fact, the change landed in openSUSE Tumbleweed some time ago already). The type “nfs4” will be considered identical to “nfs” and “minorversion” will be completely ignored, so your old NFS mounts may not work as you expect them to do it. Time to refresh yast2-nfs-client!

During this sprint, yast2-nfs-client was not only fixed internally to produce valid entries in /etc/fstab, it also got a slightly revamped form to create and edit NFS mounts that should be less confusing than the old one and also more explanatory about how NFS versioning really works when defining a mount.

NFS version selection

To ensure our users don’t get fooled by old entries that seems to be enforcing a particular NFS version (because they use “nfs4” as mount type, for example), but are in fact not doing it due to the new behavior in SLE 15 and openSUSE 15, yast2-nfs-client is now able to detect such circumstance, mark such entries in the list and offer a safe migration path to users.

nfs4 warning

As you can infer from the screenshot above, all these improvements are available when yast2-nfs-client runs standalone, as well as when it runs embedded within the YaST Partitioner. Enjoy!

Fixing Broken Translations

Recently we got some bug reports about YaST crashing at some points when running in some specific locales. It turned out that the problem was caused by broken translations.

A lot of translated texts contain placeholders like %s, %{text} or %1. These tags are replaced by the real values by YaST. But that requires that the translated text contains the same tags. If they are missing the value will not be included and, what is even worst, if they are invalid the Ruby interpreter throws an exception which means YaST aborts making our users unhappy. And that’s really bad, right?

Unfortunately the Ruby gettext does not support format tags and the GNU gettext does not support Ruby at all. As a quick solution we wrote a script which checks whether all tags are included in the translated text and reports broken translations.

The script found about 160 broken translations. The most common problems were usually just typos (s% instead of %s, {%foo} instead of %{foo}, or extra space in %␣1). But some cases were not that trivial. Translators by mistake also used the Unicode ٪ instead of the ASCII % or even translated the tags, which must stay untouched (%{مساعدة}).

Some translations were obviously wrong or even contained the original English texts – we removed them. In some cases the tags were wrong but we were not sure whether the whole translation is valid. In that case instead of fixing the tags we removed the translated text completely. It is better to ask the translators for translating again than have a completely invalid translation.

In the future we plan to improve these checks, so the tags are properly handled by Ruby and/or GNU gettext directly and we do not need a separate script for that.

Installing Over VNC Using the Browser

You are surely accustomed to remote administration using SSH. And, as you may know, the (open)SUSE installation can be done over SSH too. But, additionally, YaST also have support for installing over VNC.

When using VNC for installation, you can choose between using a native VNC viewer or a web browser based one. The cool thing about the second option, is that you can follow the installation just pointing your browser to http://IP-ADDRESS:5801.

Until now, YaST was using a Java applet based implementation, which is no longer supported in browsers. But during this sprint, we have completed the switch to a JavaScript based solution.

Unfortunately, that has resulted in losing an encryption layer: the HTTP connection on port 5801 is unencrypted, but the typical VNC port (5901) continues to be encrypted.

Asking Once About Equivalent Licenses

After splitting SUSE Linux Enterprise in several modules, it was pretty common that the user had to accept a couple of equivalent licenses during the installation process. Given that the content for those licenses was pretty much the same, it was quite confusing. Actually, we got a bug report about the installation process being stuck asking the user to accept the license over and over (it was just the same license being shown for different modules).

In order to make our users happy, YaST is now able to decide whether two licenses are the same and, in that case, it will only ask once for acceptance. For the time being, YaST applies a hash function to license contents and compare the result, but most likely this mechanism will be refined in the future.

License Confirmation in CaaSP 3.0

And talking about licenses, another small change about how they are handled was introduced in CaaSP 3.0. As you know, CaaSP features a One Dialog Installer and there was no room for the license to be shown. Now, before proceeding with the installation, YaST will show the license in the confirmation screen if needed.

CaaSP 3.0 License Confirmation Popup

Improving the addon Boot Option Handling

Back in February, we improved the addon boot option to handle the SUSE Linux Packages DVD properly. However, during testing, we found out that if you are using a system which only has one DVD drive, the installation DVD will be automatically used as an addon.

In order to fix this conflict, if the installation media and the Packages DVD are going to use the same drive, YaST will ask the user to change the DVD before using it as an addon.

Additionally, we improved the documentation of the addon boot option adding new examples to clarify how the dvd:/// URLs are handled.

Echoes of Winter: White Text on a White Background

These days we fixed a bug that only allowed clairvoyant users to finish the installation of openSUSE Kubic.

The bug is pretty unremarkable but may we draw your attention to the related CSS styling engine? It powers the high-contrast color mode that you can select with F3 or with Y2STYLE:

Linuxrc Color Mode Selection

Installer in High Contrast Mode

and if you press Ctrl-Alt-Shift-S (for style) you can change the styling on the fly, as in this example of changing the background color:

Installer Stylesheet Editor

Conclusions

openSUSE Leap 15.0 release is approaching and, as usual, we need help from our dear users to give testing versions a try and report bugs. Thanks in advance!

Highlights of YaST Development Sprint 54

April 11th, 2018 by

We were in the middle of rewriting no, refactoring recompiling all of YaST into Visual Basic when we found that it was April 2nd already and had to scratch the entire project. Next year for sure. So you are left with a report of enterprise grade stabilization and we hope that your servers will be very bored running our software.

Installation and Upgrade

Clearer Description of Migration Targets

Life goes through various roads and it is same for SLE life. SLE15 is now split into multiple modules and during the upgrade it can be quite complex to pick the desired upgrade target. We have to react to this issue as customers start complaining that the upgrade overview starts to be hard to understand and we should improve it. So we did it and now you can check the changes on the attached screenshots. We modified the overview label from listing all products to just a summary with the details displayed below as it was before. Be aware that in the future and for some products or extensions/modules more migration targets will be possible.

Old screenshot:

and the new one (for a slightly different system, so it is not an exact match for the previous screenshot):

Importing the SMT Server SSL Certificate at Upgrade

We are still improving and fixing bugs in the migration from the SLE11 or SLE12 products to the new SLE15 line. One issue we fixed this sprint was importing the SSL server certificate from the old system at upgrade.

For registration you can use a local SMT server (Subscription Management Tool) instead of the usual SCC server (SUSE Customer Center).

The SMT servers usually use a self-signed SSL certificate to save some money for buying a real certificate signed by a well-known certificate authority. This self-signed certificate is imported to the system by YaST during the initial registration so the registration process and the repositories from the server can be properly accessed.

But during the offline upgrade to SLE15 the old system is not running, the installer runs from the installation medium. In that case we need to import the SSL certificate from the old system to the installer so it can properly access the registration server and do the upgrade.

The certificate import is quite easy, we just need to be careful as SLE11 uses a different (old) path for storing the imported certificates than in SLE12 or SLE15.

As the result you should be now able not only to upgrade the systems registered against the SCC server but also the systems registered against your local SMT server.

Many System Roles

Various products that we’re able to install have grown so many groups of presets, called System Roles, that they no longer fit on the screen. We applied some dark gray magic to make them fit in a scrollable box, at the expense of losing the keyboard shortcuts, sorry.

Storage

Better Message for Multipath (and other) Problems

While scanning the storage hardware, or at a later stage while manipulating it, there is always a chance of finding problems in the system that make it very hard to continue with the installation or the execution of YaST. In that case, previous versions of storage-ng used to show you a pop-up message with some technical details about what went wrong (for example, the command that failed and its output) and with options to abort YaST or continue despite the error.

But we found that for some situations we could do better in trying to understand what went wrong and explain it to you, instead of directly showing those raw technical details. One clear example is finding the same LVM physical volume twice, something that should never happen. Apart from double vision problems (libstorage-ng doesn’t drink alcohol), the most likely cause is that a multipath system is not being correctly detected and thus every one of the connections to the disk is being detected as a different disk, duplicating the content in the eyes of YaST.

Now such a circumstance is detected and explained to you, advising to use LIBSTORAGE_MULTIPATH_AUTOSTART (see linuxrc documentation) or the corresponding entry in the AutoYaST profile if it has not been used. By the way, during this sprint we also instructed storage-ng about LIBSTORAGE_MULTIPATH_AUTOSTART, since it used to ignore that ancient libstorage modifier.

The technical details are still available under the "Details" button, as you can see below. They are simply not displayed at first sight, which should make the whole experience less daunting for less-experienced users. That change applies to all the severe errors found during the three critical phases of storage-ng: hardware activation, system probing, and commit (when the partitions and other devices are created).

Of course, the new pop-up messages have full support for AutoYaST. The most appropriate default option (continue or abort) is automatically selected depending on which one of the mentioned phases is being executed and, if AutoYaST is configured to display pop-ups, the usual countdown is displayed before doing such selection. See below the new generic error (for a different, unidentified problem) in action in AutoYaST.

AutoYaST is now Able to Reuse Encrypted Devices

As you may know, AutoYaST is quite flexible when it comes to partitioning, so we are still writing the final bits of the adaptation with the new storage layer. And this time, we were working on teaching AutoYaST how to reuse encrypted devices properly.

However, the implementation was not that straightforward, as the hardware probing occurs even before the partitioning section of the profile has been analyzed. And, in some scenarios, it is not clear which key should be used to unlock a device (for instance, this can happen when more than one encryption key is defined). To solve this problem, AutoYaST will try all defined keys on all encrypted devices until a working key is found.

Of course, this behavior is properly documented now in the AutoYaST handbook.

Miscellaneous

Fixed AutoYaST profiles validation issues.

In our previous blog entry we already mentioned that there are significant changes between SLE12 and SLE15 profiles which have been documented in this appendix.

It is very common to adapt the profiles by hand which is error-prone and sometimes it is also hard to identify where the errors are just running an installation and looking deeply into the logs. That is why profiles validation using xmllint or jing is recommended (more info here).

During this sprint we have fixed some errors with the cloned profiles after installation which were not validating.

Translation Issues

We are receiving quite a lot of bugs regarding the translations. The usual problem is that some text is not translated at all and the original English text is displayed. This sprint we fixed several issues in this area, two of them are worth sharing in the blog.

The XSL File Format

The first problem was reported for missing translations in the role descriptions in the SLES4SAP product. The SLES4SAP installation basically behaves like the standard SLES installation just with changed few defaults. To avoid the duplication and make the SLES4SAP maintenance easier we simply take the original SLES XML control file, which describes the installer behavior and the defaults, and change just few values using a XSL transformation into the resulting SLES4SAP installer control file.

It turned out that the roles with missing translations were located in that XSL file. And unfortunately YaST did not support extracting the translatable strings from XSL files. However, we support translations in XML files and because a XSL file is actually a valid XML file we could easily extend the translation support in YaST to also cover the XSL files. So now the SLES4SAP roles are correctly translated.

Missing textdomain Call

We fixed several bugs with missing translations which were caused by missing textdomain call in the code. This call defines which POT file should be loaded and searched for the translations. If the YaST code does not use this call then obviously no text can be translated as YaST does not know which POT file should be used and it silently used the original untranslated text.

That means it was quite difficult to find why some text was not translated. And because that was quite common bug we had a nice idea to improve the situation by logging a warning into the YaST log with the exact message which could not be translated. And more importantly the log now also contains the location of the code which was trying to use the translation wrongly. See the pull request for more details.

With the openQA team we discussed also the possibility to add a new check to openQA which would scan the YaST log for this particular warning and report a problem. Which means we should not overlook this quite important warning in the future.

Highlights of YaST Development Sprint 53

March 23rd, 2018 by

As the release dates for SUSE Linux Enterprise 15 and openSUSE Leap 15 approach, we keep adapting YaST to make easier for our users to take advantage of all the new features that these rock-solid operating systems will bring.

During the last two weeks that has implied, apart from regular bug fixing that we usually don’t cover here, working on AutoYaST, improving Storage-ng and polishing several aspects related to modules and extensions, like their registration and licenses.

Let’s start with the rewritten Partitioner that is part of yast2-storage-ng.

Partitioner: more flexibility with the partition id

Setting the right partition id (also known as partition type) for each partition is an important part of the system setup that is often overlooked. Our Partitioner has always displayed in a prominent place the widget allowing to set that id, suggesting always the best value based on the selected role and the chosen file system type. But in many cases, that was more than a simple suggestion. In the old Partitioner (and in the new one until this sprint) the value of the partition id field (Linux, swap, Linux LVM, etc.) could only be manually edited in case the user had selected to not format the partition. When the option “Format device” was selected, the automatically chosen value could not be changed.

In SLE15 and openSUSE Leap 15 (and quite soon in openSUSE Tumbleweed), it will be possible to modify the id, no matter if the partition is going to be formatted or not. Of course, the logic to propose the best option every time the user selects a file system type is still there, but now it can be always overridden if the user wish. That change resulted in a small rearrangement of the widgets in that screen, as you can see below (remember we are trying to be very conservative with the UI changes in the Partitioner).

UI adjustments for the partition id

Partitioner: better support for DASD

In our previous report we explained some of the aspects in which the Direct-access storage devices (DASD) used in s390 mainframes are different from regular hard disks. But as you can imagine, there are more differences… and we know our readers love to learn new stuff while enjoying our reports. 😉

In short, there are two possible kinds of DASDs devices: Extended Count Key Data (ECKD) and Fixed Block Architecture (FBA). As explained in the previous report, the ECKD devices need to be formatted at low-level in order to be used by the operating system and, moreover, there are two possible low-formats for them: Compatible Disk Layout (CDL) and Linux Disk Layout (LDL).

And now the fun – ECKD devices formatted as LDL do NOT have a partition table. FBA devices can potentially have one, but it’s also often skipped. To manage those DASDs without partition table, the Linux kernel simulates an implicit single partition taking the whole disk. Of course, working with such implicit partitions implies some restrictions, and we have introduced several controls to make sure things stay under control in the storage-ng Partitioner. For example, an error message is now shown if the user tries to remove an implicit partition.

Trying to delete an implicit partition

For curious readers, there is more information about DASD available in this link.

Partitioner: can’t resize a partition… but why?

In SLE15 and openSUSE Leap 15 we will report very detailed reasons why a partition or a file system cannot be resized, as you can see in this screenshot.

Detailed description of resizing restrictions

This used to be just a very simplistic message “Device cannot be resized”. But there may be many reasons for that, and sometimes different restrictions might contradict each other: While some type of file system only lets you grow, not shrink (e.g. XFS), the partition that the file system is on might not be able to grow, for example because there is another partition right next to it. We want to minimize user frustration that might happen when we only report the first reason, and when the user somehow managed to fix that problem, show another one that can’t be fixed.

As usual, this feature will be available in Tumbleweed in a matter of days.

Handling registration rollback in SLE15 Migration

Of course, the Partitioner was not the only YaST area to get attention during this sprint. Several aspects related to products, modules and extensions were also worked, with all the implications they have about registration, migration and licenses.

For the offline migration to SLE15 we reused some parts from the online migration which handles service pack upgrade. But it tuned out that the reused part was not correctly integrated into the installer and in some corner cases (registration errors) it did not behave correctly.

Moreover if the upgrade failed early then the system still contained a SLE12 installation but was registered as a SLE15 system on the SCC server. After booting the original SLE12 system the access to the online repositories was broken.

This sprint we fixed that so in case of registration error or when going back the original registration is restored. Now you can go back and choose a different system to upgrade and it will work as expected.

Additionally we fixed some small issues with custom repositories (add-on or driver updates) used at upgrade.

More fun with hiding/showing beta versions in SLE15

Usual readers of our blog already know that SUSE is taking extensions and modules to a whole new level in SLE15, making them a cornerstone of the system installation and upgrade process. As already explained in previous posts, that implies more complex dependencies between extensions and modules. All those mechanisms usually work nice… except a small problem we found out with beta versions.

If a given extension was in beta phase and some of its dependencies were also in beta, if the “Hide Beta Versions” checkbox was unchecked the system was displaying only the extension selected by the user, but not the auto-selected dependent beta extensions. Our SLE testers found that quite confusing. So to make everyone’s life easier, we fixed the behavior as shown in the following screenshot.

Displaying selected and auto-selected beta extensions

A look into the future: analyzing how we display licenses

Currently there are many different ways to handle and display licenses. That can happen during the installation or upgrade process, while adding additional products to an installed system and, last but not least, while using YaST2 Firstboot to perform additional installation steps on the first system execution.

Additional there are 3 different locations from which these licenses come from. They can be provided by the SUSE Customer Center, be provided by libzypp or come from a repository using a legacy approach.

To simplify and unify all that in a close future, the first step was researching all those possibilities and how they are handled in (Auto)YaST. The result of such research can be found in this document hosted on Github.

AutoYaST product selection and installer update improvements

As you probably already know, starting with SLE-15, all products are distributed using one medium and you need to choose explicitly which product to install. Of course, if the medium only contains one product that would not be needed.

In AutoYaST profile the product is selected using the /software/products/product XML node:

<software>
  <products config:type="list">
    <product>SLED</product>
  </products>
</software>

Due to a bug, the cloned system exported the product short_name instead of the name, resulting in an internal error reported by the installer update and a later error during the auto-installation which aborted it because no product was selected.

So, during this sprint we have made improvements for both scenarios.

  1. The installer update will not rely in the product selection at all (the installer is the same for all the products) but will use the self_update_id from the control file and the version and architecture from the first product available on the media. The installer update documentation has been also updated according the last changes and it is probably the best place for knowing more about its behavior.
  2. The wrong product selection error reported was not very useful and it was decided to provide more information about the list of available products from the media. Just see the image below with the latest implementation:

Warning about wrong product in AutoYaST

Document main differences in AutoYaST profiles between SLE12 and SLE15

The need to select a product is not the only relevant change affecting AutoYaST profiles for SLE15. There are many other significant changes in SLE15 compared to SLE12. Like the new modules concept, replacing SuSEfirewall2 with firewalld, replacing ntp with Chrony… Users wanting to reuse existing SLE12 profiles with SLE-15, will probably need to adjust them.

We have created this summary describing some of the most important changes in order to help with the conversion.

That document is just a preliminary and temporary work that is currently being reviewed and improved by the awesome documentation team at SUSE. Very soon (probably already done at the time you are reading this) the content will be merged and a new section titled “Main differences between SLES 12 and 15 profiles” will be available in the current guide for AutoYaST. Have we ever mentioned how much the doc team rocks? So please, use that last link as final reference instead of our temporary summary.

Cron config for NTP client

It is possible to setup the YaST-ntp-client module to sync the system clock at regular intervals. If that feature is used, YaST writes the needed configuration to a cron.d config file. We were still using “novell” as part of the name of such file, which was reported as a bug. It turned to be a good opportunity to take a look to a module that, as you can guess from that bug, we don’t update very often. 😉

First of all, we made sure that newly written files will have a more up-to-date name. Straightforward and easy.

The second part was to provide an upgrade path if the file already existed. We integrated that with the existing ntp to chrony conversion. That means the existing configuration is updated when a new version of the yast2-ntp-client package is installed, so the user does not need to run the module again to start using chrony with an existing configuration.

Last but not least, the third part was to adapt the package to be a better citizen in the RPM world, marking that file as ghost file in RPM spec. Now this command can recognize that yast2-ntp-client is responsible for that configuration file.

  rpm -qf <file>

Two months… and counting

Only two months of countdown until the release date of openSUSE Leap 15! That means a lot of hard work ahead of us, so stay tuned for more updates.

Highlights of YaST Development Sprint 52

March 9th, 2018 by

After adding many new features and introducing quite some important changes for the upcoming (open)SUSE releases, the YaST team is now going into bug squashing mode. We want to offer our users another rock solid release, so we are focusing on polishing our work.

However, when it comes to the storage layer, the story is slightly different. We are bringing back all those feature that you already know and love from the old Expert Partitioner but in a better shape.

So let’s have a look at the most relevant changes:

In addition to that, we have fixed some issues like package installation from NFS/Samba/CIFS repositories, a problem preserving the DHCP client-id and a bunch of translations issues.

Offline Upgrade from SLE11

In the previous post we announced support for the offline migration from SLE12 to SLE15 via SCC. In this sprint we focused on upgrading from SLE11 products to SLE15.

The main difference (from the registration point of view) between SLE11 and SLE12/SLE15 is that SLE11 uses the old Novell Customer Center (NCC) for registration while the newer products use the SUSE Customer Center (SCC).

However, the SCC server knows which systems are registered in NCC (there is some kind of automatic synchronization between them) so it is possible to only use the SCC server during migration without any interaction with the old NCC. That makes the transition transparent for our users.

Besides some small adjustments, the changes in YaST were mainly related to handling the different configuration files. As expected, the most difficult part was testing, so we have added some notes below about the process.

In the end we could migrate a SLES11 system to SLES15 via SCC, performing a manual upgrade and an automated one with AutoYaST too. There were some issues related to package dependencies but these are not related to YaST or SCC, so probably some RPM packages will need to be fixed.

Select the Migration Target

SLE11 Migration Notes

When migrating from a SLE11 system, there are some specific issues you should be aware:

  • The SLE11 systems registered using the internal SUSE registration keys (belonging to the Novell Inc organization) are synchronized every 24 hours. That means it might take up to 24 hours after registering a new SLE11 system to make it upgradable to SLE15 via SCC. If the registration has not been synchronized from NCC yet you will see the “Invalid credentials” error during migration.
  • For customers there is a trick: logging into the SCC Web UI will cause the registrations to be syncrhonized in few minutes. But this does not work for the SUSE keys.
  • Migration from SLE12 is not affected by this issue because SLE12 already uses SCC and the data synchronization from NCC is not involved in the migration process.

Generic Migration Notes

These notes apply when upgrading from both SLE11 or SLE12:

  • Because SLE15 is in Beta stage, your registration key needs to be entitled for the Beta products. Otherwise you will see “No migration found” error in YaST. Either join the SUSE Beta program or just wait until the SLE15 product is released and the migration is enabled.
  • Once the system is migrated, the process cannot be repeated. But if you rollback the migrated system (using a backup or a snapshot), running SUSEConnect --rollback will restore your registration status.

Configuring the Expert Partitioner

The Expert Partitioner features again a “Settings” section where users can adjust some settings to influence how the partitioner works. It is a work in progress, but for the time being the user can configure how the devices should be mounted (path, UUID, label, etc.).

But these settings are not only limited to the Expert Partitioner scope but to the whole storage layer. You could, for instance, launch again the Guided Setup after adjusting them and the new values will be taken into account.

Moreover, the partitioner is now able to perform some additional checks over mount options. For example, when trying to mount a device by label, the user will be warned if that label is not valid (for instance, because there is another file system using that label).

Cloning Partitions Layout

Cloning partitions layout was one of that kind of surprising features the old Partitioner offered. Imagine you have a disk with some partitions and you would like to have the same partition layout in another disk (or even in several disks). This is very common, for example, when you are creating a MD RAID setup, where it is useful to have the disks partitioned in the same way. To avoid the annoying work of creating all disk partitions manually, the new Expert Partitioner allows again to clone a disk layout by using the Expert button.

When you are cloning a disk, you can select all the devices where you want to clone the partition scheme of the current disk. Only suitable devices for cloning will be offered, that is, you will not see in the list disks without enough size or different topology.

After selecting in which disks you want to clone, a confirmation message will be presented and you will be warned about all devices that will be deleted before performing the disk cloning. In case you accept, you will have exactly the same partitions in all selected devices, including gaps between partitions.

Temporary Mount and Unmount File Systems for Resize

Unfortunately most file systems support resizing only while the file system is mounted or while it is unmounted. Whereas doing a temporary mount is easy, a temporary unmount is often not possible since file systems are usually in use.

libstorage-ng now inserts unmount and mount actions when needed for a specific file system. It also provides function to immediately mount or unmount a file system, so that the UI can give feedback to the user if unmounting failed.

Taking Btrfs Subvolume Hierarchy Right

btrfs subvolumes are rather delicate beasts and great care has to be taken to do things right.

For one, subvolumes are organized like a directory hierarchy. And you cannot create new subvolumes just anywhere but only in free ‘leaf’ positions. That is, neither another subvolume nor a directory with this name must exist.

In other words, if (for example) a subvolume foo/bar/xxx already exists you can no longer create a subvolume foo/bar.

Let’s see what happens:

# you must mount the btrfs file system first
~ mount /dev/sdb5 /mnt
~ btrfs subvolume list -tap /mnt
ID      gen     parent  top level       path
--      ---     ------  ---------       ----
257     8       5       5               foo
258     8       257     257             /foo/bar/xxx

~ btrfs subvolume create /mnt/foo/bar
ERROR: target path already exists: /mnt/foo/bar

The reason for that error is that there is already a directory called `foo/bar`. At this point, there are two options:

  • Delete the subvolume foo/bar/xxx and the directory foo/bar if you do not mind to loose the data in that subvolume
  • Or rename temporarily and move it back later

Let’s move the existing subvolume out of the way (no fancy command, just using mv) and then create the new one:

~ mv /mnt/foo/bar /mnt/foo/old_bar
~ btrfs subvolume create /mnt/foo/bar
Create subvolume '/mnt/foo/bar'
~ mv /mnt/foo/old_bar/xxx /mnt/foo/bar/xxx
~ rmdir /mnt/foo/old_bar

~ btrfs subvolume list -tap /mnt
ID      gen     parent  top level       path
--      ---     ------  ---------       ----
257     9       5       5               foo
258     8       259     259             /foo/bar/xxx
259     9       257     257             /foo/bar

That’s rather a complicated stunt and you even might have valuable data in the old `foo/bar` directory that could get lost in the process. So YaST refuses to do this.

Instead, it recognizes the situation and shows a hint to the user:

Of course it’s all different if you are about to format the btrfs filesystem anyway. Then the YaST partitioner will simply create the subvolumes in the correct order and everything will be fine.

Better handling of unformatted DASD and other unavailable devices

Direct-access storage devices (DASD) are the most common storage devices in s390 mainframes. When compared to common hard disks, they are special in several ways. One of them is that they need to be formatted at low-level (to not be confused with the usual meaning of “format” related to creating a file system) in order to be used by the operating system.

We got a bug report for the pre-release of SLE15 because the installer was crashing when trying to use an unformatted DASD as part of the automatic partitioning proposal (i.e. the Guided Setup). So we instructed YaST to ignore such devices, not only in the automatic proposal but also in the Partitioner. It makes very little sense to list devices in the Partitioner that cannot be manipulated in any way. That’s consistent with the SLE15 approach for other “untouchable” devices, like the hard disks that are part of a BIOS-defined RAID or the individual connections of a multipath device.

In other words, the “Hard Disks” section of the Partitioner only shows disks that can be indeed used as disks (e.g. can be partitioned) and, unlike previous SLE15 pre-releases, now unformatted DASDs are not longer in that list. As always, the user can still go a couple of steps back in the installation process and perform a low-level format the DASD in order to make them appear.

YaPI is deprecated and should not be used anymore

Dropping some old stuff is part of our roadmap too. For instance during this sprint, we have marked YaPI as deprecated.

YaPI was designed to expose functionalities from YaST but, to be honest, it is not much used these days. Due to the complexity to maintain several interfaces every time we develop a new feature, we have decided to drop YaPI. Although the code has not been completely removed, we consider it as deprecated and it should not be used anymore.

Installing Packages from NFS or Samba/CIFS

We got a bug report that when installing a system from an NFS repository, the installed system will be unable to access that repository later.

The problem was that for accessing the NFS repositories (and Samba/CIFS as well) you need additional packages which can mount such file systems. And these packages are not included in the minimal installation.

That means you cannot access the repository later which is a quite unfortunate situation. You get into the chicken/egg problem – you need to install a package to access the repository but to access the repository you need to have the package already installed…

During debugging it turned out that the problem was caused by using a dropped value from the `/etc/install.inf` file. In the past, linuxrc wrote the type of the installation repository there, but that’s not written anymore.

The fix was to evaluate all used repositories and check if any of them is located on an NFS or Samba/CIFS system. As a side effect, it fixed an issue when installing from DVD but using an additional repository located on NFS (or Samba/CIFS).

Preserving the DHCP client-id

Since SLE15, wicked will use the RFC 4361 client-id. This change needed some adaptation in the installer to copy the created identity (duid + daid) to the installed system so, after rebooting, it can get the same IP (when it is possible) that was used during the installation.

Fixing Translation Issues

Currently we are getting quite a lot of bugs about missing translations in YaST. It turned out that some bugs were caused by a missing textdomain statement in the YaST code. In such situations, no translatable texts are extracted from those files and, obviously, translators cannot translate them.

The YaST script printed a warning in that case, but it can be easily overlooked. The reason for a warning is that the check is not perfect and it reports many false positives (it complains about missing textdomain calls that are not required).

Fixing the script would be too difficult so we took other approach: we added the harmless textdomain statement also to files which strictly did not require it. Then we could change the warning to error and stop the script with a failure.

Now the more strict check is enabled in the continuous integration (Travis) so we should get a failure earlier, before the change actually hits the build service, preventing bug reports later.

We need your help!

Our QA department is doing a pretty good job when it comes to detect problems. But we would love to get feedback from you too. So, if possible, have a look at (open)SUSE beta versions and report any issue you find.

Thanks!

Highlights of YaST Development Sprint 51

February 22nd, 2018 by
  1. Can you perform an online offline migration?
  2. Will you understand the license better if you display a different translation?
  3. Is your /home mounted or haunted?

Welcome back to our linguistic blog disguised as a YaST team sprint report.

Installation and Upgrade

Offline Upgrade Using Bootable Media via SCC

The last few weeks we spent quite some time implementing the offline migration from the old SUSE Linux Enterprise products (versions 11 and 12) to the upcoming version 15.

Note: the offline migration term actually means that your production system is not booted and running, it is not about the network status. At offline migration a different system is booted (usually from a DVD). See more details in the official SUSE documentation.

We implemented and tested the upgrade from SLE 12 SP3. The offline migration workflow is similar to the online migration as implemented in SLE 12 release. The only difference is that you boot the SLE 15 medium, select Upgrade in the boot menu and then select the disk partition to upgrade. The rest should be the same as in the online migration.

The migration from SLE 11 is a bit more complex as it is registered against the older Novell Customer Center and requires some additional changes in the installer. This is work in progress.

And the last note: for testing the offline migration to SLE 15, your system needs to be registered using the Beta registration keys. For regular SLE 12 and 11 registrations, the migration to SLE 15 is blocked. It will be unblocked after the SLE15 has been officially released.

Made the addon Linuxrc Option Work Well with the Packages DVD

In SLE 15 there are numerous modules and extensions, such as the Live Patching module, or the Web Scripting module. On physical DVDs, we are putting all of them on a single Packages DVD.

When you are installing SLES and choose to add such a module during the installation from the DVD, you will be presented with a screen to select from all the modules found on the DVD.

You can also automate this step by passing the addon=dvd:/// option at the installation boot prompt. (See the Linuxrc reference). Formerly this worked only with single-product media. Starting now, the addon option will work also with multi-product media such as the Packages DVD.

Improve Licenses Translations Support

Some months ago, YaST started to use libzypp to get product licenses, instead of using the old SUSE Tags approach. However, until this sprint, this feature was somehow incomplete.

On one hand, the complete list of supported languages was shown, no matter whether a translation was available for a given language or not. On the other hand, the "Licenses Translation" button was missing (it is still used in single product media).

Now both problems are solved and, as soon as new translations are included in the installation media, they should be handled gracefully in the installer.

Replaced Components

Finalize Xinetd Conversion to Systemd Sockets

This sprint we finished our change from xinetd to systemd sockets for starting services on demand. To finalize it there is basically two main tasks.

The first one was dropping the YaST module for xinetd. That required a conversion of yast2-ftp-server that used this module and also adding a note to AutoYaST that xinetd configuration is no longer supported, so if you have it in your AutoYaST profile, it won’t be applied. The FTP server part was harder because, as mentioned in the last report, one of the two backends does not support systemd sockets, but we found that this backend is a bit ancient and support for us was quite painful. The result is that we dropped pure-ftp and kept only vsftpd backend, which makes the code much simplier and our life better (the final diff-stat is +1100/-3700). And then we converted the usage to systemd sockets. Then we could proceed to dropping yast2-inetd because there was no dependency anymore.

The second task was xinetd usage directly, with an API for starting on demand. It is not used too often and in the end the biggest parts were dropping xinetd usage for VNC based installation and yast2-inst-server which is now converted to use systemd sockets. And here we can give you a nice trick we discovered during the implementation: If a systemd service has a parameter (often the case with services started by a systemd socket) you can stop all of them with a wildcard, e.g. systemctl stop vnc@*.

So here is a happy end – after this sprint there is no xinetd usage and we can support only one tool for starting on demand, allowing us to focus on improving other parts.

Added support for exporting firewalld AutoYaST configuration

In the previous blog entry we announced AutoYaST support for configuring firewalld but cloning the firewall configuration was not supported yet and also the AutoYaST summary concerning the Firewall module needed some love and that is basically what we have implemented during this sprint.

It should be noted that editing of the AutoYaST Firewall configuration is not allowed since the firewall configuration is now done with the firewalld graphical configuration tool (firewall-config)

Storage and Partitioner

Added the Format Options Dialog to the Partitioner

One of the missing things in the new partitioner was the format options dialog letting you tune the file system a bit when it is created.

The options itself are more or less the same as in the old partitioner. This feature is intended more for the experts. As an average user you will rarely find a need to fine-tune file system parameters. But in case you do, the dialog is there to aid you (remember the help button).

Here is a screenshot of the ext4 options:

Removed the Empty Views in the Partitioner

In the process of rewriting the YaST storage stack, we also rewrote the partitioner. Some views in the partitioner were taken over from the old one, but not filled with any functionality so far – they only showed empty pages. We now removed those empty pages:

  • Crypt Files
  • Device Mapper
  • Unused Devices
  • Mount Graph
  • Settings (this one will be back soon with content)

This is what it looks like now:

Compared to the previous version with the empty views:

See also Bug #1078849.

Installation Summary in the Partitioner

One of the sections that survived the Partitioner sifting mentioned above was the Installation Summary. During this sprint we re-implemented this useful view that shows the changes that would be performed in the system, including packages to install in order for the system to work with the chosen technologies. One image is worth a thousand words.

Of course, the information in both lists is updated with every change done in the Partitioner and, as usual, everything works as a charm also in text mode. Including the possibility of collapsing or extending the (usually lengthy) list of operations on subvolumes.

Blocker Errors in Partitioner

A few sprints ago we implemented warnings in the partitioner that inform you if something looks like probably not working, but with expert knowledge it can be made working. Now we add also blocking errors where we are sure it won’t work. It is just a first draft so it will be adapted as needed and as problems appear. Some checks are already moved from the bootloader to the partitioner, so you can fix the partitioning quickly. But enough words, check out the screenshots, where the first one is an error which prevents continuing and the second one is just a warning.

Extending the AutoYaST <device> Element

When defining a <drive> section in an AutoYaST profile, the <device> element should determine to which disk you want to apply that partitioning schema. Usually, it is a device kernel name, like /dev/sda, or a link which resolves to a disk (for instance, /dev/disk/by-id/*, /dev/disk/by-path, etc.).

However, AutoYaST supports specifying other names, like by-partlabel, by-label, etc. Those links won’t resolve directly to a disk, but the storage layer will be able to find out which disk they belong to.

Although SLE 12 supported this behaviour, it was missing from SLE 15 until this sprint.

Fine-tuning of the Requirements to Boot a System

In some situations, an extra partition or a given disk layout is needed to boot an (open)SUSE operating system. Like the separate /boot partition needed in some corner-case legacy scenarios, the ESP partition that must be mounted at /boot/efi in EFI systems or the PReP partition needed by some PowerPC systems. The partitioning proposal performed by the installer tries to ensure those booting requirements are met (so does AutoYaST in some cases) and our beloved Partitioner also includes some checks to warn you user if you forget to create or mount any of those partitions.

But in some situations, the installer was suggesting partitions with a suboptimal size or even partitions that were not strictly needed. On the other hand, the Partitioner was sometimes being too picky, warning about situations that were not such a big problem. So during this sprint we refined our list of booting requirements, updating the corresponding documentation, relaxing the partitioner checks and fine-tuning the proposal outcome. Specifically the PowerPC requirements were revamped based on the input from several experts and bug reports from manufacturers of some systems.

So no matter if you usually trust the installer proposal, if you like to handcraft stuff with the Partitioner or if you install using AutoYaST, the experience should be more smooth now, which fewer (if any) ugly surprises at boot time.

Mount Options Revisited: When the Old Demons Come back to Haunt You

Recently, we reintroduced per-filesystem-type defaults for mount options. We thought this would be a great chance to clean up old code that had become messy over time; we thought we could provide a clean, well-structured and easy-to-understand way to do this.

Then people began to test some more scenarios, and we found out the hard way that in some situations, those mount options depend on the mount point for various reasons: Some quirks of underlying kernel modules like the VFAT filesystem or the way systemd handles mounting the root filesystem during booting made this necessary.

So we had to bite the bullet and reintroduce some of that old code which was kind of messy; for example, for ext4 or ext3 root filesystems, we no longer specify any data=... mount options because this might make remounting the root filesystem read/write at boot time fail; in another case, a mkdir -p /boot/efi/EFI (when installing the boot loader) on a VFAT partition failed despite VFAT technically being case-insensitive (omitting iocharset=utf8 fixed this).

Lesson learned: Some messy old code is messy for a reason. Trying to streamline it may break some scenarios.

Conclusion

The answers to the initial questions are

  1. Yes.
  2. 说不定.
  3. Most of the time.

As the SLE release cycle is shifting from the "all features are mandatory" phase to the "all bugs are top priority" phase, expect less of feature news and more bugfix news in the next report, due in two weeks.

Highlights of YaST Development Sprint 50

February 9th, 2018 by

Sprint 50 is finished and we are ready to share with you all the highlights of this last sprint!

We are close to finishing features for the new SUSE Linux Enterprise 15, so this time we came up with a lot of information about the new storage, partitioner, firewall enhancements, and roles, which now is also present for the Desktop version of SUSE Linux Enterprise. Besides that, we fought another issue regarding memory consumption in Tumbleweed installation and once again we were able to solve it. So, let’s take a look into details!

Filesystem type specific default mount options in /etc/fstab are back

We reimplemented another feature that was still missing with the rewrite of the YaST storage stack: Reasonable mount options in /etc/fstab that may be different for each filesystem type. For example, for an Ext4 filesystem we used to set options data=ordered,acl,user_xattr by default. Of course, you can still change those options in the partitioner if the defaults don’t work well for you.

For most filesystem types, this was straightforward: Just filling a table with fixed default options. But for some others, most notably the legacy Microsoft filesystem types FAT/VFAT, this involved some not-so-trivial heuristics to figure out locale data so we could provide reasonable values for iocharset=... and codepage=...; those are necessary to recode filenames with non-ASCII international characters between whatever a MS Windows system might use and Linux; otherwise, you might not even see those files when mounted on a Linux system.

Resurrected sections in the Expert Partitioner

We keep bringing the functionality from the old Partitioner back to the Storage-ng reimplementation. During this sprint, it was the turn of the NFS and Device Graph sections.

The NFS case is a little bit special from the technical point of view since it’s the only section not managed directly by the Expert Partitioner. Instead, an embedded version of yast2-nfs-client is executed when visiting that section. The same approach has been followed in this reimplementation, which means NFS is the only section in which the old Partitioner and its Storage-ng clone will offer an absolutely identical experience and behavior (including both features and bugs). Just a heads-up: NFSv4 support is still not fully functional in libstorage-ng, so the check-boxes about the NFS version may be ignored until that support reaches your distribution.

On the other hand, the “Device Graph” section was, as most of the new Partitioner, rewritten from scratch. In addition to the already known graph showing how the system is going to look after applying the changes, it includes now a representation of the current system in a separate tab. Both graphs are interactive, double-click on any node takes the user to the corresponding section of the Partitioner.

As you can see in the previous screenshot, the usual button to export the graph to Graphviz format is not alone anymore. Its new friend allows exporting the graph to the very detailed XML format used by the YaST Team to reproduce test scenarios.

Of course, the “Device Graph” section is not available if using the text-based ncurses interface, as you can see comparing the left part of the following screenshot with the previous one.

Partitioner: LVM thin provisioning

Our new Expert Partitioner was already able to manage LVM volume groups and logical volumes since several weeks ago. But now it also recovers its great ability to work with LVM thin pools and volumes. LVM thin provisioning is a powerful technology, very useful in cases where you need to administrate storage resources for a large group of users. Basically, thin provisioning allows you to provide more storage space than it is actually available in the system. You can increase the real hardware storage only when it is really required. For more information about LVM thin provisioning, you can find a great guide in this link.

With the Expert Partitioner, you can create a thin pool over a LVM volume group in a similar way you create a normal logical volume. You only have to add a new logical volume and check the “Thin pool” option in the first dialog. Once the volume group contains at least a thin pool, you will be able to create thin volumes. Once again, the process is exactly the same. Add a new logical volume and select “Thin volume” option and in which pool to create it. The rest of steps are exactly the same as for creating a normal logical volume.

Apart from creating new thin pools and volumes, options for editing, resizing and deleting are now also available for all kind of logical volumes: normal volumes, thin pools and thin volumes. In the case of resizing a thin pool, you will be warned when the resulting pool is overcommitted. Take a look at the following screenshot.

Adapting partitions and logical volumes sizes in AutoYaST

In older versions, when the proposed partitioning in a profile and it did not fit in the disk, AutoYaST tried its best to reduce the biggest partition. A typical use case was to set the root (/) partition to a huge value, so the profile could be used in systems with different disk sizes (as AutoYaST will take care of reducing that partition to make it fit). To be honest, the best solution in that scenario would be to set the size to max, so AutoYaST will do what’s expected.

However, if for any reason the wanted layout does not fit, AutoYaST is now smarter about what to do: instead of blindly reducing the biggest one, it will try to reduce all partitions in a (kind of) proportional way, informing the user about the new sizes.

Small behavior change in AutoYaST installation

Up to now, not installable packages have been ignored silently by AutoYaST, which has been defined in the AutoYaST configuration file. From now on, the user will be informed that these packages cannot be installed.

System roles for SUSE Linux Enterprise Desktop 15

SUSE Linux Enterprise uses system roles to define, during the installation process, the packages to install on the system, so it can have the necessary software to play its “role”. This feature was already available for SUSE Linux Enterprise Server and now it is also available for SUSE Linux Enterprise Desktop. In order to choose a specific role for your system, you need to select a module or extension which contains this role during the installation process. There are four available roles for Desktop:

  • GNOME Desktop (Wayland): available when Desktop Productivity (on SLED) or Workstation Extension are selected.
  • GNOME Desktop (X11): available when Desktop Productivity (on SLED) or Workstation Extension are selected.
  • GNOME Desktop (Basic): available when the Desktop Application module is selected.
  • IceWM Desktop (Minimal): available when Basesystem module is selected.

Firewalld enhancements

During the last sprints, our team has been working hard in the integration of firewalld with AutoYaST and with the CWM library for opening ports / services in our different modules (http-server, squid, dns-server etc..). Here are some changes we did during this last sprint:

YaST firewall module is discontinued

As we now adopted firewalld in our distribution, there is no more reasons to have a YaST module for the firewall. Therefore, as you may see here, we discontinued the YaST Firewall module and we recommend to use firewall-config to configure your firewall via a user interface or firewall-cmd for the command line.

AutoYaST

A new AutoYaST schema has been defined for firewalld configuration although the features supported are very limited.

We can configure properties like the default zone, the service state, the type of packages to be logged and zones specific configuration like interfaces, services, ports, protocols, and sources.

For example, a SuSEFirewall2 based profile defining some interfaces, services, and ports in the EXT zone like this one:

<firewall> 
  <enable_firewall config:type="boolean">true</enable_firewall>
  <start_firewall config:type="boolean">true</start_firewall>
  <FW_DEV_EXT>eth0</FW_DEV_EXT>
  <FW_SERVICES_EXT_TCP>443 80 8080</FW_SERVICES_EXT_TCP>
  <FW_SERVICES_EXT_UDP>21 22</FW_SERVICES_EXT_UDP>
  <FW_CONFIGURATIONS_EXT>dhcp dhcpv6 samba vnc-server</FW_CONFIGURATIONS_INT>
</firewall>

will be translated to something like this:

<firewall>
  <enable_firewall config:type="boolean">true</enable_firewall>
  <start_firewall config:type="boolean">true</start_firewall>
  <default_zone>public</default_zone>
  <zones config:type="list">
    <zone>
      <name>public</name>
      <interfaces config:type="list">
        <interface>eth0</interface>
      </interfaces>
      <services config:type="list">
        <service>dhcp</service>
        <service>dhcpv6</service>
        <service>samba</service>
        <service>vnc-server</service>
      </services>
      <ports config:type="list">
        <port>21/udp</port>
        <port>22/udp</port>
        <port>80/tcp</port>
        <port>443/tcp</port>
        <port>8080/tcp</port>
      </ports>
    </zone>
  </zones>
</firewall>

SuSEFirewall2 based profiles will continue working although limited to the configuration currently supported by YaST.

During the autoinstallation, an error will be shown if the profile has some property not supported, however, we will able to continue with the installation and also a warning will be shown suggesting the use of the new schema even when all the properties are translatable.

Opening ports / services in zones through interfaces selection

In YaST, CWMFirewallInterfaces module provides a set of widget definitions for opening services in zones through a selection of interfaces (each interface belongs to a ZONE).

The module has been adapted to work properly with the new firewalld API.

If a firewalld service is not defined (probably because the package shipping the service definition has not been adapted yet), then the CWMFirewallInterfaces widget will show a list of missing services suggesting to deploy them to be able to configure the firewall.

Move from Xinetd to Systemd sockets

As requested by our friends from packages, now the future of starting service on demand is systemd sockets instead of xinetd. There are multiple reasons for that, but for us the most important one is that we can concentrate in one thing and do it properly.

It’s hard to support different ways to start services on demand and especially to handle such a situation when a user can set it up with sockets. Our old approach to make it happen was to set up the start of services on demand with xinetd. However, this approach is really hard to debug. Besides this problem, we also would like to unify our approach with the one suggested by packagers people.

So what have we done in this last sprint? The goal was to do some research, to create a proof of concept on one specific module and to find potential obstacles when unifying approaches to start services on demand. We found out that the conversion from xinetd to systemd sockets is quite easy, but also cannot be done automatically. Basically, what we need to do is to use systemctl call (which we already support) to activate the socket that is provided by the package instead of our old approach, which is to write a file into /etc/xinetd.d/ and to reload xinetd. Such a change will make our life much easier than previously.

The hardest part is that xinetd configuration file also often contains the service configuration that YaST can and would like to modify. This is no longer possible with systemd sockets and it is also the reason that we cannot automate this conversion.

So how will we proceed with the conversion of the YaST modules? We first checked all modules that use xinetd and we verified that, for the majority, the conversion is straight-forward. YaST also has a module for inetd configuration, which no longer makes sense, so the plan is to drop it in the near future and to allow socket activation in services manager module.

A problematic module is ftp-server, which supports two backends: vsftp and pure-ftp. This is problematic because pure-ftp does not support systemd-sockets, only xinetd. We plan to discuss how to handle it, as we are also not happy that we support two backends, because it makes the life of our users harder when they just want to quickly configure a ftp server. For SLE users we already support only vstftp, so if we agree on it, we will probably also support only this server in YaST. But right now nothing is set in stone.

Memory eating strikes again

Once again we have to mention our battle with memory consumption. This time the problem happened within the NET iso for Tumbleweed, which should need no more than 1 GiB of memory during the installation process.

In the beginning of our research, we had no suspicious code to look at, we just knew that it could be related to the fact that the NET iso was using the whole repository of Tumbleweed (over 60k packages) while the DVD iso uses only a subset of packages.

So which technique did we use to find the problematic part of the code? We changed logging in order to append the memory status of the whole process to each log line. By using this approach we quickly identified the problematic part of the code. This problematic code was responsible only for logging, but as it was searching for all packages and loading all packages properties, it was consuming a huge amount of data and causing this memory issue.

As a hotfix, we removed this logging from packages and kept it only for patterns and products, which is more important for us and has low memory consumption. We also looked into all code that searches through all packages properties and we reduced it as much as we could. Finally, we forced the Ruby garbage collector to run before the processes of disk preparation and rpm installation, reducing the chances that the memory consumption of the installation process goes up.

Once again we had a happy end and we are now able to install the NET iso with 1 GiB of memory when using the graphical installer.

Concluding

As we’re getting closer to finish SLES 15, we’re getting busier and busier with features and bugs to finish. Therefore, YaST team is already working hard on Sprint 51 and we’re looking forward to come back to you in two weeks with much more cool stuffs that we’re doing. Meanwhile, have fun and stay tuned!

Highlights of YaST Development Sprint 49

January 25th, 2018 by

Time goes by and the YaST wheel keeps rolling. So let’s take a look to what have moved since our previous development report.

More flexible NET installation ISOs

Network installation media for Tumbleweed or Leap only work properly with the exact repository they have been built for – which for Tumbleweed may mean they could be outdated after just one day.

You would then run into this message:

Linuxrc warning

To improve the situation the installer can now offer to download matching boot files (kernel and initrd, to be precise) from the repository if it detects this situation:

Linuxrc offering a solution, as always

Of course, you can say ‘No’ here – but then you’re back to the red dialog. 😀

Technically, what’s done is to download a new kernel/initrd pair from the repository and restart the installation process with them (using kexec). So be prepared for a slight déjà vu.

This feature is controlled by the kexec boot option.

Storage-ng lands into Tumbleweed: handle with care

But that’s not the only news we have about openSUSE Tumbleweed. Our usual readers already know about Storage-ng, our effort to rewrite the whole YaST storage stack from scratch. And they also know it’s still a work in progress. But since there were too many valuable changes blocked by the adoption of Storage-ng, it was decided it was time to push the red button. So we are glad to announce the Storage-ng era has started with its inclusion in the first official (open)SUSE product – starting with snapshot 20180117, libstorage-ng has replaced libstorage and, thus, yast2-storage-ng has replaced yast2-storage.

They say forewarned is forearmed, so an article was published in advance in news.opensuse.org to set the expectations and to provide and overview of the current status. We would like to encourage all openSUSE Tumbleweed users to (re)visit the article to get a better picture of the situation.

Alignment of partitions in the expert partitioner

An important part of that work in progress is the re-implementation of the Expert Partitioner with Storage-ng technologies. As mentioned many times in previous posts, this is mainly a 1:1 clone, with the same functionality presented in exactly the same way than the classic YaST partitioner. But some times we take the opportunity to introduce some improvement here and there, as we did this week with a topic that can have a very noticeable impact in the system performance: partitions alignment.

Although many people is not aware of it, the partitions in a system must be properly aligned to avoid the performance drop caused by excessive read-modify-write cycles. For details please refer to the great article at Wikipedia explaining the topic, especially the sections titled “4 KB sector alignment” and “SSD page partition alignment”. Moreover, leaving performance considerations aside, some partition tables require alignment to simply work, like DASD partition tables which need alignment to tracks (usually 12 sectors).

The new expert partitioner takes all that into consideration when creating and resizing partitions, ensuring always the required alignment (like the DASD tracks) and encouraging the optional performance-related one, avoiding undesired gaps between partitions in the process.

Detail of the Expert Partitioner dialog to create a partition

Above you can see the dialog for choosing the size for a new partition that, unsurprisingly, looks very much like the same dialog in the pre-storage-ng Expert Partitioner. If a size is specified by the user in that dialog (any of the two first options in the form), the start and end of the partition will be aligned to ensure optimal performance and to minimize gaps. That may result in a slightly smaller partition (with the difference being usually less than 1MiB). If a custom region is specified, the start and end will be honored as closely as possible, with no performance optimizations (although mandatory alignment, like DASD tracks, still will take place). This third option is the best to create very small partitions.

The same considerations for optimal alignment will also be taken into account while resizing an existing partition and calculating the minimal and maximal sizes suggested by the partitioner during that process.

Choosing the new size of a resized partition

Sanity checks for the storage setup

The possibility of bypassing the performance optimizations in the Expert Partitioner is just one example of the (potentially unleashed) power that tool provides. As a consequence of that flexibility, sometimes the user can overlook some important setup configurations or even make mistakes. To help with that, the Expert Partitioner recovered this week its ability to check the entered storage setup.

Once the user has set partitions, LVM volumes, file systems, mount points, etc. and decides to proceed, the Partitioner will validate that setup to ensure it fulfills all necessary requirements for booting and running the system. When some issue is detected, a popup message is presented to show what the problem is, offering the option to ignore the warning and move forward.

The resurrected partitioner sanity checks

Two kind of checks are carried out to ensure the partitioning setup validity. First, the presence of needed partitions for booting is checked. Booting requirements depends on the current architecture (x86, PowerPC, AArch, etc.) and other technical details like the partition table type (GPT vs MS-DOS). Then, the mandatory volumes for the current product are checked. The mandatory volumes are defined in the revamped partitioning section of the control file. Typically, only a volume for root and another for swap used to be mandatory, but now this is totally configurable by anyone defining the product (SLE, Leap, Tumbleweed, your own custom openSUSE derivative…).

As a bonus, all the sanity checks are now centralized (they used to be scattered around the YaST source code) and it’s easier to add new ones (you will miss some old checks at this moment) and to use them from other parts of YaST (like the bootloader module or AutoYaST).

More improvements in the Expert Partitioner

The new warnings and the alignment improvements commented above are not the only news on the evolution of the Expert Partitioner clone this week. Resizing of LVM devices has also been brought back to life, both for volume groups and logical volumes. In the case of logical volumes, the functionality is not much different, at least in the surface, from the partition resizing that was already present and that you can see in the screenshot of the alignment section.

On the other hand, in the context of the Partitioner, resizing a volume group actually means adding or removing physical volumes. Actions that are now possible again, including the corresponding checks. For example, a physical volume cannot be removed if it already exists on disk (that could destroy your data) or if the resulting size of the volume group is not enough to cover all its logical volumes.

Trying to remove the wrong PV

Apart from the mentioned functionality, there has also been improvements in how the Expert Partitioner presents the information. For example, now the “type” column shows the correct label and icon for each device instead of that useless TODO label. Moreover, similar TODO marks were replaced by proper data in the device overview tab.

TODO labels are gone

Minimize changes between the SLE15 “Installer” and “Packages” DVDs

The SUSE Enterprise Server 15 (SLES15) product can be installed from a bootable “Installer” DVD medium which contains the installer and a subset of packages needed for a very minimal system. The other packages are available either from a registration server (after registering the SLES product) or via a separate “Packages” DVD medium.

Due to the structure of those DVDs (with some packages being in present in both) the SLES installer was asking the user to change the medium several times during the installation process. Ideally the installer should use all packages from the “Packages” medium without changing the media.

In addition, there is yet another requirement for preferring the packages from the installation DVD to the packages available via a remote repository. Downloading a package from the internet is usually much slower than the DVD and can be problematic in network connections with a download limit or with a price based on the bandwidth usage.

Now the installer properly adjust the priority of all the repositories to achieve the desired behavior. To avoid possible side effects we decided to change the repository priority only when more than one repository is used and all repositories are local (e.g. DVD, hard disk, USB flash disk…). That means in some less common cases (2 DVDs + a remote repository) you will still need to change the medium but this is a safer solution.

Add On products in AutoYaST

For those using SLE Add On products, we have improved the error message if an Add On Product cannot be added during an AutoYaST installation. The user can see now which wrongly configured Add On Product has produced the error.

AutoYaST reporting which Add On is wrong

This will be specially useful with the upcoming SLE15, in which the concepts of Add Ons and Modules will become more relevant than ever.

Fixed a crash when shutting down the YaST user interface

And now it’s time for the corresponding dose of technical insights for those who enjoy that part of our reports.

When UI::OpenDialog() and UI::CloseDialog() calls didn’t match when shutting down the UI (user interface YaST component), you’d get a segmentation fault with a core dump. Well, you did want to shut down YaST, but probably not like that. This is now fixed.

After tracking this down, it was surprisingly simple to reproduce: Just use the YaST version of the trivial “Hello, World” program and comment out the UI::CloseDialog() call.

This was a case of providing additional error reporting causing more problems than the original error: leaving dialogs open while terminating the program is an error, of course. But fixing this little problem by cleaning up the remaining dialogs lead to handling widgets after some of the underlying infrastructure (in this case the QApplication) was already destroyed, so all the QWidgets were also destroyed (because the QApplication takes care of that), but YaST’s generic UI layer was still unaware of that fact and tried to destroy them again.

This is now fixed by properly cleaning up the widget tree in YaST’s generic UI layer first which will also clean up the associated QWidgets so there is nothing left to clean up for the QApplication.

This might also fix a number of similar segfaults in other situations where the YaST Ruby engine would need to shut down because of other problems, e.g. when there is an unhandled Ruby exception.

Surprisingly enough, this must have been a very old (10+ years?) bug, but it never became quite obvious, or at least nobody was ever annoyed enough to try to track it down.

If you want even more details, check the conversation in the bug report.

More to come

The end of this sprint caught up with a lot of almost finished stuff. But following the Scrum principle of “nothing is done until it fits the Definition of Done”, we don’t blog about such stuff. Fortunately, that means the next report will likely be quite juicy. So, see you again in a couple of weeks!

Highlights of YaST Development Sprint 48

January 9th, 2018 by

The YaST team finished its 47th Sprint right before the Christmas break but, sadly, we had not published the corresponding report… until now. The last sprint of the year brought some interesting changes, like Chrony support for AutoYaST, better multi-products medium handling, etc. So let’s recap those changes.

Chrony support in AutoYaST

As part of our effort to support Chrony as the default NTP service for (open)SUSE, we have revamped how AutoYaST handles the configuration of such a service. The first noticeable change is that we have redesigned the schema which, instead of containing low level configuration options, is now composed of a set of high level ones that are applied on top of the default settings.

And here is how the new (and nicer) configuration looks like:

<ntp-client>
  <ntp_policy>auto</ntp_policy>
  <ntp_servers config:type="list">
    <ntp_server>
      <iburst config:type="boolean">false</iburst>
      <address>cz.pool.ntp.org</address>
      <offline config:type="boolean">true</offline>
    </ntp_server>
  </ntp_servers>
  <ntp_sync>15</ntp_sync>
</ntp-client>

Updating the Remote Administration Capabilities

During this sprint, the remote administration client has been deeply modified. To begin with, as xinetd is being replaced by systemd sockets, we have dropped that dependency (adjusting the code accordingly).

Additionally the VNC handling have been improved too. Until now, YaST offered the possibility to connect through a web browser using a Java applet. Now YaST allows the user to enable/disable this feature (check the screenshot below to see how it looks now). It is worth to mention that Michal Srb has replaced the old viewer with novnc, a JavaScript based one. Thanks a lot for that, Michal!

And last but not least, we have seized the occasion to do some code cleaning, reimplementing some dialogs using the Common Widget Manipulation object oriented API.

Modifying AutoYaST Profile During Installation

AutoYaST offers a cool feature that allows the profile to be modified during the initial stages of the installation using an user script. So you can run a script which adjusts the profile and AutoYaST will read it again. If you are interested in such a feature, you could find more information in the official documentation.

On the other hand, in our previous report, we mentioned that AutoYaST was able again to use multipath devices using the new storage stack. But we didn’t count that it was possible to modify the profile on runtime so the initialization happened too early.

Now the bug is fixed so you can again adjust any storage setting using the aforementioned feature.

Properly Handling Selected Modules

As you may know, some time ago we added a support for the multi-product media (DVDs which contain more than one repository/product in separate subdirectories). This time we fixed some issues regarding this functionality.

Originally after selecting several products only one of them was actually selected to install and only one product was displayed in the installation proposal. Fortunately, those issues have been addressed now.

Unified Look & Feel for Multi-Product Selection Dialog

For the multi-product DVD media we used this selection dialog:

The functionality is very similar to the on-line product selection dialog displayed after registering the system:

As you can see the look & feel is quite different, but from the usability point of view the dialogs should look the same regardless whether the products are added from a DVD medium or from an on-line source (a registration server).

This sprint we improved the DVD media dialog to better match the registration dialog:

.

The dialog is still not exactly the same, but now it looks more similar so users should feel more familiar with it. There is also displayed an additional note about not handling the product dependencies automatically. This note was already present in the help text but that is hidden by default. As we got quite a lot of bug reports about this issue we decided to make this fact more prominent.

(Note: The dialogs actually cannot look the very same as the DVD media currently lack some information like the dependencies, beta status, detailed descriptions…).

Dropping SYSTEMCTL_OPTIONS Variable Support

We have been using the environment variable called SYSTEMCTL_OPTIONS (which is SUSE-specific) in our systemd services to prevent locks in dependencies. As this hack will not be necessary for upcoming the (open)SUSE 15 version, it will be dropped from systemd and, therefore, we already removed it from our systemd services.

Unifying Disklabel Handling in AutoYaST

When specifying an AutoYaST partitioning schema, you can select which partition type you want to use for each device (MSDOS, GPT, DASD, etc.). In the past, AutoYaST implemented its own logic to select which one to use in case that it was not specified by the user. After this sprint, AutoYaST relies on the new storage stack in order to decide which option fits better when the user does not specify one.

Bonus: Automatically Checking the Defined Systemd States

Some time ago we had serious issues with service management in YaST (see bug#1012047 and bug#1017166). The problem was caused by introducing a new systemd service state which was not expected by YaST. We fixed the problem by correctly handling the new state.

But the main problem was that we (as the YaST developers) were not notified about this major system change and we found this change later after we got bug reports in Bugzilla. To avoid this problem again in the future we decided to implement a script which would regularly check the defined systemd states notifying us if a unknown state was detected.

To implement the regular check we use the Travis cron job feature which allows running continuous integration builds not only after a change is pushed into the repository but also in regular intervals, even when there is no change in the code.

Alternatively you can use any CI service, but we chose Travis because it is easy to use and we already use Docker for normal CI jobs which allows us to run the latest systemd from openSUSE Tumbleweed in an easy way.

In this case we could possibly run the script in OBS when building the yast2-services-manager package, but that would need adding systemd to BuildRequires which does not sound as a good idea…

So if you also need to run some check scripts regularly you can see more details in this pull request.

Conclusion

2017 was an exciting year with a lot of interesting stuff: a new storage layer, multi-product installation medium, integration of new components (firewalld, chrony, etc.). And it looks like 2018 will not be different and we will have a lot of fun.

Thanks for your support and happy new year!

Highlights of YaST Development Sprint 47

December 7th, 2017 by

On the night of December 5th, teams of three are sprinting through the streets of Czech towns, visiting homes: Mikuláš (the developer), čert (the scrum master), and anděl (the product owner). If you’ve been a bad kid, you will get pieces of coal or brown potatoes. Good kids, on the other hand, will get new YaST features:

  • Performance: adapting to jemalloc, a better Ruby memory allocator
  • Replaced components: s/ntpd/chrony/g s/SUSEFirewall2/firewalld/g
  • Storage: resizing partitions, resizing RAID
  • Software modules and extensions: preselecting them, resolving dependencies automatically, creating your own installation ISO with mksusecd
  • Security related: tarballs for reproducible builds, SSH keys for root
  • AutoYaST: asking for a disk

Performance

Using Jemalloc Memory Allocator in Ruby

The MRI Ruby (the original C implementation) interpreter allows using the jemalloc library for allocating the memory instead of the usual glibc default. The advantage is better memory usage (30-40% less used memory was reported here) and it has some extra debugging features.

But after enabling this feature in Ruby in openSUSE Factory and SLE15 many YaST packages failed to build. It turned out to be an issue caused by dynamically loading the library by YaST. A workaround was to directly link the YaST against libjemalloc.

Later we found out that some packages still do not build. This time the problem was caused by a warning printed by the library on the error output. That happened only when running the old YaST test suite which still uses an embedded Ruby interpreter (normal YaST usage or the new unit tests use full Ruby which does not have this problem). The fix was just to ignore that warning when checking the error output in the tests.

If you want to check whether your Ruby uses the jemalloc feature then run this command:

ruby -r rbconfig -e "puts RbConfig::CONFIG['LIBS']"

If the output includes the -ljemalloc option then your Ruby is using the jemalloc library.

Replaced Components

Switching NTP from ntpd to chrony

It was decided that it is a good time now to switch the Network Time Protocol (NTP) implementation from ntpd to chrony as it is more secure, nicer and better. So also YaST has to adapt and modify its NTP client module to work with chrony. The module also shows its age and it is a bit hairy, so we took the opportunity to do some cleaning.

The most visible change is the UI on the running system. Please note that the UI is not final yet and it is mostly just a proof of concept. But the goals are clear: The first goal is to be really client only, as previously NTP also allowed to configure an NTP server, making the UI complex and confusing for the majority of users that just want to select a server to sync against. The second goal is to focus on the majority of users who want a simple UI to configure a common NTP client, leaving fine tuning for experts who modify configuration files directly.

In the installer, chrony is now called instead of ntpdate. This change is invisible to users and it simply works the same as previously.

We also decided to drop the command-line interface (CLI) of the NTP client module as chrony itself comes which a nice CLI chronyc. Instead of duplicating the work our CLI just suggests to use chronyc.

Please also note that changes are not finished yet and more will come. One of such changes is AutoYaST support, which is currently just skipped. But let us show you some pictures to get an idea how it will look soon in Tumbleweed and explain our decisions along the way:

The first image is from the main screen. It shows three main areas:

  1. The way the time is synchronized. It allows a pure manual run, synchronizing in a given interval or using the daemon that runs always.
  2. Configuration of sources for synchronization servers. It can be dynamic or static. For static, only the ones in the servers table (see point 3) are used. For dynamic, it also adds NTP servers from the network (like ones from DHCP). So when the user uses only public servers, the static configuration works well. But when internal NTP servers are used and they can change, then using the dynamic option makes sense.
  3. A list of synchronization servers. This specifies a statically defined list of NTP servers to sync against. You can use the familiar Add/Edit/Delete buttons.

The second image is from the Edit dialog. It was also simplified to the most common options. The Test button allows a quick check if a server is reachable and there are no typos in its address. The Quick Initial Sync option is useful to synchronize time quickly when connected to network. And Starting Offline is a nice chrony feature that allows to define the server as offline during the start-up and only when connected to the network to mark it as online and synchronize. It greatly helps with boot time and is a good option for notebooks where fast boot is important and the network is managed by Network Manager.

Firewalld will be the default firewall in SLE15 (Installer adapted)

Firewalld has some nice advantages over SuSEFirewall2: it can be dynamically managed, permits more zones, has a separation between runtime and permanent configuration options, it is well maintained, and it is already supported in some applications or libraries.

These are some of the main reasons why it has been decided to replace completely SuSEFirewall2 with firewalld.

In a past sprint report we announced that yast-firewall was adapted to support firewalld, but that was mainly an adaptation of the code to supporting both backends.

During this sprint we have completely replaced SuSEFirewall2 in the installer using a new firewalld API and although the UI seems to not have changed at all, the firewall dialogs have been completely reimplemented using CWM (our object-oriented API to YaST widgets).

During next sprints we will continue adapting the firewalld API and YaST modules to complete the replacement. The next target will be supporting firewalld in AutoYaST.

Storage

Expert Partitioner: Resizing

The Expert Partitioner has regained the ability to resize partitions. A Resize button is now available in the Hard Disks view as well as in the view of either a particular disk or a specific partition. When you try to resize a partition, a new dialog is shown with three options: maximum size, minimum size and custom size.

When the Custom Size option is selected, you have to specify manually the new partition size, but do not worry, the Expert Partitioner will prevent you from entering wrong sizes. Also, it will automatically align the partitions for a better performance.

Improvements in RAID management

As with partitions, it is now also possible to resize software RAIDs, although in the case of RAIDs resizing is a completely different operation performed by adding or removing devices to it. The partitioner will ensure you have selected the minimum amount of devices necessary for the current RAID type. Take into account that resizing a Software RAID will be only possible for new RAIDs being created, that is, resize action is not allowed when the RAID exists on disk.

As you can see in that screenshot, buttons for sorting the devices within a RAID have also been added at the right of the device list during this sprint. Those buttons are available both when creating a new RAID and when resizing it.

Last but not least, now it is also possible to work with BIOS RAIDs in the same way you do with regular disks. You will find all BIOS RAIDs in the Hard Disks section of the Expert Partitioner, where you could add or remove partition to the RAID device.

Software Modules and Extensions

The SLE15 products were split into several repositories and the installation medium contains only the minimal set of packages required to boot the system. If you want to have something more then you have to either register the system or use an additional medium.

To make that easier for users the registration module now pre-selects the recommended modules or extensions. However, if you for some reason really need a minimal system you can still deselect the pre-selected items.

The list of recommended addons is maintained at the server side (SCC) so it is possible to change that without updating the YaST installer.

Adding Modules and Extensions in AutoYaST

The list of available modules and extensions for SLE15 is already quite long as the base SLE15 products have been split into several modules. That makes adding the modules from the registration server more complicated compared to SLE12.

Originally the AutoYaST registered the addons in the XML profile exactly in the specified order. And that made troubles because SCC requires the dependent modules to be registered first. Writing the modules in the correct registration order in the profile was not easy for SLE15.

To make it easier AutoYaST now automatically reorders the modules according to their dependencies and even registers the dependent modules which are missing in the profile. Obviously that works well only if the missing module does not require a registration key.

mksusecd and linuxrc Supporting the New Media Layout

Starting with SLE15 the installation media have a slightly different layout. In short: the content file that was holding information about the product and a list of checksums is gone and has been replaced by .treeinfo and CHECKSUMS. Also, the package repository is now a repomd repository.

Also, SLE15 has been split into several so-called modules. The installation medium itself contains only a minimal set of packages. You have to register during the installation process to access other modules or use a separate medium containing them.

To save you from carrying several USB sticks around, mksusecd lets you build your own customized installation medium.

First, check what is on the media. The installation iso has just the base product:

mksusecd --list-repos SLE-15-Installer.iso
Repositories:
  SLES15 [15-0]

and you need an extra image for the modules:

# mksusecd --list-repos SLE-15-Packages.iso 
Repositories:
  Basesystem-Module [15-0]
  Desktop-Productivity-Module [15-0]
  Desktop-Applications-Module [15-0]
  Development-Tools-Module [15-0]
  HA-Module [15-0]
  HPC-Module [15-0]
  Legacy-Module [15-0]
  Public-Cloud-Module [15-0]
  SAP-Applications-Module [15-0]
  Server-Applications-Module [15-0]

Then pick the modules you want to add to the installation medium:

mksusecd --create new.iso \
  --include-repos Basesystem-Module,Legacy-Module \
  SLE-15-Installer.iso SLE-15-Packages.iso
Repositories:
  SLES15 [15-0]
  Basesystem-Module [15-0]
  Legacy-Module [15-0]
assuming repo-md sources
El-Torito legacy bootable (x86_64)
El-Torito UEFI bootable (x86_64)
building: 100%
calculating sha256...

Now use new.iso to start an installation.

Security / Development

Creating Reproducible Tarballs

We automatically submit the YaST packages from the Git repositories to the OBS projects using Jenkins. We use two Jenkins instances, the public Jenkins submits to openSUSE Factory/Tumbleweed, the internal Jenkins submits the same packages to SLE15.

The OBS compares the SLE15 packages with the openSUSE version to make sure the same packages are built in both projects. But this check compares only the file checksums, not the archive content.

The problem was that the internal and external Jenkins created a tarball with different checksum although the files inside were exactly same. If you run simple tar cfjv archive.tar.bz2 files you will find out that the tarball checksum is different for each run. So how to create a tarball in a reproducible way?

To build a reproducible tarball we use these tar options:

  • --owner=root --group=root – to make sure the file owner and the group is always the same, it does not matter who builds the tarball or who owns the files on the system
  • --mtime=<timestamp> – to have constant file time stamps, it does not matter when you downloaded the source files. Having fixed time stamps (like 0) is not a good idea as you do not know how the files are old actually, but using the current time makes the tarball not reproducible. So we use the date of the last commit in the Git repository (git show -s --format=%ci), it is stable across multiple runs and still describes how old the files are.
  • --format=gnu – use the GNU tar format, the default POSIX format contains some archive time stamps
  • --null --files-from - – this tells tar to read the file names from standard input, we use this options together with find ... -print0 | LC_ALL=C sort -z to sort the files to always have the very same file order.

Note: it also depends which compression method you use for compressing the tarball. For example gzip by default also adds some time stamps to the archive, bzip2 does not. If you want to use gzip then use the -n option.

See the tarball Rake task for the implementation details.

AutoYaST supports root SSH Authorized Keys deployment

From a security point of view, it is recommended to use SSH for logging into a remote machine instead of user and password in plain text format. But having to memorize the user and password specially if you try to use a strong non predictable password is also hard and hard to maintain.

For that reason SSH provides authentication based on public key cryptography and AutoYaST supports the deployment of SSH Authorized keys for normal users since SLE-12-SP2 but it was not working for the root user.

We have fixed this issue in SLES-12-SP3 allowing to deploy the SSH authorized keys also for the root user and exporting them into the cloned system profile.

AutoYaST keeps improving

The storage-ng based AutoYaST version has received a couple of improvements like, for instance, an improved resizing handling (supporting logical volumes) or multipath support. Additionally, we’ve squashed some bugs, like setting size=max for LVs (bsc#1070131) or some problems when not defining any partition (bsc#1070790 and bsc#1065061).

But even more interesting is the fact that we have brought back a hidden (and undocumented) feature. Did you know that if you set the <device/> element to ask, AutoYaST will ask you about which device to use for installation? Cool, right? This feature will continue working in (open)SUSE 15 and now it is documented!

Conclusion

My colleagues are telling me that practicing Scrum may be getting just ever so slightly on my nerves because I have several bugs in my description of the St. Nicholas tradition. Surely they are wrong. Stay tuned for the next report from a new and improved Scrum team: Ježíšek, Santa, und das Christkind.