Home Home > Distribution
Sign up | Login

Deprecation notice: openSUSE Lizards user blog platform is deprecated, and will remain read only for the time being. Learn more...

Archive for the ‘Distribution’ Category

The issues with contributing to projects only once

June 4th, 2017 by

I work to improve the openSUSE Tumbleweed (GNU/)Linux distribution. Specifically I make sure that all packages can be built twice on different hosts and still produce identical results, which has multiple benefits. This generates a lot of patches in a single week.

OBS
Sometimes it is enough to adjust the .spec file – that is a small text file usually specific to us. Then it is straight-forward

  1. osc bco
  2. cd $PROJECT/$PACKAGE
  3. optional: spec_add_patch $MY.patch $SOME.spec
  4. edit *.spec
  5. osc build
  6. osc vc
  7. osc ci
  8. osc sr

And OBS will even auto-clean the branch when the submit-request is accepted. And it has a ‘tasks’ page to see and track SRs in various stages. For the spec_add_patch to work, you need to do once
ln -s /usr/lib/build/spec_add_patch /usr/local/bin/

When you want to contribute patches upstream, so that other distributions benefit from your improvements as well, then you first need to find out, where they collaborate. A good starting point is the URL field in the .spec file, but a google search for ‘contribute $PROJECT’ often is better.

github
Then there are those many projects hosted on github, where it is also pretty low effort, because I already have the account and it even remains signed in. But some repos on github are only read-only mirrors.

  1. check pull requests, if some have been merged recently
  2. fork the project
  3. git clone git@github.com:…
  4. cd $REPO
  5. edit $FILES
  6. git commit -a
  7. git push
  8. open pull request
  9. maybe have to sign a CLA for the project
  10. When change is accepted, delete fork to not clutter up repository list too much (on github under settings)

sourceforge
The older brother of github. They integrate various ways of contributing. The easiest one is to open a Ticket (Patch or Bug) and attach the .patch you want them to merge with a good description. While many developers do not have the time and energy to debug every bug you file, applying patches is much easier, so gets your issue fixed with a higher chance.

devel Mailinglist
Some projects collaborate mainly through their development MLs, then I need to

  1. subscribe
  2. confirm the subscription
  3. git format-patch origin/master
  4. git send-email –to $FOO-devel@… –from $MYSUBSCRIBEDEMAIL 000*.patch
  5. wait for replies
  6. if it is a high-volume ML, also add an IMAP folder and an entry to .procmailrc
  7. unsubscribe
  8. confirm

project bugtracker
Like https://bugzilla.gnome.org/ https://bugs.python.org/ https://bugs.ruby-lang.org/ https://bz.apache.org/bugzilla/

  1. create unique email addr
  2. sign up for account
  3. add info to my account list
  4. optional: search for existing bug (90% of the time there is none)
  5. file bug
  6. attach patch

So as you can see there is a wide range of ways. And most of them have some initial effort that you would only have once… But then I only contribute once per project, so I always pay that.

Thus, please make it easy for people to contribute one simple fix.

Highlights of YaST development sprint 35

May 25th, 2017 by

openSUSE Conference 2017 is coming! And as we flight there (literally, one third of the YaST team is in a plane right now typing this), we wanted to inform our beloved readers on what we did in the previous three weeks.

So here is our report, brought to you by airmail!

Bugfixes, bugfixes everywhere

Leaving openSUSE Tumbleweed aside, The YaST team is currently working to deliver SLE12-SP3, openSUSE Leap 42.3, SLE15, openSUSE Leap 15, SUSE CaaSP 1.0 and Kubic (more about Kubic later). Three of them are already in beta phase, which means they are being extensively tested by several parties and in many scenarios, hardware platforms and possible configurations. That amount of manual testing always result in several bug being discovered, no matter how much we try to have some automated tests for the most common cases.

Many of the bugs our testers are finding are related to internationalization and localization, mainly texts in the UI that are always displayed in English, despite the system been configured (or being installed) in a different language.

But, of course, other kind of bugs are also being found. For example, our hardware detection component (hwinfo) was not able to deal with some new machines, making the installation experience everything but pleasant.

As a result, a significant amount of the YaST team manpower during this sprint was targeted to squash those annoying bugs. Which doesn’t mean we didn’t have time for some interesting new features and improvements.

Storage reimplementation: unlock encrypted devices

Once again, our new storage system comes with news. Now it’s able to detect and unlock preexisting encrypted devices during the hard disks probing step, raising you a new pop-pup dialog to ask for the corresponding device password. After unlocking the devices, all your installed systems will be accessible for upgrade and, moreover, the LVM volumes allocated over encrypted devices will be activated.

The new storage stack is expected to debut in SLE15 (and, thus, openSUSE Leap 15), but the functionality can already be tested, for both the installation and upgrade processes, with the StorageNG test ISOs.

Luks activation in StorageNG

The storage reimplementation & AutoYaST – a love story

But the happiest news coming from the new storage stack during this sprint is it’s marriage with AutoYaST. The new automatic partitioning proposal (that is, the “Guided Setup”) is now integrated with AutoYaST.

Thanks to the new software architecture, AutoYaST users will be able to override every single partitioning setting from the control file.

<profile xmlns="http://www.suse.com/1.0/yast2ns" xmlns:config="http://www.suse.com/1.0/configns">
  <general>
    <storage>
      <!-- Override settings from control file  -->
      <try_separate_home config:type="boolean">false</try_separate_home>
      <proposal_lvm config:type="boolean">true</proposal_lvm>
    </storage>
  </general>
</profile>

So you can easily switch on/off LVM, use a separate partition for /home, enable/disable snapshots, enable/disable Windows resizing, etc. All that, still relying on the automated storage proposal to iron the details up. Something that is not possible with the current version of AutoYaST without being forced to define explicitly every partition and LVM volume.

But the simplest way to use the new libstorage proposal is to not define any setting at all in the AutoYaST configuration file. In that case, the partitioning proposal code will do the complete job, installing a new system with the default options.

Of course, before integrating the new storage stack into the upcoming SLE15, the AutoYaST support have to go one step further. Apart from using and configuring the proposal, it must be possible to define a completely custom setup including partitions, LVM volumes, software RAID devices and so on through the corresponding <partitioning> section of the AutoYaST profile. So we used this sprint to sketch a plan to make that possible in the following months, analyzing all the scenarios and configurations supported by AutoYaST and looking for the best way to support them using the existing yast2-storage-ng infrastructure. The outcome of that effort is this detailed document and a list of tasks (PBIs in Scrum jargon) for the upcoming sprints. So be prepared for more news in this regard.

Automatic Cleanup of Snapshots created by Rollback

So far the user had to ensure that snapshots created by rollbacks got deleted to avoid filling up the storage. This process has now been automated. During a rollback, Snapper now sets the cleanup algorithm to “number” for the snapshot corresponding to the previous default subvolume and for the backup snapshot of the previous default subvolume. This enhanced behavior will be available in SLE12-SP3 and openSUSE Leap 42.3. For more information take a look at the more detailed post in the Snapper blog.

Helping to bring the CaaSP fun to openSUSE

For several sprints already we have been presenting features targeted to SUSE CaaSP, the Kubernets-powered solution for managing containers. Many of those features and custom configurations live in a package called yast2-caasp, originally targeted to this great upcoming product built on top of the SLE12-SP2 codebase.

But now the package is also available for Tumbleweed-based systems by request of the Kubic project. Kubic will be the openSUSE alter ego of SUSE CaaSP, that is, a Container as a Service Platform based on openSUSE and Kubernetes. As with any other YaST component, the exact same source code will shared by the SUSE product and its openSUSE brother.

Improved UX when an invalid registration URL is provided

Humans make mistakes, but when the mistakes are made entering some option in
the installation command line, it usually means that a reboot of the machine is be needed to fix them.

That was the case for the registration URL (regurl) option. In the provided address was malformed the installation just stopped. During this sprint we have added an early check of that URL which allows the user to reenter it and continue with the installation. Something that obviously improves the user experience.

Invalid regurl handling in normal installation

In case of an autoinstallation (AutoYaST), the error is reported and the steps to get installer updates and to register the system are skipped.

Invalid regurl handling in autoinstallation

There is still room for more improvements, allowing the user to also modify the URL in other scenarios. For example, for an URL with a valid format but that points to an unreachable server. But in those cases is not so straightforward to identify the culprit of the problem. It would make no sense to annoy the user with a recurring pop-up to change the registration URL if the root of the issue is not the URL but a incorrect network configuration.

Translations and Interpolations

As mentioned at the begining of this post, we recently got quite some bug reports about missing translations. Although some of them were really caused by bugs in the YaST code, others were a consequence of a buggy Ruby rxgettext script which collects the translatable strings from the Ruby source code. The bug is known by the Ruby-GetText developers, but it’s unclear when (or whether) it will be fixed.

The problem is that the tool cannot collect the translatable strings from interpolations. For example it cannot find the “foo” string from this string literal: "#{_("foo")}". As a result, that string is missing in the resulting POT file and cannot be translated by the SUSE or openSUSE localization teams.

As a workaround, we fixed the YaST code to not use the translations inside interpolations. We also documented the possible problems when mixing translations a interpolations and their solution.

And talking about new developer oriented documentation…

Security Tips for YaST Developers

YaST runs with the administrator privileges (root) and therefore we have to be aware of the possible security issues in the code. During this sprint we published a document with a short summary of security tips for YaST developers.

If you are programming an YaST module you should definitely read it, but it might be interesting also for other programmers as many mentioned issues are generic, not tight only to YaST.

The document is available online here.

See you at the conference

That’s all for this sprint report. We have many more things in the oven, be we didn’t manage to finish them during the sprint, so they will have to wait for the next report. Meanwhile we hope to see many of you at the openSUSE Conference 2017. There will be a whole workshop about modern YaST development, a summary with the more relevant news in the last year of YaST development, talks about the new superb yast2-configuration-management module, about our continuous delivery infrastructure and about how we use Docker to deliver YaST… And, of course, also many other interesting content like the awesome presentation from Thorsten Kukuk about the brand new openSUSE Kubic we mentioned earlier. And even more important, a lot of fun!

openSUSE Conference 2017

For those of you that cannot attend to the conference, see you again in this little corner of the internet in three weeks!

Highlights of YaST development sprint 34

May 3rd, 2017 by

Here we go again! Only one week after our previous report, we already have a new bunch of (hopefully) exciting news. Let’s take a look to the outcome of our 34th Scrum sprint.

Trusted boot support for EFI

In the report of our 19th sprint, we already presented the new (at that point in time) and shiny Trusted Boot support in YaST2 Bootloader. So far, the only supported scenario was legacy boot (i.e. no UEFI) on x86_64 systems. Now, thanks to TPM2, is also possible use Trusted Boot with EFI, so we added support for it in our beloved bootloader module.

So now YaST Bootloader looks the same in non-EFI and EFI variants, no matter which underlying technology is actually used. Of course, YaST is only the tip of the iceberg, booting in Trusted Boot with EFI is possible thanks to all the tools that has recently added support for TPM2. openSUSE developers and packagers rock!

Configuring the NTP service in CaaSP

For a CaaSP cluster to work properly, it’s vitally important that all nodes have their clocks in sync. So, from now on, the installer is able to configure each node in a proper way and the administration node will act as NTP server for the worker nodes.

To achieve that, the user will be asked to specify one or several NTP servers to be used as time source during administration node installation and YaST will take care of the rest (updating the configuration and enabling the service).

If a NTP service is announced through SLP, YaST will propose automatically.

NTP configuration in YaST

For worker nodes, YaST will configure the system to keep it synchronized with the administration role.

Storage reimplementation: improvements in the guided setup

Through the previous reports, you have been able to follow the evolution of the renovated guided setup for the partitioning proposal. This sprint is not different, we have improved and adjusted that new wizard even further, making it smarter and more usable.

The new version is able to decide which steps to show depending on the current scenario. For example, in systems with only one disk the whole disk selection dialog will be skipped. The steps are also simplified by disabling widgets that are not applicable to the current situation. For example, if there is no previous Linux installation, the question about what to do with the existing Linux partitions will be disabled.

And talking about the actions to perform on preexisting partitions, that has also been improved. In the first guided setup version, these options were only displaying for illustrative purposes, but now they are 100% real and the proposal will honor their values, so the user can easily select what to do with previous Windows or Linux partitions. We even added a third option for other kind of partitions.

New settings in the storage proposal

Last but not least (regarding the guided setup), the password selection for encryption is now more usable, allowing the user to choose a not so strong password if really desired.

Allowing users to shoot their own feet

Insserv removal

YaST is a complex and large piece software. It means that time to time some pieces that used to be great and shiny become obsolete and end up being useless. The cycle of life. 😉

Some time ago, it was decided it was time for insserv to enjoy retirement and it was replaced by a stub. But there were still calls to insserv in YaST and we decided to remove them all. There were several reasons for that decision. Basicaly (open)SUSE has used systemd for couple of years already, so revisiting places where the YaST code depended on SySV was a must. As a side effect it shortened the list of YaST dependencies and, in the end, it is another small step towards smaller installation.

So good bye insserv, it was a pleasure to work with you.

Improvements in the ZFCP Controller Configuration for zKVM on S/390

When running the installer on a mainframe in a zKVM virtual machine it displays a warning about not detected ZFCP controllers:

ZFCP warning on S/390

However, when running in a zKVM virtual machine the disk is accessible via the virtio driver, not through an emulated ZFCP controller. The warning is pointless and confusing.

The fix was basically just an one-liner which skips the warning when the zKVM virtualization is detected, but the YaST module for ZFCP doesn’t usually receive to much maintenance, so we applied our boy scout rule and improved the code a bit.

The improvements include using Rubocop for clean and unified coding style, enabling code coverage to know how much the code is tested (in this case it turned out to be horribly low, just about 4%), removing unused files, etc… You can find the details in the pull request.

Storage reimplementation: improvements all around

As we reported in our report about Hack Week 15, we have been working on an alternative way to offer the power of the new storage library to the Ruby world. The new API is finally ready for prime-time and used in all the Ruby code.

We took the opportunity to greatly improve the developer documentation and to revamp the yast2-storage-ng README and status page.

We also did some extra checks and added automated testing to ensure our partitioning proposal ensure the requisites if a S/390 system using ZFCP, so mainframe users also have a peaceful transition to the new storage stack.

We also greatly improved the ability of the new library to work with alternative name schemes for the devices. Up to now, only using plain kernel device name (e.g. /dev/sda1) was fully supported. Now we can do all the operations (specially generating the /etc/fstab file) by device name, by UUID, by filesystem label, by device id and by device path.

More content already in the oven!

As you already know, at least we repeat it quite often, 😉 YaST was converted from YCP to Ruby some time ago. However, this conversion was done on language basis. Some old design decisions and principles stayed, like the usage of SCR for accessing the underlying system.

Some time ago we introduced CFA (Config Files Api Gem) as a more powerful and flexible Ruby-powered replacement for SCR. Although we have been using it for a while in several YaST modules, we felt the concepts and rationales behind its operation where not that clear.

So we have invested some time improving the documentation and writing a blog post to properly present and explain CFA to the world. We will publish it next week, so stay tuned!

Great news ahead!

The next sprint will be the first in which the whole YaST team will work together integrating the new storage stack in every single part of YaST. So we hope the next report to be full of good news about the expert partitioner, improvements in AutoYaST’s handling of disks and so on.

Of course, that would be only a small fraction of all the stuff we plan to work on. See you in three weeks with more news!

Highlights of YaST development sprint 33

April 26th, 2017 by

It has been a long time since our last status update! The reason is the end of the previous sprint caught quite some of the YaST Team members on vacations and, when the vacation period was over, we were so anxious to jump into development to make YaST another little bit better that the blog post somehow fell behind.

But it’s time to pay our (reporting) debts. So these are some of the highlights of the 33th development sprint that finished on April 11th.

AutoYaST and Salt integration

During this sprint, a new module has been added to the YaST tool box: YaST2 Configuration Management.

This module offers integration between AutoYaST and configuration management systems like Salt. The idea is that AutoYaST will take care of system installation (partitioning, network setup, etc.) and, if desired, the system configuration can be delegated to one of those external tools.

The YaST Configuration Management module was born during an internal SUSE workshop during the last summer and it got more love during HackWeek 14 and 15.

Now it is officially part of the YaST family and it will be included in the upcoming releases.

The new module: YaST - Configuration Manager

Extend the YaST Installer Workflow by Add-ons

The YaST installer already allows extending the installation work flow by add-on extensions. However, this was only supported for the SUSE tag repositories used on the ISO installation media. That means the online repositories, which normally use the RPM-MD data format, could not use this feature.

This sprint we extended the support also for the other repository formats (basically any repository format supported by libzypp). The original limitation was caused by the fact that the other repository types do not support other files except the RPM packages.

To overcome this limitation we now support packaging the installer extension files into a standard RPM package which can be then provided by any repository type.

The implementation is documented and there is the YaST:extension OBS project with a simple example extension.

The example extension in action

YaST pattern definitions

The software pattern definitions have been split and moved to the respective OBS devel projects. See more details in this opensuse-factory announcement. That means the YaST patterns are now maintained in the
YaST:Head project.

The project sources have been imported to the GitHub repository to track the history and use the code review workflow. Also and the usual Jenkins and Travis automation has been set up. For contributing your changes in the YaST patterns use the usual GitHub pull request workflow as for the other YaST packages. Thank you in advance! 😉

CaaSP deserves its own YaST package!

Among other things, our team is working hard to make YaST fulfill the requirements of the upcoming Containers as a Service Platform (CaaSP) product. As part of this effort, we have added some new features, discovered (and fixed) some bugs, improved documentation and so on.

We’ve also added some specific CaaSP code, so during this sprint we’ve decided to create a new dedicated package (yast2-caasp) and move the code there.

Currently it only contains system role handlers and some additional documentation, but most probably we will add some stuff during the upcoming months.

Bootloader improvement

Also the bootloader module has been improved to better handle invalid partitioning proposal in the CaaSP product. When the partitioning proposal did not contain a valid root directory then the bootloader module crashed.

After the fix it now displays details about the problem so the user can manually fix the configuration.

New YaST-bootloader warning

Automatic screenshots in the AutoYaST integration tests

An important part of keeping the quality in a job is investing in the quality of the tools. So during this sprint we decided to improve the capabilities of the AutoYaST integration tests. To help with debugging, AYTests will now store a screenshot and, if possible, YaST2 logs from installation/upgrade under the workspace.

The screenshot will be refreshed every 30 seconds so, if a timeout occurs, it will be now easy to find out where the process got stuck.

Creating your own installation media

Recently, a new set of packages were introduced into Tumbleweed to help setting up the local installation servers. They are named tftpboot-installation-<PRODUCT>-<ARCH> (for example tftpboot-installation-openSUSE-Tumbleweed-x86_64) and are intended to make it easy to set up the PXE boot environment for an installation server.

These packages basically contain the installation environment as found on the SUSE installation media.

And this enables mksusecd to create a network installation image from it.

For example, the package above installs its files into directory /srv/tftpboot/openSUSE-Tumbleweed-x86_64.

So, let’s run

mksusecd \
  --create foo.iso \
  --net=http://download.opensuse.org/tumbleweed/repo/oss/suse \
  /srv/tftpboot/openSUSE-Tumbleweed-x86_64

and we get a network installation ISO image that will install the Tumbleweed distribution using the official openSUSE Tumbleweed repository.

Note that we are using the RPM-MD repository at /tumbleweed/repo/oss/suse instead of /tumbleweed/repo/oss as one might expect. Of course it is also OK to use the /tumbleweed/repo/oss repository but we want to be cool. 😀

You can put foo.iso also on a USB stick

dd if=foo.iso of=/dev/<USB_DEVICE>

and boot from it.

To be extra-cool, try the --fat option

mksusecd \
  --create foo.iso \
  --fat \
  --net=http://download.opensuse.org/tumbleweed/repo/oss/suse \
  /srv/tftpboot/openSUSE-Tumbleweed-x86_64

that will create a FAT partition for the data, which is a bit more convenient when you plan to put the image on an USB stick (and yes, you can still use the image to burn a DVD).

Serial console at boot

The YaST bootloader module can be used to configure the parameters to allow accessing the system’s boot process through a serial console. But that’s a relatively complex topic and is easy to make mistakes when specifying such parameters. In the past, the message displayed by YaST in case of error was not helpful enough. To improve usability, the new pop-up is nicer and includes a proper example, as can be seen in the following screenshot.

More guided serial console setup in YaST-Bootloader

Storage reimplementation: new proposal guided setup

The previous sprint we brought in the ability to use encryption for both partition-based and LVM-based proposals. This time we go a step further and present a new guided setup that allows you to do even more. We have worked hand in hand with our UX experts to design a new proposal wizard composed by four steps.

In the first one, a list with the available disks is showed and you can select which ones to use for your fresh installation.

Guided proposal setup - step 1

In the second screen, you can select a specific disk to be used for the root partition, and also, you might decide what to do with the existing Windows and Linux installed systems. Currently, this last functionality is only illustrative, but it will become functional in the upcoming sprints.

Guided proposal setup - step 2

The third step is surely more familiar for you. As in the previous sprint, here you can select the LVM usage and encryption. And of course, the encryption password will be checked to ensure you use it is strong enough.

Guided proposal setup - step 3

Finally, in the last step the filesystem type for the root partition can be selected. Moreover, you can decide whether to use a separate home or not. Or you can select another filesystem type for your home.

As result of the wizard, a new partition schema is automatically created taking into account all the options you have selected. And naturally, that is only the first version. We will let know about the news in the guided setup in following sprints.

Warn the user in case of inconsistencies in Online Migration

Before the live Service Pack migration the system can be manually modified in many ways producing inconsistencies between the installed system and the extensions/modules registered in the registration server.

In this sprint we have added some steps that will allow the user to fix the inconsistencies. Also the displayed summary of the available migrations has been improved showing information about products without any migration available (e.g. third party addons).

For the online migration it is important to be able to rollback to the original state (before the migration started) when a problem occurs or the migration is aborted by user.

Now the user will be able to decide if the registered but not installed products should be deactivated as part of the rollback.

Warning for inconsistent online migration

See you very soon!

As usual, this report only covers a relatively small part of all the work done during the previous sprint and, as usual, you will have to wait until the end of the current sprint to get more exciting news. The bright side is that the sprint will finish in a matter of days, so you will only need to wait one week to read our next report.

Stay tuned and have a lot of fun!

Fun things to do with driver updates

April 25th, 2017 by

Today: And what if I want to remove some files?

It’s easy and obvious to add new files with a driver update (DUD). But what if you need to remove some files? Or, related: can you replace some read-only file by a writable copy?

Let’s for this article assume you want to modify the Xorg configuration. Say,
/usr/share/X11/xorg.conf.d/10-evdev.conf troubles you.

The direct way would be to write an update.pre script than removes the file and include this into a DUD.

update.pre is run right after the DUD has updated the files in the installation system.

For example:

echo \
  rm /usr/share/X11/xorg.conf.d/10-evdev.conf \
  > update.pre
mkdud --create test1.dud --dist tw --name "remove 10-evdev.conf" update.pre

But when we try test1.dud we run into this:

Driver Update: remove 10-evdev.conf
Driver Updates added:
  remove 10-evdev.conf
[...]
rm: cannot remove '/usr/share/X11/xorg.conf.d/10-evdev.conf': Read-only file system

So, we see the catch: much of the installation system resides on a read-only file system! You can’t just go and modify things.

But how does the driver update process manage to add new files to the installation system then? It does so by restructuring the file system using symlinks. In the process all directories that need to be modified are replaced by writable copies.

In other words: if you include the file you want to remove in the DUD – you will be able to remove it. It’s actually sufficient to include the directory the file resides in to make this work.

So, let’s try this:

mkdir -p /tmp/dud/usr/share/X11/xorg.conf.d
echo \
  "rm /usr/share/X11/xorg.conf.d/10-evdev.conf" \
  > update.pre
mkdud --create test2.dud --dist tw --name "remove 10-evdev.conf" update.pre /tmp/dud

Now we don’t get any error applying test2.dud and when we login to the installation system, we see:

console:vm9732:/ # ls -l /usr/share/X11/xorg.conf.d
total 0
console:vm9732:/ # 

Tip

For easy testing a DUD, boot the machine with

startshell=1 sshd=1 password=*** dud=<URL>

startshell=1 wi ll stop the installation workflow after the installation system has been fully prepared just before YaST will be started. sshd=1 will start an SSH daemon and you’ll be able to connect to the machine and look around.

A similar trick can be used to make files writable (watch out for correct shell quoting):

mkdir -p /tmp/dud/usr/share/X11/xorg.conf.d
echo \
  cp --remove-destination '$(readlink -f /usr/share/X11/xorg.conf.d/10-evdev.conf)' \
  /usr/share/X11/xorg.conf.d/10-evdev.conf \
  > update.pre
mkdud --create test3.dud --dist tw --name "make 10-evdev.conf writable" update.pre /tmp/dud

We can verify the result:

console:vm9732:/ # ls -l /usr/share/X11/xorg.conf.d               
total 4
-rw-r--r-- 1 root root 1099 Apr 24 13:06 10-evdev.conf
console:vm9732:/ #

The file is now writable.

Highlights of YaST development sprint 32

March 22nd, 2017 by

To make sure you didn’t missed us too much, in our latest blog post we summarized all the YaST-related projects worked during Hack Week 15. But after all the fun, it was time for… more fun! So let’s take a look to what the team has delivered on this first sprint after Hack Week 15.

Storage reimplementation: encrypted proposal without LVM

One of the known limitations of the current installer is that it’s only able to automatically propose an encrypted schema if LVM is used. For historical reasons, if you want to encrypt your root and/or home partitions but not to use LVM, you would need to use the expert partitioner… and hope for the best from the bootloader proposal.

But the new storage stack is here (well, almost here) to make all the old limitations vanish. With our testing ISO it’s already possible to set encryption with just one click for both partition-based and LVM-based proposals. The best possible partition schema is correctly created and everything is encrypted as the user would expect. We even have continuous tests in our internal openQA instance for it.

The part of the installer managing the bootloader installation is still not adapted, which means the resulting system would need some manual fixing of Grub before being able to boot… but that’s something for an upcoming sprint (likely the very next one).

Improved add-ons listing for SLE12-SP1

The dialog in SLES-12-SP1 for selecting the add-ons after registering the system was originally designed just for a small list of add-ons. Unfortunately (or fortunately, depending on how you look at it), the number of add-ons grew over the time and it exceeded the original limit for the text mode UI.

The equivalent screen in SLE-12-SP2 is not affected by the problem because it uses a different layout with scrollable list. But the SP1 dialog looks like this.

Broken add-ons list in SP1

If you look carefully at the screenshot you will see that the Web and Scripting Module is missing in the list and the Back, Next and Abort buttons at the bottom are also not displayed.

The fix decreased the size of the Details widget and allowed displaying more items in each column. Now there is even free space for three more add-ons.

Fixed addons list in SP1

Moreover the dialog is now dynamic and checks the current size of the screen. If there is enough free space then the list is displayed in one column so the labels are not truncated and the Details widget size is increased back to the original size.

Add-ons list in SP1 with enough space

Storage reimplementation: Btrfs subvolumes

The management of subvolumes is one of those features that make Btrfs rather unique and that need special handling when compared to more traditional file systems. That was indeed one of the several reasons to rewrite libstorage – Btrfs subvolumes never fully fitted the philosophy and data structures on the old (current) libstorage and yast2-storage.

In this sprint we introduced support for subvolumes in libstorage-ng from the ground up, taking into consideration all the specificities, use cases and scenarios found in the past. And, hopefully, in a way that is also prepared for whatever the future brings.

The new functionality is already working and tested and it’s included in the latest versions of libstorage-ng, but is still not used in the proposal or any other part yast2-storage. You will have to wait another sprint to see more visible results. At least if “more visible” means screenshots. Meanwhile, if you like images you can always enjoy the graphs generated from the internal structures managed by libstorage-ng.

Internal subvolumes representation in libstorage-ng

Storage reimplementation: system upgrade

The new storage stack has been able to install an openSUSE system for quite some time already. While we keep improving that area, the next challenge was to make the upgrade from a previous openSUSE version also possible using our testing ISO.

That implies scanning the hard disks looking for previous installations, allowing the user to select one, mounting the corresponding partitions or LVM volumes, performing the update of every package and doing some final tasks like updating the bootloader configuration.

Following the iterative approach encouraged by Scrum, we focused in the first three steps, which is something that a user (or openQA, for that matter) can test and verify. So now we are able to detect and list pre-existing systems and start the upgrade process on the selected one. And we have automated tests in openQA to ensure it works across all the combinations of partition-based vs LVM-based layout and UUID-based vs name-based fstab file.

Add-ons can define new system roles

YaST is pretty customizable when it comes to adapt/modify the installation workflow. Among other things, add-ons are allowed to adapt the workflow (adding/removing steps), define new proposals, etc. And starting now, they can also define new system roles.

Let’s see an example of adding a new mail server role:

<update>
  <system_roles>
    <insert_system_roles config:type="list">
      <insert_system_role>
        <system_roles config:type="list">
          <system_role>
            <id>mail_role</id>
            <software>
              <default_patterns>base Minimal mail_server</default_patterns>
            </software>
          </system_role>
        </system_roles>
      </insert_system_role>
    </insert_system_roles>
  </system_roles>
</update>

<!-- Don't forget to add the texts -->
<texts>
  <mail_role>
    <label>Mail Server</label>
  </mail_role>
  <mail_role_description>
    <label>• Software needed to set up a mail server
• No production ready yet!</label>
  </mail_role_description>
</texts>

And now let’s see how it looks:

A role added by an addon

Which leads us to the next section…

The list of roles becomes responsive in text mode

A really nice thing about YaST is that it’s able to run in textmode, so you don’t need a graphical interface to install or configure your system. As a consequence, YaST developers need to keep certain limitations in mind when working in the user interface.

Now that add-ons can add new system roles, we noticed a potential problem in the dialog selection screen: we eventually will get out of space if more than one system role is added. So we decided to improve how system roles are displayed to make them fit in a 80×25 mode (that is, only 25 lines of text). Let’s see the changes with some examples.

This is how the screen looks by default, with a reasonably small set of roles.

Default system roles list

If the system detects there is no space to present all the information in such a convenient way, it removes all the spaces so at least the information is all there, even if it looks a little bit packed.

Roles list with no extra space

If even that is not enough, the extra descriptions are omitted, which gives us way more room.

Compact roles list

If roles don’t fit even without the descriptions, the introductory text will be also omitted which means we can present up to eighteen (yes, 18!) roles in the screen.

Storage reimplementation: guided setup mock-up

As explained in several previous reports, we are collaborating closely with SUSE UX experts to design the revamped interfaces of the installer’s partitioning proposal and the expert partitioner. We already showed you the document we used as a base to discuss the partitioning proposal, including the conclusions, and the first very simple prototype of the so-called Guided Setup.

During this sprint, that collaborative effort focused on defining exactly how every step of that wizard should work and look like. The goal was to get some interface mock-ups to be used as starting point for the upcoming sprint. More than ever, a picture (well, four of them) is worth a thousand words.

First step of the guided partitioning setup mock-up

Second step of the guided partitioning setup mock-up

Third step of the guided partitioning setup mock-up

Fourth step of the guided partitioning setup mock-up

Prevent the installation of CaaSP if Btrfs snapshots are not possible

CaaSP is a single purpose system, and having snapshots enabled is essential. So there’s now a check in place that will simply prevent you from going on with the installation if snapshots are disabled (for example, if the disk is too small).

Blocked CaaSP installation

Storage reimplementation: better handling of /etc/fstab and /etc/cryptab

For the new storage stack, we refactored the classes to handle /etc/fstab. While this would normally not be anything to write much about, we included intelligent handling for existing comments based on this standalone GitHub project.

This means that existing comment blocks at the start and at the end of the file remain untouched, and comments before any content entry remain attached to that entry; i.e. when that entry is moved around in the file (e.g. because of mount dependencies), that comment is moving along with the entry it belongs to. While this is not 100% fool proof, it is much better than the usual strategy to simply discard such comments when the file is rewritten.

Quite some adaptations and bugfixes for CaaSP

As you already know from previous reports and other sources, a considerable part of SUSE’s development firepower is focused on building the upcoming CaaSP. As part of that heavy development process, the YaST team invested a significant part of the sprint adapting YaST for CaaSP and fixing bugs introduced by previous adaptations. A large collection of changes here and there that are hard to summarize here but that help CaaSP to be a couple of steps closer to the final goal.

Keep it rolling!

We have already planned our next sprint which will hopefully bring more features to the new storage stack, CaaSP-related improvements, a surprise about AutoYaST and more stuff. And, of course, it will be followed by its corresponding report.

So see you in three weeks. Stay tuned and have a lot of fun!

Fun things to do with driver updates

March 16th, 2017 by

Today: But what if I need a new kernel?

A driver update (DUD) can of course update a single driver. But if that’s not enough and you need a whole new kernel to run an installation?

There are two parts to solve:

  1. replace the kernel used during installation and
  2. get the new kernel installed

We’ll need two tools for this (both available in Tumbleweed or here: mksusecd and mkdud).

1. Replace the kernel used during installation

For this it’s important to know which kernel packages you’ll actually need. Typically it will be kernel-default and kernel-firmware. But older SUSE distributions (SLE 11 comes to mind) had the kernel packages split into kernel-default and kernel-default-base – you’ll need them both.

To make things confusing, modern SUSE distributions also have kernel-default-base – but it’s an alternative to kernel-default. In this case we don’t need it.

If unsure, check kernel-default. If it contains the actual kernel (e.g. /boot/vmlinuz) then you don’t need kernel-default-base.

On some architectures modules are also taken from xen-kmp-default. If that’s important for you, you can add this package to the kernel list as well.

In fact you can add any number of kernel packages or kmps you like.

In the past, sometimes a different kernel flavor was used. For example PowerPC had kernel-ppc64 for a while. Simply use the flavor you need.

It’s a good idea to gather all the kernel rpms into a single directory for easier use:

> mkdir k
> cp kernel-default.rpm kernel-firmware.rpm k
> cp kernel-default-base.rpm k    # only if needed
# add any kernel-related rpms you need

Then, take your SUSE installation iso and run

> mksusecd --create new.iso \
  --kernel k/* -- \
  original_dvd1.iso

Note that the --kernel option accepts a variable number of arguments, so you have to add an isolated -- to terminate the argument list properly.

The output could look like this:

> mksusecd --create new.iso \
  --kernel k/* -- \
  SLES-11-SP4-DVD-ppc64-GM-DVD1.iso
kernel version: 3.0.101-63-ppc64 --> 3.0.101-94-ppc64
CHRP bootable (ppc64)
building: 100%
calculating sha1...

The command above will actually get the list of required modules from the old installation iso. If you are missing some driver or the new kernel comes with some additional driver, the module will not be added to the new iso.

But there’s the --modules option. It will add the listed modules together with any implicitly required modules via module dependencies.

For example, let’s add the airport wifi-module to our PowerPC iso:

> mksusecd --create new.iso \
  --kernel k/* \
  --modules airport -- \
  SLES-11-SP4-DVD-ppc64-GM-DVD1.iso
kernel version: 3.0.101-63-ppc64 --> 3.0.101-94-ppc64
kernel modules added:
  airport, cfg80211, orinoco
CHRP bootable (ppc64)
building: 100%
calculating sha1...

As you can see, it automatically adds orinoco and cfg80211 as well.

2. Get the new kernel installed

This is relatively simple. A driver update can do this:

> mkdud --create foo.dud \
  --dist sle11 \
  --install repo \
  k/*

This creates a driver update for SLE 11 (which also applies to SP4) and the kernel rpms are installed via an auto-generated add-on repo (--install repo).

Now we have the driver update that installs our kernel packages. But how do we use it?

We integrate it into our iso above!

> mksusecd --create new.iso \
  --initrd foo.dud \
  --kernel k/* -- \
  SLES-11-SP4-DVD-ppc64-GM-DVD1.iso

mksusecd has an --initrd option that directly accepts driver updates and integrates them into the iso.

3. Can I have a choice?

Maybe you just want to test this new kernel or sometimes need the old one and sometimes the new one. Can you make an installation iso that lets you choose the kernel?

Oh yes! 🙂

> mksusecd --create new.iso \
  --add-entry 3.0.101-94 \
  --initrd foo.dud \
  --kernel k/* -- \
  SLES-11-SP4-DVD-ppc64-GM-DVD1.iso

This does not replace the old kernel but adds a new boot entry Installation - 3.0.101-94.

So you can install with old or the new kernel.

Highlights of YaST development sprint 31

February 20th, 2017 by

As we announced in the previous report, our 31th Scrum sprint was slightly shorter than the usual ones. But you would never say so looking to this blog post. We have a lot of things to talk you about!

Teaching the installer self-update to be a better citizen

As you may know, YaST includes a nice feature which allows the installer to update itself in order to solve bugs in the installation media. This mechanism has been included in SUSE Linux Enterprise 12 SP2, although it’s not enabled by default (you need to pass an extra option selfupdate=1 to make it work).

So after getting some feedback, we’re working toward fixing some usability problems. The first of them is that, in some situations, the self-update mechanism is too intrusive.

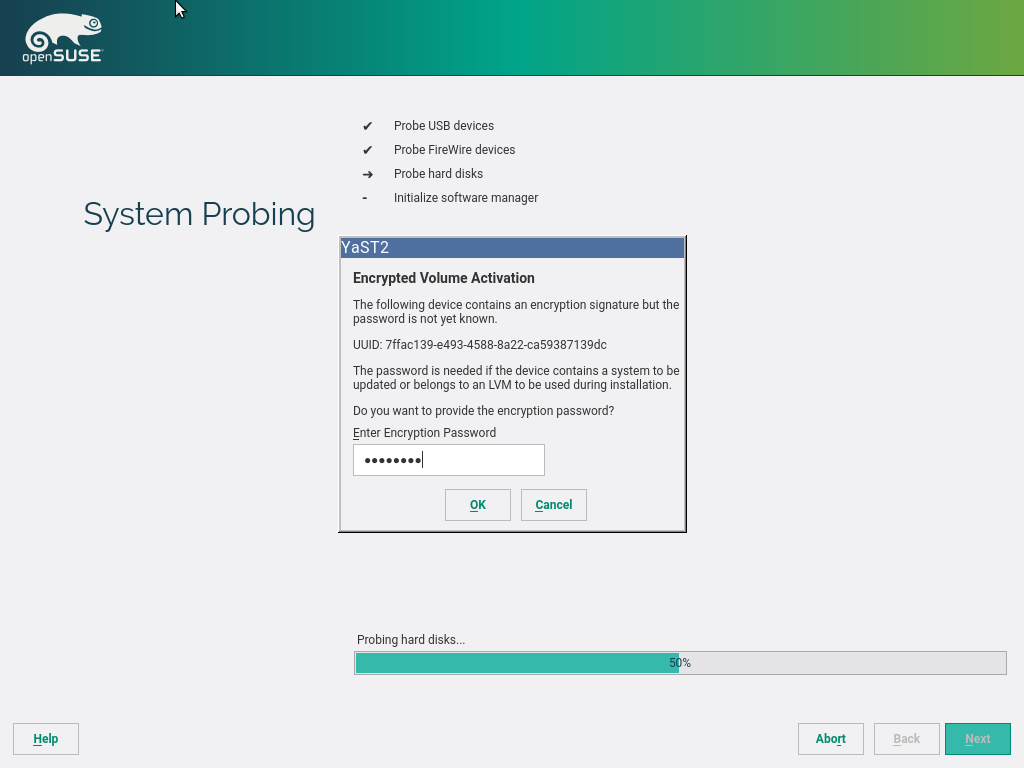
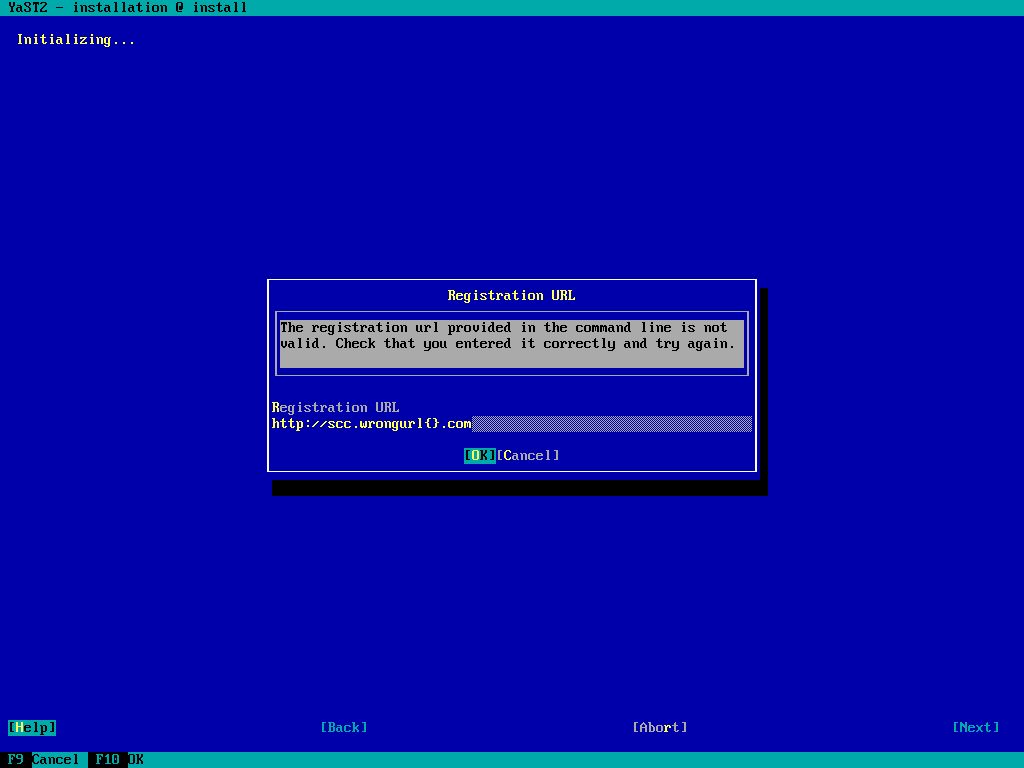
Consider the following scenario: you’re installing a system behind a firewall which prevents the machine to connect to the outside network. As the SUSE Customer Center will be unreachable, YaST complains about not being able to get the list of repositories for the self-update. And, after that, you get another complain because the fallback repository is not accessible. Two error messages and 2 timeouts.

And the situation could be even worse if you don’t have access to a DNS server (add another error message).

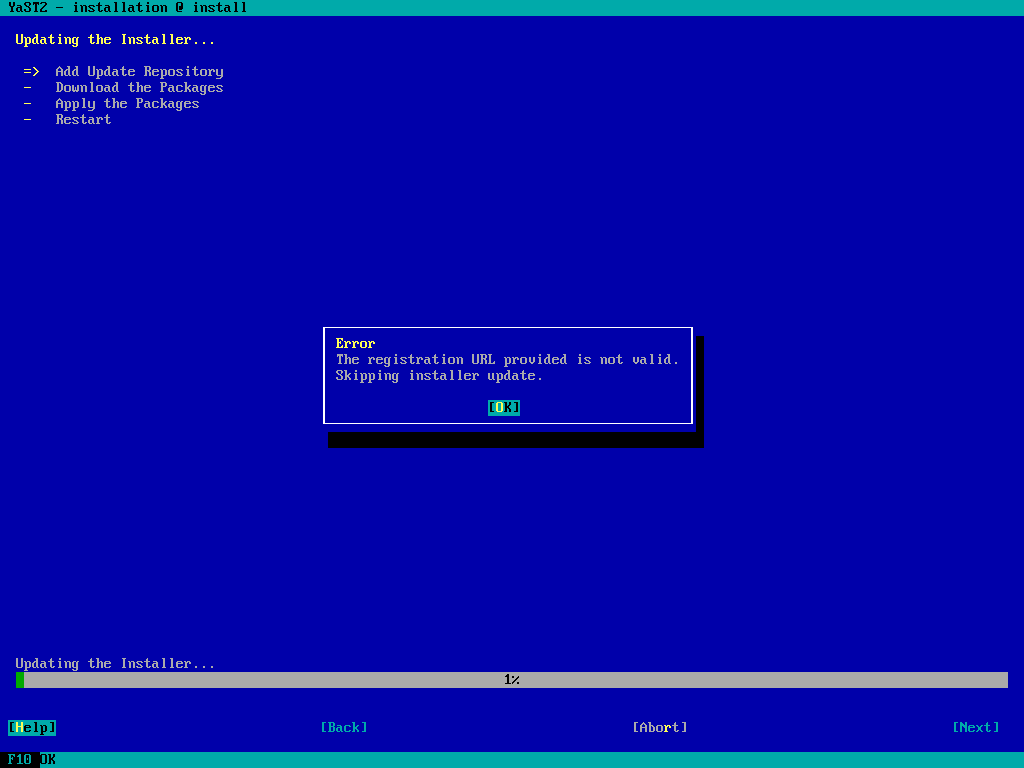
So after some discussion we’ve decided to show such errors only if the user has specified SMT or a custom self-update repository (which is also possible). In any other case, the error is logged and the self-update is skipped completely.

You can find further information in our Self-Update Use Cases and Error Handling document.

During upcoming sprints, we’ll keep working on making the self-update feature great!

Configuring workers during CaaSP installation

While CaaSP release approaches, our team is still working hard to satisfy the new requirements. Thankfully, YaST is a pretty flexible tool and it allows us to change a lot of things.

For CaaSP installation, YaST features a one-dialog installation screen. During this sprint, configuration of the Worker role has been implemented, including validation of the entered URL and writing the value to the installed system. You can check the animated screenshot for details.

The CaaSP worker configuration

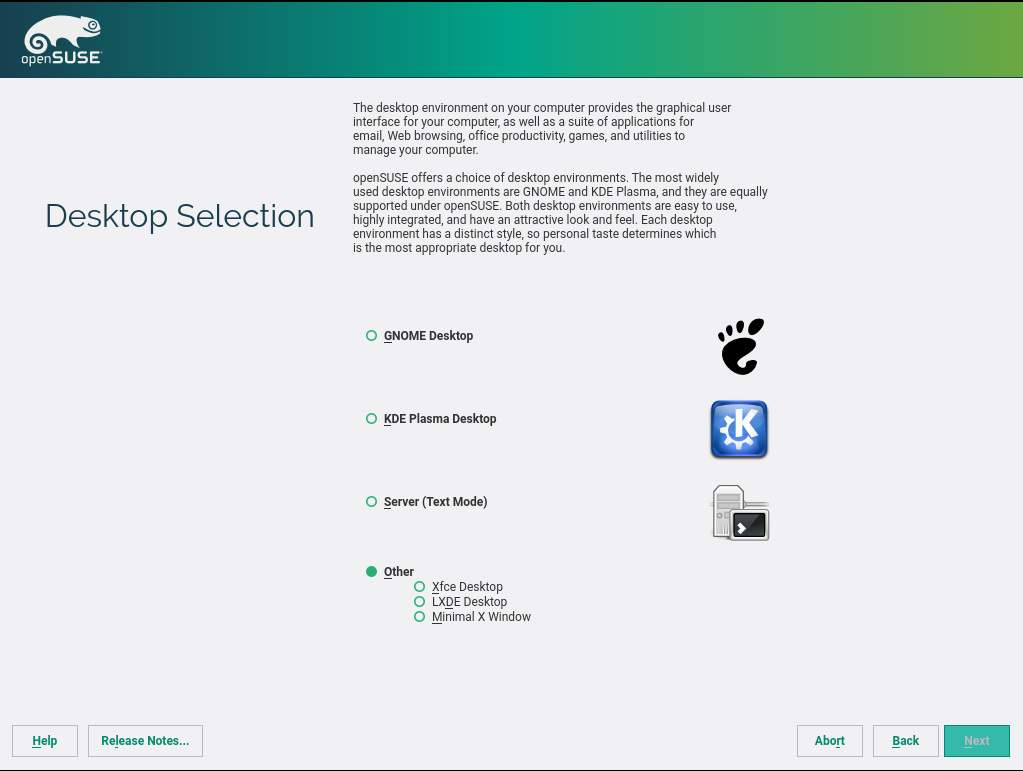
New desktop selection screen in openSUSE installer

The world of Linux desktop environments change relatively quick, with new options popping-up and some projects being abandoned. Thanks to the openSUSE’s community of packagers we have a lot of these new desktop environments available on the openSUSE distributions. But the status of those packages for openSUSE is also subject to changes: some desktop environments are poorly maintained while others have a strong and active group of packagers and maintainer behind.

The YaST Team does not have enough overview and time to watch all these desktop environment and evaluate which one is ready or not for being in the installer’s desktop selection screen. So the openSUSE Release Team decided to replace this dialog with something a bit more generic but still useful for newcomers.

They asked the YaST Team to come up with a new dialog featuring the two openSUSE main desktops (KDE Plasma and GNOME) and allowing the easy selection of other environments without reworking the dialog in the future. The goal of that new dialog was to replace the existing one you can see in the following screenshot.

The old desktop selection screen

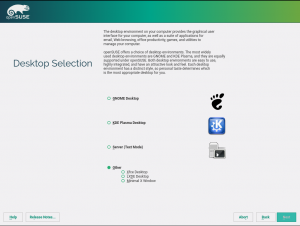
We decided the new dialog should rely on patterns for several reasons. The main one is that the set of patterns is under the close control of the openSUSE community, which looks more closely than us to the desktop environments and their integration into the distribution. Moreover, each pattern specifies its own icon and description that can be somehow re-used by the installer.

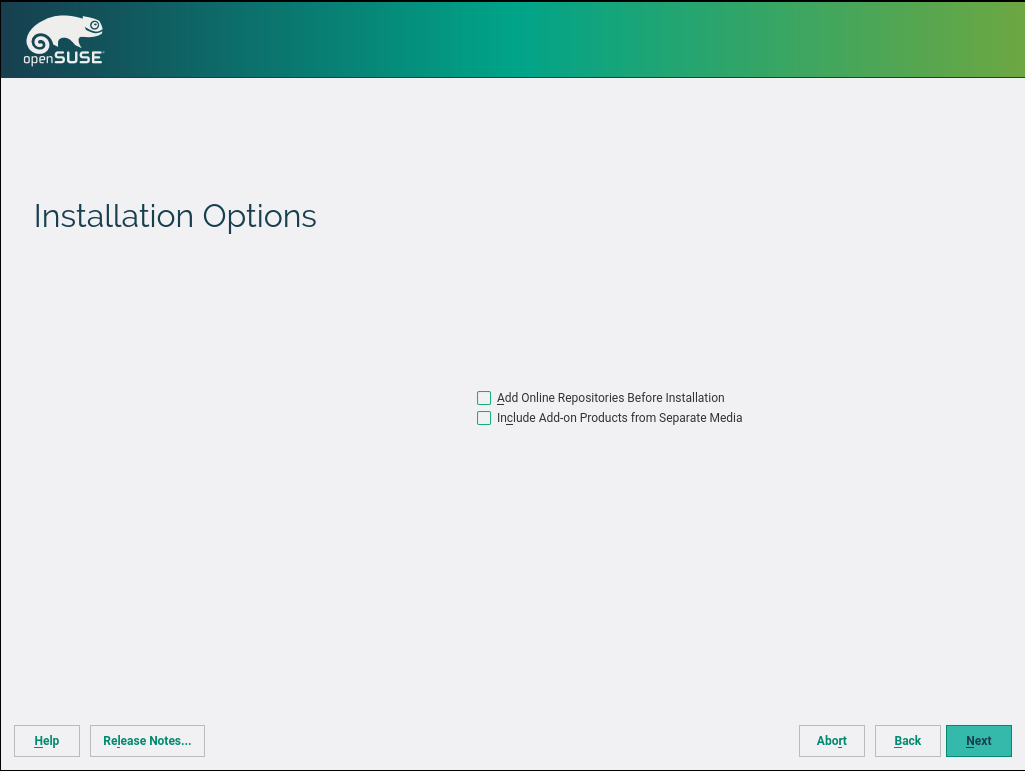
We also took the opportunity to merge this almost empty and outdated dialog with the new one.

The old additional repositories screen

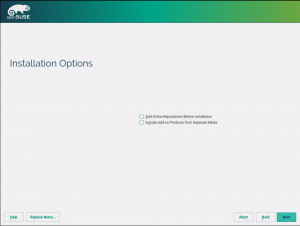
Addons are no longer produced for openSUSE, so only the second checkbox made any sense nowadays. Moreover, the functionality of that second checkbox directly influence the available selection of patterns, so it made more sense to merge everything in a single screen that keeping an extra step in the installation just to accommodate a checkbox.

So we sent a proposal for the new dialog to the opensuse-factory mailing list and, after implementing many of the ideas discussed there (like better wording or using a button instead of a checkbox for the online repositories), this is the new dialog that replaces the two ones mentioned above.

The new desktop selection dialog

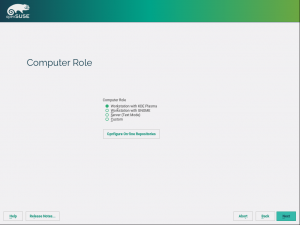
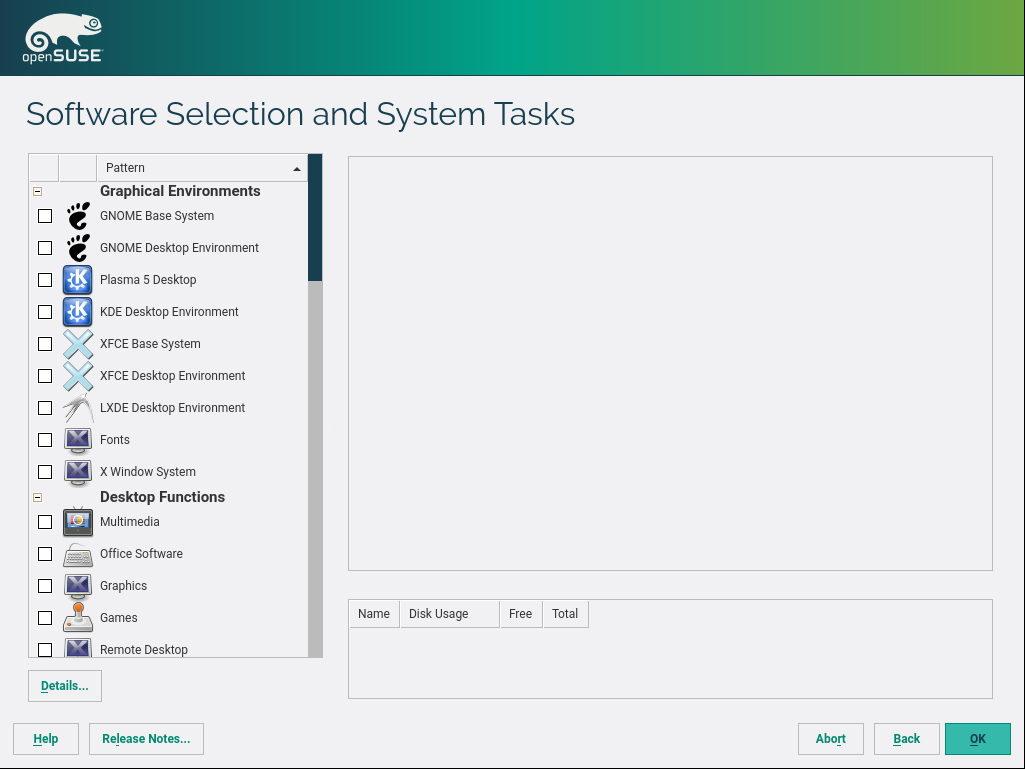
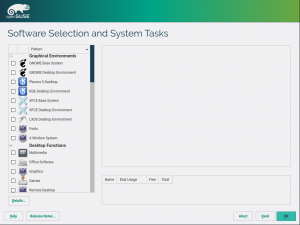
Selecting “custom” will take the users to the already existing patterns selection screen. Just in case you don’t remember how that screen looks like, you can check this image.

The patterns selection screen

If these screenshots are not enough to make your mind about the change, you can check the following animation, in which KDE Plasma is initially chosen to be changed at a later point (going back in the workflow) to LXQt.

Desktop selection animation

It will take some time before the changes hit the Tumbleweed installer, since they obviously have a non-trivial impact on the openQA tests, that will need some adaptation.

We would like to thank everybody that contributed to this new feature by providing feedback and suggestions through the mailing list. Once again, the openSUSE community has proved to be simply awesome!

Storage reimplementation: improved handling of logical partitions

Our reimplementation of the storage layer keeps getting improvements here and there. With the base x86 case working, we are now implementing the tricky parts, like the partitions renumbering that takes place when dealing with logical partitions in a MBR style partition table.

With GPT partition tables or with primary partitions in a MBR partition table, the partition gets a number (like sda1) when it’s created and keeps that number for its whole lifetime. But logical partition gets constantly renumbered when other partitions are created and destroyed. We need to know in advance what device name every partition will get in order to configure everything beforehand and only commit the changes to the disk when the user clicks in the “install” (during the installation process) or “commit” (if running the expert partitioner).

Now, libstorage-ng is able to simulate in memory the re-numbering process, so we can calculate all the settings related to partitioning (like the configuration of the bootloader) before really touching the disk.

Making kdump work in CaaSP

When you enable the Kernel Crash Dump (kdump), you probably expect that you will get a kind of core dump, like you do for regular processes. What you might not expect is an automatic reboot. That is a nice bonus. If you are tired of waiting for an actual kernel crash, you can test your kdump setup by triggering a crash yourself. Just run this as root:

echo c > /proc/sysrq-trigger

The way kdump works is by allocating some extra memory at boot time and putting a second kernel+initrd there. When the main kernel realizes it is crashing, it transfers control (by kexec) to the other one, which has only one purpose, to dump the memory of the crashed kernel.

In the upcoming Containers as a Service Platform, kdump was not working because the root filesystem is read-only there and we were not able to create the kdump initrd. We fixed it by creating it just after the RPMs are installed, when the FS is still read-write.

Fixes for Snapper in CaaSP

Kdump was not the only component affected by the fact of having a read-only filesystem in CaaSP. Snapper was also running into problems when trying to execute the rollback and cleanup operations. Now the problems are fixed. While working on that we did enough interesting findings to deserve a separate blog entry. So you can expect a new entry in the Snapper.io blog soon.

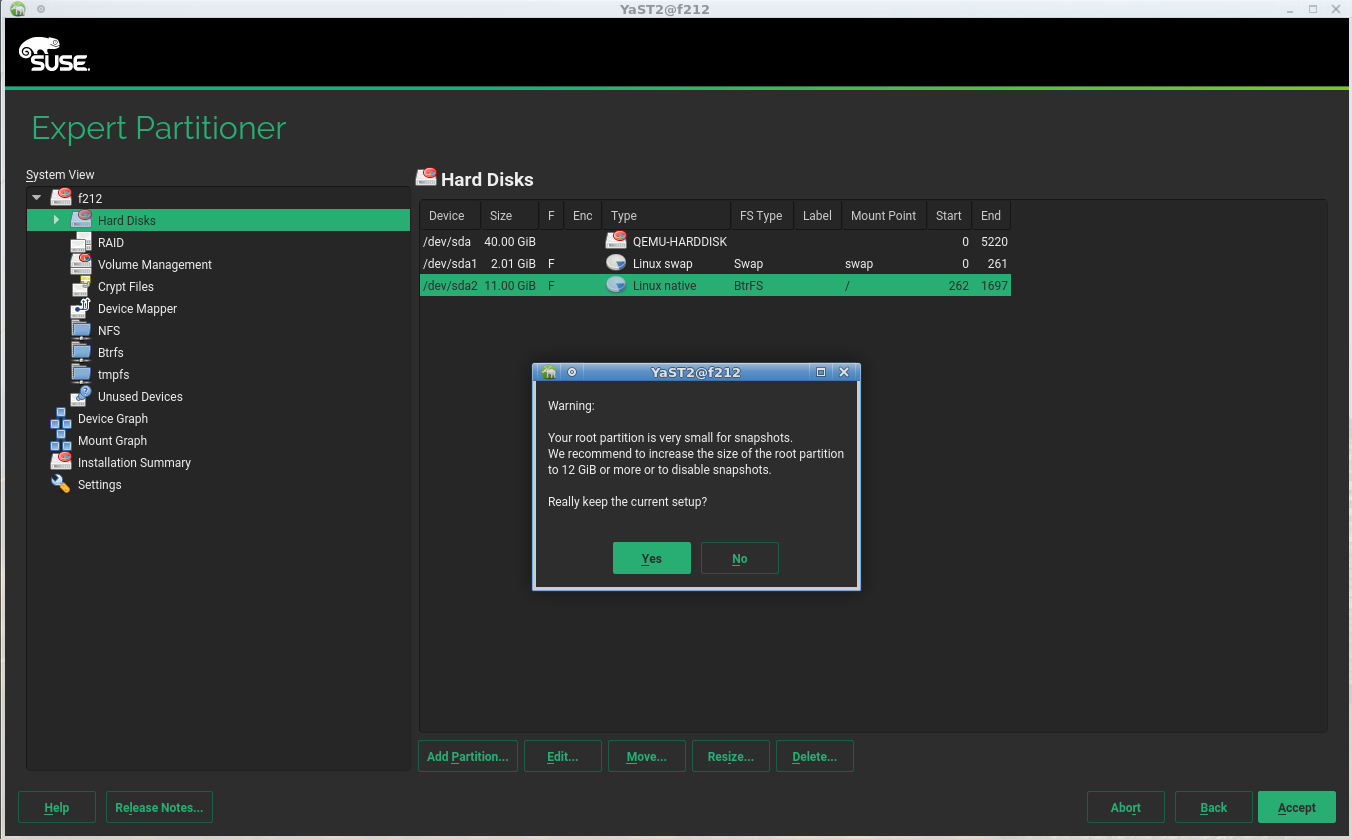
Snapshot-related improvements in the expert partitioner

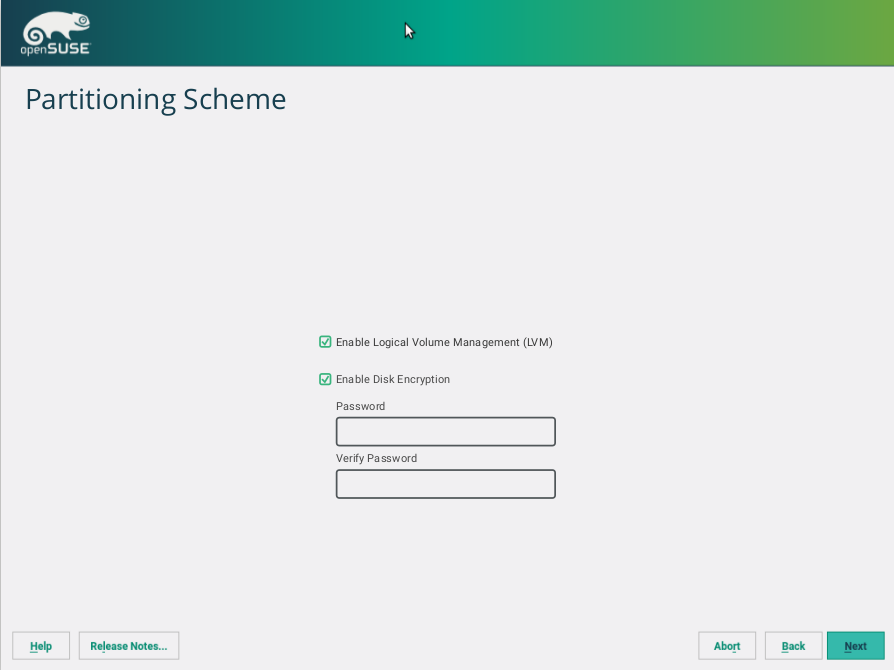
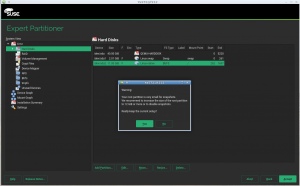
While we work on the new storage system, we are still taking care and improving the current one that will continue to be shipped with SLE12-SP3, SUSE CaaSP and openSUSE Leap 42.3. During this sprint we introduced a couple of usability improvements in the expert partitioner related to Btrfs subvolumes.

First of all, we moved the “Enable Snapshots” checkbox that was pretty much hidden in the “Subvolume Handling” dialog to the place where it really belongs – below the selector of the file-system type.

New location for enabling snapshots

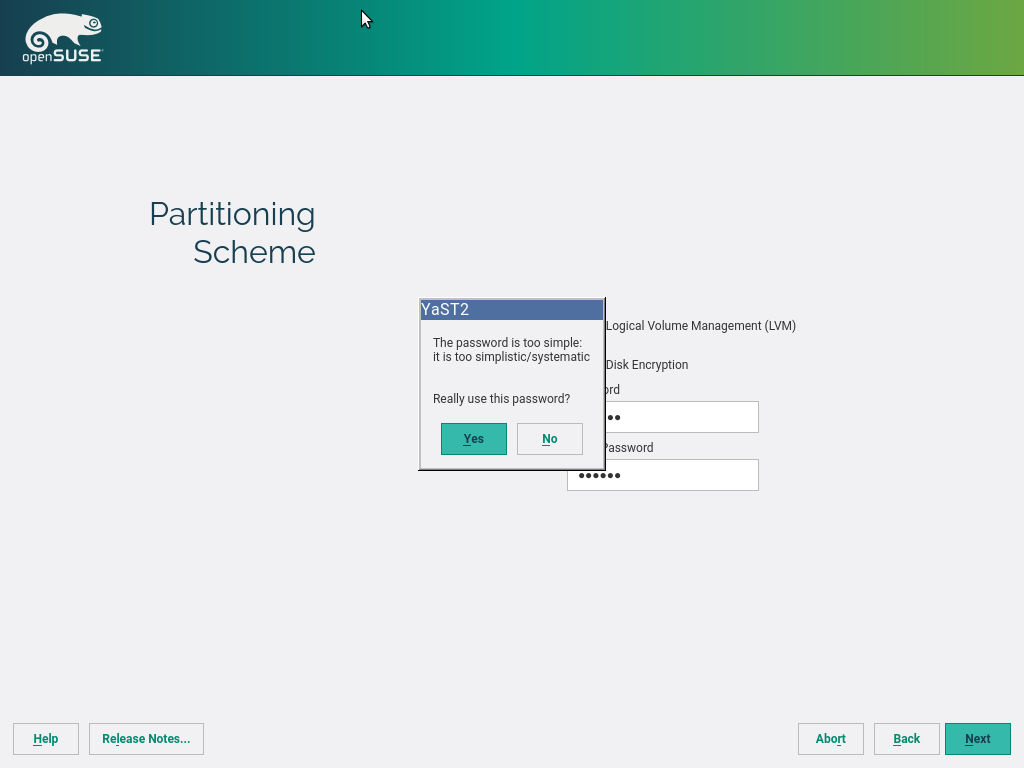
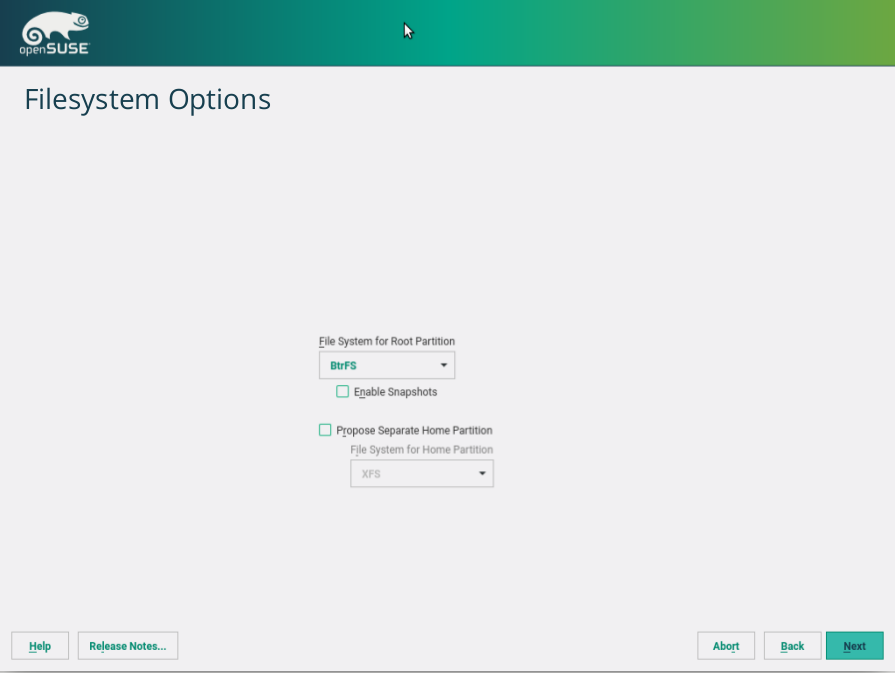
In addition, we added the warning you can see in the screenshot below for users enabling snapshots in a potentially problematic setup.

Warning for snapshots in a small partition

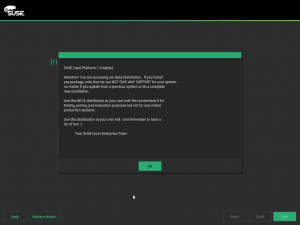
Bring back the beta warning on CaaSP

And talking about warnings, we improved the CaaSP installation dialog to show the Alpha/Beta product warning at the beginning. After changing the CaaSP installation to use the all-in-one dialog described in our previous post, this feature was lost as it is part of the initial EULA dialog. Now it is back and the users should now properly see the current product status.

The CaaSP alpha/beta warning pop-up

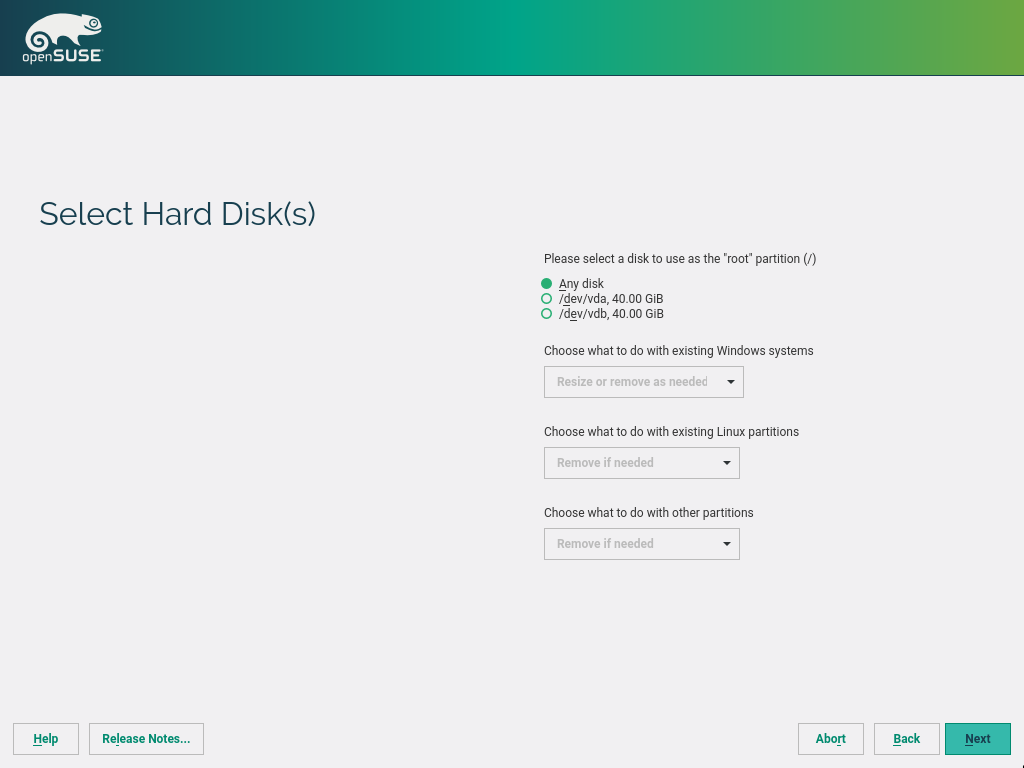
Storage reimplementation: encrypted LVM proposal

Back to our storage layer reimplementation, the new system is now able to propose a setup with encrypted LVM. Since some sprints ago, we were already able to propose a partition-based and a LVM setup. That means the new proposal is now feature-pair with the old one, with the only exceptions of Btrfs sub-volumes (that shouldn’t be a big challenge) and s/390 storage (that is still not properly managed by the underlying libstorage-ng).

The bright part is that the new code is written with re-usability in mind, which means implementing an encrypted partition-based proposal (with no LVM) would be trivial. The new code is 100% covered by automatic unit tests and scores to the top in all the automatic quality checkers we have run (like Rubycritics, CodeClimate, and Rubocop).

So now we are prepared for whatever the future brings, having lost no single feature in the way.

Storage reimplementation: prototype if the UI for the proposal settings

The next challenge is to make the power of that new storage proposal available to the users through the user interface. In the previous post we presented the document describing the general ideas we wanted to discuss with UX experts.

It’s our pleasure to announce we met the experts and we very easily reached an agreement on how the user interaction should be. During this sprint we already implemented a prototype of the future proposal settings wizard that is, as usual, included in our testing ISO.

Now that we have solid foundations, it’s very likely that the following sprint will result in the fully working wizard, with almost-final wording and design.

Support for CaaSP added to the AutoYaST integration tests

While fixing a problem with AutoYaST and CaaSP, we decided to extend our AutoYaST integration testing tool to support CaaSP. But, as a side effect, we also made some additional improvements that were long overdue (like improving the procedure to download ISOs, reducing timeouts, etc.).

Now, our internal Jenkins instance takes care of running AutoYaST integration tests for the development version of CaaSP (as it already does for SLE 12 SP2).

Services manager moved to first auto-installation stage

AutoYaST allows to define a set of services to be enabled/disabled in the installed system, applying this configuration during the 2nd stage (after the first reboot).

Unfortunately, this approach won’t work for CaaSP because, in that case, the 2nd stage won’t be available. For that reason, during this sprint, we have adapted AutoYaST to write services configuration during 1st stage.

As usual, not only CaaSP, but other future (open)SUSE versions will benefit of this change.

Faster YaST installation when the release notes cannot be downloaded

Sometimes a very small simple change in a program makes a very noticeable impact in its everyday use. That’s the case of a fix implemented during this sprint. YaST usually re-tries to download the distribution release notes several times if the first attempt was unsuccessful. Although that’s correct from a general point of view, there are cases in which retrying makes no sense and only delays the installation. We have now added failed DNS resolution to that list of cases, which should result in a noticeable faster installation in many scenarios.

Moreover, in the case of AutoYaST we now skip downloading the release notes completely. Downloading them don’t make us much sense in the kind of unattended scenarios handled by AutoYaST and skipping this step and all the possible associated problems result in a more robust process.

Better continuous integration for Libyui

In the previous sprint we switched to Docker at Travis so we could build and test our packages in the native openSUSE system instead of the default Ubuntu. This sprint we did the same change also for the Libyui library which implements the UI part of YaST.

Originally we could not build the Libyui packages at Travis as either the required build dependencies were missing or were present at a very old unusable version. With this switch we can easily use the latest packages from openSUSE Tumbleweed and thus enable Travis builds for all Libyui packages.

See you after Hack Week!

As already mentioned, this week is Hack Week 15! So our Scrum process will be on hold for some days. That doesn’t necessarily mean the YaST development will stall. Since there are quite some YaST-related projects in the Hack Week page, you can expect YaST to simply go in unexpected directions. 🙂

And remember Hack Week is not a SUSE internal initiative, we are open to collaboration from anybody within or outside the company. So jump in and have fun with us!

Highlights of YaST development sprint 30

February 3rd, 2017 by

This is our first post in 2017 and looks like we must start apologizing. In our previous post we promised news about this blog, but the administrative part slowed us down and the surprise is still not ready. On the bright side, we have quite some news about YaST. So let’s go for it!

One-click system installation for CaaSP

As you may know, SUSE has been working on making containers easier, with SUSE Container as a Service Platform. We have referred to it in several previous posts using the CASP acronym, although nowadays the correct one is CaaSP (maybe we could sell the new “a” as a shiny feature 😉 ).

Part of this upcoming product is also an interactive installation option using the good old YaST. CaaSP uses a limited subset of the SLE possibilities and we wanted to make the installation simpler to reflect that. So we reduced the number of dialogs you have to click through… to one!

One-click installation in CaaSP

As you can see, it is at the expense of stuffing the screen with more widgets than usual. Still, the only part where you must make a decision is the root password.

We expect that most of the CaaSP installations will actually not use this, because they will be done automatically with AutoYaST. But still this should be useful when you are only getting started.

Refining the read-only installation proposals

It was possible to make a proposal “read-only” for some time already. However, its black-and-white logic was not sufficient for some use cases. So, it was redesigned and you can mark a proposal hard read-only or soft read-only. The difference is that users will never be able to change hard read-only proposal. However their will be able to modify a soft read-only proposal if the proposal reports an error. It can be useful e.g. for error recovery in software proposal. It has been implemented originally for CaaSP, but it will be available for SLE-12-SP3 and Leap 42.3 too.

Installing directly from a repomd repository

When you install (open)SUSE you have up to now needed a specially prepared install repository. In addition to the repository with the RPM packages, it needed a bunch of specially prepared files containing the installation system and our beloved YaST installer.

That’s all gone now!

You can now point the installer to any plain repomd repository. For this to work you have to point the installer to the repomd repository and to the installation system (they can be completely separate now).

For example:

install=http://download.opensuse.org/tumbleweed/repo/oss instsys=disk:/boot/x86_64/root

In that example, we install Tumbleweed from the openSUSE website and use the installer from some local media (maybe the NET iso).

To make things even easier there is now a regular package (tftpboot-installation-openSUSE) that contains the installation system and some sample config files.

Check out this linuxrc documentation for technical details.

Storage reimplementation: removing stones from the installation path

In our latest post, we presented the dedicated openQA instance contantly testing the new storage layer implementation. It still doesn’t run exactly the same tests than openQA.opensuse.org because not all technologies and operations are supported yet in the new yast2-storage. But now we are a couple of steps closer to run the full-blown tests also in our dedicated instance.

During this sprint, the partitioning proposal gained the ability to deal with disks not containing a partition table in advance (it always proposes to create a GPT one in that scenario) and the software selection proposal learned how to use the new storage API, so it can properly inspect the system and the associated error pop-ups are gone from the installation workflow.

More power to the system roles

We keep extending the capabilities of the system roles, now with the ability to specify some systemd services to enable. As the roles can define which software gets installed in the system, it made sense for them to also be able to specify the desired status for the services included in that software

For example, it would be possible for a given product (let’s say a customized openSUSE) to define a “static web server” role. Choosing that role during installation would result in a system with a HTTP server already installed and enabled, so the user just need to copy the files to be served into the right directory.

Expert partitioner is now less restrictive with encryption

Setting up an encrypted LVM was always pretty easy when using the automated storage proposal – simply select “encrypted LVM” at the proposal settings and you are done.

But doing that manually was almost impossible: The expert partitioner wouldn’t allow any of the system mount points (“/”, “/usr”, “/var”, …) on any encrypted partition, and it also wouldn’t allow to encrypt, but not format a partition of type “LVM” for use as an LVM physical volume.

Both restrictions are now lifted; you can now create an LVM physical volume with encryption, or you can do the encryption layer on the logical volume if you prefer. And you can create an encrypted plain partition with a filesystem directly on it without LVM.

Over the years, Grub2 learned how to do that, so you don’t even need a /boot partition anymore. For the time being, you’ll need to enter the encryption password twice, though: once at the Grub2 prompt and once later at the graphical console so systemd can mount those filesystems. Our base system developers are working on a secure solution to avoid that.

Migrate Travis CI to Docker

That’s actually not a change in YaST itself, but in its development infrastructure. Still, we believe it would be interesting for the average reader of our blog.

So far we used Travis CI for building and testing the commits and pull requests at GitHub. But the problem was that by default Travis runs Ubuntu 12.04 or 14.04 at the build workers. That had several drawbacks for us, since compiling and testing YaST on Ubuntu is not trivial and the result is not always 100% equivalent to openSUSE. All this meant extra maintenance work for us.

Fortunately Travis allows using Docker containers at the workers and that allows using basically any Linux distribution. This sprint we spent some time converting the Travis configuration to use a dockerized openSUSE Tumbleweed at Travis.

From Github to Travis thanks to Docker

The work was successful, we switched all YaST modules to use this new builds and the result is already paying off at several levels, although it took us over 100 pull requests (all of them manually tweaked and reviewed) to make it happen.

The current solution is documented and we had also a short internal presentation about this change. The notes from the presentation are available here.

Improved continuous integration for Snapper

We also enabled Travis integration with Docker for Snapper. As you may know, Snapper is a portable software that has always offered packages for many Linux distributions in the filesystems:snapper OBS repository.

So we took the continuous integration one step further and enabled Travis builds on more distributions, currently we build for openSUSE Tumbleweed, openSUSE Leap 42.2, Fedora 25, Debian 8 and Ubuntu 16.10. You can see an example build here or more details in the documentation.

Example build result of Snapper at Travis

That means we can ensure that the package still builds on all these distributions even before merging a pull request!

Better integration with systemd for YaST Services

Systemd recognizes many possible states for a service beyond the classic Unix enabled/disabled and running/stopped, and that list of possible states grows with every systemd release. In the past YaST have had some issues displaying the services status.

Now the problems are fixed by delegating to systemd the conversion from the concrete state to the good old known Unix equivalent. So the user now gets more precise information about all services running on the system.

Storage reimplementation: redesigning the installation user experience

In the latest post we showed you the document we were using as a base to discuss the new expert partitioner UI with usability experts. Now it was turn for the proposal settings dialog. We collected the current state, had a very productive discussion and ended up with a proposal for a new interface. You can check the resulting document covering all that.

As mentioned, the SUSE UX experts will use that document as a starting point to design the final interface. But we want the process to be as open as everything around YaST, so feel free to provide feedback.

Reading product renaming information from libzypp

When performing an upgrade, YaST needs to know whether a product is renamed or replaced by a another one. For example, in the past, the Subscription Manager Tool (SMT) lived in its own product but it’s included in SUSE Linux Enterprise 12. So YaST needs to know that the suse-smt product was just replaced by sles.

This information is usually provided by the SUSE Customer Center (SCC). But what happens if, for example, we are performing an offline upgrade? Until now, YaST used a hard-coded fallback list.

From now on, before falling back to such a list, YaST will ask libzypp for that information so, hopefully, it will avoid some problems while upgrading extensions and it will reduce the hassle of maintaining a hard-coded list.

Storage reimplementation: Making sure to install storage-related packages

The YaST storage subsystem has been taking care about storage-related software packages for a long time. For example, when a specific filesystem type like Btrfs or XFS is used by the system, we need to make sure that necessary support packages like btrfsprogs or xfsprogs are installed.

Figuring out what features are used is now done by the new libstorage. In this sprint, we created one Ruby class that maps those features to respective packages and one class that handles package installation itself. One interesting technical aspect is how Ruby introspection capacities are used to avoid duplicating the list of defined features from the C++ part (i.e. libstorage).

Power the chameleon

Apart from all those changes in YaST, and many more we have not included in this summary, we have something else to celebrate. On February 1st the YaST Team at SUSE has grown with the addition of a new member, Iván, who will allow the project to evolve even faster and better… and that will not be the last announcement in that direction, so stay tuned.

But don’t forget you can also help YaST, and openSUSE in general, to keep moving. This week we added several ideas for Google Summer of Code projects to the openSUSE mentoring page, including one idea to contribute to YaST. Do you have a better plan for this summer?

See you in less than three weeks, since the next sprint will be slightly shorter due to Hack Week 15.

How to build OS images without kiwi

December 26th, 2016 by

kiwi has long been the one standard way of building images in openSUSE, but even though there exist extensive writings on how to use it, for many it is still an arcane thing better left to the Great Magicians.

Thus, I started to use a simpler alternative image building method, named altimagebuild when I built our first working Raspberry Pi images in 2013 and now I re-used that to build x86_64 VM images at
https://build.opensuse.org/package/show/home:bmwiedemann/altimagebuild
after I found out that it even works in OBS, including publishing the result to our mirror infrastructure.
It is still in rpm format because of how it is produced, so you have to use unrpm to get to the image file.

This method uses 3 parts.

  • a .spec file that lists packages to be pulled into the image
  • a mkrootfs.sh that converts the build system into the future root filesystem you want
  • a mkimage.sh that converts the rootfs into a filesystem image

The good thing about it is that you do not need specialized external tools, because everything is hard-coded in the scripts.
And the bad thing about it is that everything is hard-coded in the scripts, so it is hard to share general improvements over a wider range of images.

In the current version, it builds cloud-enabled partitionless images (which is nice for VMs because you can just use resize2fs to get a larger filesystem and if you later want to access your VM’s data from outside, you simply use mount -o loop)
But it can build anything you want.

To make your own build, do osc checkout home:bmwiedemann/altimagebuild && cd $_ && osc build openSUSE_Leap_42.2

So what images would you want to build?