Home Home > Tag > arm7
Sign up | Login

Deprecation notice: openSUSE Lizards user blog platform is deprecated, and will remain read only for the time being. Learn more...

Posts Tagged ‘arm7’

Banana Pi M2 running openSUSE Tumbleweed

December 3rd, 2015 by

Following up from my earlier post about openSUSE LTSP on Banana Pi, Nora Lee from the manufacturer of the board got in touch with me and sent me a couple of their new boards- Banana Pi M2, runs on A31s quad-core CPU and has 1G RAM, powerful enough to run openSUSE Tumbleweed with Xfce Desktop.

Here is how you can get openSUSE running on Banana Pi M2.

* Download the image

* Extract the archive to get openSUSE-Tumbleweed-Bpi-M2-Xfce.img

* Dump openSUSE-Tumbleweed-Bpi-M2-Xfce.img on to a SD card
(dd if=/path/to/openSUSE-Tumbleweed-Bpi-M2-Xfce.img of=/dev/sdX bs=4M; sync #replace /dev/sdX with your actual SD card device)

*  In case you have a bigger SD card, use yast2 disk(partitioner) to “expand” the second partition. You can use yast’s package manager to install more software. The default password for root is linux, you may want to change that first thing after booting.

I am unable to get sound on this hardware, probably their kernel is missing sound related modules, if you figure out how to get sound working drop me a line so I can include it in next release.Everything else(wifi, hdmi out, USB ports etc) works well enough.

LTSP client goes Banana Pi!

December 16th, 2014 by

The Raspberry Pi is a credit-card sized computer running ARM processor that plugs into your TV/PC monitor, mouse and a keyboard, it is capable of running Linux and can be made to do many interesting things.The Banana Pi is a what Chinese ingeniousness came up with after they checked out Raspberry Pi, they made a lot more powerful knockoff. This is a “How-to” use Banana Pi as LTSP client. (more…)

openSUSE ARM image

January 21st, 2012 by

When I wrote this week, how I ran openSUSE on my genesi smarttop some people asked for a ready-to-use image. After spending less than 8 hours fiddling with u-boot-scripts, partition tables, tuning ext3 and initrds, it was done… and is now so easy:

wget http://www.zq1.de/efika.img.xz # 83MB
xz -cd efika.img.xz | dd of=/dev/sdX bs=1M

with sdX being the device name of your SD-card (e.g. “mmcblk0” on the smarttop itself) with at least 1GB (actually 1024000000 bytes) of free space.

When inserted at boot, it should just boot up within 23 seconds and let you login as root with password “linux” on SSH, serial and with a USB-keyboard on HDMI. I spent some effort on putting as few packages as possible into it. Still, you have zypper to install packages and nano to edit files.

There is still a known hangup when you try to reboot. Workaround is: init 2 ; sleep 12 ; killall rsyslogd ; umount /boot/ ; mount -o remount,ro / ; reboot

As it still uses the original linux-2.6.31 kernel, it has another bug that also happens with pre-installed Ubuntu: sometimes (in ~40% of cases), boot stopps early, before graphics is initialized, when the last line on serial is “console handover: boot [ttymxc0] -> real [tty1]”. Try turning it off and on again.

This should allow you to have a whole lot of fun…

running openSUSE on ARM

January 19th, 2012 by

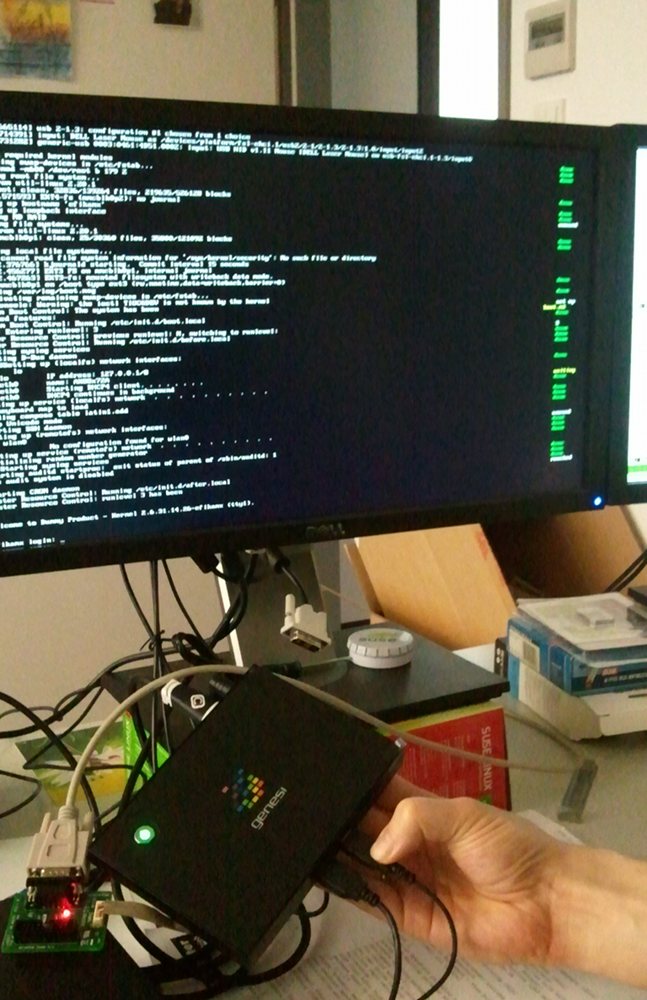
This week I finally got my genesi efika MX box. By default it has on old Ubuntu version installed on its internal IDE-attached 8GB SSD. It features 512 MB RAM and a 800 MHz ARMv7 CPU.

Using a HDMI-cable and an HDMI-DVI-Adaptor I got it connected to a monitor, plugged in a USB keyboard+mouse and it pretty much worked out of the box with WLAN,Ethernet,X11 (except for a bug that causes it to force you to change PW on every console login). How boring.

Having read about recent progress with openSUSE on ARM I wanted the excitement of running it on this box.

Michal’s image and script (now in alpha) was very helpful to get me started within 15 minutes.

If you have any (e.g. x86) openSUSE system running, there is another easy way to create a working ARM chroot-environment:

zypper ar http://download.opensuse.org/repositories/openSUSE:/Tools:/Unstable/openSUSE_12.1/openSUSE:Tools:Unstable.repo
zypper install qemu osc
osc co openSUSE:Factory:ARM bash
cd openSUSE:Factory:ARM/bash
edit bash.spec # add lines with your packages like BuildRequires: zypper,vim
osc build –no-verify –clean standard armv7l

If it worked well, /var/tmp/build-root/ should contain a chroot environment. E.g. you can run

file /var/tmp/build-root/bin/bash
/var/tmp/build-root/bin/bash: ELF 32-bit LSB executable, ARM, version 1 (SYSV), dynamically linked (uses shared libs), for GNU/Linux 2.6.16, BuildID[sha1]=0xed9ca12f44c8591560d780cf807b6b6cf8ca8873, stripped

I partitioned my SD-card into two partitions. The first one for /boot with ext2 (needs only 150MB) and the second one for / to contain the rootfs. Be sure to have barrier=0 in your fstab for all ext[34] partitions so that writing to SD will not be as slow. The default U-Boot configuration first checks on the first partition of an SD-card for boot.scr which is a uImage-formatted version of a U-boot script. I copied all of Ubuntu’s /boot and /lib/modules/, slightly adapted their boot.script file to have root=/dev/mmcblk0p2 and uImage/uInitrd-2.6.31.14.26-efikamx as kernel/initrd, dropped “quiet splash” and added “console=ttymxc0,115200” to see more of the boot and ran a line from another helpful site:

mkimage -A arm -O linux -T script -C none -a 0 -e 0 -n “my boot script” -d boot.script boot.scr
echo mxc0:S12345:respawn:/sbin/agetty -L 115200 ttymxc0 vt102 >> /etc/inittab # for serial console

However, this failed to boot. Using the serial debug console, I could see U-boot trying to load the boot.scr but it was thinking it was zero bytes for some strange reason. Re-creating my /boot partition as a raw copy of /dev/sda1 with my adaptions ontop finally gave me an SD-card that just boots openSUSE Factory on ARM with framebuffer console on HDMI/DVI.

Find more ARM-related info on our openSUSE ARM Portal