Another development sprint is over. Time flies! In our previous post we already reported about the branching of Tumbleweed and the upcoming releases and about the expected consequences: the landing of some cool features in a less conservative Tumbleweed.
We are still dedicating quite some effort to polish the upcoming stable releases (SLE12-SP2 and Leap 42.2), but in this sprint we finally found some time to play. Which is great because blogging about new features is more fun than doing it about bug fixes. 🙂
Importing Authorized Keys with AutoYaST
When logging in via SSH, public key authentication should be preferred over password authentication. Until now, the best way of setting up the required authorized_keys files in AutoYaST was using the files section.
However, that approach is tedious and error prone, as you need to make sure you set the correct owner, permissions, etc. Moreover you need to keep in sync the user definition (username and home directory) with the file definition.
AutoYaST now supports the specification of a set of public keys for each user with a pretty straightforward syntax:
<user>
  <username>suse<username>
  <authorized_keys config:type="list">
    <listentry>ssh-rsa your-public-key-1</listentry>
    <listentry>ssh-rsa your-public-key-2</listentry>
  <authorized_keys>
<user>
AutoYaST takes care of writing the files and setting the ownership and the proper permissions.
While documenting this new feature we realized the AutoYaST documentation about users management could be more detailed, which leads us to…
Improving the documentation
Usually developers love to create programs loaded with cool features but hate to write documentation. Fortunately there are people out there who enjoy writing documentation and bringing all those features to light. We have already mentioned in previous reports how grateful we are for having the SUSE documentation team polishing and publishing our documentation drafts and how open and straightforward the process is.
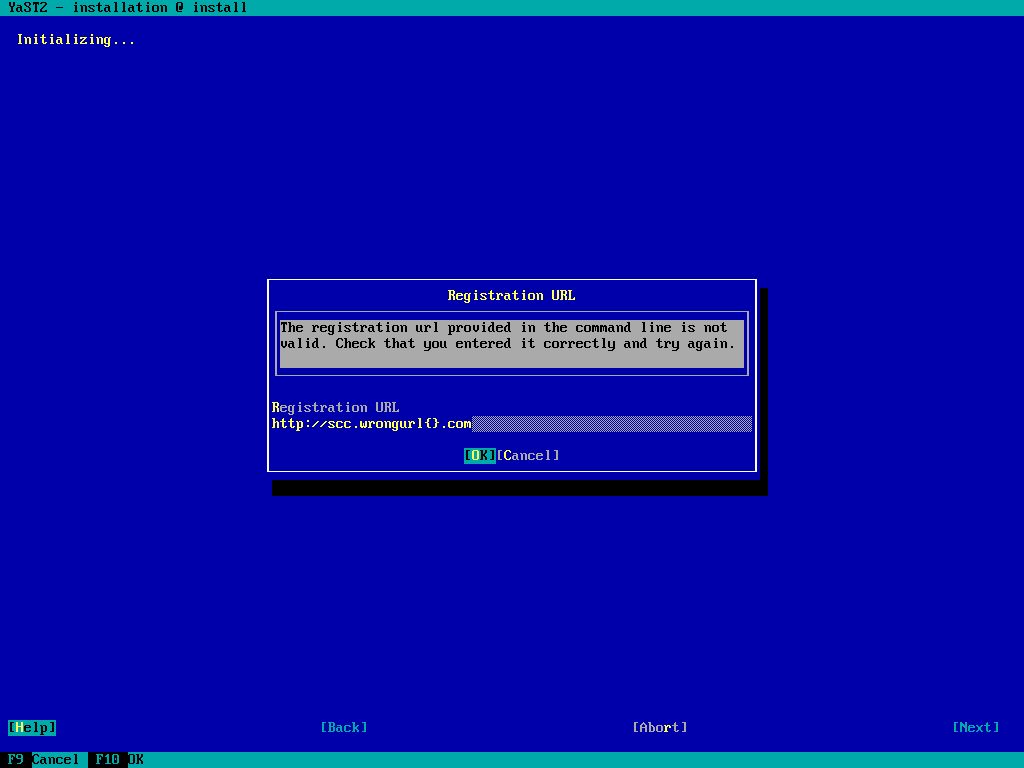
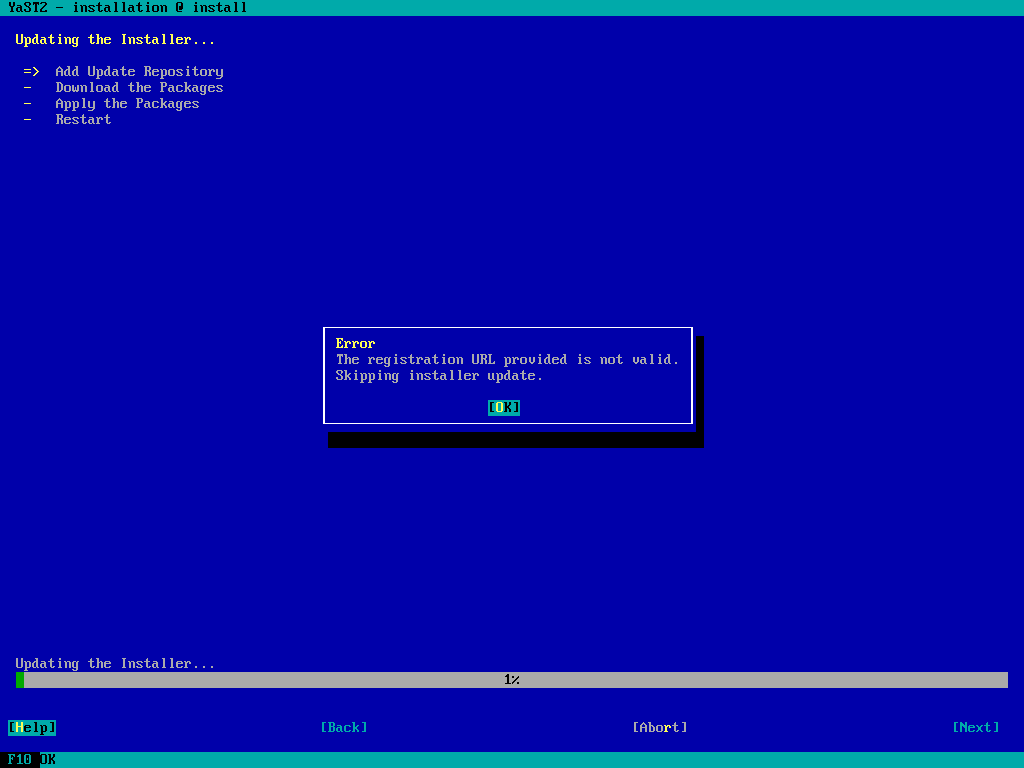
We updated the YaST documentation to include information about the installer self-update feature, which will debut in SUSE Linux Enterprise 12 SP2 and openSUSE Leap 42.2. As part of the same pull request and in the AutoYaST side, some additional improvements were made, including cleaning-up some duplicated information about SUSE registration.
On the other hand and as a consequence of the above mentioned new feature, the AutoYaST documentation regarding users management has been rewritten adding missing information like groups, user defaults and login settings.
All our pull requests are already merged in the doc-sle repository. At a later point in time, the SUSE documentation team will review and polish all the new content (including ours) and will publish an up-to-date version of the online documentation. If you don’t want to wait, you can easily generate an HTML or PDF version of the documentation including all the non-reviewed contributions just following the very simple instructions in the README file of the doc-sle repository.
Did we already mention we love the open source, programmer-friendly processes of the documentation team? 😉
Storage reimplementation: something you can touch
We promised news about the storage reimplementation and here they are. Our customized Tumbleweed image (labeled as NewStorage) in the storage-ng OBS repository can now perform some simple actions during installation and display the result to the user.
First of all, when proposing the timezone settings it will, as usual, check for MS Windows installations in the disk to guess if the hardware clock should be set to UTC. The news is that check is performed using the new storage stack, that offers more functionality in every sprint.
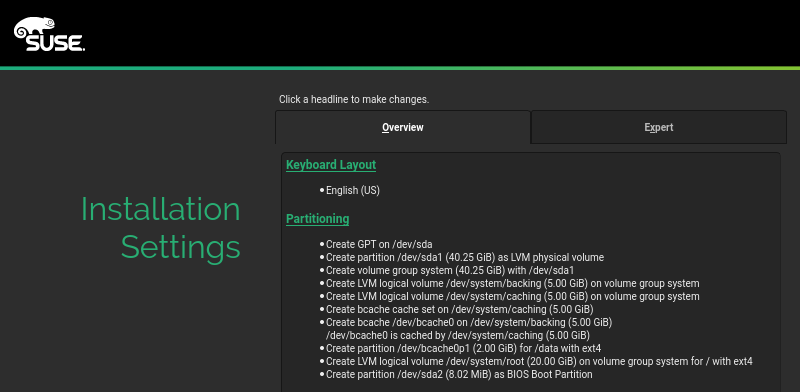
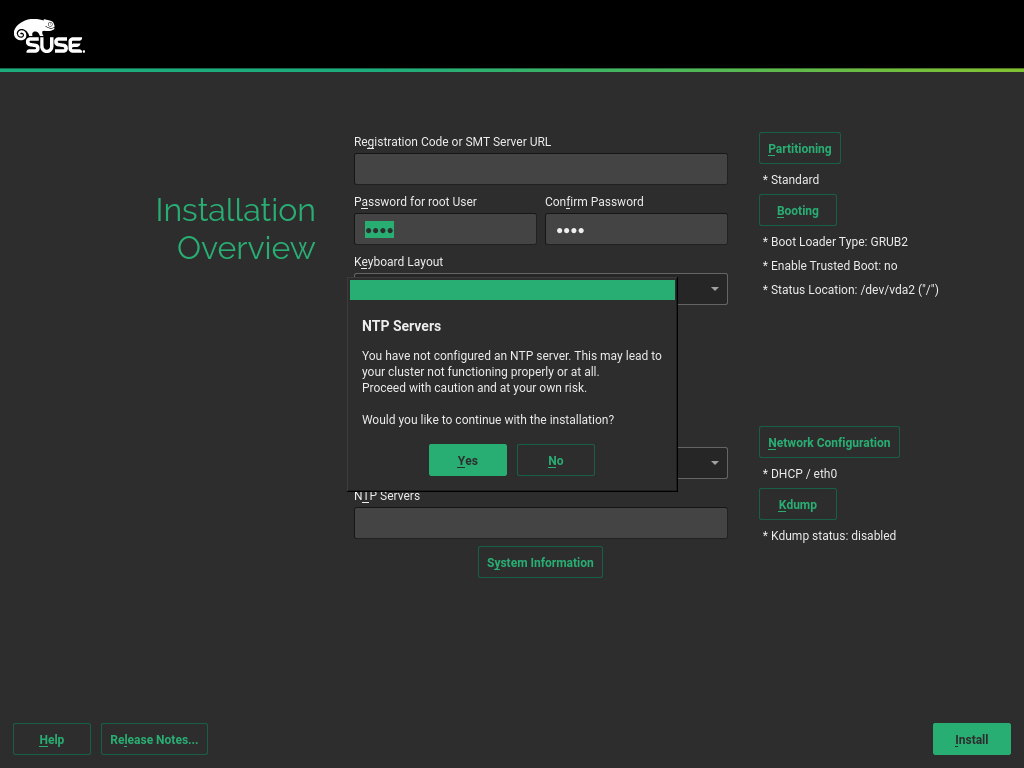
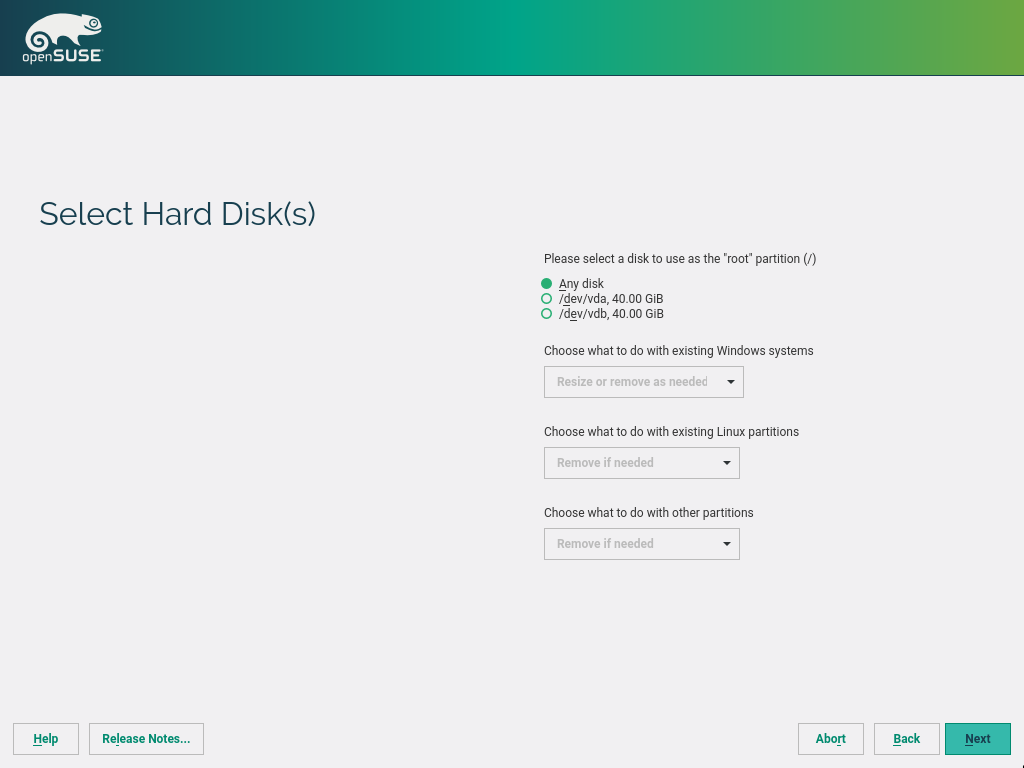
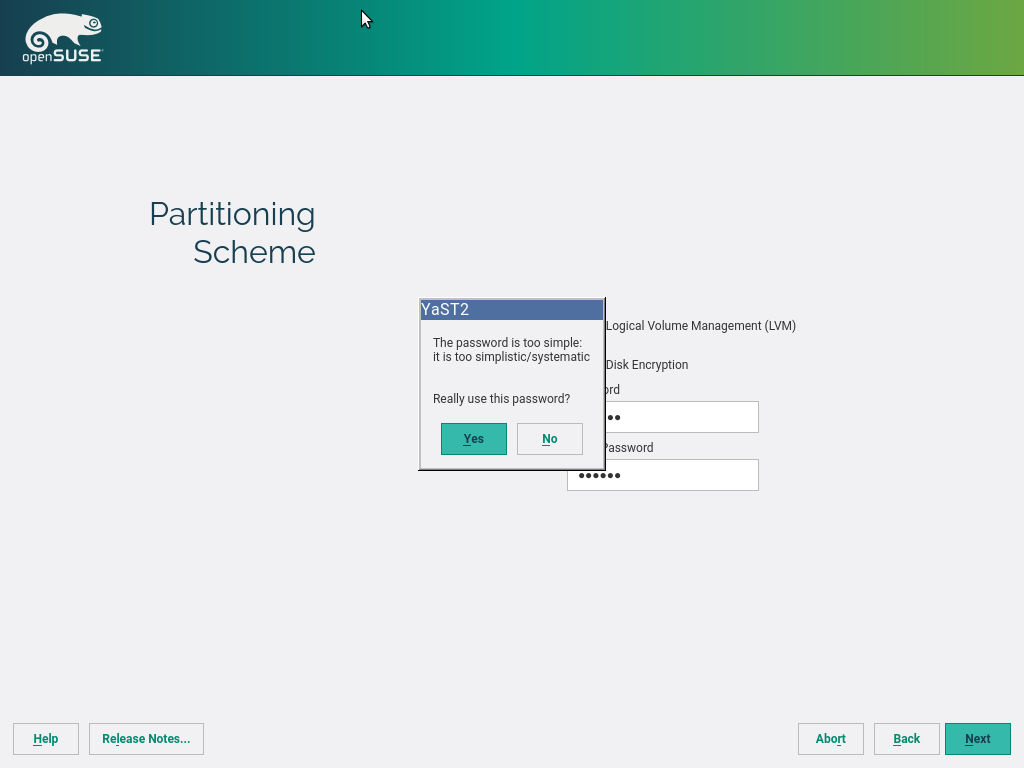
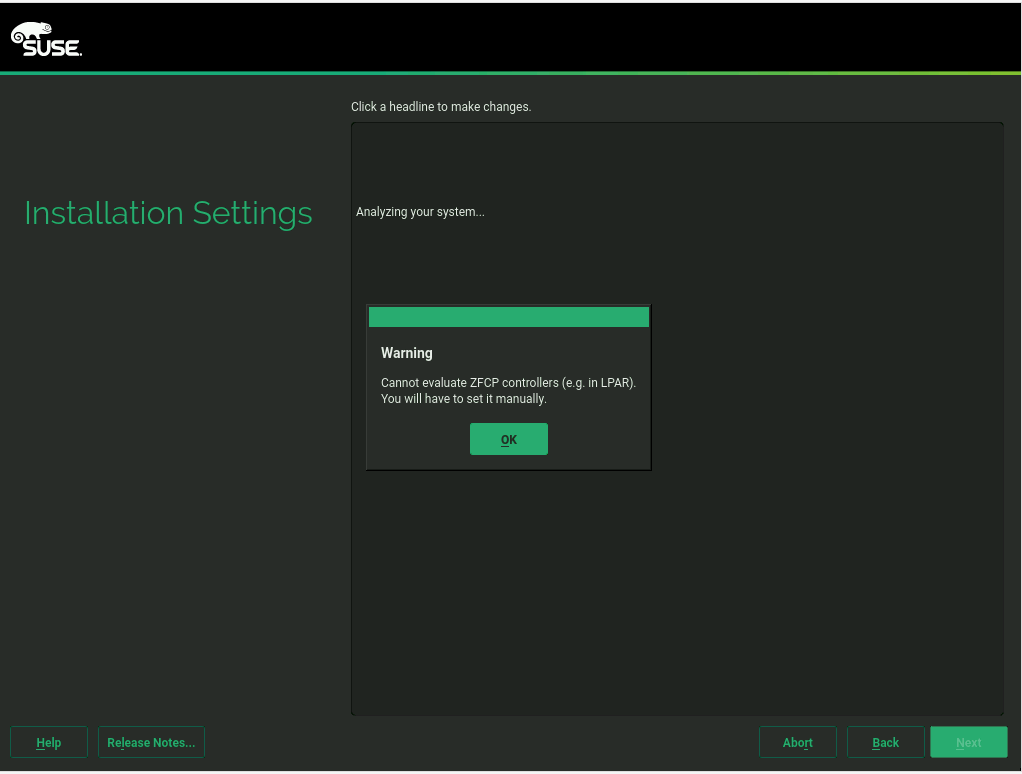
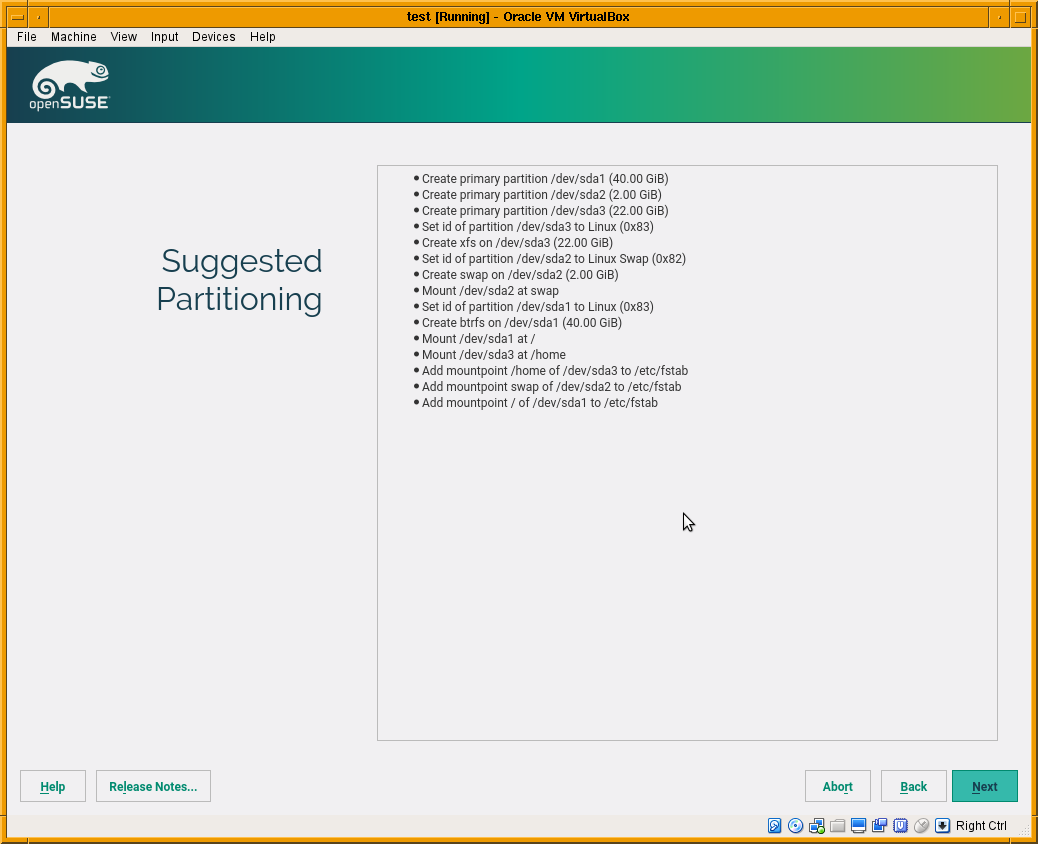
More important is that the installer will show the partitioning proposal calculated also using the new stack. As you can see in the screenshot below, the screen is way more simpler than the one you would find in a regular Tumbleweed. There are no buttons to change the settings or to run the expert partitioner yet. That doesn’t mean the functionality is not there, it’s simply that we prefer to focus first on modifying all the installer steps to use the new stack (what will enable us to use openQA) before refining every screen to add all options there.
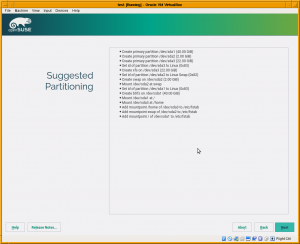
Right now the system works only in disks containing a MS-DOS style partition table and will always propose a partition-based (no LVM) setup. That’s because we prefer to solve the hardest scenarios first. Using LVM and/or GPT partition tables is less challenging than the already supported scenario.
Reduce global warming by saving OBS build power
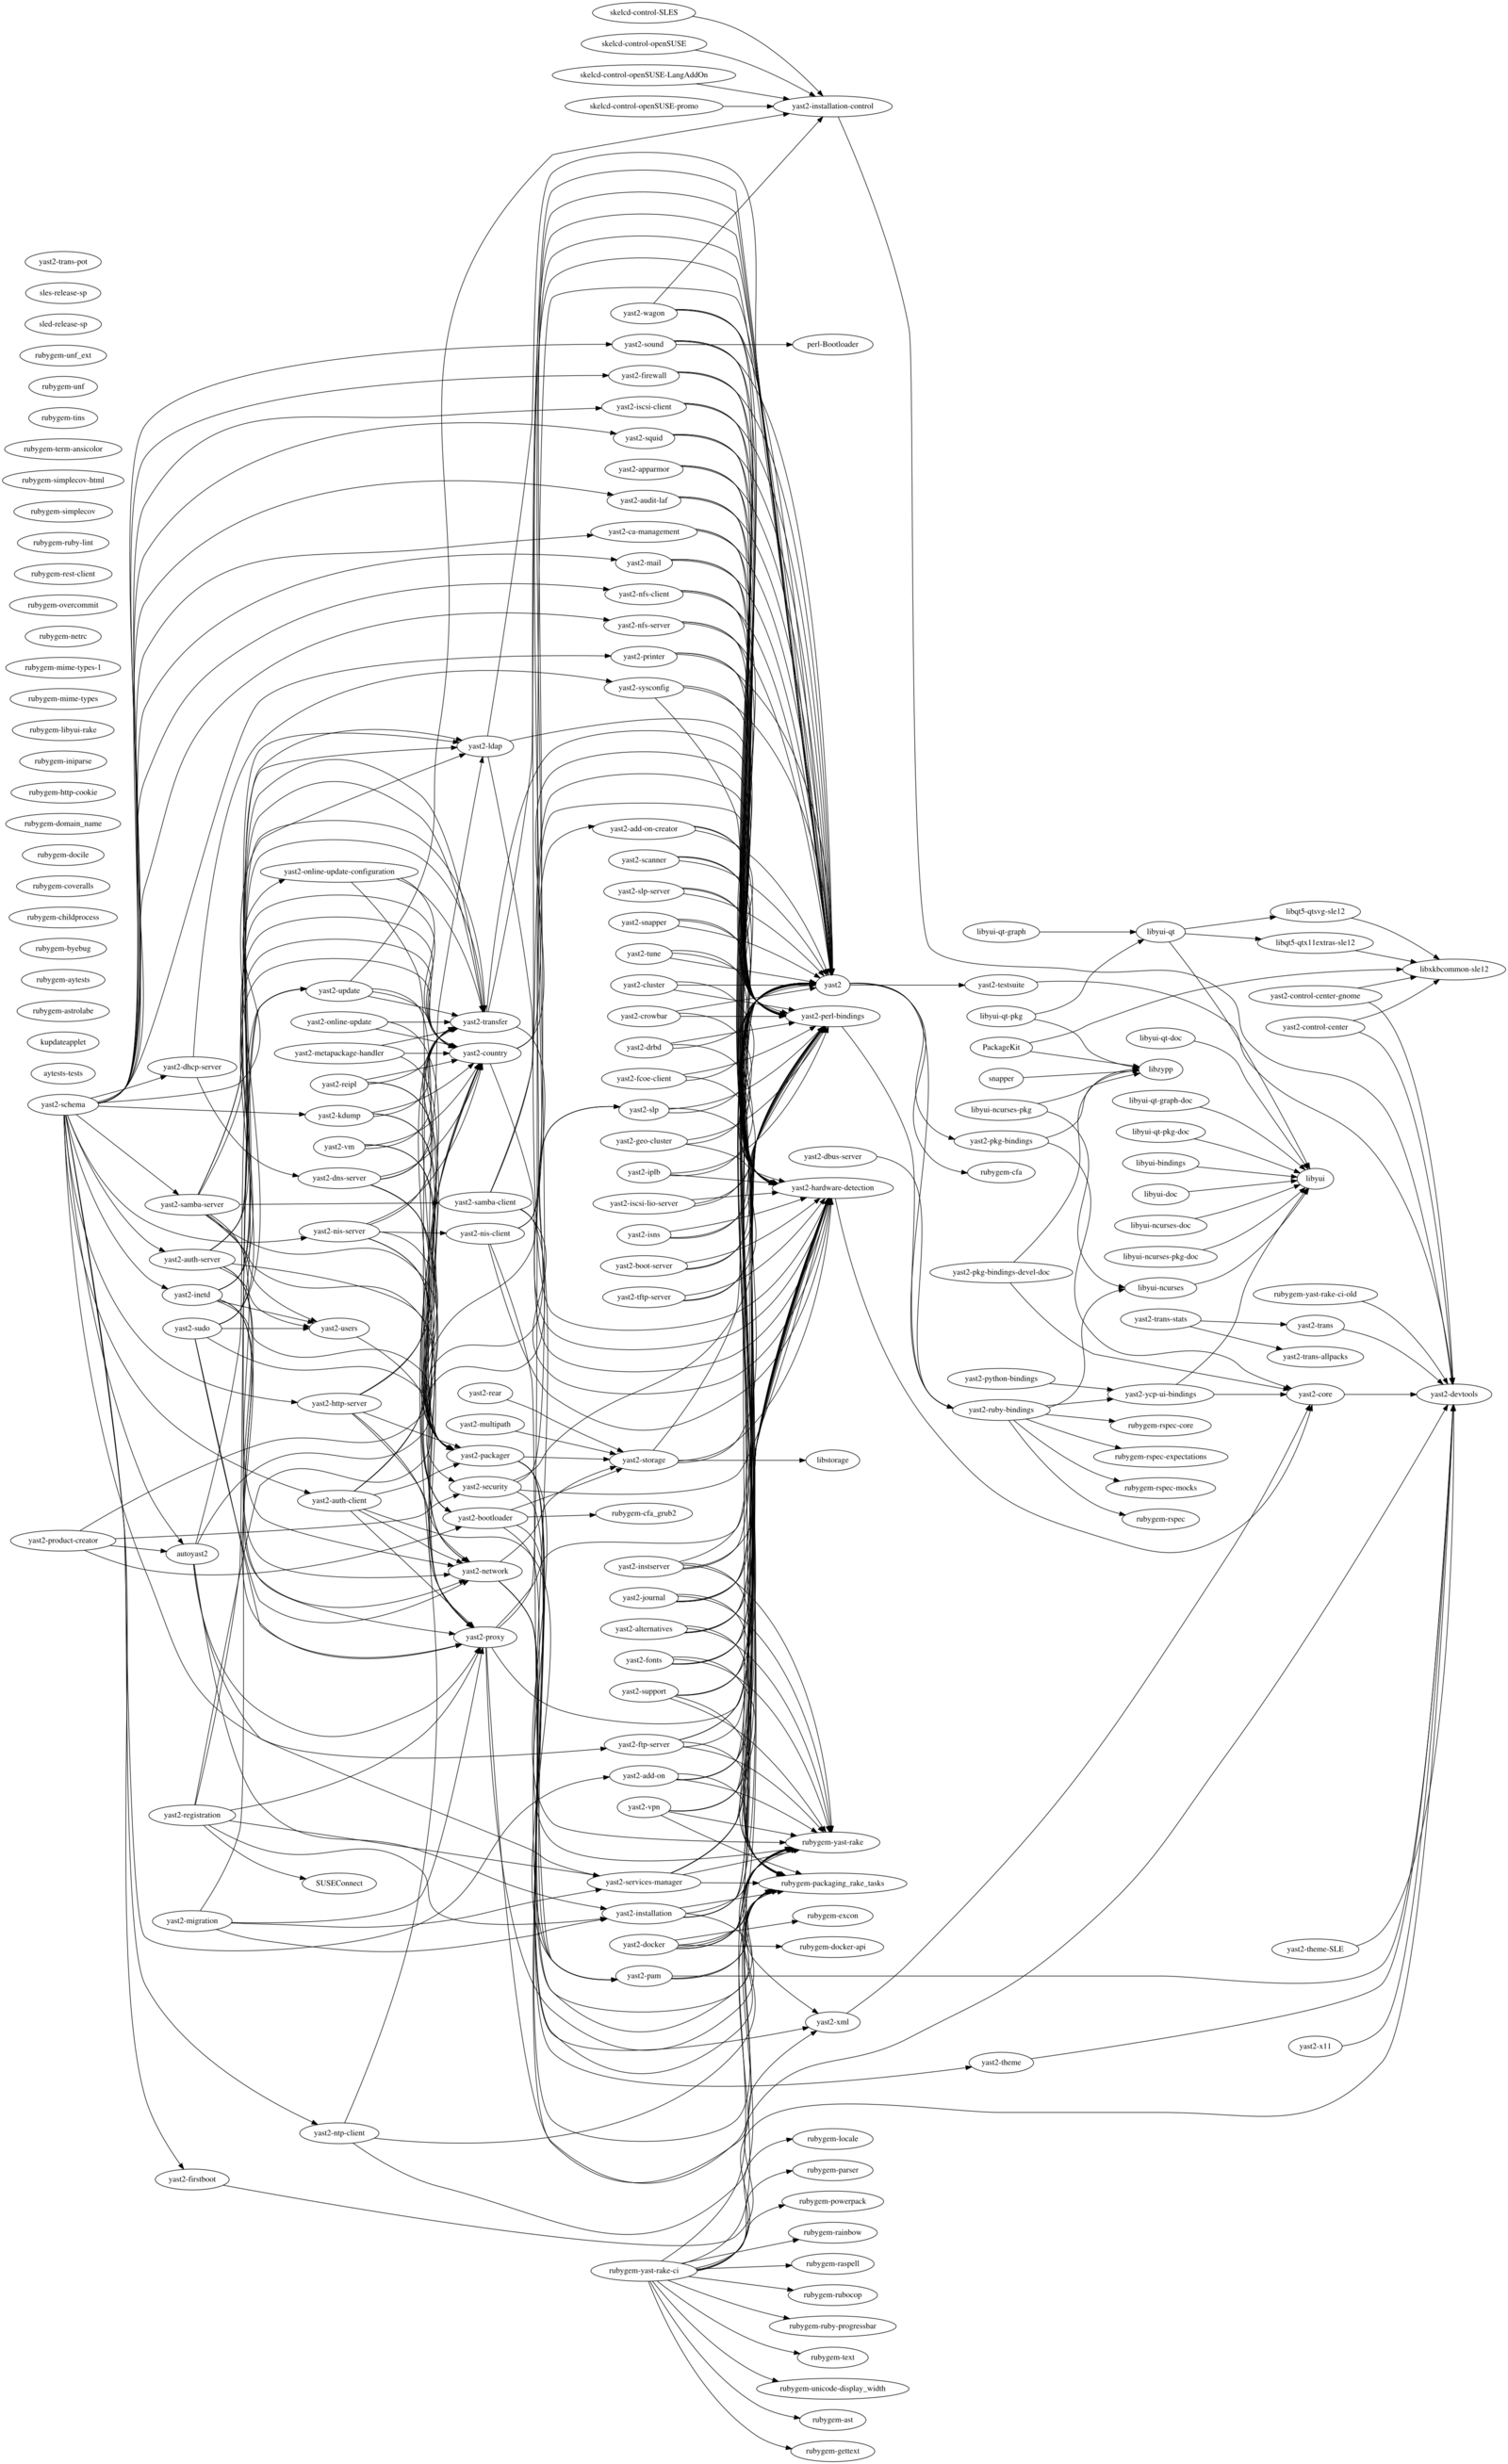
As you may know, we use the awesome Open Build Service (OBS) to generate both the YaST rpm packages and the openSUSE/SLE ISO images. Every time the source code of any component changes, OBS rebuilds that component and all the packages that depend on it.
Our beloved openSUSE and SLE release managers told us that there were several YaST packages that often triggered rebuild of other YaST packages, that triggered yet another rebuild, that triggered… you got the idea. 😉
The mentioned problem slows down the creation of new ISO images, interferes with the continuous integration process (specially visible in Tumbleweed) and wastes valuable OBS resources.
During this sprint we reduced the rebuild time of YaST by 30%. That’s for sure interesting, but knowing the details about how we did it could be even more interesting for many readers. We feared the explanation could be too complex and technical to fit into this report… which gives us just another opportunity for blogging. So expect an upcoming post including interesting technical stuff and crazy graphs like this one.
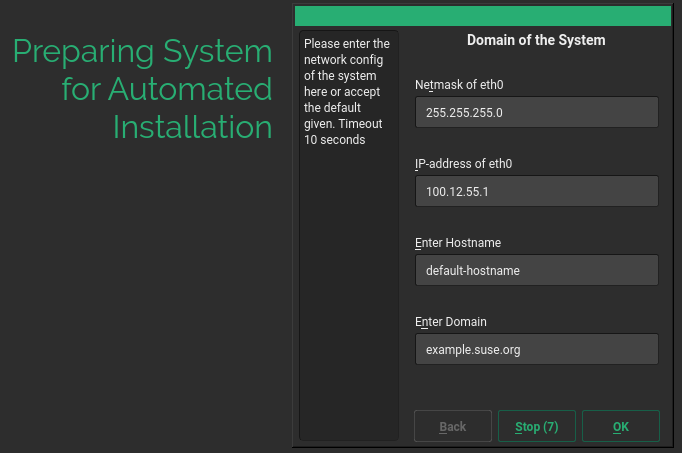
Some adjustment for the installer in the LiveCDs
One of the good things about working in open source is that sometimes the evolution of the projects you have created can surprise you. Quite some time ago, the YaST team dropped support for the live installer. It was simply too demanding to keep it alive while still doing our regular work (bug fixes and new features for YaST and the regular installer).
Recently the live installer was removed from Tumbleweed, the only system in which it was still available (after having been dropped in the past from stable openSUSE releases). One could have expected that somebody would decide then to step up and take the maintainership of the live installer.
But what actually happened was that Fabian Vogt decided to try a different approach we haven’t considered – adding the standard network installer to the LiveCDs images of Tumbleweed. He managed to make it work well enough and asked us for help to debug some problems. We fixed the initial problems by disabling the self-update functionality in the LiveCDs (it’s simply not designed to work on that scenario).
There are still quite some problems to be resolved to make everything work flawlessly, but if Fabian and others don’t give up, we will keep assisting them in order to bring the installation back to the LiveCDs… even in unexpected ways.
UI Designer
The YaST user interface is quite difficult to design and code. The main problem is that there is was no interactive UI designer where you could build a dialog or modify an existing one. Instead, you had to write new code or modify the existing code which creates and opens the dialog. Then, to see your changes you had to start the YaST module, go to the respective dialog and check its content. If it didn’t look like you intended, you had to close it, modify the code and start it again. And again… and again. Very annoying especially if the dialog is hidden deep in the module and you need to take several steps to get there.
During Hack Week 14, a project to improve the situation a bit was started. We already had a dialog spy which can be opened by Ctrl+Shift+Alt+Y keyboard shortcut, but that was read-only. You could only inspect the dialog tree and see the details of the selected widget but you could not change anything.
During that Hack Week project it was improved so it could edit the properties of the existing widgets, remove them or even add some new widgets. However the code was more or less a proof of concept than ready to be merged into the YaST UI and released to public. So we decided to finish it in this sprint.
As usual, it was harder than expected… but we made it and here is a short demo showing how it works and what you can do there:
The new tool is still far from being perfect. The most obvious missing feature is that the dialog is changed in place and you cannot save or export you changes. After closing the dialog everything is lost. But it can still help to try things in the UI or make a quick prototype, specially when discussing solutions with interface designers. Hopefully we find some more time in the future to make it even better.
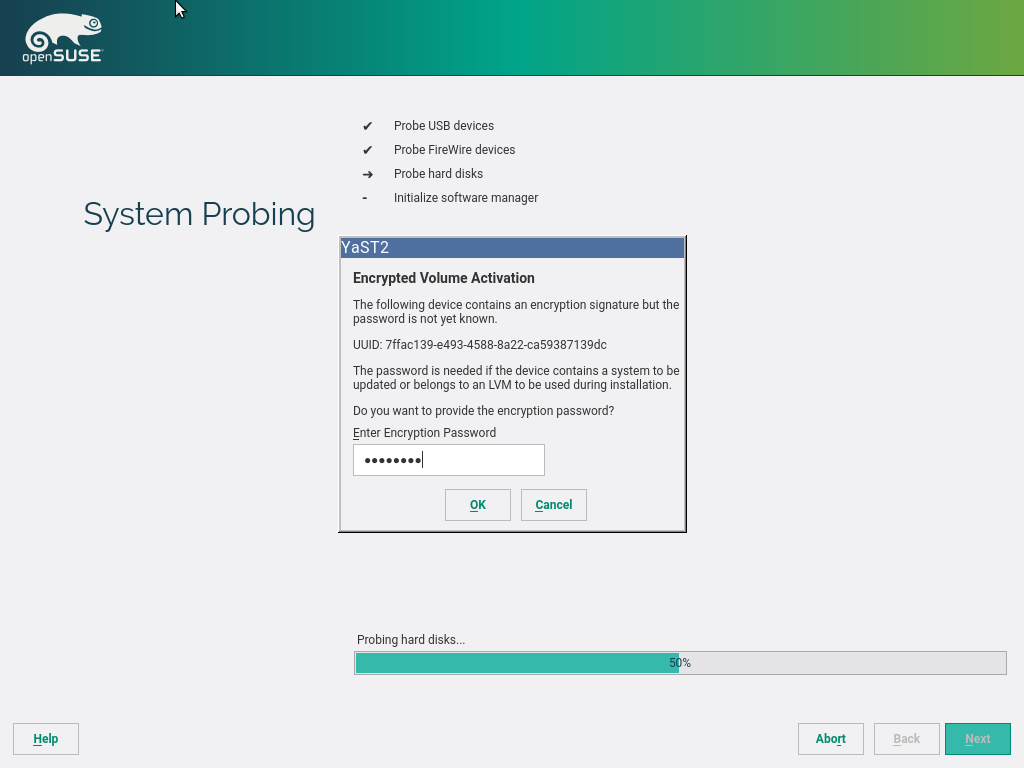
Storage reimplementation: encryption support
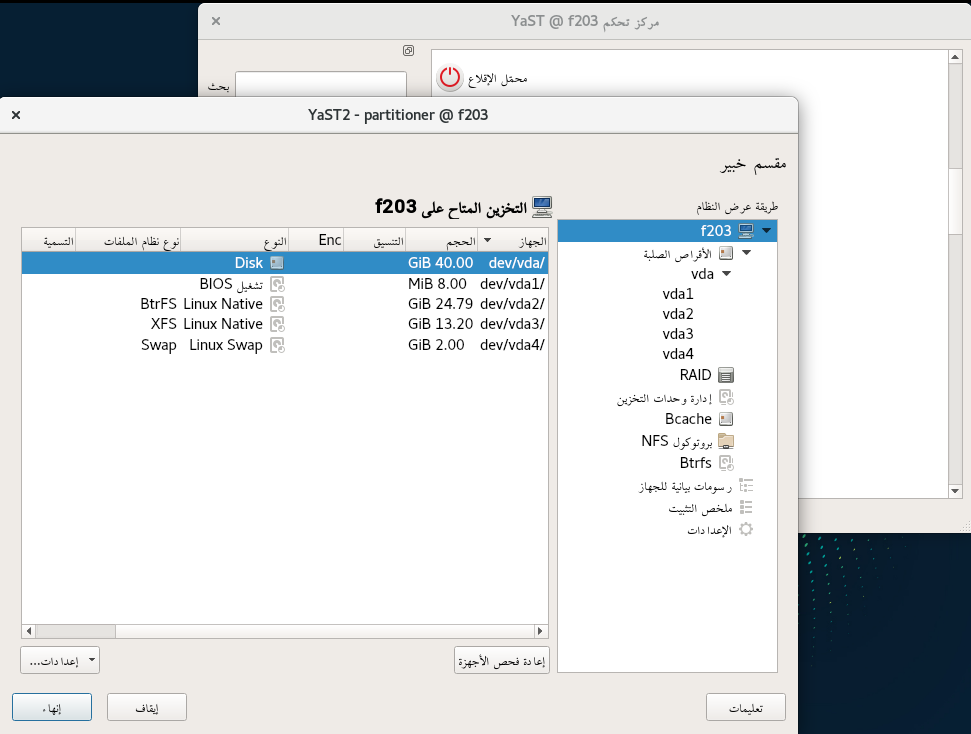
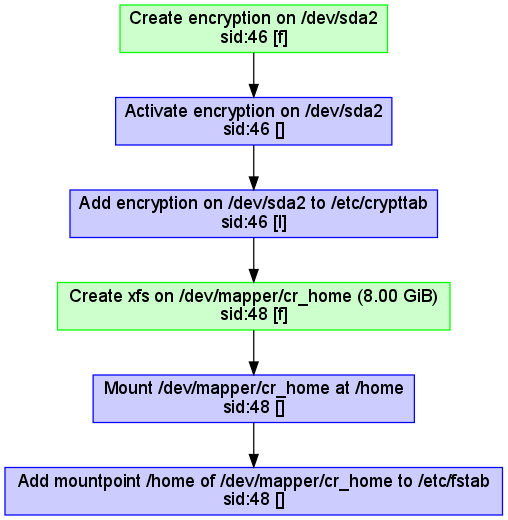
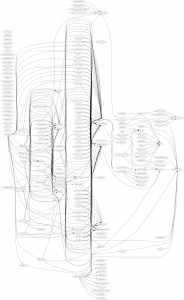
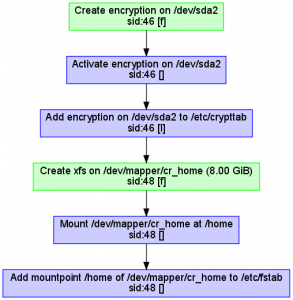
Although the partitioning proposal still does not support encryption or LVM, we implemented full LUKS (encryption) support in the underlying library (libstorage-ng). Together with the LVM support implemented in the previous sprint, that makes the new library already a valid replacement for the old libstorage in many situations and scenarios. Now it’s mainly a matter of switching from one version to another in every single YaST component, starting with the expert partitioner that we plan to start redesigning in the next sprint.
As usual, new features in the library are hard to illustrate, unless you accept the action diagrams as screenshots. In that case, here you can see the sequence of actions performed by the library when creating an encrypted home volume.
Syncing keyboard layouts and console fonts in Leap and Tumbleweed
In parallel to our Scrum sprints, we have been for some time steady working, together with the openSUSE maintainers of X.Org and systemd, in redesigning how keyboard maps and console fonts are managed by YaST. Some changes were introduced in Tumbleweed some time ago but never made it to SLE (or Leap) because they needed more testing.
Recently Ludwig Nussel, the Leap’s release manager, decided that he wanted to sync 42.2 with Tumbleweed in that regard, using the new approach instead of the more conservative SLE one. Thus, we also invested quite some time coordinating again with Stefan Dirsch (X.Org) and Franck Bui (systemd) to push the changes just in time for the beta2 version of Leap 42.2… just in time to introduce bug#1000565, that was honored with its inclusion in the list of most annoying bugs in 42.2 Beta2.
The bright side is that a fix for the bug has already been provided (see bug report) and you can now finally test the new fonts and keyboard maps. Please, do so and provide feedback in order to get a properly localized Leap 42.2 release.
See you soon
As usual, this post was just a quick overview of the most interesting part of the sprint, because most people (including ourselves) don’t want to read about the boring part of the work, which is mainly fixing bugs.
The good news is that this time you will not have to wait another three weeks to read interesting stuff about YaST. As mentioned, we plan to publish a blog post about the reduction of the build time of YaST. And we will probably also publish a post about the visit of a YaST geecko to Euruko 2016.
So this time more than ever… stay tuned!