Home Home > 2020
Sign up | Login

Deprecation notice: openSUSE Lizards user blog platform is deprecated, and will remain read only for the time being. Learn more...

Archive for 2020

Highlights of YaST Development Sprint 94

March 6th, 2020 by

After some time of silent work (our previous blog post was published a month ago), the YaST Team is back with some news about the latest development sprint and some Hack Week experiments. Those news include:

  • Enabling YaST on the Windows Subsystem for Linux
  • Usability improvements for the Online Search, the Partitioner and the Kdump module
  • Better control of overridden sysctl configuration values
  • Improvements in the default selections of the upcoming SLE 15 SP2 installer
  • New features for zSeries mainframes like Secure Boot and I/O devices auto-configuration
  • And, as a bonus, a couple of Hack Week projects related to YaST, Ruby and Crystal

So, as you can see, we have a little bit of everything in the menu, from WSL to mainframes, from new features to small usability improvements, from installation to system fine-tuning… So let’s dive into the details!

Improved compatibility with WSL

Have you ever heard about WSL, the Windows Subsystem for Linux? To be honest, before this sprint we haven’t payed much attention to it either. But as both openSUSE Leap and SUSE Linux Enterprise (SLE) are available to Windows users via WSL images and the 15.2 releases of both distributions are approaching, we decided it was time to dive into WSL to research how it works and how can YaST be useful there.

Setting up an (open)SUSE test system inside a WSL environment was a piece of cake thanks to the excellent documentation at the openSUSE Wiki.

Many components of YaST are useless in WSL because not everything can actually be configured from the Linux system itself and because systemd is not available (we are talking exclusively about WSL1 here). But YaST is still very useful for the initial setup of the system when running the (open)SUSE image for the first time. It can be used to setup the first user, to confirm the license and, in the SLE case, also to register the system. The YaST modules for software management can also be very handy to customize the image at any point after that initial setup.

So far, we have done three changes to improve the experience of executing YaST within WSL.

  • We increased the speed of the initial boot by removing calls to systemd when it is not available.
  • We fixed the registration process for YaST Firstboot.
  • We implemented a feature to explicitly mark YaST modules that work in WSL and show only those modules in the YaST control center.

We also documented all our findings about WSL in this document.

As always, we are hungry for feedback. Please reach out to us and tell us what’s your experience using YaST inside WSL and which modules do you miss the most.

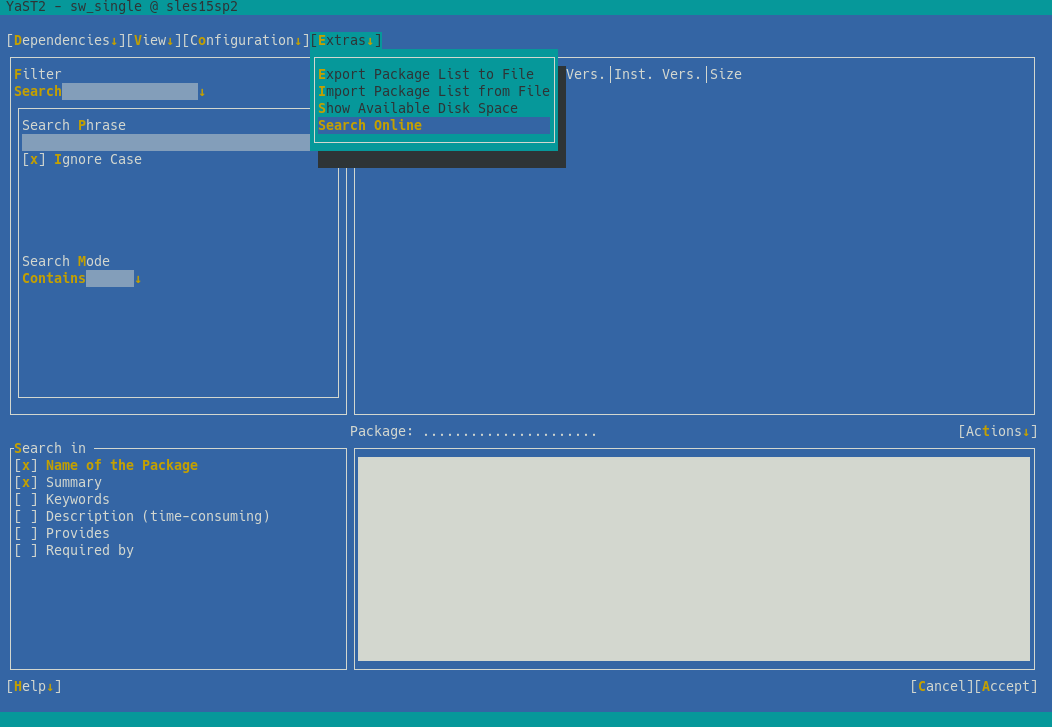
As we announced one month ago, YaST will offer a mechanism to search for packages through all SUSE Linux Enterprise modules, even if they are not registered. This feature, known as package online search, was already available using zypper’s search-packages command or through the SCC web interface.

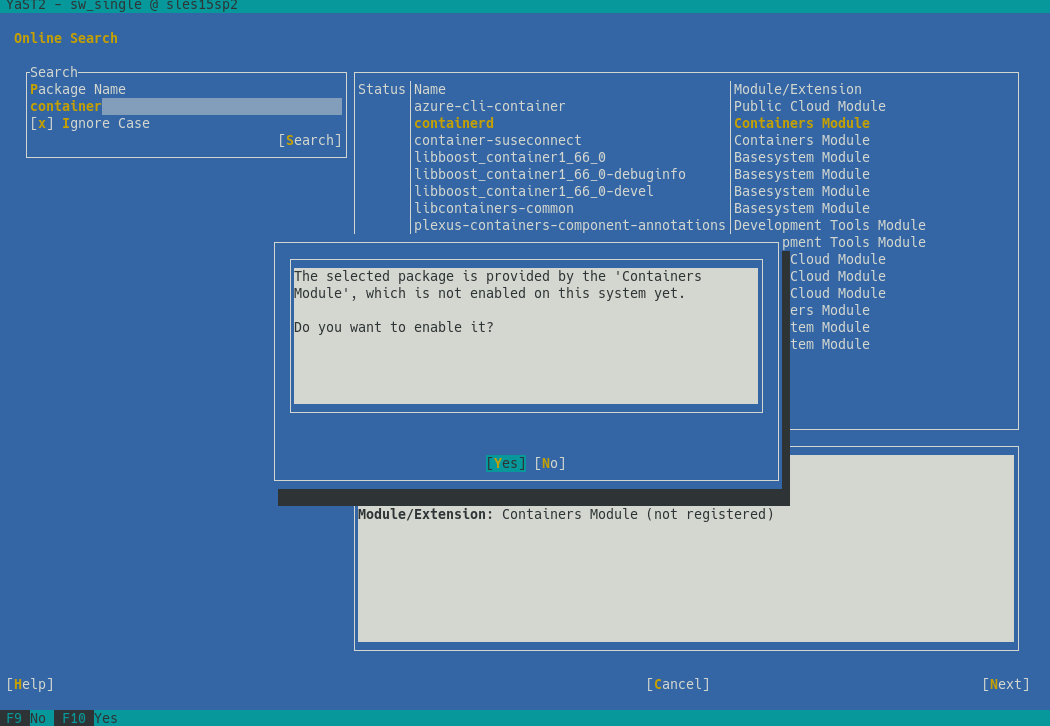
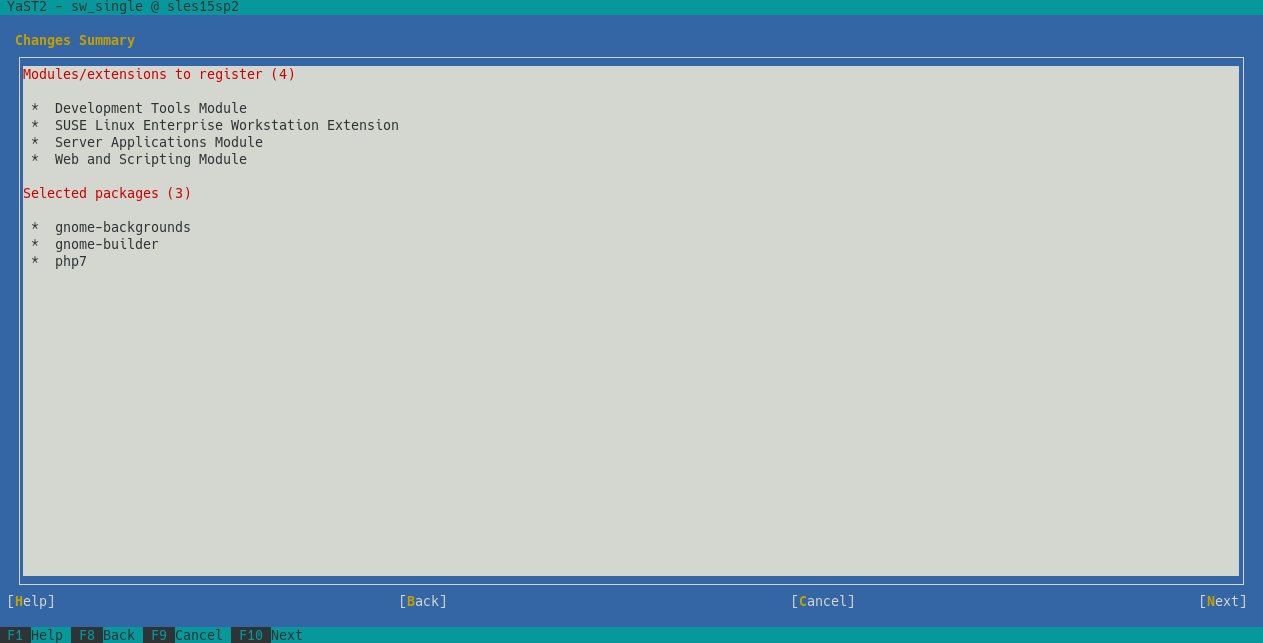
After gathering some feedback during the sprint review meeting, we decided to invest some time improving the overall UX experience. Perhaps the most relevant change is the new summary screen, which shows the list of modules to activate and packages to install.

New summary screen for the online search

Additionally, we improved error handling and, by the way, we fixed the case sensitive filter.

…And the Partitioner as Well

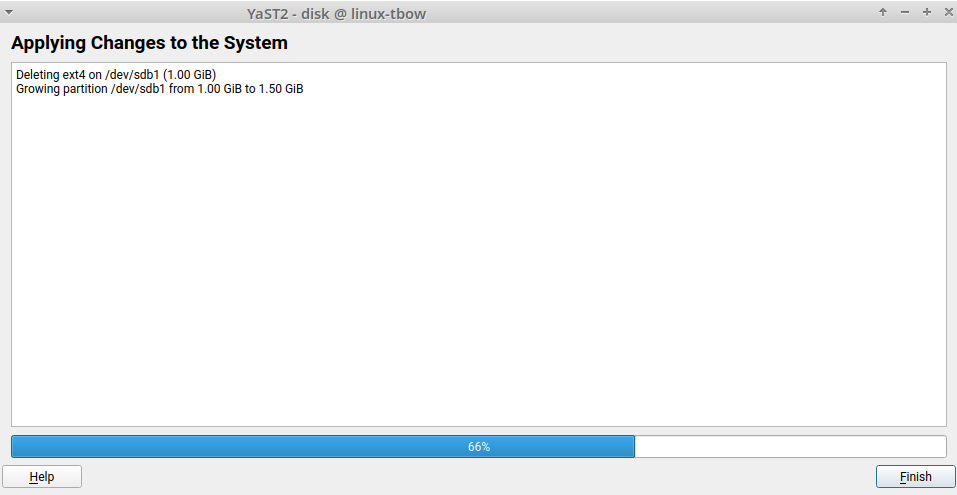
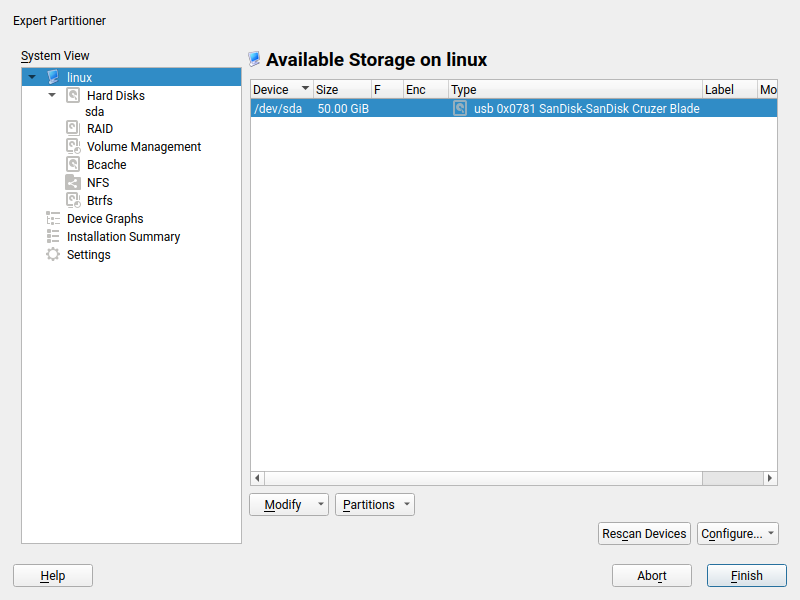
The online search is not the only part of YaST that has received some love in the UX area. We also tried to improve a bit the usability of the Partitioner. In this occasion, based on the feedback coming from our users via openSUSE’s Bugzilla.

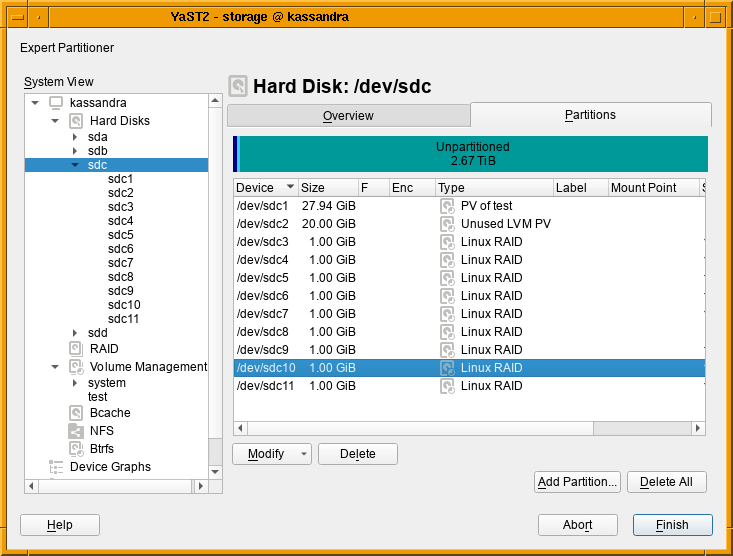
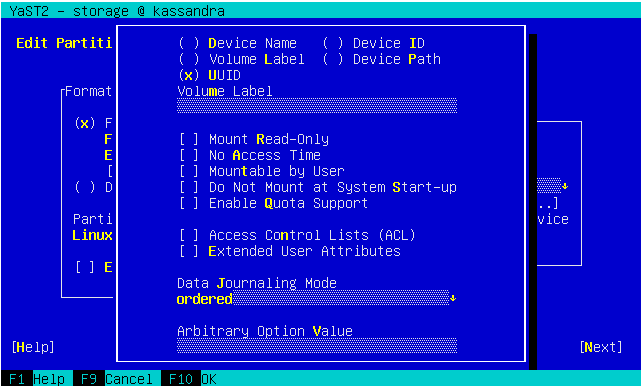
On one hand, we got a report about this dialog been too long to properly fit in low screen resolutions.

Previous dialog for mount options

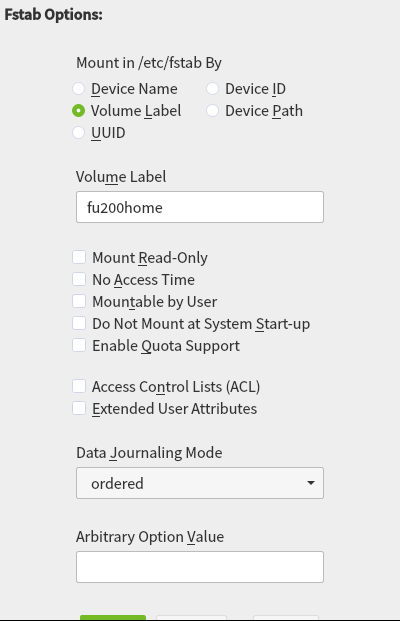
The result was even worse in a text console with a resolution of 80 columns and 24 lines, which is the minimum size we design all YaST screens to work on.

Previous text-based dialog for mount options

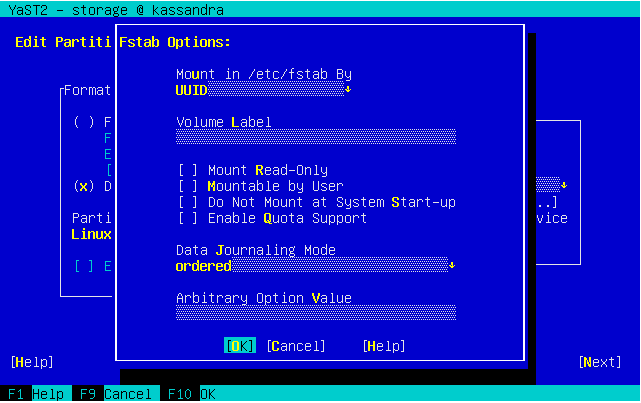
So we dropped some obsolete options and made others more compact. Now the dialog fits in 24 lines again.

Revamped text-based dialog for mount options

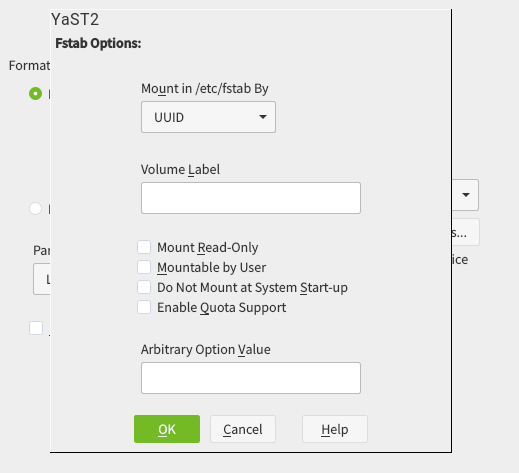
And, as you can see below, it looks also nicer (or at least less overwhelming) in graphical mode as well. It’s worth mentioning we also took the opportunity to fix other related dialogs that had similar problems.

Revamped dialog for mount options

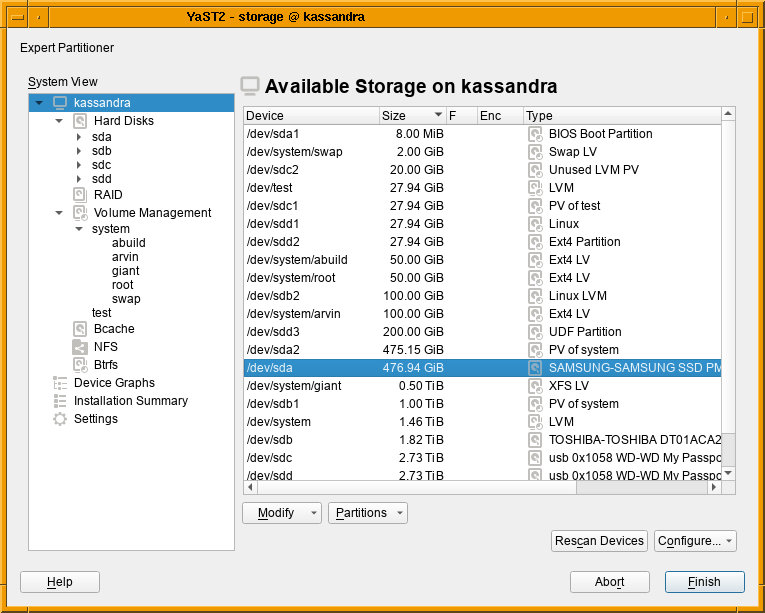
On the other hand, we also got a report about how inconvenient was to always jump to the first tab when a device was selected in the devices tree at the left of the Partitioner, forcing the user to click in the “Partitions” tab (or any other desired one) over and over.

In that regard and as you may remember, a couple of sprints ago we made the overview screen actionable, avoiding the navigation to the device page just to perform a simple action over it. But navigating through the different devices back and forth is still possible and useful. Now such navigation has been improved by remembering the last tab and row selected per section or device whenever possible, which will save you a bunch of clicks when working with multiple devices.

Related to this, we started a public discussion about what should be the default tab the first time a device is visited. Once again, we are looking for opinions. So we would be grateful if you read the thread and contribute to the discussion.

Showing Suggested Values for Kdump Configuration

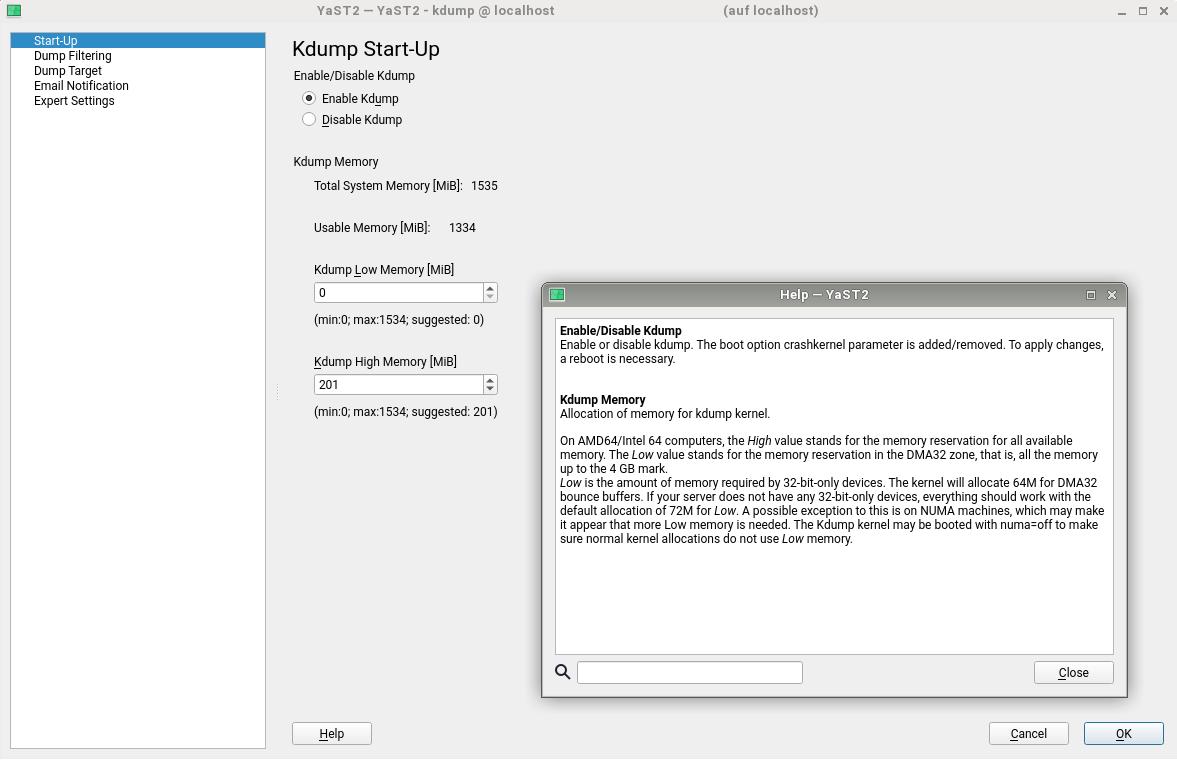
But the Partitioner was not the only YaST module for which our users pointed usability problems via Bugzilla. After some changes in how Kdump works after the migration from openSUSE Leap 42.3 to 15.0, it turned out that using YaST to re-adjust the values was not as helpful as it should be. YaST Kdump displayed the current size of the memory reservations, as well as the min and max margins. But it did not show the recommended default values for the current system, so if the user has adjusted the limits in the past it was impossible to get an up-to-date proposal from YaST calculated for the current system.

We have adapted the dialog to show those suggested values. As you can see below, we also took the opportunity to extend the help text to explain the meaning of the different values.

New Kdump configuration screen

Better Control of Overridden Kernel Parameter Values

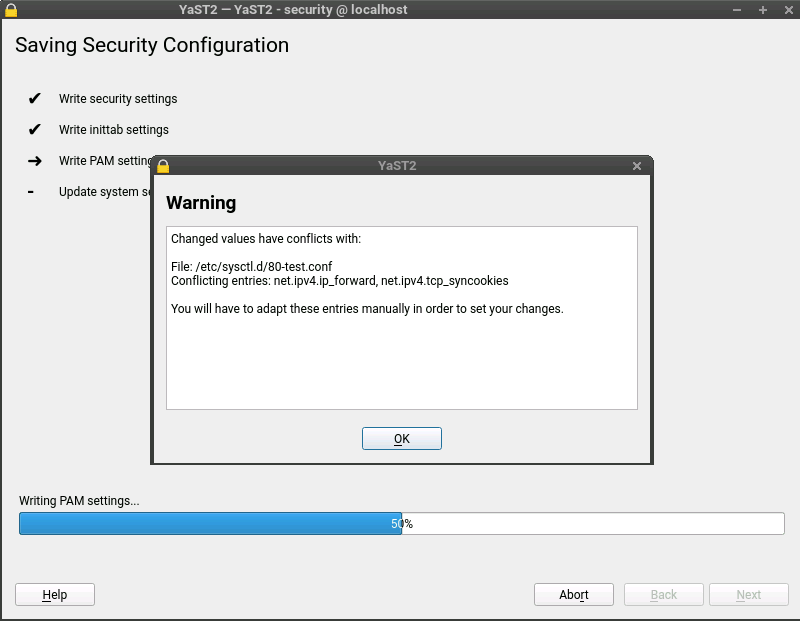
And talking about YaST pieces we are improving step by step, you may remember from our report of sprint 86 that we are adapting YaST to deal with the new structure of the sysctl configuration.

Up to now YaST has stored sysctl values mainly in /etc/sysctl.conf and /etc/sysctl.d/70-yast.conf. But this reflects only a part of the possibilities for storing those values. The truth is that there are many more locations where these settings can be stored: /run/sysctl.d, /etc/sysctl.d, /usr/local/lib/sysctl.d, /usr/lib/sysctl.d, /lib/sysctl.d, /etc/sysctl.conf

Now YaST also takes care of these locations and informs the user if there are some conflicting values, as you can see in the following screenshot.

YaST alerting about conflicts in sysctl

The Default Pre-selected SLE Modules

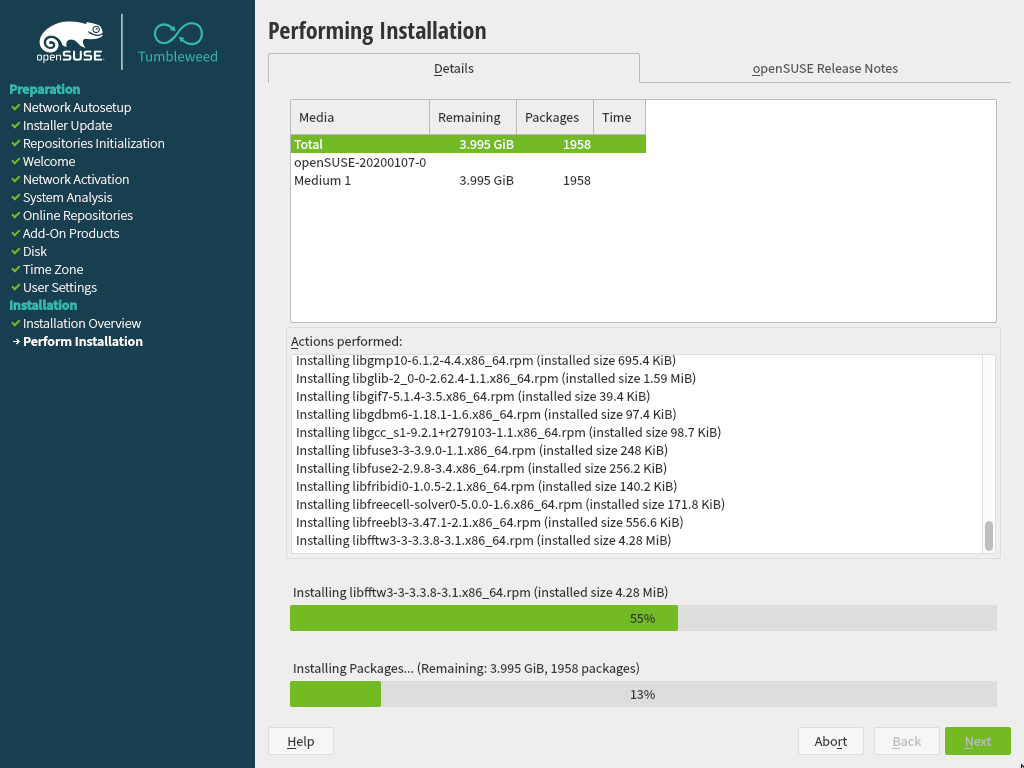
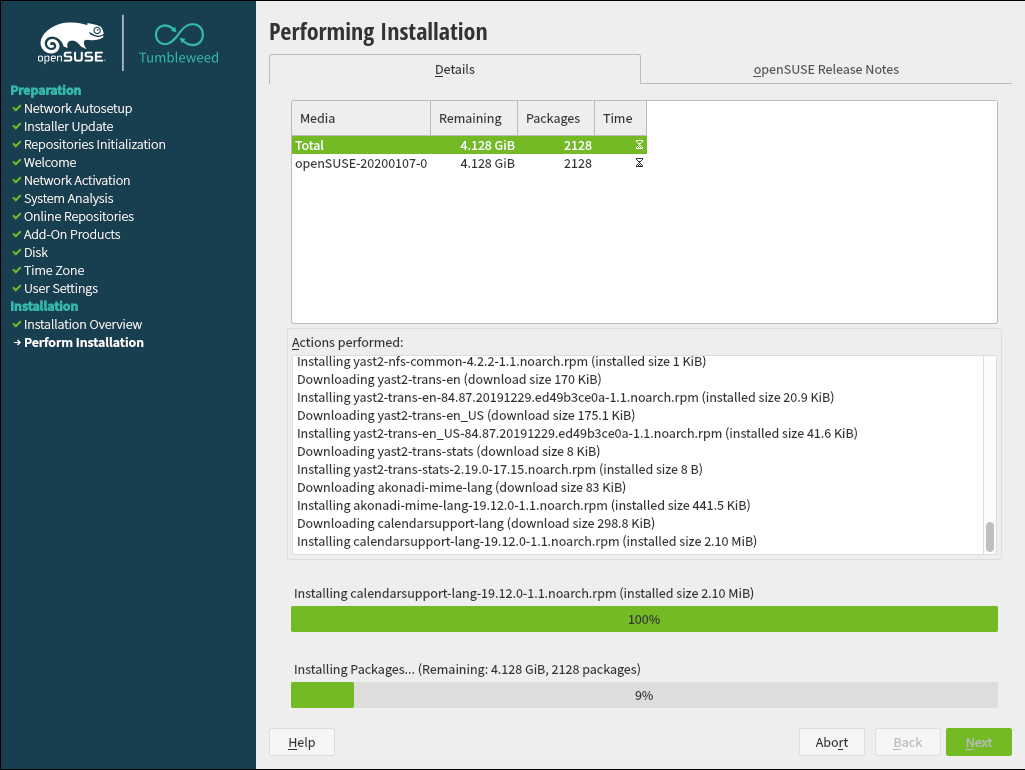
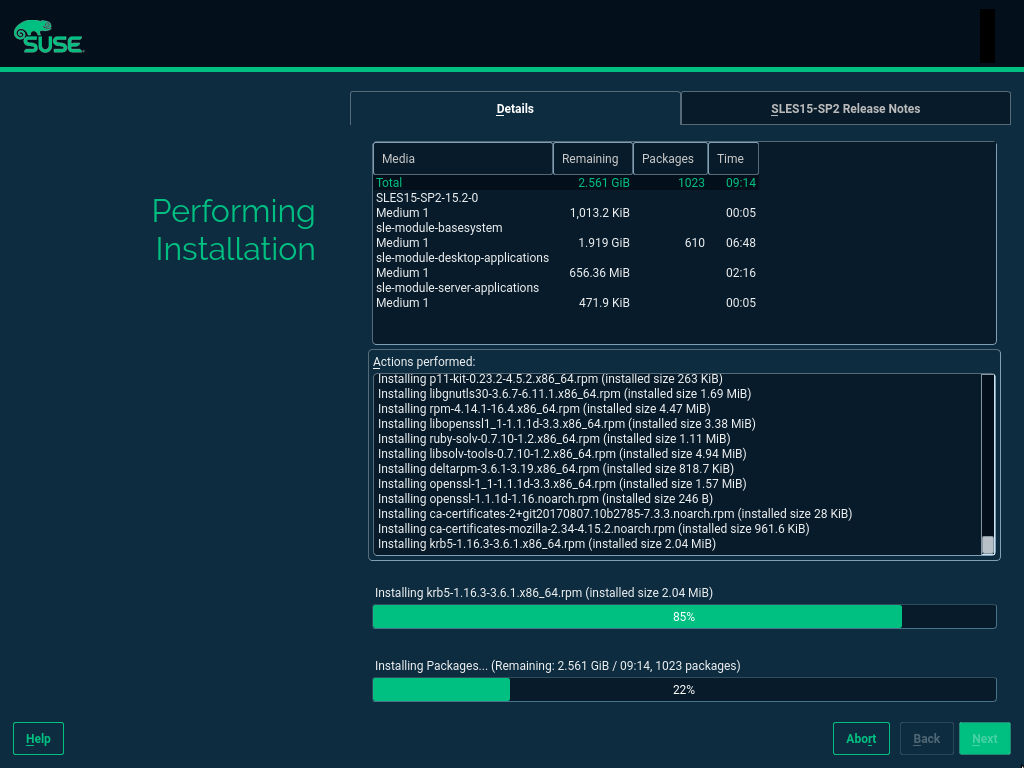
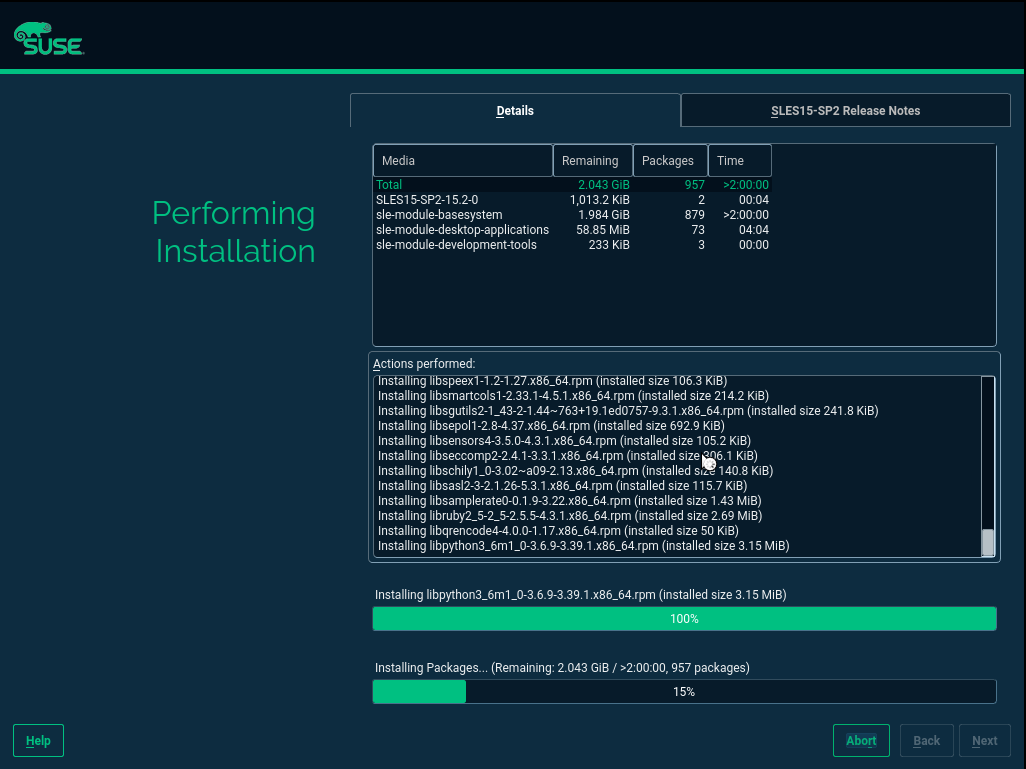
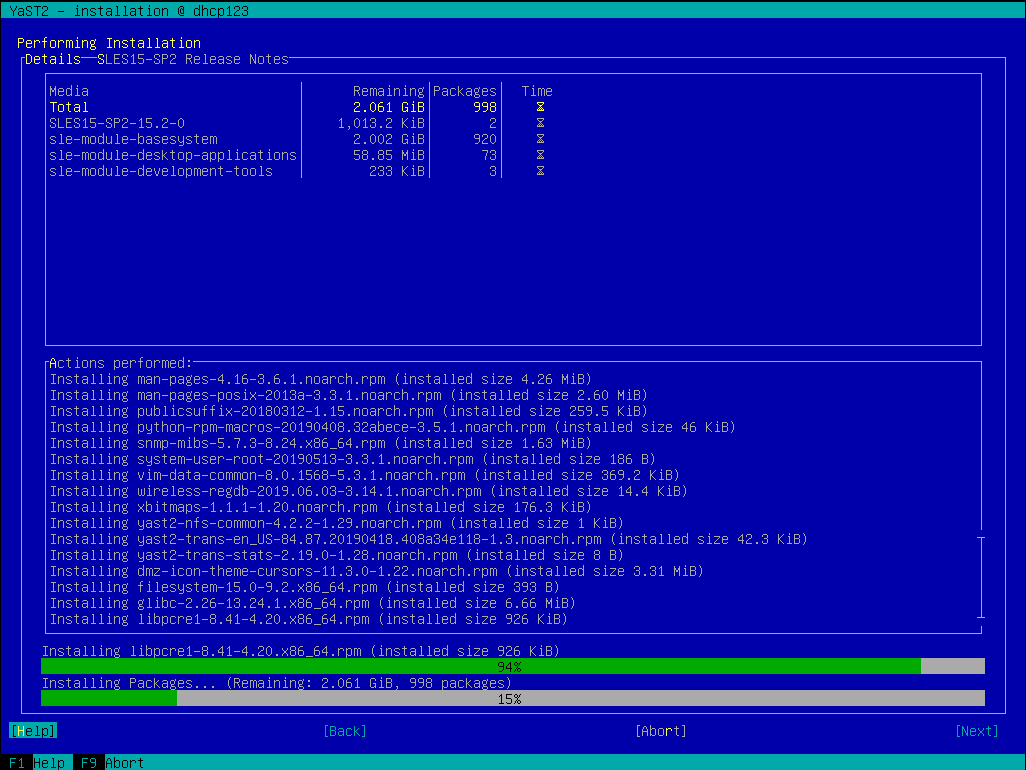
We have also invested some time smoothing some rough edges off the installation process for the upcoming openSUSE 15.2 and SLE 15 SP2. For example, if you register your SLE 15 product during installation you will see the available modules and extensions in the following dialog. Some of them are by default pre-selected because they either contain the base system components (kernel, glibc,…) or the product specific packages (e.g. GNOME for SLE Desktop).

Modules selection during SLE installation

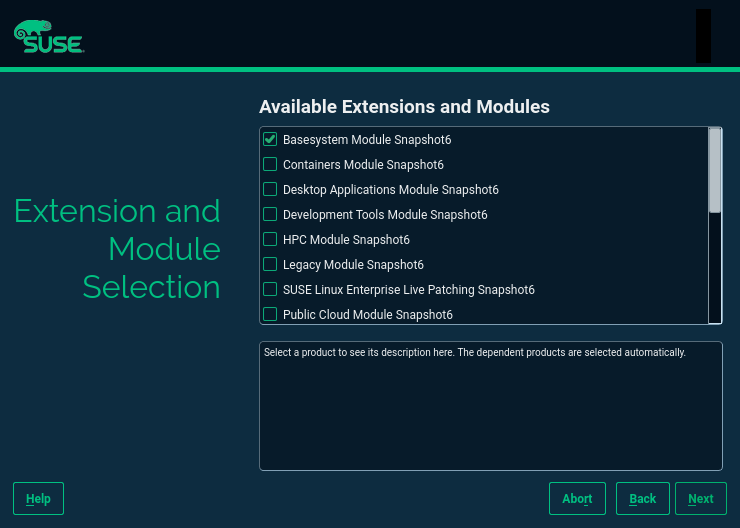
However, if you skip the registration and use the packages from the DVD medium there were no modules or extension pre-selected. The problem is that the information about the default modules was only available in the SCC data which obviously is not available in an offline installation.

In SLE 15 SP2 we added this extra information to the installer configuration files so now also in an offline installation YaST can preselect the default modules for each product.

Proposing NTP Servers During Installation

And talking about offering sensible defaults for installation, we also improved the situation regarding the configuration of the NTP server. For openSUSE based systems (including Kubic) and a few SUSE products, like CaaSP or SLE High Performance Computing, YaST sets up the NTP daemon during installation. YaST tries to determine which server to use through the DHCP information but, when it is not available, it will propose one from openSUSE and SUSE pools (e.g., n.opensuse.pool.ntp.org where n is a number between 0 and 3).

However, we still were using the novell.pool.ntp.org pool for SUSE based products. During this sprint, we have switched to the suse.pool.ntp.org pool of servers and, additionally, we have refactored some code in order to reduce duplication and improve testability.

Secure Boot Support for IBM zSeries

You may have noticed by the recent sprint reports that we are improving several aspects related to the installation and configuration of zSeries mainframes. This sprint was not an exception… and will certainly not be the last one in that regard.

As a result of that effort, YaST now supports the Secure Boot feature found on the latest zSeries machines. It’s rather similar to the existing UEFI Secure Boot so we took the opportunity to unify the Secure Boot handling found on different architectures.

This means you get this checkbox if your zSeries machine does have Secure Boot support.

Configuring Secure Boot in zSeries

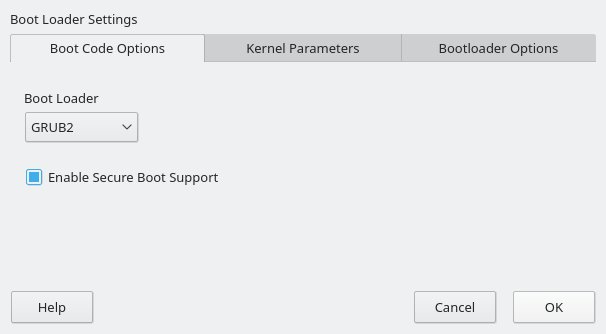
In addition, we added a shortcut link on the installation summary screen that lets you enable Secure Boot with just a click.

Secure Boot in the proposal screen

As mentioned, we took the opportunity to unify the management of Secure Boot in all platforms, so this new shortcut link is also available in x86_64 or aarch64 machines that have UEFI Secure Boot.

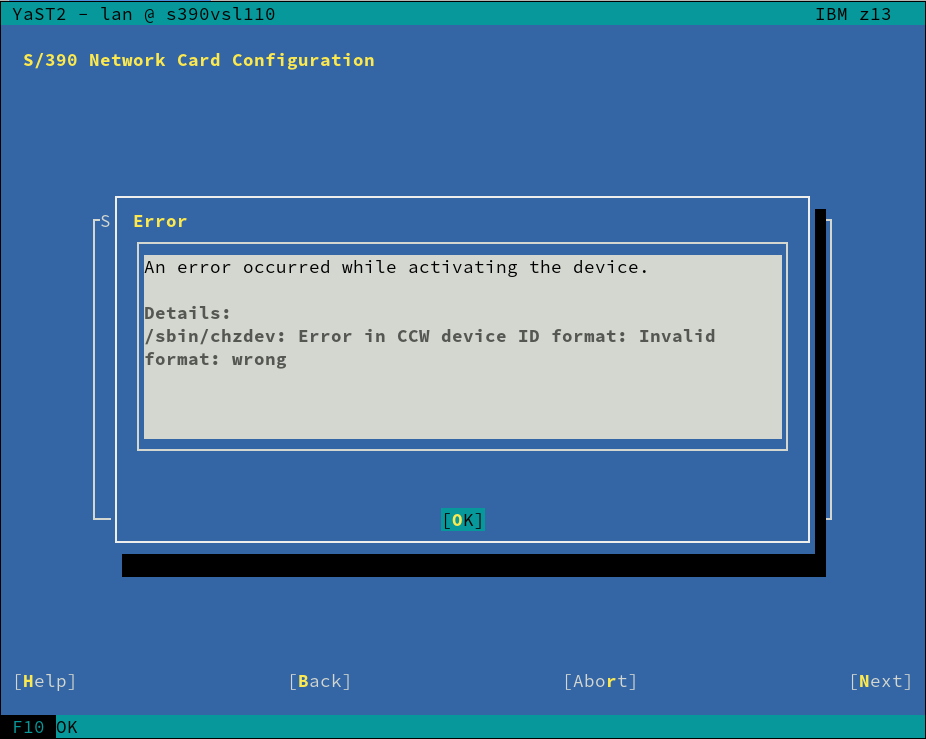
Automatic Configuration of I/O Devices in zSeries

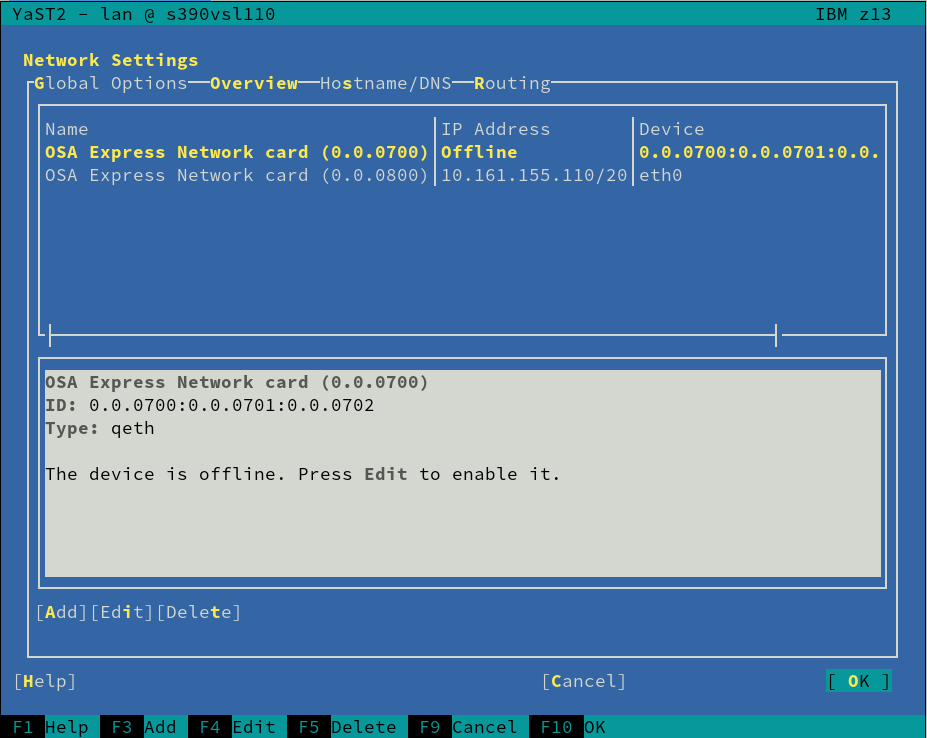
And talking about zSeries mainframes, anyone having used Linux in one of those systems know that input/output devices, like disks or network cards, must be configured and activated before they can be detected and used normally by the operating system.

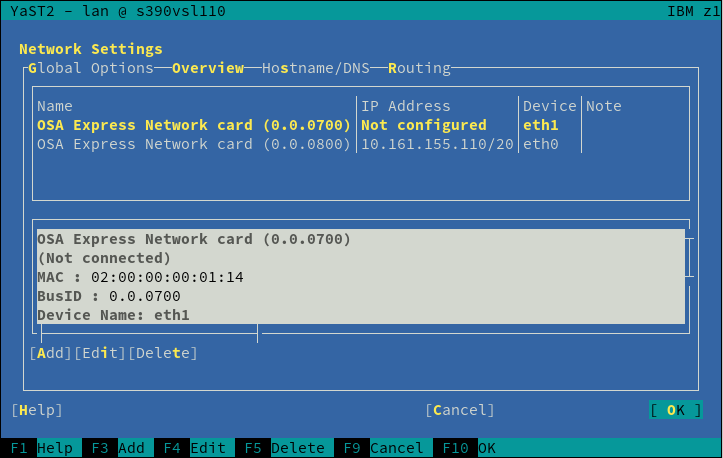
But thanks to the new I/O device auto-configuration mechanism, users can now specify IDs and settings of I/O devices that should be automatically enabled in Linux. We modified the installer to detect such configuration and trigger the corresponding configuration actions, removing the need of manually activating disks and network devices during the installation process.

This is still an experimental feature and we are waiting for feedback to make sure the current implementation works in all the desired scenarios. If everything goes as expected, the feature will debut in SLE 15 SP2.

Hack Week

As said at the beginning of the post, the main reason for spending almost a month without publishing any report was that the whole YaST Team at SUSE was diving into completely different topics due to Hack Week 19, which theme was “Simplify, Modernize and Accelerate”.

There were not many projects related to YaST in this edition of Hack Week, but there are at least two that could be interesting for YaST fans and contributors. Fortunately, we have published reports for both of them in the yast-devel mailing list. So check out the results of “Learn Crystal by Porting Part of YaST to that Language” and “YaST Logs Analyzer“.

More to come

Now that we are back to our usual development pace, we should have more news about YaST development in a couple of weeks. The plan is to focus on fixing bugs for the upcoming releases of openSUSE Leap and SUSE Enterprise Linux, but we are pretty sure we will still find interesting bits of information for you.

Meanwhile, keep in touch through the usual channels and have a lot of fun!

Micro openSUSE Leap 15.1 for AWS

February 16th, 2020 by

I make the minimalist version of openSUSE available on AWS. In addition to multipurpose, complete stable and easy to use. It is intended for users, developers, administrators, and any professional who wants openSUSE resources on the server. It’s great for beginners, experienced users and ultra geeks, in short, it’s perfect for everyone! Suggestions at cabelo@opensuse.org, More information here: https://aws.amazon.com/marketplace/pp/B083XBP51G

micro-opensuse-15.1

Here are the main advantages:

Resources openSUSE Leap 15.1 Micro openSUSE 15.1
Disk space 1,5G 686M
Used memory 70M 55M
Packages 576 236

Disadvantage: It does not have YAST!

Highlights of YaST Development Sprint 93

February 7th, 2020 by

Lately, the YaST team has been quite busy fixing bugs and finishing some features for the upcoming (open)SUSE releases. Although we did quite some things, in this report we will have a closer look at just a few topics:

  • A feature to search for packages across all SLE modules has arrived to YaST.
  • Improved support for S390 systems in the network module.
  • YaST command-line interface now returns a proper exit-code.
  • Added progress feedback to the Expert Partitioner.
  • Partial support for Bitlocker and, as a lesson learned from that, a new warning about resizing empty partitions.

The Online Search Feature Comes to YaST

As you already know, starting in version 15, SUSE Linux follows a modular approach. Apart from the base products, the packages are spread through a set of different modules that the user can enable if needed (Basesystem module, Desktop Applications Module, Server Applications Module, Development Tools Module, you name it).

In this situation, you may want to install a package, but you do not know which module contains such a package. As YaST only knows the data of those packages included in your registered modules, you will have to do a manual search.

Fortunately, zypper introduced a new search-packages command some time ago that allows to find out where a given package is. And now it is time to bring this feature to YaST.

For technical reasons, this online search feature cannot be implemented within the package manager, so it is available via the Extra menu.

Search Online Menu Option

YaST offers a simple way to search for the package you want across all available modules and extensions, no matter whether they are registered or not. And, if you find the package you want, it will ask you about activating the needed module/extension right away so you can finally install the package.

Online Search: Enable Containers Module

If you want to see this feature in action, check out the demonstration video. Like any other new YaST feature, we are looking forward to your feedback.

Fixing and Improving Network Support for S390 Systems

We have mentioned a lot of times that we recently refactored the Network module, fixing some long-standing bugs and preparing the code for the future. However, as a result, we introduced a few new bugs too. One of those bugs was dropping, by accident, the network devices activation dialog for S390 systems. Thus, during this sprint, we re-introduced the dialog and, what is more, we did a few improvements as the old one was pretty tricky. Let’s have a look at them.

The first obvious change is that the overview shows only one line per each s390 group device, instead of using one row per each channel as the old did.

New YaST Network Overview for S390 Systems

Moreover, the overview will be updated after the activation, displaying the Linux device that corresponds to the just activated device.

YaST2 Network Overview After Activation

Last but not least, we have improved the error reporting too. Now, when the activation fails, YaST will give more details in order to help the user to solve the problem.

YaST2 Network Error Reporting in S390 Systems

Fixing the CLI

YaST command-line interface is a rather unknown feature, although it has been there since ever. Recently, we got some bug reports about its exit codes. We discovered that, due to a technical limitation of our internal API, it always returned a non-zero exit code on any command that was just reading values but not writing anything. Fortunately, we were able to fix the problem and, by the way, we improved the behavior in several situations where, although the exit code was non-zero, YaST did not give any feedback. Now that the CLI works again, it is maybe time to give it a try, especially if it is the first time you hear about it.

Adding Progress Feedback to the Partitioner

The Expert Partitioner is a very powerful tool. It allows you to perform very complex configurations in your storage devices. At every time you can check the changes you have been doing in your devices by using the Installation Summary option on the left bar. All those changes will not be applied on the system until you confirm them by clicking the Next button. But once you confirm the changes, the Expert Partitioner simply closes without giving feedback about the progress of the changes being performed.

Actually, this is a kind of regression after migrating YaST to its new Storage Stack (a.k.a. storage-ng). The old Partitioner had a final step which did inform the user about the progress of the changes. That dialog has been brought back, allowing you to be aware of what is happening once you decide to apply the configuration. This progress dialog will be available in SLE 15 SP2, openSUSE 15.2 and, of course, openSUSE Tumbleweed.

YaST Partitioner Progress Feedback

Recognizing Bitlocker Partitions

Bitlocker is a filesystem encrypting technology that comes included with Windows. Until the previous sprint, YaST was not able to recognize that a given partition was encrypted with such technology.

As a consequence, the automatic partitioning proposal of the (open)SUSE installer would happily delete any partition encrypted with Bitlocker to reclaim its space, even for users that had specified they wanted to keep Windows untouched. Moreover, YaST would allow users to resize such partitions using the Expert Partitioner without any warning (more about that below).

All that is fixed. Now Bitlocker partitions are correctly detected and displayed as such in the Partitioner, which will not allow users to resize them, explaining that such operation is not supported. And the installer’s Guided Setup will consider those partitions to be part of a Windows installation for all matters.

Beware of Empty Partitions

As explained before, whenever YaST is unable to recognize the content of a partition or a disk, it considers such device to be empty. Although that’s not longer the case for Bitlocker devices, there are many more technologies out there (and more to come). So users should not blindly trust that a partition displayed as empty in the YaST Partitioner can actually be resized safely.

In order to prevent data loss, in the future YaST will inform the user about a potential problem when trying to resize a partition that looks empty.

YaST" Expert Partitioning Warning when Resizing Empty Partitions

Hack Week is coming…

That special time of the year is already around the corner. Christmas? No, Hack Week! From February 10 to February 14 we will be celebrating the 19th Hack Week at SUSE. The theme of this edition is Simplify, Modernize & Accelerate. If you are curious about the projects that we are considering, have a look at SUSE Hack Week’s Page. Bear in mind that the event is not limited to SUSE employees, so if you are interested in any project, do not hesitate to join us.

Highlights of YaST Development Sprint 92

January 24th, 2020 by

An Actionable Partitioner Overview Screen

Until now, the Partitioner landing screen has been useful to have a big picture of the devices in your system and as a shortcut to jump directly to the device page just with a double click over it. But, do you know what? From yast-storage-ng 4.2.74 on you can work directly with devices from that screen similar as you already do in the more specific pages, through the contextual actions added below the devices list. That means, for example, no more jumps to Hard Disks just to add a new partition nor resize an existing one. Enjoy 😉


More details: PR 1024

Numeric Sorting in Tables

We have improved the sorting for tables in libyui, the UI library of YaST. So far columns were sorted directly by the text displayed, e.g. the device name or the size in the expert partitioner. For some use-cases this resulted in unexpected ordering, e.g. partitions of a disk were ordered “/dev/sda1”, “/dev/sda10”, “/dev/sda2”, and sizes were ordered “1 GiB”, “2 TiB” and “4 GiB”.

Now it is possible to provide a sort-key for every table entry which is then used instead of the displayed text. This allows the expected ordering and is already implemented for the tables in the expert partitioner as the two pictures below show.


Improving the NFS Module

YaST offers a specific module to configure your NFS shares. Similar to every YaST module, you can run it by executing yast2 nfs in your terminal, or by launching it from the YaST Control Center. But there is another cool way to use the YaST NFS module: opening the Expert Partitioner!


The Expert Partitioner offers a NFS section on the left menu tree where you can do everything that the NFS module provides. Thanks to that, you can configure your NFS shares at the same time you format your partitions!

But that integration needed some improvements after we migrated YaST to the new Storage Stack (a.k.a. storage-ng). Moreover, some bugs were detected when using the NFS module for mounting and unmounting shares, see for example bsc#1006815 and bsc#1151426.

All those bugs were fixed, ww the NFS module behaves as expected in both cases, when running in standalone mode and inside the Expert Partitioner. Note that now the current status of the existing shares is preserved. That is, an unmounted share will continue unmounted after editing it. Unmounted entries are indicated with an asterisk in the list of shares, similar to what the Expert Partitioner does for the rest of unmounted devices. All these improvements will be available for SUSE Linux Enterprise SP1, openSUSE Leap 15.1 and openSUSE Tumbleweed.


Installation Progress Improvements

We got some bug reports about how installation progress reporting works and while we were touching it, we also added a few smaller improvements to the code.

The first change is that nowadays installing from multiple discs almost never happens but still there was always a “Medium 1” column which did not make much sense. So we removed the column and if there is a multi-media source, it will be appended to the name if needed.

The second visible change is a new Unicode character ⌛ (hourglass) during the initial phase of RPM installation until the remaining time can be estimated.

The third change is that now the maximum time is always capped at 2 hours, so even if there are multiple sources and some of them took more then two hours, it always show just “>2:00:00” and even in total it is capped, so it can no longer show something like “>6:00:00”.

The fourth one is that now you can read the release notes without disturbances. Previously you would get switched to the package log tab after each package finished its installation. Now it will redraw only when you go back from the release notes screen.

The fifth one is a fix for showing the remaining packages, where it is shown only for the active source and not for all. So now it shows remaining packages for all repositories.

And last but not least we do a bunch of refactoring, code quality improvements and also adding automatic unit tests to reduce regressions in the future.

Tumbleweed before and now:

SLE before and now:

and new ncurses:

Doomsday Preparations: Retracted Packages

If a maintenance update is released for any of our supported products, it may happen that after its release we realize that it introduces new problems, so we have to unpublish (retract) it.

So far, our maintenance team always managed to find other solutions, but sooner or later it will happen that it takes too long to realize that an update was broken, so users will install it.

For that purpose we introduced a new status retracted for patches and packages. We hope that we will never need it, but if we do, we need it in a hurry — until a better, fixed version of those packages is released.

We added new filters “Retracted Packages” and “Retracted Installed Packages” to the package selection, and the affected versions are colored in red and get a [RETRACTED] marker in the “Versions” tab:


Those lists should always be empty. Also, retracted versions will never automatically be installed. If package versions are retracted, but are already installed, the “Retracted Installed Packages” view will be opened automatically when starting the package selection to make you aware of them. Then you can choose to manually downgrade to a previous version or to wait until a fixed version is available.

In general, don’t worry: We never needed this so far, and we hope that we will never need it. Still, we take precautions for the worst case.

More details: PR 82

Qt Package Selection Gets Faster

This came as a byproduct of the previous item: While working on the new filter views for retracted packages, we found that it could take a long time (10-20 seconds) when switching away from the “All Packages” view, so we started digging deeper to find out why.

We found it strange that clearing the package list on the right side of that dialog was so slow; considerably slower than filling it with all packages. After some investigations, we found that in the course of all those changes for all those Qt versions (since Qt 3.x in mid-2006) some internal housekeeping for those list items was now no longer necessary because later Qt versions took over more and more of those responsibilities, and our own housekeeping now got in the way of that and was considerably slowing it down.

Once we found the cause, the fix was easy: We threw out our own housekeeping code and are now relying on what the Qt widget does, and hey presto, clearing that list now happens instantly instead of taking 10-20 seconds.

More details: PR 82 (“Other Fixes”)