Home Home > Systems-management > Yast
Sign up | Login

Deprecation notice: openSUSE Lizards user blog platform is deprecated, and will remain read only for the time being. Learn more...

Archive for the ‘YaST’ Category

Highlights of YaST Development Sprint 94

March 6th, 2020 by

After some time of silent work (our previous blog post was published a month ago), the YaST Team is back with some news about the latest development sprint and some Hack Week experiments. Those news include:

  • Enabling YaST on the Windows Subsystem for Linux
  • Usability improvements for the Online Search, the Partitioner and the Kdump module
  • Better control of overridden sysctl configuration values
  • Improvements in the default selections of the upcoming SLE 15 SP2 installer
  • New features for zSeries mainframes like Secure Boot and I/O devices auto-configuration
  • And, as a bonus, a couple of Hack Week projects related to YaST, Ruby and Crystal

So, as you can see, we have a little bit of everything in the menu, from WSL to mainframes, from new features to small usability improvements, from installation to system fine-tuning… So let’s dive into the details!

Improved compatibility with WSL

Have you ever heard about WSL, the Windows Subsystem for Linux? To be honest, before this sprint we haven’t payed much attention to it either. But as both openSUSE Leap and SUSE Linux Enterprise (SLE) are available to Windows users via WSL images and the 15.2 releases of both distributions are approaching, we decided it was time to dive into WSL to research how it works and how can YaST be useful there.

Setting up an (open)SUSE test system inside a WSL environment was a piece of cake thanks to the excellent documentation at the openSUSE Wiki.

Many components of YaST are useless in WSL because not everything can actually be configured from the Linux system itself and because systemd is not available (we are talking exclusively about WSL1 here). But YaST is still very useful for the initial setup of the system when running the (open)SUSE image for the first time. It can be used to setup the first user, to confirm the license and, in the SLE case, also to register the system. The YaST modules for software management can also be very handy to customize the image at any point after that initial setup.

So far, we have done three changes to improve the experience of executing YaST within WSL.

  • We increased the speed of the initial boot by removing calls to systemd when it is not available.
  • We fixed the registration process for YaST Firstboot.
  • We implemented a feature to explicitly mark YaST modules that work in WSL and show only those modules in the YaST control center.

We also documented all our findings about WSL in this document.

As always, we are hungry for feedback. Please reach out to us and tell us what’s your experience using YaST inside WSL and which modules do you miss the most.

As we announced one month ago, YaST will offer a mechanism to search for packages through all SUSE Linux Enterprise modules, even if they are not registered. This feature, known as package online search, was already available using zypper’s search-packages command or through the SCC web interface.

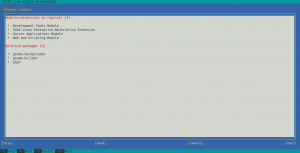
After gathering some feedback during the sprint review meeting, we decided to invest some time improving the overall UX experience. Perhaps the most relevant change is the new summary screen, which shows the list of modules to activate and packages to install.

New summary screen for the online search

Additionally, we improved error handling and, by the way, we fixed the case sensitive filter.

…And the Partitioner as Well

The online search is not the only part of YaST that has received some love in the UX area. We also tried to improve a bit the usability of the Partitioner. In this occasion, based on the feedback coming from our users via openSUSE’s Bugzilla.

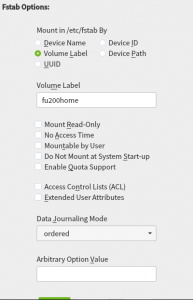
On one hand, we got a report about this dialog been too long to properly fit in low screen resolutions.

Previous dialog for mount options

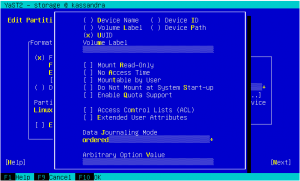
The result was even worse in a text console with a resolution of 80 columns and 24 lines, which is the minimum size we design all YaST screens to work on.

Previous text-based dialog for mount options

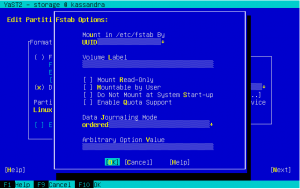
So we dropped some obsolete options and made others more compact. Now the dialog fits in 24 lines again.

Revamped text-based dialog for mount options

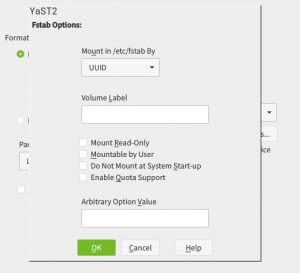
And, as you can see below, it looks also nicer (or at least less overwhelming) in graphical mode as well. It’s worth mentioning we also took the opportunity to fix other related dialogs that had similar problems.

Revamped dialog for mount options

On the other hand, we also got a report about how inconvenient was to always jump to the first tab when a device was selected in the devices tree at the left of the Partitioner, forcing the user to click in the “Partitions” tab (or any other desired one) over and over.

In that regard and as you may remember, a couple of sprints ago we made the overview screen actionable, avoiding the navigation to the device page just to perform a simple action over it. But navigating through the different devices back and forth is still possible and useful. Now such navigation has been improved by remembering the last tab and row selected per section or device whenever possible, which will save you a bunch of clicks when working with multiple devices.

Related to this, we started a public discussion about what should be the default tab the first time a device is visited. Once again, we are looking for opinions. So we would be grateful if you read the thread and contribute to the discussion.

Showing Suggested Values for Kdump Configuration

But the Partitioner was not the only YaST module for which our users pointed usability problems via Bugzilla. After some changes in how Kdump works after the migration from openSUSE Leap 42.3 to 15.0, it turned out that using YaST to re-adjust the values was not as helpful as it should be. YaST Kdump displayed the current size of the memory reservations, as well as the min and max margins. But it did not show the recommended default values for the current system, so if the user has adjusted the limits in the past it was impossible to get an up-to-date proposal from YaST calculated for the current system.

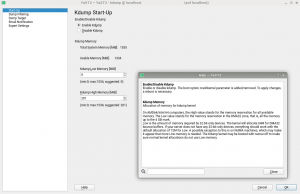
We have adapted the dialog to show those suggested values. As you can see below, we also took the opportunity to extend the help text to explain the meaning of the different values.

New Kdump configuration screen

Better Control of Overridden Kernel Parameter Values

And talking about YaST pieces we are improving step by step, you may remember from our report of sprint 86 that we are adapting YaST to deal with the new structure of the sysctl configuration.

Up to now YaST has stored sysctl values mainly in /etc/sysctl.conf and /etc/sysctl.d/70-yast.conf. But this reflects only a part of the possibilities for storing those values. The truth is that there are many more locations where these settings can be stored: /run/sysctl.d, /etc/sysctl.d, /usr/local/lib/sysctl.d, /usr/lib/sysctl.d, /lib/sysctl.d, /etc/sysctl.conf

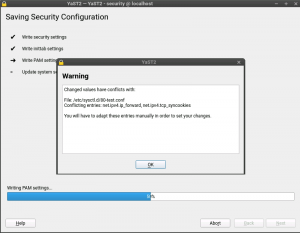
Now YaST also takes care of these locations and informs the user if there are some conflicting values, as you can see in the following screenshot.

YaST alerting about conflicts in sysctl

The Default Pre-selected SLE Modules

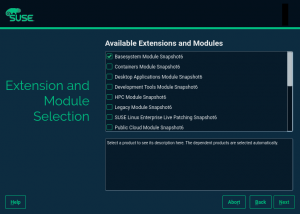
We have also invested some time smoothing some rough edges off the installation process for the upcoming openSUSE 15.2 and SLE 15 SP2. For example, if you register your SLE 15 product during installation you will see the available modules and extensions in the following dialog. Some of them are by default pre-selected because they either contain the base system components (kernel, glibc,…) or the product specific packages (e.g. GNOME for SLE Desktop).

Modules selection during SLE installation

However, if you skip the registration and use the packages from the DVD medium there were no modules or extension pre-selected. The problem is that the information about the default modules was only available in the SCC data which obviously is not available in an offline installation.

In SLE 15 SP2 we added this extra information to the installer configuration files so now also in an offline installation YaST can preselect the default modules for each product.

Proposing NTP Servers During Installation

And talking about offering sensible defaults for installation, we also improved the situation regarding the configuration of the NTP server. For openSUSE based systems (including Kubic) and a few SUSE products, like CaaSP or SLE High Performance Computing, YaST sets up the NTP daemon during installation. YaST tries to determine which server to use through the DHCP information but, when it is not available, it will propose one from openSUSE and SUSE pools (e.g., n.opensuse.pool.ntp.org where n is a number between 0 and 3).

However, we still were using the novell.pool.ntp.org pool for SUSE based products. During this sprint, we have switched to the suse.pool.ntp.org pool of servers and, additionally, we have refactored some code in order to reduce duplication and improve testability.

Secure Boot Support for IBM zSeries

You may have noticed by the recent sprint reports that we are improving several aspects related to the installation and configuration of zSeries mainframes. This sprint was not an exception… and will certainly not be the last one in that regard.

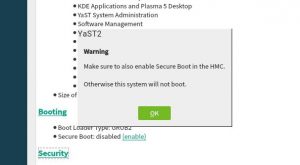
As a result of that effort, YaST now supports the Secure Boot feature found on the latest zSeries machines. It’s rather similar to the existing UEFI Secure Boot so we took the opportunity to unify the Secure Boot handling found on different architectures.

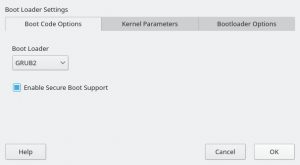
This means you get this checkbox if your zSeries machine does have Secure Boot support.

Configuring Secure Boot in zSeries

In addition, we added a shortcut link on the installation summary screen that lets you enable Secure Boot with just a click.

Secure Boot in the proposal screen

As mentioned, we took the opportunity to unify the management of Secure Boot in all platforms, so this new shortcut link is also available in x86_64 or aarch64 machines that have UEFI Secure Boot.

Automatic Configuration of I/O Devices in zSeries

And talking about zSeries mainframes, anyone having used Linux in one of those systems know that input/output devices, like disks or network cards, must be configured and activated before they can be detected and used normally by the operating system.

But thanks to the new I/O device auto-configuration mechanism, users can now specify IDs and settings of I/O devices that should be automatically enabled in Linux. We modified the installer to detect such configuration and trigger the corresponding configuration actions, removing the need of manually activating disks and network devices during the installation process.

This is still an experimental feature and we are waiting for feedback to make sure the current implementation works in all the desired scenarios. If everything goes as expected, the feature will debut in SLE 15 SP2.

Hack Week

As said at the beginning of the post, the main reason for spending almost a month without publishing any report was that the whole YaST Team at SUSE was diving into completely different topics due to Hack Week 19, which theme was “Simplify, Modernize and Accelerate”.

There were not many projects related to YaST in this edition of Hack Week, but there are at least two that could be interesting for YaST fans and contributors. Fortunately, we have published reports for both of them in the yast-devel mailing list. So check out the results of “Learn Crystal by Porting Part of YaST to that Language” and “YaST Logs Analyzer“.

More to come

Now that we are back to our usual development pace, we should have more news about YaST development in a couple of weeks. The plan is to focus on fixing bugs for the upcoming releases of openSUSE Leap and SUSE Enterprise Linux, but we are pretty sure we will still find interesting bits of information for you.

Meanwhile, keep in touch through the usual channels and have a lot of fun!
Highlights of YaST Development Sprint 93

February 7th, 2020 by

Lately, the YaST team has been quite busy fixing bugs and finishing some features for the upcoming (open)SUSE releases. Although we did quite some things, in this report we will have a closer look at just a few topics:

  • A feature to search for packages across all SLE modules has arrived to YaST.
  • Improved support for S390 systems in the network module.
  • YaST command-line interface now returns a proper exit-code.
  • Added progress feedback to the Expert Partitioner.
  • Partial support for Bitlocker and, as a lesson learned from that, a new warning about resizing empty partitions.

The Online Search Feature Comes to YaST

As you already know, starting in version 15, SUSE Linux follows a modular approach. Apart from the base products, the packages are spread through a set of different modules that the user can enable if needed (Basesystem module, Desktop Applications Module, Server Applications Module, Development Tools Module, you name it).

In this situation, you may want to install a package, but you do not know which module contains such a package. As YaST only knows the data of those packages included in your registered modules, you will have to do a manual search.

Fortunately, zypper introduced a new search-packages command some time ago that allows to find out where a given package is. And now it is time to bring this feature to YaST.

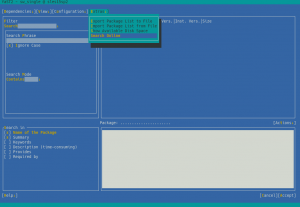
For technical reasons, this online search feature cannot be implemented within the package manager, so it is available via the Extra menu.

Search Online Menu Option

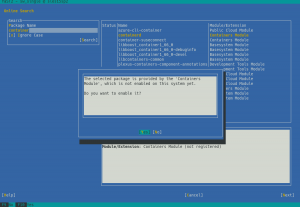
YaST offers a simple way to search for the package you want across all available modules and extensions, no matter whether they are registered or not. And, if you find the package you want, it will ask you about activating the needed module/extension right away so you can finally install the package.

Online Search: Enable Containers Module

If you want to see this feature in action, check out the demonstration video. Like any other new YaST feature, we are looking forward to your feedback.

Fixing and Improving Network Support for S390 Systems

We have mentioned a lot of times that we recently refactored the Network module, fixing some long-standing bugs and preparing the code for the future. However, as a result, we introduced a few new bugs too. One of those bugs was dropping, by accident, the network devices activation dialog for S390 systems. Thus, during this sprint, we re-introduced the dialog and, what is more, we did a few improvements as the old one was pretty tricky. Let’s have a look at them.

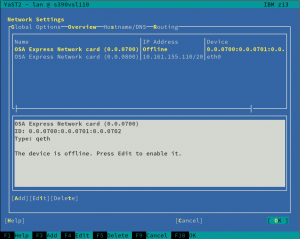
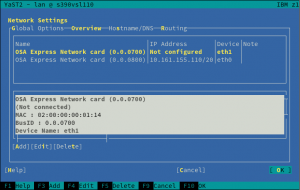
The first obvious change is that the overview shows only one line per each s390 group device, instead of using one row per each channel as the old did.

New YaST Network Overview for S390 Systems

Moreover, the overview will be updated after the activation, displaying the Linux device that corresponds to the just activated device.

YaST2 Network Overview After Activation

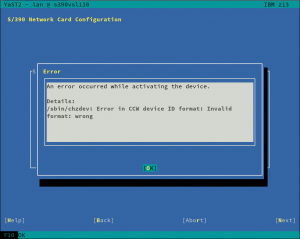
Last but not least, we have improved the error reporting too. Now, when the activation fails, YaST will give more details in order to help the user to solve the problem.

YaST2 Network Error Reporting in S390 Systems

Fixing the CLI

YaST command-line interface is a rather unknown feature, although it has been there since ever. Recently, we got some bug reports about its exit codes. We discovered that, due to a technical limitation of our internal API, it always returned a non-zero exit code on any command that was just reading values but not writing anything. Fortunately, we were able to fix the problem and, by the way, we improved the behavior in several situations where, although the exit code was non-zero, YaST did not give any feedback. Now that the CLI works again, it is maybe time to give it a try, especially if it is the first time you hear about it.

Adding Progress Feedback to the Partitioner

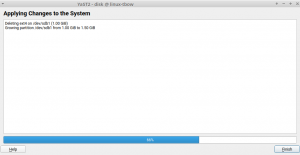
The Expert Partitioner is a very powerful tool. It allows you to perform very complex configurations in your storage devices. At every time you can check the changes you have been doing in your devices by using the Installation Summary option on the left bar. All those changes will not be applied on the system until you confirm them by clicking the Next button. But once you confirm the changes, the Expert Partitioner simply closes without giving feedback about the progress of the changes being performed.

Actually, this is a kind of regression after migrating YaST to its new Storage Stack (a.k.a. storage-ng). The old Partitioner had a final step which did inform the user about the progress of the changes. That dialog has been brought back, allowing you to be aware of what is happening once you decide to apply the configuration. This progress dialog will be available in SLE 15 SP2, openSUSE 15.2 and, of course, openSUSE Tumbleweed.

YaST Partitioner Progress Feedback

Recognizing Bitlocker Partitions

Bitlocker is a filesystem encrypting technology that comes included with Windows. Until the previous sprint, YaST was not able to recognize that a given partition was encrypted with such technology.

As a consequence, the automatic partitioning proposal of the (open)SUSE installer would happily delete any partition encrypted with Bitlocker to reclaim its space, even for users that had specified they wanted to keep Windows untouched. Moreover, YaST would allow users to resize such partitions using the Expert Partitioner without any warning (more about that below).

All that is fixed. Now Bitlocker partitions are correctly detected and displayed as such in the Partitioner, which will not allow users to resize them, explaining that such operation is not supported. And the installer’s Guided Setup will consider those partitions to be part of a Windows installation for all matters.

Beware of Empty Partitions

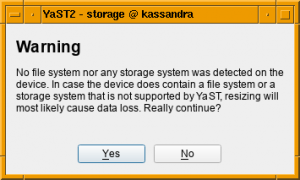
As explained before, whenever YaST is unable to recognize the content of a partition or a disk, it considers such device to be empty. Although that’s not longer the case for Bitlocker devices, there are many more technologies out there (and more to come). So users should not blindly trust that a partition displayed as empty in the YaST Partitioner can actually be resized safely.

In order to prevent data loss, in the future YaST will inform the user about a potential problem when trying to resize a partition that looks empty.

YaST" Expert Partitioning Warning when Resizing Empty Partitions

Hack Week is coming…

That special time of the year is already around the corner. Christmas? No, Hack Week! From February 10 to February 14 we will be celebrating the 19th Hack Week at SUSE. The theme of this edition is Simplify, Modernize & Accelerate. If you are curious about the projects that we are considering, have a look at SUSE Hack Week’s Page. Bear in mind that the event is not limited to SUSE employees, so if you are interested in any project, do not hesitate to join us.

Highlights of YaST Development Sprint 92

January 24th, 2020 by

An Actionable Partitioner Overview Screen

Until now, the Partitioner landing screen has been useful to have a big picture of the devices in your system and as a shortcut to jump directly to the device page just with a double click over it. But, do you know what? From yast-storage-ng 4.2.74 on you can work directly with devices from that screen similar as you already do in the more specific pages, through the contextual actions added below the devices list. That means, for example, no more jumps to Hard Disks just to add a new partition nor resize an existing one. Enjoy 😉


More details: PR 1024

Numeric Sorting in Tables

We have improved the sorting for tables in libyui, the UI library of YaST. So far columns were sorted directly by the text displayed, e.g. the device name or the size in the expert partitioner. For some use-cases this resulted in unexpected ordering, e.g. partitions of a disk were ordered “/dev/sda1”, “/dev/sda10”, “/dev/sda2”, and sizes were ordered “1 GiB”, “2 TiB” and “4 GiB”.

Now it is possible to provide a sort-key for every table entry which is then used instead of the displayed text. This allows the expected ordering and is already implemented for the tables in the expert partitioner as the two pictures below show.


Improving the NFS Module

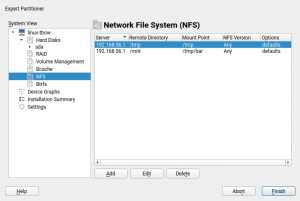
YaST offers a specific module to configure your NFS shares. Similar to every YaST module, you can run it by executing yast2 nfs in your terminal, or by launching it from the YaST Control Center. But there is another cool way to use the YaST NFS module: opening the Expert Partitioner!


The Expert Partitioner offers a NFS section on the left menu tree where you can do everything that the NFS module provides. Thanks to that, you can configure your NFS shares at the same time you format your partitions!

But that integration needed some improvements after we migrated YaST to the new Storage Stack (a.k.a. storage-ng). Moreover, some bugs were detected when using the NFS module for mounting and unmounting shares, see for example bsc#1006815 and bsc#1151426.

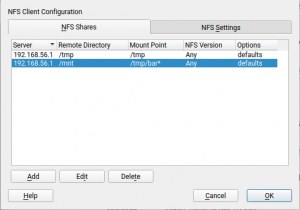
All those bugs were fixed, ww the NFS module behaves as expected in both cases, when running in standalone mode and inside the Expert Partitioner. Note that now the current status of the existing shares is preserved. That is, an unmounted share will continue unmounted after editing it. Unmounted entries are indicated with an asterisk in the list of shares, similar to what the Expert Partitioner does for the rest of unmounted devices. All these improvements will be available for SUSE Linux Enterprise SP1, openSUSE Leap 15.1 and openSUSE Tumbleweed.


Installation Progress Improvements

We got some bug reports about how installation progress reporting works and while we were touching it, we also added a few smaller improvements to the code.

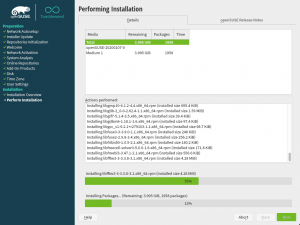
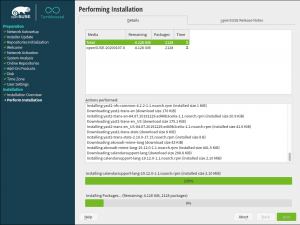
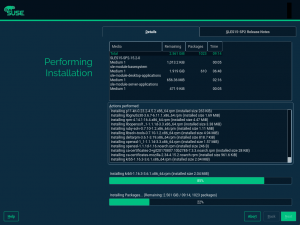
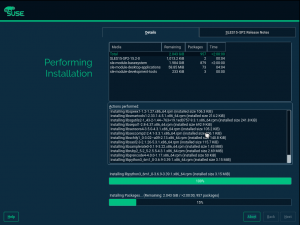
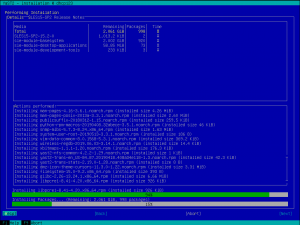
The first change is that nowadays installing from multiple discs almost never happens but still there was always a “Medium 1” column which did not make much sense. So we removed the column and if there is a multi-media source, it will be appended to the name if needed.

The second visible change is a new Unicode character ⌛ (hourglass) during the initial phase of RPM installation until the remaining time can be estimated.

The third change is that now the maximum time is always capped at 2 hours, so even if there are multiple sources and some of them took more then two hours, it always show just “>2:00:00” and even in total it is capped, so it can no longer show something like “>6:00:00”.

The fourth one is that now you can read the release notes without disturbances. Previously you would get switched to the package log tab after each package finished its installation. Now it will redraw only when you go back from the release notes screen.

The fifth one is a fix for showing the remaining packages, where it is shown only for the active source and not for all. So now it shows remaining packages for all repositories.

And last but not least we do a bunch of refactoring, code quality improvements and also adding automatic unit tests to reduce regressions in the future.

Tumbleweed before and now:

SLE before and now:

and new ncurses:

Doomsday Preparations: Retracted Packages

If a maintenance update is released for any of our supported products, it may happen that after its release we realize that it introduces new problems, so we have to unpublish (retract) it.

So far, our maintenance team always managed to find other solutions, but sooner or later it will happen that it takes too long to realize that an update was broken, so users will install it.

For that purpose we introduced a new status retracted for patches and packages. We hope that we will never need it, but if we do, we need it in a hurry — until a better, fixed version of those packages is released.

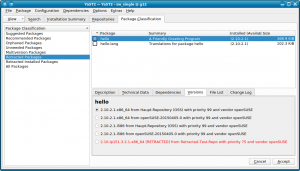
We added new filters “Retracted Packages” and “Retracted Installed Packages” to the package selection, and the affected versions are colored in red and get a [RETRACTED] marker in the “Versions” tab:


Those lists should always be empty. Also, retracted versions will never automatically be installed. If package versions are retracted, but are already installed, the “Retracted Installed Packages” view will be opened automatically when starting the package selection to make you aware of them. Then you can choose to manually downgrade to a previous version or to wait until a fixed version is available.

In general, don’t worry: We never needed this so far, and we hope that we will never need it. Still, we take precautions for the worst case.

More details: PR 82

Qt Package Selection Gets Faster

This came as a byproduct of the previous item: While working on the new filter views for retracted packages, we found that it could take a long time (10-20 seconds) when switching away from the “All Packages” view, so we started digging deeper to find out why.

We found it strange that clearing the package list on the right side of that dialog was so slow; considerably slower than filling it with all packages. After some investigations, we found that in the course of all those changes for all those Qt versions (since Qt 3.x in mid-2006) some internal housekeeping for those list items was now no longer necessary because later Qt versions took over more and more of those responsibilities, and our own housekeeping now got in the way of that and was considerably slowing it down.

Once we found the cause, the fix was easy: We threw out our own housekeeping code and are now relying on what the Qt widget does, and hey presto, clearing that list now happens instantly instead of taking 10-20 seconds.

More details: PR 82 (“Other Fixes”)

Highlights of YaST Development Sprint 91

December 18th, 2019 by

The last two weeks of the year, and also the first one of the new year, are vacation season in many parts of the world and YaSTland is not an exception. But before we enter hibernation mode, let’s take a look to the most important features and bugfixes we implemented in the last sprint of 2019. That includes:

  • bringing back to life some sections of the Software Manager,
  • implementing system upgrade with the new SLE media types,
  • making the installation in Raspberry Pi and IBM Z System even better,
  • improving usability of encryption,
  • reducing the footprint of the Snapper plugin for ZYpp,
  • as always, many other small improvements and fixes.

Restored Some Package Views: Recommended, Suggested, etc.

Let’s start with a redemption story. Some time ago we implemented feature fate#326485 which requested dropping the “Package Groups” view from the package manager UI. That was quite an easy task.

However, a few weeks later we got a bug report that the lists of recommended, suggested, etc… packages couldn’t be displayed anymore. It turned out that, in the Qt package manager front-end, the removed “Package Groups” view not only used to display the static group data from the packages but it also contained some special computed package lists like orphaned, suggested or recommended packages. So these lists were lost as a collateral damage of removing the “Package Groups” view.

The ncurses package manager was not affected by the same problem because, in that front-end, those views are grouped in a separate “Package Classification” section. So the task for this sprint was to somehow revive the lists in Qt and make them again available to the users.

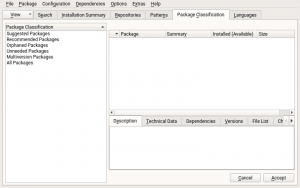
We partly reverted the Package Groups removal and restored displaying those special package groups. To make it consistent we also use the “Package Classification” name for the view, like in the ncurses package manager.

The new Package Classification view in Qt

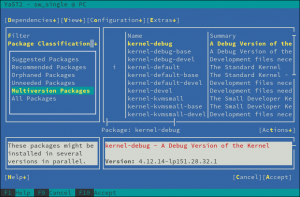
On the other hand, the ncurses front-end was missing some lists like the “Multiversion Packages” and “All Packages”. To take consistency another step further, we added these missing lists and did some small cleanup and fixes so now both the Qt and the ncurses package managers should offer the same functionality and should look similar.

The revamped Package Classification view in ncurses

User-friendly Encryption Device Names

And talking about bug reports that trigger some usability revamp, some users had pointed that, when the system is booting and prompts for the password of an encrypted device, it’s not always that easy to identify which exact device it is referring to:

Booting password prompt before the change

The root of the problem is that when YaST creates an encryption device (during the installation by means of the storage proposal, or manually with the Expert Partitioner), the device mapper name for the new encrypted device is generated from the udev id of the underlying device (e.g., cr_ccw-0XAF5E-part2).

We decided to improve the encryption naming generation in YaST for Tumbleweed and future releases of Leap and SLE. From now on, the name will be based on the mount point of the device. For example, if an encrypted device is going to be mounted at root, its device mapper name would be cr_root. In general, when the encrypted device is mounted, the device mapper name would be cr_mount_point (e.g., cr_home_linux for an encrypted device mounted at /home/linux).

Booting password prompt after the change

Note that udev-based names might still be used for some scenarios. For example, when the device is not mounted or for an indirectly used encrypted device (e.g., an encrypted LVM Physical Volume).

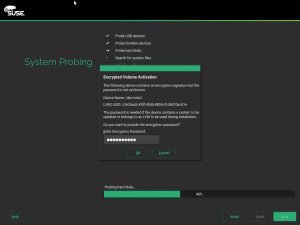
And related to the identification of encryption devices, we have also added more information about the device when the encryption devices are activated during the installation process. Providing the password for the correct device was very difficult because the user needed to know the UUID of the encryption device. Now on, the activation popup also informs about the kernel name of the underlying device, making much easier to identify it.

New password prompt during installation

Because names matter… which leads us to the next topic.

How does it Feel to Run a Mainframe?

As you may know, (open)SUSE runs in a vast range of hardware, including powerful mainframes like the IBM Z family. One of the strengths of our beloved distributions is that, despite the differences in hardware and scope, the installation and usage experience is very similar in all the supported systems.

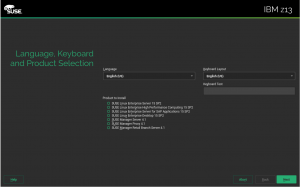
Consistency and ease of use are good, but when you drive a luxury car you want to see the brand’s badge on top of the hood. So in future versions of the installer, the model of the machine will be displayed when installing in an IBM Z system. See the right-top corner of the following screenshot.

IBM Z Model in the installer

The text-based installer also has been modified to include the same banner in a similar place.

IBM Z Model in the text-mode installer

But in the same way that (open)SUSE enables you to install and use Linux in a mainframe “just like in any other computer”, we also target to do the same in the other extreme of the hardware spectrum.

Better Support for Raspberry Pi in the Partitioning Proposal

One year ago we announced that openSUSE Leap 15.1 and SLE-15-SP1 would be the first Linux distributions that could be installed in Raspberry Pi devices following the standard installation procedure, instead of deploying a Raspberry-specific pre-built image. The only prerequisite was the existence in the target SD card (or disk) of a partition containing the Raspberry Pi boot code.

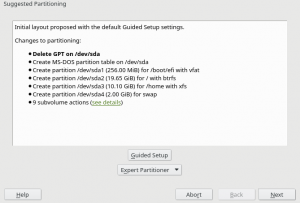
But we are now able to go one step further for SLE-15-SP2 (and Leap 15.2). Thanks to the technologies included in those upcoming releases, (open)SUSE will not longer need a separate partition with the boot code in all cases. Now the installer can make a reasonable installation proposal in all situations, even if the target storage device doesn’t contain a booting partition in advance. See, for example, what the installer suggests by default for installing a fully standard SLE-15-SP2 Beta1 in a 32 GiB SD card that contained initially a GPT partition table (tip: GPT partition tables cannot be used to boot in a Raspberry Pi device… and the installer knows it).

Installer proposal for a Raspberry Pi

With that, the installation of the standard SLE-15-SP2 Beta1 (the aarch64 version, of course) in a Raspberry Pi 3 or 4 is as easy as “next”, “next”, “next”… with the only exception of a couple of packages that must be manually selected for installation (raspberrypi-* and u-boot-rpi3). Hopefully, future beta images of both SLE and openSUSE Leap 15.2 will select those packages automatically when installing in a Pi, which will make the (open)SUSE experience in those devices basically identical to any other computer.

SLE Upgrade with the New Media Types

And talking about the standard installation images of the upcoming SLE-15-SP2, we explained in our previous blog post that those versions of SUSE Linux Enterprise (SLE) and all its associated products will be distributed in two new kinds of media – Full and Online. The Full Media contains many repositories and the system can be installed without network connectivity. The Online Media is similar to the openSUSE’s net installer, it contains no repository and it must download everything from the network. The big difference with openSUSE is that SLE systems need to be registered in order to have access to remote repositories.

But apart from installation, those two new media types can also be used to upgrade an existing system… at least after all the improvements implemented during the latest sprint.

In the case of the Online Media, if the system is registered the upgrade process will switch all repositories to point to their corresponding versions at the SUSE Customer Center (SCC) and will get the new software from there. If the system is not registered, the upgrade process is cancelled and the user is advised to either register the system or use the Full Media.

The Full Media can be used to upgrade any system, registered or not, but the process is different in each case. For a non-registered system, the repositories will be switched to the ones included in the media and the system will be upgraded from there. For registered systems the process is the same that with the Online Media, so the software will be fetched from the remote repositories at the SUSE Customer Center.

Last but not least, we also made sure the process with both medias works with an AutoYaST upgrade (yes, you can also use AutoYaST to perform an unattended upgrade, in addition to the better known unattended installation). For a registered system, we simplified the procedure as much as possible and it only needs access to SCC and an empty AutoYaST profile. For non-registered systems it is a little bit more complex because the profile must specify which repositories from the media should be used for the upgrade. But other than that, the process works quite smooth.

And, of course, we used the opportunity to improve the unit test coverage of the code and to improve the documentation, including the profiles we used for testing.

The Snapper Plugin for ZYpp Becomes More Compact and Future-proof

Snapper lets you make filesystem snapshots. It has a companion, snapper-zypp-plugin, a plugin for ZYpp that makes snapshots automatically during commits. See the “zypp” descriptions in this listing:


# snapper list

  # | Type   |Pre # | Date                     | User | Used Space | Cleanup  | Description  | Userdata     
----+--------+------+--------------------------+------+------------+----------+--------------+-------------
  0 | single |      |                          | root |            |          | current      |              
[...]
824 | pre    |      | Tue Dec 17 10:00:27 2019 | root |  16.00 KiB | number   | zypp(zypper) | important=no
826 | post   |  824 | Tue Dec 17 10:02:19 2019 | root |  16.00 KiB | number   |              | important=no
827 | single |      | Tue Dec 17 11:00:01 2019 | root |  16.00 KiB | timeline | timeline     |             
828 | single |      | Tue Dec 17 11:00:01 2019 | root |  16.00 KiB | timeline | timeline     |             

To make our enterprise products supportable for a looong time, we have rewritten this plugin to C++, starting with snapper-0.8.7. (The original Python implementation is not dead, it is resting in old Git commits.)

As a result, Python regular expressions are no longer supported in the /etc/snapper/zypp.conf file. POSIX extended regular expressions work instead, which should work sufficiently well for the purpose of package name matching. Shell patterns continue working unchanged.

Happy new year!

During the following three weeks, the YaST team will interrupt the usual sprint-based development pace. That also means, almost for sure, that we will not publish any blog post about the development of YaST until mid January of 2020. So we want to take this opportunity to wish you a happy new year full of joy and Free Software.

See you soon and make sure to start the year with a lot of fun!

Highlights of YaST Development Sprint 90

December 5th, 2019 by

As usual, during this sprint we have been working on a wide range of topics. The release of the next (open)SUSE versions is approaching and we need to pay attention to important changes like the new installation media or the /usr/etc and /etc split.

Although we have been working on more stuff, we would like to highlight these topics:

  • Support for the new SLE installation media.
  • Proper handling of shadow suite settings.
  • Mount points handling improvements.
  • Help others to keep the Live Installation working.
  • Proper configuration of console fonts.
  • Better calculation of minimum and maximum sizes while resizing ext2/3/4 filesystems.
  • Small fixes in the network module.

The New Online and Full SLE Installation Media

The upcoming Service Pack 2 of SUSE Linux Enterprise products will be released on two media types: Online and Full.

On the one hand, the Online medium does not contain any repository at all. They will be added from a registration server (SCC/SMT/RMT) after registering the selected base product. The Online medium is very small and contains only the files needed for booting the system and running the installer. On the other hand, the Full medium includes several repositories containing base products and several add-ons, which can help to save some bandwidth.

Obviously, as the installer is the same for both media types, we need to adapt it to make it work properly in all scenarios. This is an interesting challenge because the code is located in many YaST packages and at different places. Keep also in mind that the same installer needs to also work with the openSUSE Leap 15.2 product. That makes another set of scenarios which we need to support (or at least not to break).

The basic support is already there and we are now fine-tuning the details and corner cases, improving the user experience and so on.

Proper Handling of Shadow Suite Settings

A few weeks ago, we anticipated that (open)SUSE would split system’s configuration between /usr/etc and /etc directories. The former will contain vendor settings and the latter will define host-specific settings.

One of the first packages to be changed was shadow, which stores now its default configuration in /usr/etc/login.defs. The problem is that YaST was not adapted in time and it was still trying to read settings only from /etc/login.defs

During this sprint, we took the opportunity to fix this behavior and, what is more, to define a strategy to adapt the handling of other files in the future. In this case, YaST will take into account the settings from /usr/etc directory and it will write its changes to a dedicated /etc/login.defs.d/70-yast.conf file.

Missing Console Font Settings

The YaST team got a nice present this year (long before Christmas) thanks to Joaquín, who made an awesome contribution to the YaST project by refactoring the keyboard management module. Thanks a lot, Joaquín!

We owe all of you a blog entry explaining the details but, for the time being, let’s say that now the module plays nicely with systemd.

After merging those changes, our QA team detected that the console font settings were not being applied correctly. Did you ever think about the importance of having the right font in the console? The problem was that the SCR agent responsible for writing the configuration file for the virtual consoles was removed. Fortunately, bringing back the deleted agent was enough to fix the problem, so your console will work fine again.

Helping the Live Installation to Survive

Years ago, the YaST Team stopped supporting installation from the openSUSE live versions due to maintainability reasons. That has not stopped others from trying to keep the possibility open. Instead of fixing the old LiveInstallation mode of the installer, they have been adapting the live versions of openSUSE to include the regular installer and to be able to work with it.

Sometimes that reveals hidden bugs in the installer that nobody had noticed because they do not really affect the supported standard installation procedures. In this case, YaST was not always marking for installation in the target system all the packages needed by the storage stack. For example, the user could have decided to use Btrfs and still the installer would not automatically select to install the corresponding btrfsprogs package.

It happened because YaST was checking which packages were already installed and skipping them. That check makes sense when YaST is running in an already installed system and is harmless when performed in the standard installation media. But it was tricky in the live media. Now the check is skipped where it does not make sense and the live installation works reasonably well again.

A More Robust YaST Bootloader

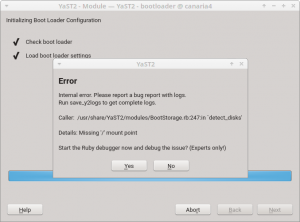
In order to perform any operation, the bootloader module of YaST first needs to inspect the disk layout of the system to determine which devices allocate the more relevant mount points like /boot or the root filesystem. The usage of Btrfs, with all its exclusive features like subvolumes and snapshots, has expanded the possibilities about how a Linux system can look in that regard. Sometimes, that meant YaST Bootloader was not able to clearly identify the root file system and it just crashed.

"Missing '/' mount point" error

Fortunately, those scenarios are reduced now to the very minimum thanks to all the adaptations and fixes introduced during this sprint regarding mount points detection. But there is still a possibility in extreme cases like unfinished rollback procedures or very unusual subvolumes organization.

So, in addition to the mentioned improvements in yast2-storage-ng, we have also instructed yast2-bootloader to better deal with those unusual Btrfs scenarios, so it will find its way to the root file system, even if it’s tricky. That means the “missing ‘/’ mount point” errors should be gone for good.

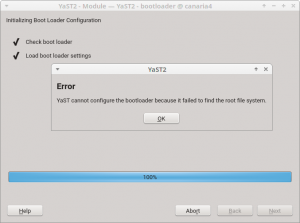
But in case we overlooked something and there is still an open door to reach the same situation again in the future, we also have improved YaST to display an explanation and quit instead of crashing. Although we have done our best to ensure this blog entry will be the only chance for our users to see this new error pop-up.

YaST2 Bootloader: root file sytem not found

Improving the Detection of Mount Points

As mentioned above, improving the detection of mount points helped to prevent some problems that were affecting yast2-bootloader. However, that is not the only module that benefits from such changes.

When you run some clients like the Expert Partitioner, they automatically use the libstorage-ng library to discover all your storage devices. During that phase, libstorage-ng tries to find the mount points for all the file systems by inspecting /etc/fstab and /proc/mounts files. Normally, a file system is mounted only once, either at boot time or manually by the user. For the first case, both files /etc/fstab and /proc/mounts would contain an entry for the file system, for example:

$ cat /etc/fstab
/dev/sda1  /  ext4  defaults  0  0

$ cat /proc/mounts
/dev/sda1 / ext4 rw,relatime 0 0

In the example above, libstorage-ng associates the / mount point to the file system which is placed on the partition /dev/sda1. But, what happens when the user bind-mounts a directory? In such a situation, /proc/mounts would contain two entries for the same device:

$ mound /tmp/foo /mnt -o bind
$ cat /proc/mounts
/dev/sda1 / ext4 rw,relatime 0 0
/dev/sda1 /mnt ext4 rw,relatime 0 0

In the Expert Partitioner, that file system will appear as mounted at /mnt instead of /. So it will look like if your system did not have the root file system after all!

This issue was solved by improving the heuristic for associating mount points to the devices. Now, the /etc/fstab mount point is assigned to the device if that mount point also appears in the /proc/mounts file. That means, if a device is included in the /etc/fstab and the device is still mounted at that location, the /etc/fstab mount point takes precedence.

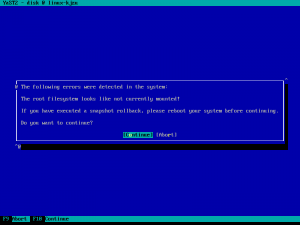
As a bonus, and also related to mount points handling, now the Expert Partitioner is able to detect the situation where, after performing a snapshot-based rollback, the system has not been rebooted. As a result, it will display a nice and informative message to the user.

System not rebooted after snapshot rollback

Improved Calculation of Minimum and Maximum Sizes for ext2/3/4

If you want to resize a filesystem using YaST, it needs to find out the minimum and maximum sizes for the given filesystem. Until now, the estimation for ext2/3/4 was based on the statvfs system call and it did not work well at all.

Recently, we have improved YaST to use the value reported by resize2fs as the minimum size which is more precise. Additionally, YaST checks now the block size and whether the 64bit feature is on to calculate the maximum size.

Polishing the Network Module

As part of our recent network module refactorization, we have improved the workflow of wireless devices configuration, among other UI changes. Usually, these changes are controversial and, as a consequence, we received a few bug reports about some missing steps that are actually not needed anymore. However, checking those bugs allowed us to find some small UI glitches, like a problem with the Authentication Mode widget.

Moreover, we have used this sprint to drop the support for some deprecated device types, like Token Ring or FDDI. Below you can see how bad the device type selection looks now. But fear not! We are aware and we will give it some love during the next sprint.

Network Device Type Selection

Conclusions

The last sprint of the year is already in progress. This time, we are still polishing our storage and network stacks, improving the migration procedure, and fixing several miscelaneous issues. We will give you all the details in two weeks through our next sprint report. Until then, have a lot of fun!
Highlights of YaST Development Sprints 88 and 89

November 22nd, 2019 by

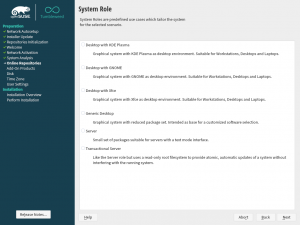
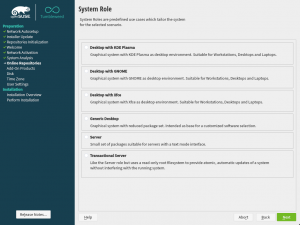
A More User Friendly Role Selector Dialog

Step by step, we continue improving the user experience making use of the newly added widgets to libyui. This sprint was the turn to update the role selection dialog to use the new item selector introduced during the sprint 87. Apart from looking better as it can be seen in the screenshots below, there are two immediate improvements:

  • the vertical scroll, when present, is respected after selecting a role (instead of “jumping to the beginning”), and
  • the selected role (if any) will be visible when arriving at the dialog even when the list is quite long or the available space too short.
Before After

What is more, updating the dialog was also useful for us to realize about some needed improvements for the widget itself, mentioned in the next section. Quite a productive change 🙂

When one Bit is not Enough: The CustomStatusItemSelector

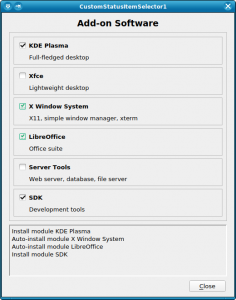
A few weeks ago, we wrote about the new ItemSelector widget that is finding its way into YaST user interfaces. It turned out that just a simple on/off status is not enough in some cases, so we had to extend that concept. For example, software modules may have dependencies, and we want to show the difference between one that was explicitly selected by the user and one that was auto-selected because some other software module requires it.

This kind of shook the foundations of the underlying classes; all of a sudden a bit is no longer just a bit, but it needs to be broken down into even smaller pieces. Well, we cheated; we now use integer values instead. Most of the class hierarchy still only uses 0 and 1, but the new YCustomStatusItemSelector also supports using higher numbers for application-defined purposes.

For each possible status value, the application defines the name of the icon to be displayed (for graphical UIs like the Qt UI), the text equivalent (for text mode / the NCurses UI), and an optional nextStatus which tells the widget what status to cycle to when the user changes the status of an item with a mouse click or with the keyboard. A value of -1 lets the application handle this.

So this is not a one-trick-pony that is useful only for that one use case (the software modules), but a generic tool that might find good uses in other places all over YaST as well.

Usage examples: C++, Ruby.

Snapper and Machine-readable Output

Most likely you already know snapper, a great tool to work with your filesystem snapshots. Some third-party scripts and tools (e.g., YaST) use the snapper CLI to get some information, but generally, snapper generates an output intended to be human-readable. Sometimes that could cause some troubles in scripts checking the snapper output. Now on, snapper also offers CLI options to generate its output in a machine-readable format, i.e., CSV and JSON. Please, check this post for more information about those new options.

Fix Boot Problems with Remote Encrypted Devices

Since we adopted systemd, the management during system boot of encrypted devices on top of network-based devices like iSCSI or FCoE disks has been less than optimal. But now we are happy to announce that we have put all the pieces together to make the experience as smooth as possible.

One of the main responsibilities of systemd is sorting the actions performed during boot and setting the dependencies between them. For example, if there are encrypted devices, systemd will first ask you for the password and activate the devices to afterwards mount the file system contained in those encrypted devices. Systemd should be able to distinguish when an encrypted device is based on a network-based storage device and, thus, can only be initialized after the network is up. In some cases that detection failed (for example network block device based mounts, such as iSCSI and FCoE disks) and systemd got stuck before initializing the network waiting for the device to be available.

Recently, SLE and openSUSE Leap has incorporated support for specifying the _netdev option in the /etc/crypttab file. With such option, systemd will recognize the encrypted device as network-based and will only try to activate it after setting up the network. That’s analogous to the corresponding _netdev option in /etc/fstab that has been already there for quite some time and that can be used to defer when a device is mounted. For it to work properly, the _netdev option must be present in all the relevant entries of both crypttab and fstab.

And that’s exactly what YaST will do now in openSUSE Tumbleweed and upcoming releases of both SLE and openSUSE Leap. From now on, the _netdev option will be added fstab for all mount points depending (directly or indirectly) on the network. In addition, that option (and also the noauto and nofail ones) will be propagated from fstab to all the corresponding crypttab entries.

This should mark the end of a dark age of encrypted iSCSI and FCoE devices timing out during boot.

AutoYaST Support for Random and Pervasive Encryption

Back in October, we announced that YaST got support for new encryption methods like random or pervasive encryption. At that time, AutoYaST was out of scope because we wanted to have a stable (and tested) API first. Fortunately, the time has come and now AutoYaST supports these encryption mechanisms.

Starting in autoyast2 4.2.17, you can specify the encryption method using a crypt_method element, as shown in the example below. Possible values are luks1 (regular LUKS1 encryption), pervasive_luks2 (pervasive volume encryption), protected_swap (encryption with volatile protected key), secure_swap (encryption with volatile secure key) and random_swap (encryption with volatile random key).

    <drive>
     <type config:type="symbol">CT_DISK</type>
     <use>all</use>
     <partitions config:type="list">
      <partition>
       <size>20G</size>
       <mount>/</mount>
       <filesystem config:type="symbol">ext4</filesystem>
       <crypt_method config:type="symbol">luks1</crypt_method> <!-- default method if crypt_key is defined -->
       <crypt_key>S3CR3T</crypt_key>
      </partition>
      <partition>
       <size>1G</size>
       <mount>swap</mount>
       <crypt_method config:type="symbol">random_swap</crypt_method> <!-- set encryption method -->
      </partition>
     </partitions>
    </drive>

As we want AutoYaST to be as user-friendly as possible, it will try to help you if you do some mistake setting the encryption configuration as when in the screenshot below.

Finally, the old crypt_fs element is deprecated, although it stills works for backward-compatibility reasons. Basically, it is equivalent to setting crypt_method to luks1.

Improve Support for AutoYaST Guided Partitioning

When it comes to partitioning, we can categorize AutoYaST use cases into three different levels:

  • Automatic partitioning: the user does not care about the partitioning and trusts in AutoYaST to do the right thing.
  • Guided partitioning: the user would like to set some basic settings (use LVM, set an encryption password, etc.)
  • Expert partitioning: the user specifies how the layout should look, although a complete definition is not required.

To some extent, it is like using the regular installer where you can skip the partitioning screen and trust in YaST, use the Guided Proposal, or define the partitioning layout through the Expert Partitioner.

The second level (Guided partitioning) was introduced in AutoYaST with the release of SUSE Linux Enteprise 15 (and Leap 15.0) but it was not documented at all. Additionally, although it was working as designed at first sight, it was far from being that useful.

This sprint with invested quite some time improving the documentation (kudos to our awesome documentation team) and the behaviour. Now, if you want to set up an LVM system without having the specify all the details, you can use the following snippet in your profile:

<general>
  <storage>
    <lvm config:type="boolean">true</lvm>
  </storage>
</general>

If you are interested in the available options, you can check the documentation draft.

using YaST firstboot wizard in WSL

November 21st, 2019 by

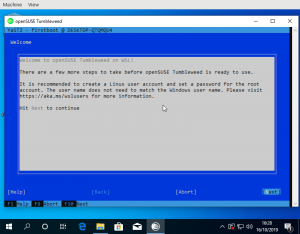
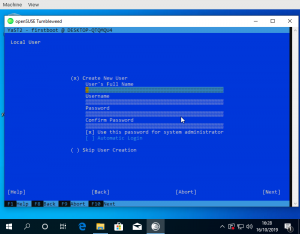
When starting a WSL distribution for the first time, a text prompt for user name and password appears:

The code for that is partially in the Windows launcher. The Windows side actually prompts for the user name:
https://github.com/microsoft/WSL-DistroLauncher/blob/master/DistroLauncher/DistroLauncher.cpp#L44

and passes it to ‘adduser’:
https://github.com/microsoft/WSL-DistroLauncher/blob/1f8551f7e2ea22bba2e6fb02f01e7a5f7fb757f3/DistroLauncher/DistributionInfo.cpp#L14

That seems to be a Debian specific tool that also prompts for a password. We don’t have it in openSUSE. When done, the Windows part actually calls into the Linux environment again with ‘id -u’ to get the uid of the added user:
https://github.com/microsoft/WSL-DistroLauncher/blob/1f8551f7e2ea22bba2e6fb02f01e7a5f7fb757f3/DistroLauncher/DistributionInfo.cpp#L44

So in order to also prompt for the password we’d have to write a wrapper like the Debian one or implement another prompt in the launcher. Implementing such a prompt in Windows code seems boring to me. When writing a wrapper, I’d do something dialog based to make it look more fancy. There’s already jeos-firstboot that does something similar already and more. But then the WSL image doesn’t have to be really minimal, which means we have YaST!

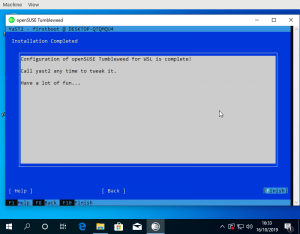
So even though WSL doesn’t really boot as it has no systemd it would be still possible to run the YaST firstboot wizard on first start. What modules it launches is configurable via xml file. So leaving out hardware/VM specific things like network configuration it works pretty well:


For the launcher to know the name of the created user a small YaST module was needed to write the name into /run/wsl_firstboot_uid. The launcher fetches it from there.

Using the YaST firstboot wizard also allows to use e.g. the existing registration dialogs on SLE or add other useful configuration steps. One feature I have in mind would be for example is the role selection screen to offer some pre defined package selections for WSL use cases.

Tumbleweed and Leap appx files to test this are available from download.opensuse.org. Keep in mind that one needs to import the certificates used by OBS for signing first.

Highlights of YaST Development Sprint 87

October 23rd, 2019 by

It’s time for another YaST team report! Let’s see what’s on the menu today.

  • More news and improvements in the storage area, specially regarding encryption support.
  • Some polishing of the behavior of YaST Network.
  • New widgets in libYUI.
  • A look into systemd timers and how we are using them to replace cron.
  • And a new cool tool for developers who have to deal with complex object-oriented code!

So let’s go for it all.

Performance Improvements in Encrypted Devices

As you may know, we have recently extended YaST to support additional encryption mechanisms like volatile encryption for swap devices or pervasive encryption for data volumes. You can find more details in our blog post titled "Advanced Encryption Options Land in the YaST Partitioner".

Those encryption mechanisms offer the possibility of adjusting the sector size of the encryption layer according to the sector size of the disk. That can result in a performance boost with storage devices based on 4k blocks. To get the best of your systems, we have instructed YaST to set the sector size to 4096 bytes whenever is possible, which should improve the performance of the encrypted devices created with the recently implemented methods.

Additionally, we took the time to improve the codebase related to encryption, based on the lessons we learned while implementing volatile and pervasive encryption. We also performed some additional tests and we found a problem that we are already fixing in the sprint that has just started.

Other improvements related to encryption

One of those lessons we have learnt recently is that resizing a device encrypted with a LUKS2 encryption layer works slightly different to the traditional LUKS1 case. With LUKS2 the password must be provided in the moment of resizing, even if the device is already open and active. So we changed how libstorage-ng handles the passwords provided by the user to make it possible to resize LUKS2 devices in several situations, although there are still some cases in which it will not be possible to use the YaST Partitioner to resize a LUKS2 device.

As a side effect of the new passwords management, now the process that analyzes the storage devices at the beginning of the installation should be more pleasant in scenarios like the one described in the report of bug#1129496, where there are many encrypted devices but the user doesn’t want to activate them all.

And talking about improvements based on our users’ feedback, we have also adapted the names of the new methods for encrypting swap with volatile keys, as suggested in the comments of our already mentioned previous blog post. We also took the opportunity to improve the corresponding warning messages and help texts.

New name and description for encryption with volatile keys

Network and Dependencies Between Devices

Similar to encryption, the network backend is another area that needed some final adjustments after the big implementation done in the previous sprints. In particular, we wanted to improve the management of devices that depend on other network devices, like VLANs (virtual LANs) or bridges.

Historically, YaST has simply kept the name of the device as a dependency, even if such device does not exist any longer. That leaded to inconsistent states. Now the dependencies are updated dynamically. If the user renames a device, then it’s automatically renamed in all its dependencies. If the user deletes a device that is needed by any other one, YaST will immediately ask the user whether to modify (in the case of bonding and bridges) or to remove (in the case of VLANs) those dependent devices.

New libYUI Widget: ItemSelector

Now that we mention the user experience, it’s fair to note that it has been quite a while since we created the last new widget for libYUI, our YaST UI toolkit. But we identified a need for a widget that lets the user select one or many from a number of items with not only a short title, but also a descriptive text for each one (and optionally an icon), and that can scroll if there are more items than fit on the screen.

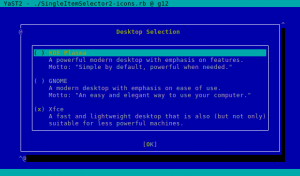
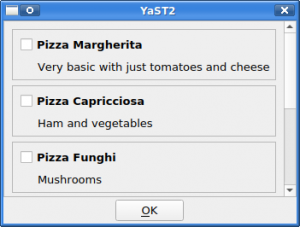
So say hello to the new SingleItemSelector.

SingleItemSelector in graphical mode

As you would expect from any libYUI widget, there is also a text-based (ncurses) alternative.

SingleItemSelector in text mode

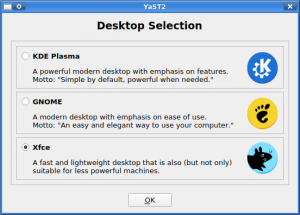
Please, note the screenshots above are just short usage examples. We are NOT planning to bring back the desktop selection screen. On the other hand, now we have the opportunity to make a prettier screen to select the computer role. Stay tuned for more news about that.

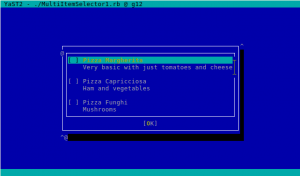
There is also an alternative version of the new widget that allows to select several items. The unsurprisingly named MultiItemSelector.

MultiItemSelector in graphical mode

Which, of course, also comes with an ncurses version.

MultiItemSelector in text mode

In the near future, we are planning to use that for selecting products and add-on modules. But this kind of widgets will find other uses as well.

Fun with Systemd Timers

And talking about the close future, many of you may know there is a plan coming together to replace the usage of cron with systemd timers as the default mechanism for (open)SUSE packages to execute periodic tasks.

In our case, we decided to start the change with yast2-ntp-client, which offers the possibility to synchronize the system time once in a while. So let’s take a look to how systemd timers work and how we used them to replace cron.

When defining a service in systemd it is possible to specify a type for that service to define how it behaves. When started, a service of type oneshot will simply execute some action and then finish. Those services can be combined with the timers, which invoke any service according to monotonous clock with a given cadence. To make that cadence configurable by the user, the YaST module overrides the default timer with another one located at /etc/systemd/system.

As a note for anyone else migrating to systemd timers, our first though was to use the EnvironmentFile directive instead of overriding the timer. But that seems to not be possible for timers.

One clear advantage of using a systemd service to implement this is the possibility of specifying dependencies and relations with other services. In our case, that allows us to specify that one time synchronization cannot be used if the chrony daemon is running, since they would both conflict. So the new system is slightly more complex than a one-liner cron script, but it’s also more descriptive and solid.

And another tip for anyone dealing with one-shot services and systemd timers, you can use systemd-cat to catch the output of any script and redirect it to the systemd journal.

Everybody Loves Diagrams

But apart from tips for sysadmins and packagers, we also have some content for our fellow developers. You know YaST is a huge project that tries to manage all kind of inter-related pieces. Often, the average YaST developer needs to jump into some complex module. Code documentation can help to know your way around YaST internals that you don’t work with every day. To generate such documentation, we use the YARD tool, and its output is for example here, for yast-network. Still, for large modules with many small classes, this is not enough to get a good overview.

Enter yard-medoosa, a plugin for YARD that automatically creates UML class diagrams, clickable to get you to the classes textual documentation.

The yast2-network medoosa

It is still a prototype but it has proven useful for navigating a certain large pull request. We hope to soon tell you about an improved version.

More Solid Device Names in fstab and crypttab

Back to topics related to storage management, you surely know there are several ways to specify a device to be mounted in the /etc/fstab file or a device to be activated in the /etc/crypttab. Apart from using directly the name of the device (like /dev/sda1) or any of its alternative names based on udev, you can also use the UUID or the label of the file-system or of the LUKS device.

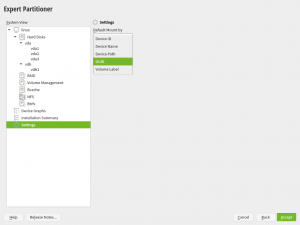
By default, YaST will use the udev path in s390 systems and the UUID in any other architecture. Although that’s something that can be configured modifying the /etc/sysconfig/storage file or simply using this screen of the Partitioner, which makes possible to change how the installation (both the Guided Setup and the Expert Partitioner) writes the resulting fstab and crypttab files.

Changing the way devices are referenced

But, what happens when the default option (like the udev path) is not a valid option for some particular device? So far, YaST simply used the device name (e.g. /dev/sda1) as an immediate fallback. That happened at the very end of the process, when already writing the changes to disk.

We have improved that for Tumbleweed, for SLE-15-SP1 (which implies Leap 15.1) and for the upcoming versions of (open)SUSE. Now, if the default value is not suitable for a particular device because the corresponding udev path does not exists, because using a given name is incompatible with the chosen encryption method, or for any other reason, YaST will fall back to the most reasonable and stable alternative. And it will do it from the very beginning of the process, being immediately visible in the Partitioner.

Stay Tuned for More… and Stay Communicative

As usual, when we publish our sprint report we are already working on the next development sprint. So in approximately two weeks you will have more news about our work, this time likely with a strong focus in AutoYaST.

Don’t forget to keep providing us feedback. As commented above, it’s very valuable for us and we really use it as an input to plan subsequent development sprints.

Advanced Encryption Options Land in the YaST Partitioner

October 9th, 2019 by

Welcome to a new sneak peek on the YaST improvements you will enjoy in SLE-15-SP2 and openSUSE Leap 15.2… or much earlier if you, as most YaST developers, are a happy user of openSUSE Tumbleweed.

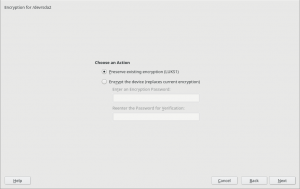
In our report of the 84th sprint we mentioned some changes regarding the encryption capabilities of the YaST Partitioner, like displaying the concrete encryption technology or the possibility to keep an existing encryption layer.

Keeping the previous encryption layer

And the report of sprint 85 contained a promise about a separate blog post detailing the new possibilities we have been adding when it comes to create encrypted devices.

So here we go! But let’s start with a small disclaimer. Although some of the new options are available for all (open)SUSE users, it’s fair to say that this time the main beneficiaries are the users of s390 systems, which may enjoy up to four new ways of encrypting their devices.

Good Things don’t Need to Change

As you may know, so far the YaST Partitioner offered an “Encrypt Device” checkbox when creating or editing a block device. If such box is marked, the Partitioner asks for an encryption password and creates a LUKS virtual device on top of the device being encrypted.

LUKS (Linux Unified Key Setup) is the standard for Linux hard disk encryption. By providing a standard on-disk-format, it facilitates compatibility among distributions. LUKS stores all necessary setup information in the partition header, enabling to transport or migrate data seamlessly. So far, there are two format specifications for such header: LUKS1 and LUKS2. YaST uses LUKS1 because is established, solid and well-known, being fully compatible with the (open)SUSE installation process and perfectly supported by all the system tools and by most bootloaders, like Grub2.

You should not fix what is not broken. Thus, in most cases, the screen for encrypting a device has not changed at all and it still works exactly in the same way under the hood.

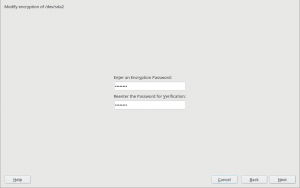
Editing an encrypted device

But using an alternative approach may be useful for some use cases, and we wanted to offer an option in the Partitioner for those who look for something else. So in some special cases that screen will include a new selector to choose the encryption method. Let’s analyze all those new methods.

Volatile Swap Encryption with a Random Key

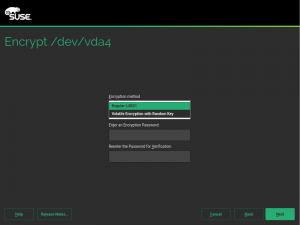
When a swap device has been marked to be encrypted, the user will be able to choose between “Regular LUKS1” and “Volatile Encryption with Random Key”. Both options will be there for swap devices on all hardware architectures. The first option simply uses the classical approach described above.

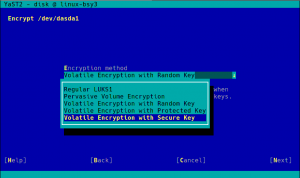
Selecting the encryption method

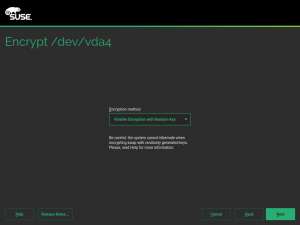
The second one allows to configure the system in a way in which the swap device is re-encrypted on every boot with a new randomly generated password.

Encrypt swap with a random password

Some advanced users may point that configuring such a random encryption for swap was already possible in versions of openSUSE prior to Leap 15.0. But the procedure to do so was obscure to say the least. The encryption with a random password was achieved by simply leaving blank the “Enter a Password” field in the encryption step. The exact implications were not explained anywhere in the interface and the help text didn’t mention all the risks.

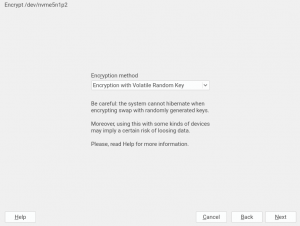
Now the same configuration can be achieved with a more explicit interface, relevant information is provided as you can see in the screenshot below and some extra internal controls are in place to try to limit the potential harm.

Help text for the random swap method

With this approach, the key used to encrypt the content of the swap is generated on every boot using /dev/urandom which is extremely secure. But you can always go a bit further…

Swap Encryption with Volatile Protected AES Keys

One of the nice things about having a mainframe computer (and believe us there are MANY nice things) is the extra security measures implemented at all levels. In the case of IBM Z or IBM LinuxONE that translates into the so-called pervasive encryption. Pervasive encryption is an infrastructure for end-to-end data protection. It includes data encryption with protected and secure keys.

In s390 systems offering that technology, the swap can be encrypted on every boot using a volatile protected AES key, which offers an extra level of security compared to regular encryption using data from /dev/urandom. This document explains how to setup such system by hand. But now you can just use YaST and configure everything with a single click, as shown in the following screenshot.

Encrypting swap with volatile protected keys

The good thing about this method is that you can use it even if your s390 system does not have a CCA cryptographic coprocessor. Oh, wait… you may not know what a cryptographic coprocessor is. Don’t worry, just keep reading.

Pervasive Encryption for Data Volumes

Have you ever wondered how James Bond would protect his information from the most twisted and resourceful villains? We don’t know for sure (or, at least, we are supposed to not disclosure that information), but we would bet he has an s390 system with at least one Crypto Express cryptographic coprocessor configured in CCA mode (shortly referred as a CCA coprocessor).

Those dedicated pieces of hardware, when properly combined with CPU with CPACF support, make sure the information at-rest in any storage device can only be read in the very same system where that information was encrypted. They even have a physical mechanism to destroy all the keys when the hardware is removed from the machine, like the self-destruction mechanisms in the spy movies!

As documented here, the process to enjoy the full power of pervasive encryption for data volumes in Linux can be slightly complex… unless you have the YaST Partitioner at hand!

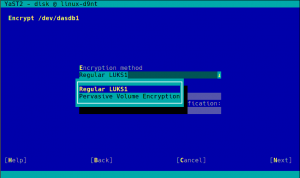
Pervasive volume encryption

As you can see in the screenshot above, the process with YaST is as simple as choosing “Pervasive Volume Encryption” instead of the classic LUKS1 that YaST uses regularly for non-swap volumes. If YaST finds in the system a secure AES key already associated to the volume being encrypted, it will use that key and the resulting encryption device will have the DeviceMapper name specified for that key. If such secure keys don’t exist, YaST will automatically register a new one for each volume.

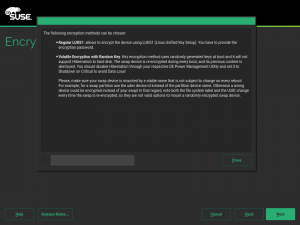
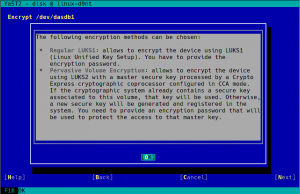
Help for pervasive volume encryption

Pervasive encryption can be used on any volume of the system, even the root partition.

I want it all!

So far we have seen you can use protected AES keys for randomly encrypting swap and registered secure keys for protecting data volumes. But what if you want your swap to be randomly encrypted with a volatile secure AES key? After all, you have already invested time and money installing those great CCA coprocessors, let’s use them also for the random swap encryption!
If your hardware supports it, when encrypting the swap you will see a “Volatile Encryption with Secure Key” option, in addition to the other four possibilities commented above. As easy as it gets!
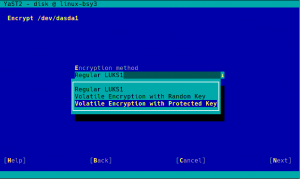
All possible methods for encrypting a swap

More Booting Checks in non-s390 Systems

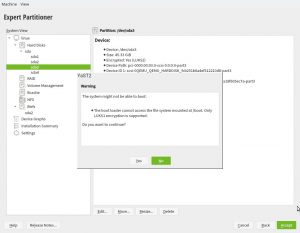
As described in the help for pervasive volume encryption showed above, that encryption method uses LUKS2 under the hood. So we took the opportunity to improve the Partitioner checks about encryption and booting. Now, in any architecture that is not s390 the following warning will be displayed if the expert partitioner is used to place the root directory in a LUKS2 device without a separate plain /boot.

New check for booting

As mentioned, that doesn’t apply to s390 mainframes. The usage of zipl makes possible to boot Linux in those systems as long as the kernel supports the encryption technology, independently of the Grub2 (lack of) capabilities.

What’s next?

We are still working to smooth off the rough edges of the new encryption methods offered by YaST and to add AutoYaST support for them. You may have noticed that most of the improvements currently implemented will only directly benefit s390 systems… even just a subset of those. But at the current stage, we already have built the foundation for a new era of encryption support in YaSTland.

We are thinking about adding more encryption methods that could be useful for all (open)SUSE users, with general support for LUKS2 being an obvious candidate. But that’s not something we will see in the short term because there are many details to iron up first in those technologies to make then fit nicely into the current installation process.

But hey, meanwhile you can play with all the other new toys!

Highlights of YaST Development Sprint 85

September 26th, 2019 by

Refactored Network on its way to Tumbleweed

A few weeks ago we submitted the first round of changes to the network module to Tumbleweed. At that point, it was still using the old data model for most operations (except routing and DNS handling) and a lot of work remained to be done.

We have been working hard on improving the overall quality of this module and we will submit an updated (and much improved) version in the upcoming days. To summarize, here are some highlights:

  • Completed the new data model (support for TUN/TAP, bridges, bonding, VLANs, etc.).
  • New wireless configuration workflow.
  • Revamped support for interface renaming and driver assignment, including better udev rule handling.
  • Fixed /etc/hosts handling when switching from static to DHCP based configuration.
  • Many small fixes in several areas.

Are we done with the refactoring? No, we are still working on improving S390 support and fixing small issues, but most of the work is already done.

Of course, as soon as we finish, we will publish a blog entry with the gory details. But, as we know that you love screenshots, let us show you a handful of them.

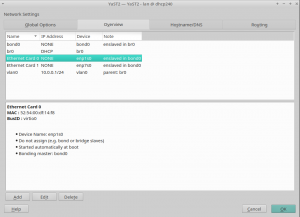
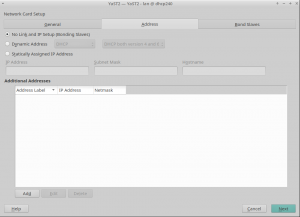
Although we have not introduced big user interface changes, we have tried to improve small things, like properly displaying whether an interface belongs to a VLAN or hiding the "Hardware" tab for virtual interfaces.

DNS resolution not working during installation, or: openQA is different

When we got a bug report that DNS resolution was not working during installation (since SLE-15 apparently), a solution seemed straightforward: /run/netconfig/resolv.conf was missing because the /run directory was not mirrored (bind-mounted) into the target system. That’s a task that used to be done by yast-storage in times before SLE-15 and was for some unknown reason forgotten when we implemented yast-storage-ng. A one-line fix was easily done, tested, and submitted.

Or so it seemed.

A few days later we got reports from SLE openQA that tests started to fail with this patch. Nothing networking related but the installation did not finish because the 10 seconds countdown dialog (‘going to reboot’) at the very end of the installation was frozen. The UI didn’t accept any input whatsoever. But whatever we tried, the issue was not reproducible outside openQA. YaST logs from openQA showed that /run got mounted as planned and was cleanly unmounted at the end of the installation – before that frozen dialog. So no clue so far and the issue was set aside for a while. Until the same reports came in from Tumbleweed testing. It was clearly linked to this one-line patch. But how?

It stayed a mystery until a chat with an openQA expert shed some light on the issue. What we thought was happening was: openQA stopped the dialog (by pressing a button) and when it tried to go on the OK button did not respond anymore. What we learned does actually happen is this: openQA stops the dialog, then switches from X to the text console, collects logs, switches back to X, and then the UI does not respond anymore. So that was quite an essential point missing.

And with this it was easily reproduced outside openQA: the X logs showed that the X server lost all its input devices after the switch. And that was because someone had deleted the whole /run directory. The YaST logs didn’t contain a hint (of course not, would have been too easy) but grepping the sources found the place where YaST deleted the directory.

The code had been added after complaints that the installation left a cluttered /run directory – of course the installation did leave files there, since it was forgotten to bind-mount the directory. So once the mentioned patch bind-mounted it again the deletion code cleaned up not /run in the installation target system but the real /run as well – cutting off the X server from the outside world resulting in freezing the openQA test.

And the moral of the story is: probably none. But it highlights again that the automated test setup can have unexpected feedback on the test itself. Luckily in this case, as the issue would not have been noticed otherwise.

Computer, Enlarge the Device Graph

The partitioner module has a graphical view to help you see the relations in more complex storage setups:

If you turn the mouse scroll wheel up or down, we will zoom the view in or out. Now the direction matches the behavior in web browsers and online maps, previously we had it the wrong way around.

Update: during proofreading, a team mate told me: "A device graph? That’s not a device graph. THAT’s a device graph:"