Home Home > Systems-management > Yast
Sign up | Login

Deprecation notice: openSUSE Lizards user blog platform is deprecated, and will remain read only for the time being. Learn more...

Archive for the ‘YaST’ Category

YaST++: next step in system management

February 15th, 2012 by

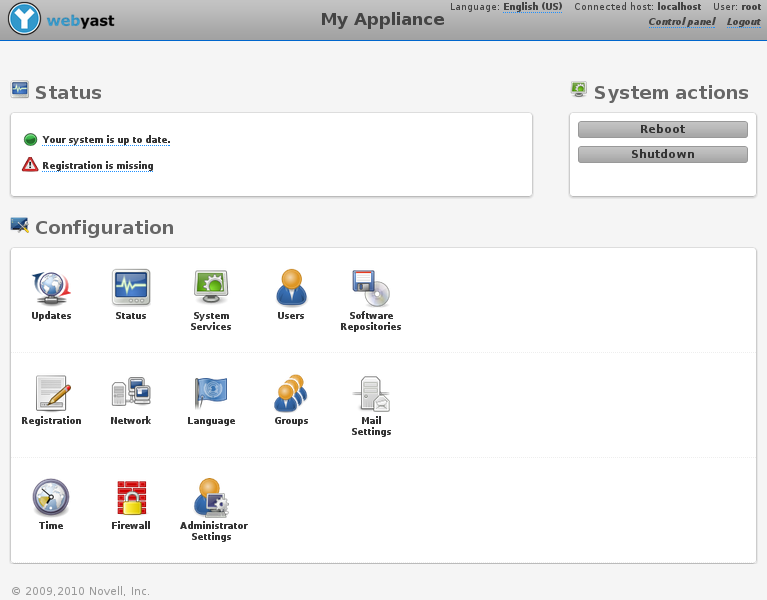
All of you probably know YaST, the installation and system configuration tool for openSUSE.

With current YaST, plenty of tasks that system administrator could image are doable using understandable UI: creating users, bootloader configuration, network setup and even Apache configuration. However, it has its drabacks. While being do-it-all tool, it comes with large package dependency even for only simple tasks. It is largely written in an outdated language which has its roots in last century and only few people in the world know it. It lacks the testing abilities of modern languages. It is SUSE specific and lacks larger developer community.

So last year, we (actually, Josef) came with the idea for YaST++: new configuration library that could be a common layer for configuration tools in SUSE (and beyond). Such library should provide simple and understandable API for all tools around. Written in up-to-date language many people know and like, so they can join the development (spoiler: we chose Ruby). Offering bindings  to various other languages, so different tools could benefit from it,

Now, this “YaST++” does not actually mean to be replacement of current YaST (with its Qt/GTK/ncurses UI), but it could replace the lower layer of YaST, which is doing the real system configuration. And it would be open for other library users as well: the obvious targets for now are WebYaST and SUSE Studio, but we’d like to see if other tools are interested: even from non-SUSE world.

From architecture point, YaST++ is itself divided into two layers, we call them YLib and config agents. YLib is the high-level library, providing the API (like ‘create user’, ‘set new time zone’ etc.). Config agents form the lower layer, that is actually touching the system. This low level consits of D-BUS services, which are running as a root (thus have the full access to the system) but are started only for users with proper permissions (we are using polkit for policies definition). So YaST++ offers role based access management, where specific users can be allowed to do specific sets of actions. For more, check our architecture document (still WIP).

We’ve started to work on several modules (none of them is finished, though). Let’s look at example in module for users configuration (packages yast++lib-users and config_agent-passwd). Look at example code in ‘users_read’ script of examples subdirectory. With simple ruby call of

YLib::Users::read({})

you get the list of current users. If the script gets additional parameters, it can list e.g. all data about selected user, or only specific information about all:

> ./users_read root
{“gid”=>”0”, “name”=>”root”, “uid”=>”0”, “shell”=>”/bin/bash”, “password”=>”x”, “home”=>”/root”}

> ./users_read only name
{“result”=>[“Batch jobs daemon”, “User for Avahi”, “bin”, “Daemon”, “dnsmasq”, “FTP account”, “Games account”, “User for haldaemon”, “User for OpenLDAP”, “LightDM daemon”, “Printing daemon”, “Mailer daemon”, “Manual pages viewer”, “User for D-Bus”, “MySQL database admin”, “News system”, “user for nginx”, “nobody”, “NTP daemon”, “User for build service backend”, “openslp daemon”, “PolicyKit”, “Postfix Daemon”, “PulseAudio daemon”, “qemu user”, “Router ADVertisement Daemon for”, “root”, “RealtimeKit”, “Smart Card Reader”, “user for smolt”, “SSH daemon”, “NFS statd daemon”, “Novell Customer Center User”, “TFTP account”, “usbmuxd daemon”, “Unix-to-Unix CoPy system”, “WWW daemon apache”, “User for YaST-Webservice”, “LXDE Display Manager daemon”]}

YaST++ developement is in its early stage (even the name is not final), but we already have something to offer.

Check the code and documentation at github project. There’s already a simple tutorial for those who want to try writing new parts.

Download packages from Build Service project.

Comment/propose/oppose in public YaST mailing list.

New Style for YaST2

October 24th, 2011 by

YaST2 got a lot of improvements which will be available in openSUSE 12.1. YaST doesn’t accidentally overwrite configuration files anymore (last bug fixed 😉 ) and snapper provides a rollback function for configuration options, just to mention a few. Therefore it’s time to give YaST2 a new and fresh style. As YaST Qt supports Stylesheets it’s simple to influence YaST’s style.

Screenshot of YaST's New Style

FACTORY contains the new style already. Packages for older releases are also available in my build service project: http://software.opensuse.org/download.html?project=home:tgoettlicher:Factory&package=branding-openSUSE.

I hope you like it. You can use YaST’s Stylesheet Editor to play around the the stylesheet as described in my this blog post. Please send me improvements you want to share. Thanks.

Mockup :: GNOME3 and YaST

April 30th, 2011 by

With the release of GNOME3 I would assume that people are interested in seeing how YaST2 (suggestion: rename it to YaST3 !!) is going to take form with GTK3. Of course this means eventually writing another application in GTK3, hopefully different from the old gnome-control-panel ‘style’ which was actually pretty confusion from the user point of view as it was far too close to gnome-control-center, thus confusing new comers.

My suggestion (unaware if it’s possible or not) was probably to explore GNOME3 features to serve YaST integrated already with GNOME3. This could be an interesting approach as it would offer integration and some advantages:

* Better integration with GNOME3 without having to write(/maintain another application;
* Take advantage of YaST2 modular structure;
* Present YaST in a prime space in GNOME3, thus offering a openSUSE differentiation point;
* No conflicts with possible KDE existing front-ends for YaST2;
* Improve users experience.

My proposal would be something like (maybe to be served as an extension for gnome-shell). Please neglect my ‘lame’ photo manipulation skills:

Mockup: YaST2 on GNOME3

Introducing snapper: A tool for managing btrfs snapshots

April 1st, 2011 by

Today we want to present the current development of snapper, a tool for managing btrfs snapshots.

For years we had the request to provide rollbacks for YaST and zypper but things never got far due to various technical problems. With the rise of btrfs snapshots we finally saw the possibility for a usable solution. The basic idea is to create a snapshot before and after running YaST or zypper, compare the two snapshots and finally provide a tool to revert the differences between the two snapshots. That was the birth of snapper. Soon the idea was extended to create hourly snapshots as a backup system against general user mistakes.

The tool is now in a state where you can play with it. On the other hand there is still room and time for modifications and new features.

Overview

We provide a command line tool and a YaST UI module. Here is a brief tour:

First we manually create a snapshot:

# snapper create --description "initial"

Running YaST automatically creates two snapshots:

# yast2 users

Now we can list our snapshots:

# snapper list
Type   | # | Pre # | Date                     | Cleanup  | Description
-------+---+-------+--------------------------+----------+-------------
single | 0 |       |                          |          | current
single | 1 |       | Wed Mar 30 14:52:17 2011 |          | initial
pre    | 2 |       | Wed Mar 30 14:57:10 2011 | number   | yast users
post   | 3 | 2     | Wed Mar 30 14:57:35 2011 | number   |
single | 4 |       | Wed Mar 30 15:00:01 2011 | timeline | timeline

Snapshot #0 always refers to the current system. Snapshot #2 and #3 were created by YaST. Snapshot #4 was created by an hourly cronjob.

Getting the list of modified files between to snapshots is easy:

# snapper diff 2 3
c... /etc/group
c... /etc/group.YaST2save
c... /etc/passwd
c... /etc/passwd.YaST2save
c... /etc/shadow
c... /etc/shadow.YaST2save
c... /etc/sysconfig/displaymanager
c... /var/tmp/kdecache-linux/icon-cache.kcache
c... /var/tmp/kdecache-linux/plasma_theme_openSUSEdefault.kcache

You can also compare a single file between two snapshots:

# snapper diff --file /etc/passwd 2 3
--- /snapshots/2/snapshot/etc/passwd    2011-03-30 14:41:45.943000001 +0200
+++ /snapshots/3/snapshot/etc/passwd    2011-03-30 14:57:33.916000003 +0200
@@ -22,3 +22,4 @@
 uucp:x:10:14:Unix-to-Unix CoPy system:/etc/uucp:/bin/bash
 wwwrun:x:30:8:WWW daemon apache:/var/lib/wwwrun:/bin/false
 linux:x:1000:100:linux:/home/linux:/bin/bash
+tux:x:1001:100:tux:/home/tux:/bin/bash

The main feature of course is to revert the changes between two snapshots:

# snapper rollback 2 3

Finally yast2-snapper provides a YaST UI for snapper.

Testing

Playing with snapper should only be done on test machines. Both btrfs and snapper are not finished and included known bugs. Here is a step-by-step manual for installing and configuring snapper for openSUSE 11.4.

Feedback

We would like to get feedback, esp. about general problems and further ideas. There are also tasks everybody can work on, e.g. the snapper wiki page or a man-page for snapper.

For the time being there is no dedicated mailing-list so just use opensuse-factory@opensuse.org.

Easy use of WebYaST for OpenSuSE 11.3

December 21st, 2010 by

Have you ever tried WebYaST ? No ? Then it is time for. 🙂

We have noticed that WebYaST is not really known in the OpenSuSE community. One reason for is that WebYaST is not really user friendly regarding the installation.

So we have investigate here some effort. Lets  see….

Installation

The simplest way is the one-click installation which is already installed on your OpenSuSE 11.3.

Just use a web browser (like firefox) with the url:

http://download.opensuse.org/repositories/YaST:/Web/openSUSE_11.3/webyast.ymp

The browser will ask you to start the installation via the one-click installation. Start the installation and go through the installation workflow.

Starting and managing WebYaST

WebYaST is a web application which runs on two http servers on your system. For starting and managing these servers Thomas Goettlicher has written a nice Qt-applet which can be started e.g. in KDE:

After starting the WebYaST applet the WebYaST icon appears on the right edge of the frame :

WebYaST is disabled

WebYaST enabled

With the right mouse click you can manage WebYaST:

With this applet you can start WebYaST in your browser too. After accepting the GPG-key please login with your “root” account.

And that’s WebYaST:

That’s all.

(Yes, I know that sentence is written almost in every post here. Even in posts where problems just starting after the sentence has been read. :-))

But I think that should be really all. If not, please use bugzilla and blame us !

Have fun !

(Yes, I know that’s the second sentence which should be in every blog :-))

Systems Management Zeitgeist

September 14th, 2010 by

Dear Lizards,
This recent release from IT World on the best Linux distributions out there caught my eye last weekend, as it declares “The package’s administration utility, YaST, is widely acknowledged as one of the best” in its entry on openSUSE and SLE (the documentation also drew praise, distinguishing itself as “some of the best printed documentation you’ll find for any distro“), and reminded me I wanted to share some of the positive feedback I collected during our 11.x development and after final release.  Ready? Here we go.

Some of the initial ‘Net commentary was all centered on performance and memory footprint, from Snorp’sI don’t think it’s possible to overstate just how much of an improvement it really is” to Duncan’s benchmarks providing interesting numerical comparisons like  “Yum uses about 9 times more memory” (and takes several times longer).  This was refreshing given that at the same time Yum’s less-than-nimble footprint was drawing some interesting comments from Zed and Zbr.

Eventually, the improvements rolled over to the press, with Jason Perlow proclaiming 11 RC1 the Mercedes-Benz to Ubuntu’s Wolkswagen. Jason had plenty of praise in his review, but I am singling out “the most beautiful installer program I have ever seen” and “quite impressed with how fast the package repository management works” since this is the Systems Management team’s ticker-tape parade, after all.  Our then Community Ambassador Zonker followed up with his Package Keeper piece on the special that Linux Pro Magazine issued for the 11.0 release, focusing on package management as “one of the most impressive advances” in the release (link sadly missing as article still paywalled).   Linux Format retorted with “One of our favorite features of SUSE is the one-click install system” and “faster than any other package manager we’ve seen, and on top of that it looks great, too” in their What SUSE Does Best review (no link, as LXF requires subscription).

Finally, with the release of our Enterprise distribution, the commentary rolled over to our corporate customers, as I previously reported when one customer I like to track personally as particularly representative reported a 300% speed improvement in rolling updates to production.

Afterwards, we have moved up live distro upgrade (more famously known as zypper dup) to fully supported status, quickly receiving loud praise from a Linux Journal editor with clearly too many Debian-using friends.  We do relate to his plight, in a tongue-in-cheek manner, and are happy to help.  Indeed, other distributions have started adopting Zypper as well, with Ark leading the way.

So what is next for us? Well, with Btrfs around the corner, integrating snapshot and rollback into the update system stands clearly out from the crowd: an undo button to painlessly bring back the system to where it was before your last upgrade. Stay tuned!

The package’s administration utility, YaST, is widely acknowledged as one of the best,The package’s administration utility, YaST, is widely acknowledged as one of the best,

Road to 11.3 : when pattern are not your friend, pre selection can be a trap

June 10th, 2010 by

So it’s time to take some hours to test our future version.

Today I start a fresh M7/Factory install : booting from pxe. The test case is build quickly a minimal server text mode.

Just uncheck the auto configuration, we are after all linux admin. Choose your partition keyboard, language (en recommanded for server) etc … normal.

Just before starting the install check software :  click on installation resume . You will discover that base-system-pattern would like to install a kernel-desktop, wtf why we want a server !

So there’s a new ticket about that : https://bugzilla.novell.com/show_bug.cgi?id=613216

I express the fact that it would be nice to have a new pattern selected when we choose minimal install server text mode.

And you what about your opinion about pre-selection or having a base-system-server pattern … Please comment, & vote on bugzilla

A pattern guru wanted to build a patch for that.

Your own OEM configuration: YaST Firstboot

May 13th, 2010 by

Have you ever thought how users should configure their systems, deployed by AutoYaST or kiwi? One of possible answers is called YaST Firstboot.

The YaST firstboot utility is a special kind of configuration workflow that can be run after the basic system is installed. It is started on the first boot of the system and guides a user through a series of steps that allow for easier configuration of their desktops. YaST firstboot does not run by default and has to be configured to run by the user or the system administrator. It is useful for image deployments where the system in the image is already configured (read: AutoYaST, SUSE_Studio, KIWI), and end-user should do only the last few steps, like setting the root password.

Enabling Firstboot

To enable running firstboot configuration sequence on the machine, it is necessary to:

  • Have yast2-firstboot package installed. Depending on your installation method, this means adding the package to the list of packages to be installed (e.g. for AutoYaST) or that are part of installation image.
  • Create the empty file /var/lib/YaST2/reconfig_system. If this file is present on system boot, firstboot configuration sequence is started. YaST Firstboot removes the file when the configuration is done.

Customizing YaST Firstboot

There are two files that control the behavior of Firstboot: the firstboot control file (firstboot.xml) and the sysconfig file /etc/sysconfig/firstboot. The control file defines the steps that should be part of your configuration sequence, in the sysconfig file it is possible to define custom messages and paths to various files.

Customized Messages

Most important texts configurable in sysconfig file is the text shown in the License Agreement screens. For license texts, there are sysconfig variables FIRSTBOOT_LICENSE_DIR and FIRSTBOOT_NOVELL_LICENSE_DIR.

The license text is read from the file ‘license.txt’ or from ‘license_<locale>.txt’. The license texts of the Novell base product are by default installed to the directory /etc/YaST2/licenses/base/ — you can set different value to FIRSTBOOT_NOVELL_LICENSE_DIR if they are elsewhere. Use FIRSTBOOT_LICENSE_DIR to indicate a path to directory containing vendor licence texts; it is preferred to put these license texts into another subdirectory of /etc/YaST2/licenses/.

To show two license texts in one dialog (typically the one from vendor and one from Novell), use ‘firstboot_license_novell’ step in your firstboot.xml file. This client will use the license texts specified by both FIRSTBOOT_LICENSE_DIR and FIRSTBOOT_NOVELL_LICENSE_DIR.

Customized Workflow

The default firstboot workflow can be controled using one single file which uses the same syntax as the control.xml file used to control the complete installation. The firstboot control file consists of workflow and proposal configurations and can be used to add or remove configuration screens depending on the end configuration of the system. The file firstboot.xml is installed with the yast2-firstboot package and can be found at the following location: /etc/YaST2/firstboot.xml.

This file can be modified to match the post installation requirements of the product in question. In addition to the default and pre-installed components, custom screens can be added to enable maximal flexiblity during post installation. Look into the example firstboot.xml file coming with your yast2-firstboot package for more available steps.

Custom Scripts

Not everything can be achieved with already prepared steps, and it is usually not necessary to write your own ycp dialogs.

You can add schell scripts to be executed at the end of the firstboot configuration. Scripts should be placed in /usr/share/firstboot/scripts or in a custom location that can be set using the variable SCRIPT_DIR of /etc/sysconfig/firstboot configuration file. The scripts are executed in alphabetical order of their names.

AutoYaST Support

It is possible to configure the firstboot process as a part of autoinstallation, so the system can be installed with most of the default values set via AutoYaST profile, leaving the rest to the end user during the firstboot sequence.

As a part of autoinstallation configuration, you need to provide all the changes mentioned above:

  • Customize /etc/sysconfig/firstboot: it can be done e.g. via Sysconfig Editor in System section of AutoYaST configuration module.
  • Provide customized firstboot.xml file and point to its location in FIRSTBOOT_CONTROL_FILE value of /etc/sysconfig/firstboot.
  • Enable Firstboot: do it via GUI in Misc/Firstboot section of AutoYaST configuration module or manually by adding the section
<firstboot>
   <firstboot_enabled config:type="boolean">true</firstboot_enabled>
</firstboot>

to your AutoYaST profile.

This is the shortened version of the article published at http://en.opensuse.org/YaST_Firstboot

WebYaST Status Module

December 15th, 2009 by

After releasing WebYaST 1.0 last week we have had a look to the status module again and have come to the conclusion that we can do it better. 🙂

The current version looks more like a medical monitoring system that no one understand:

current status page

Technical background

The system data will be collected by a service called collectd (www.collectd.org). This data will be stored in a rrd-database which is located in

/var/lib/collectd/<system-name>/[cpu-0|cpu-1|df|interface|load|memory|….]

An own file/database will for each value will be generated.

The upper screen shot shows that an own graphic will be shown for each value. This is not really user friendly. We would like to show only values which provides “really” interesting information for the sysadmin or user. These values should also be grouped in order to reduce the amount of graphs.

Another lack of information is the labeling of the graphs. There is no description what the values mean and in which period they have been evaluated.

The aim

would be to give the user a nice overview about the system status. Additional, there should be an alarm system available if system values are exceeded. E.g. there should be sent an email to the system administrator if no disk space is available anymore.
The Administrator should also be able to configure “his” needed system values in a nice way.

Suggestion for configuration

configure

There are three parts:

  • General
    General setting like period time of shown data, email address in the case of occurred errors and the color of displayed limits.
  • Graphics
    Defining graphs with

    • labels
    • scales
    • flag for cumulate values
      This means that the values in the graph are added. E.g. the component df of collectd returns two values of a partition (free, used). These values will be cumulated in the graph like this:
      collecdtd disk status
  • Enable Values/Limits
    • Defining which data of collectd will be shown in the graphics described above. This enable us to group data in one graph, defining color and label of each collectd value:
      collecdtd cpu2
    • Defining limits and send an email if the value is overstepped longer than the defined period (Alarm after (min.))

The Result

should be an amount of view graphs which include interesting data only. These values are checked periodically and an email will be sent if they exceed a defined limit.

I am asking for

your opinion about:

  • Do you know a much more fancy way for displaying system status data ?
  • Which kind of Data would be interesting for you (CPU, memory, disk-space,….)?
  • When and for which kind of data would you like to get an email if limits have been exceeded?

So, before changing this module we would like to ask you what you would like to see. 🙂

Thanks in advance.

openSUSE@ARM: GSoC status and final spurt

August 12th, 2009 by

I was buried with work in the last couple of days, so whats new on my GSoC-project:

  • a lot of patches went into factory and some more are queued
  • fixed issues with qemu
  • most yast packages already building
  • zypper builds, but requires some more bugfixing
  • X11 builds
  • cross-compilation stable, speed is good

Todo:

  • create image (bootable to console)
  • create image (bootable to x11 on beagleboard)
  • evaluate switch in webfrontend for cross-feature
  • project documentation/GSoC