Home Home > Systems-management
Sign up | Login

Deprecation notice: openSUSE Lizards user blog platform is deprecated, and will remain read only for the time being. Learn more...

Archive for the ‘Systems Management’ Category

Highlights of YaST Development Sprint 84

September 16th, 2019 by

The YaST Team finished yet another development sprint last week and we want to take the opportunity to let you all glance over the engine room to see what’s going on.

Today we will confess an uncomfortable truth about how we manage the Qt user interface, will show you how we organize our work (or at least, how we try to keep the administrative part of that under control) and will give you a sneak peak on some upcoming YaST features and improvements.

Let’s go for it!

There Be Dragons: YaST Qt UI Event Handling

The YaST Qt UI is different in the way that it uses Qt. Normal Qt applications are centered around a short main program that after initializing widgets passes control to the Qt event loop. Not so YaST: it is primarily an interpreter for the scripts (today in Ruby, in former times in YCP) that are executed for the business logic. Those scripts, among other things, also create and destroy widget trees. But the control flow is in the script, not in a Qt event loop. So YaST uses different execution threads to handle both sides: graphic’s system events for Qt widgets and the control flow from the scripts.

This was always quite nonstandard, and we always needed to do weird things to make it happen. We always kind of misused Qt to hammer it into shape for that. And we always feared that it might break with the next Qt release, and that we might have a hard time to make it work again.

This time has now come with bug#1139967, but we were lucky enough to find a Qt call to bring it back to life; a QEventLoop::wakeUp() call fixed it. We don’t quite know (yet) why, though. Any hint, anyone?.

Should we even tell you that? Well, we think you deserve to know. After all, it worked well for about 20 years (!)… and now it’s working again.

The Refactoring of YaST Network Keeps Going

What is still not working that fine is the revamped network management. We have been working on it during the latest sprint, but it will take at least another one before it’s stable enough to be submitted to openSUSE Tumbleweed.

On which parts have we be working during the this sprint? Glad you asked! 😉 We are cleaning the current mess in wireless configuration. Soon that part will be more intuitive and consistent with other types of network. We are also making sure we propose meaningful defaults for the new cards added to the network configuration (all types of cards, not only wireless). The functionality to configure udev in order to enjoy stable names for the network interfaces has also received some love. The new version is more stable and flexible. And last but not least, we are improving the device activation in s390 systems for it to be more straightforward in the code and more clear in the user interface.

If everything goes as planned, by the end of the next sprint we will be ready to submit the improved YaST Network to Tumbleweed. That will be the right time for a dedicated blog post with screenshots and further explanations of all the changes.

Enhancing the Partitioner Experience with Encrypted Devices

And talking about ongoing work, we are currently working to broaden the set of technologies and use-cases the Partitioner supports when it comes to data encryption. As with the network area, the big headlines in that regard will have to wait for future blog posts. But if you look close enough to the user interface of the Partitioner available in Tumbleweed you can start spotting some small changes that anticipate the upcoming new features.

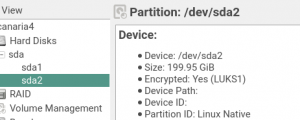
The first change is very subtle. When visualizing the details of an encrypted device, next to the previously existing “Encrypted: Yes” text you will now be able to see the concrete type of encryption. For all devices encrypted using YaST, that type will always be LUKS1 since that’s the only format that YaST has supported… so far. 😉

Partitioner: show the type of encryption

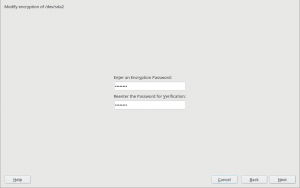
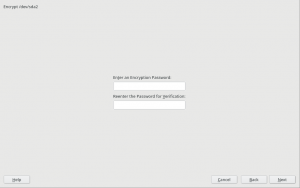
Some other small changes are visible when editing an encrypted device. If such a device was not originally encrypted in the system, nothing changes apart from minor adjustments in the labels. The user simply sees a form with an empty field to enter the password.

Encrypting a plain device

When editing for a second time a device that was already marked for encryption during the current execution of the Partitioner, the form is already prefilled with the password entered before. In the past, the previous encryption layer was ditched (so it’s password and other arguments were forgotten) and the user had to define the encryption again from scratch. That will become even more relevant soon, when the form for encryption becomes more than just a password field. Stay tuned for news in that regard.

Editing an encrypted device

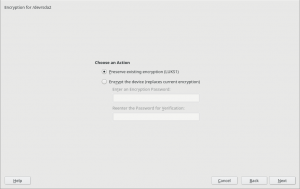
Moreover, when editing a device that is already encrypted in the system, an option is offered to just use the existing encryption layer instead of replacing it with a (likely more limited) encryption created by the Partitioner.

Keeping the previous encryption layer

Apart from opening the door for more powerful and relevant changes in the area of encryption, these changes represent an important usability improvement by themselves.

Tidying up the YaST Team’s Trello Board

As you can see in this report and in all the previous ones, the YaST Team works constantly on many different areas like installation, network management, storage technologies… you name it. We use Trello to organize all that work. For each bug in Bugzilla or feature in Jira there is a corresponding Trello card. As it happens, sometimes when a bug is closed its Trello card is forgotten to be updated.

A check with ytrello revealed that, out of a total of 900-something cards, about 500 were outdated and could be closed. More than the half! Why so many?

We found that quite a number of these cards were open cards in closed (archived) lists. So when you archive a list, don’t forget to archive its cards before. We have just learned that Trello does not do this automatically. That’s exactly why there’s a menu item Archive All Cards in This List... besides Archive This List in the Trello user interface.

Back to work!

This has been a summer of promises on our side. We told you we are working to improve our user interface library (libYUI), revamping the code to manage the network configuration, extending the support for encryption… which means we have a lot work to be finished.

So let us go back to work while you do your part – having a lot of fun!

Highlights of YaST Development Sprint 83

August 30th, 2019 by

The summer is almost gone but, looking back, it has been pretty productive from the YaST perspective. We have fixed a lot of bugs, introduced quite interesting features to the storage layer and the network module refactoring continues to progress (more or less) as planned.

So it is time for another sprint report. During the last two weeks, we have been basically busy squashing bugs and trying to get the network module as feature-complete as possible. But, after all, we have had also some time to improve our infrastructure and organize for the future.

YaST2 Network Refactoring Status

Although we have been working hard, we have not said a word about the yast2-network refactoring progress since the end of July, when we merged part of the changes into yast2-network 4.2.9 and pushed it to Tumbleweed. That version included quite a lot of internal changes related to the user interface and a few bits of the new data model, especially regarding routing and DNS handling.

However, things have changed a lot since then, so we would like you to give you an overview of the current situation. Probably, the most remarkable achievement is that the development version is able to read and write the configuration using the new data model. OK, it is not perfect and does not cover all the use cases, but we are heading in the right direction.

In the screencast below you can see it in action, reading and writing the configuration of an interface. The demo includes handling aliases too, which is done way better than the currently released versions.

YaST2 Network New Data Model in Action

Moreover, we had brought back support for many types of devices (VLAN, InfiniBand, qeth, TAP, TUN, etc.), improved the WiFi set-up workflow and reimplemented the support for renaming devices.

Now, during the current sprint, we are focused on taking this new implementation to a usable state so we can release the current work as soon as possible and get some feedback from you.

Finally, if you like numbers, we can give you a few. Since our last update, we have merged 34 pull requests and have increased the unit test coverage from 44% in openSUSE Leap 15.0/SUSE Linux Enterprise SP1 to around 64%. The new version is composed of 31.702 (physical) lines of code scattered through 231 files (around 137 lines per file) vs 22.542 in 70 files of the old one (more than 300 lines per file). And these numbers will get better as we continue to replace the old code 🙂

Missing Packages in Leap

It turned out that some YaST packages were not updated in Leap 15.1. The problem is that, normally, the YaST packages are submitted to the SLE15 product and they are automatically mirrored to the Leap 15 distribution via the build service bots. So we do not need to specially handle the package updates for Leap.

However, there are few packages which are not included in the SUSE Linux Enteprise product line, but are included in openSUSE Leap. Obviously these packages cannot be updated automatically from SUSE Linux Enterprise because they are not present there. In this case Leap contained the old package versions from the initial 15.0 release.

In order to fix this issue, we manually submitted the latest packages to the Leap 15.2 distribution. To avoid this problem in the future we asked the Leap maintainers to add the Leap specific packages to a check list so they are verified before the next release. Of course, if you see any outdated YaST package in Leap you can still open a bug report. 😉

Just for reference, the affected packages are: yast2-alternatives, yast2-slp-server, yast2-docker and skelcd-control-openSUSE (the content is only present on the installation medium, it’s not released as an RPM).

Let’s use all disks!

As you may remember, three sprints ago we added some extra configuration options to make the storage guided proposal able to deal with the SUSE Manager approach. We even wrote a dedicated blog post about it!

Despite offering the new options in the Guided Setup, we tried to keep the default initial behavior of the installer consistent with other (open)SUSE products. So the installer initially tried to install the whole system in a single disk, unless that was impossible or it was told by the user to expand on several disks.

But the SUSE Manager folks found that to be contrary to the new ideas introduced in their Guided Setup. According to their feedback, in this case remaining consistent with other (open)SUSE product was not reducing the confusion, but rather increasing it. SUSE Manager should try from the very beginning to expand the product as much as possible among all available disks.

For that reason, during this sprint we introduced the first improvement (a.k.a. another configuration option), so now it is possible to tell whether the initial proposal should try to use multiple disks as first try.

Bootloader and Small MBR Gaps

We received a bug report because a system was not able to boot after installation. In this case, the user decided to use Btrfs and placed the root file system in a logical partition. In theory, this scenario should work but, unfortunately, the MBR gap was too small to embed the Grub2 bootloader code.

At first sight, this problem could be solved by asking YaST to install the bootloader into the logical partition and the generic boot code in the MBR. But this will only work if you set the logical partition as the active one. Sadly, some BIOSes could insist on having a primary partition as the active one.

But don’t worry, we have good news. Grub2 maintainers took care of this problem. In case the MBR gap is too small, Grub2 will automatically fall-back to the Btrfs partition. That’s all. And what does it mean for YaST? Well, thanks to this fix, YaST will simply work out of the box and your system will be bootable again. But not so fast! You still have to wait a little bit more to have these Grub2 improvements available in a Tumbleweed installer.

Handling Empty Comment Lines in NTP Configuration

AutoYaST supports defining an specific NTP configuration to be applied during the installation and it relies in Augeas to read/write the ntp.conf file. But it seems that Augeas has some problems when it tries to write comments with empty lines, as you can see in bug 1142026. The solution was to adapt YaST to filter out empty comment lines before saving the configuration file, working around the Augeas problem.

Error Resizing Some Partitions

Typically, an MS-DOS partition table reserves its first MiB for the MBR gap, so the partitions normally start after that point. But it is possible, especially in partitions for old Windows systems, that it starts before that first MiB. In that case, if we try to resize that partition (e.g., by using the Expert Partitioner), YaST crashes due to an error when calculating the resize information. Fortunately, this problem is gone now, and you will be able to resize this kind of partitions as well.

Side Effects of Keyboard Layouts Unification

During the sprint 81, the openSUSE and SUSE Linux Enterprise console keyboard layouts were unified after some minor changes. One of those changes was to stop using the, in appearance, useless keymaps symlinks for Arabic and Cambodian. But they were there for a reason: are being used by YaST to correctly adapt the keyboard in the X11 environment. Just visit the pull request if you prefer to scare yourself want to dive in more technical details.

Fortunately for the users of those keyboards, we realized about this problem before the upcoming SLE-15-SP2 was released 🙂 And, it’s fixed.

House Keeping Tasks

As part of our development duties for this sprint, we invested quite some time in reviewing and updating our continuous integration (CI) set up. Apart from using Travis CI for pull requests, we rely on Jenkins to run the tests and submit the code to the appropriate projects in the Open Build Service instances.

Then, when the development of a new version starts or when the product is about to be released, we need to adjust the configuration. Just in case you are wondering, we do not do this work by hand anymore and we use Salt and Jenkins Job Builder to handle this configuration.

Closing Thoughts

During the next sprint (actually, the current one) we are working in three different areas, apart from squashing bugs: improving encryption support in the storage layer, adding some features to the installer (repo-less installer, support for reading product licenses from a tarball, etc.) and, of course, refactoring the network code. Obviously, we will give you all sort of details in our next sprint report.

Highlights of YaST Development Sprint 82

August 14th, 2019 by

July and August are very sunny months in Europe… and chameleons like sun. That’s why most YaST developers run away from their keyboards during this period to enjoy vacations. Of course, that has an impact in the development speed of YaST and, as a consequence, in the length of the YaST Team blog posts.

But don’t worry much, we still have enough information to keep you entertained for a few minutes if you want to dive with us into our summer activities that includes:

  • Enhancing the development documentation
  • Extending AutoYaST capabilities regarding Bcache
  • Lots of small fixes and improvements

AutoYaST and Bcache – Broader Powers

Bcache technology made its debut in YaST several sprints ago. You can use the Expert Partitioner to create your Bcache devices and improve the performance of your slow disks. We even published a dedicated blog post with all details about it.

Apart of the Expert Partitioner, AutoYaST was also extended to support Bcache devices. And this time, we are pleased to announce that … we have fixed our first Bcache bug!

Actually, there were two different bugs in the AutoYaST side. First, the auto-installation failed when you tried to create a Bcache device without a caching set. On the other hand, it was not possible to create a Bcache with an LVM Logical Volume as backing device. Both bugs are gone, and now AutoYaST supports those scenarios perfectly.

Configuring Bcache and LVM with AutoYaST

But Bcache is a quite young technology and it is not free of bugs. In fact, it fails when the backing device is an LVM Logical Volume and you try to set the cache mode. We have already reported a bug to the Bcache crew and (as you can see in the bug report) a patch is already been tested.

Enhancing Our Development Documentation

This sprint we also touched our development documentation, specifically we documented our process for creating the maintenance branches for the released products. The new branching documentation describes not only how to actually create the branches but also how to adapt all the infrastructure around (like Jenkins or Travis) which requires special knowledge.

We will see how much the documentation is helpful next time when somebody has to do the branching process for the next release. 😉

Working for a better world YaST

We do our best to write code free of bugs… but some bugs are smarter than us and they manage to survive and reproduce. Fortunately we used this sprint to do some hunting.

Those are only some examples of the kind of bugs we have fought during this sprint. But checking bug reports has also made us think in the future…

LibYUI in 21st Century

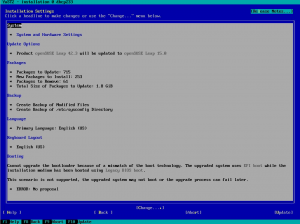
We fixed a bug related to how the focus was managed in text mode after changing any setting via the hyperlinks available in the installation summary.

Installation summary in text mode

The implemented solution is actually not perfect, it’s just the better we can do with our set of widgets. And that was yet another example of such problem – LibYUI is an awesome library that allows us to create interfaces that work in both graphic and text modes, but it has basically not evolved for more than a decade… and it’s time to fix that!

So we have been discussing how to organize our time in the close future to leave some room for innovation and renovation regarding LibYUI and the YaST UI in general. Stay tuned for more news.

August is still not over

The YaST Team will keep working during the rest of the summer sharpening our Linux Swiss army knife. But half of the team is still on vacation or starting their vacation now. So most likely our next report will be here in two weeks and it will also be a light read.

Meanwhile, don’t forget to have a lot of fun!

Highlights of YaST Development Sprint 81

July 29th, 2019 by

Unifying the Console Keyboard Layouts for SLE and openSUSE

The way of managing internationalization in Linux systems has changed through the years, as well as the technologies used to represent the different alphabets and characters used in every language. YaST tries to offer a centralized way of managing the system-wide settings in that regard. An apparently simple action like changing the language in the YaST interface implies many aspects like setting the font and the keyboard map to be used in the text-based consoles, doing the same for the graphical X11 environment and keeping those fonts and keyboard maps in sync, ensuring the compatibility between all the pieces.

For that purpose, YaST maintains a list with all the correspondences between keyboard layouts and its corresponding "keymap" files living under /usr/share/kbd/keymaps. Some time ago the content of that list diverged between openSUSE and SLE-based products. During this sprint we took the opportunity to analyze the situation and try to unify criteria in that regard.

We analyzed the status and origin of all the keymap files used in both families of distributions (you can see a rather comprehensive research starting in comment #18 of bug#1124921) and we came to the conclusions that:

  • The openSUSE list needed some minor adjustments.
  • Leaving that aside, the keymaps used in openSUSE were in general a better option because they are more modern and aligned with current upstream development.

So we decided to unify all systems to adopt the openSUSE approach. That will have basically no impact for our openSUSE users but may have some implications for users installing the upcoming SLE-15-SP2. In any case, we hope that change will be for the better in most cases. Time will tell.

Exporting User Defined Repositories to AutoYaST Configuration File.

With the call yast clone_system an AutoYaST configuration file will be generated which reflects the state of the running system. Up to now only SUSE Add-Ons have been defined in the AutoYaST configration module. Now also user defined repositories will be exported in an own subsection <add_on_others> of the <add-on> section.

<add-on>
  <add_on_others config:type="list">
    <listentry>
      <alias>yast_head</alias>
      <media_url>https://download.opensuse.org/repositories/YaST:/Head/openSUSE_Leap_15.1/</media_url>
      <name>Yast head</name>
      <priority config:type="integer">99</priority>
      <product_dir>/</product_dir>
    </listentry>
  </add_on_others>
  <add_on_products config:type="list">
    <listentry>
      <media_url>dvd:/?devices=/dev/sr1</media_url>
      <product>sle-module-desktop-applications</product>
      <product_dir>/Module-Desktop-Applications</product_dir>
    </listentry>
    <listentry>
      <media_url>dvd:/?devices=/dev/sr1</media_url>
      <product>sle-module-basesystem</product>
      <product_dir>/Module-Basesystem</product_dir>
    </listentry>
  </add_on_products>
</add-on>

The format of the <add_on_others> section is the same as the <add_on_products> section.

Better Handling of Broken Bootloader Setups during Upgrade

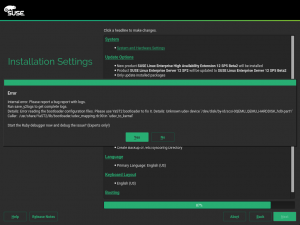
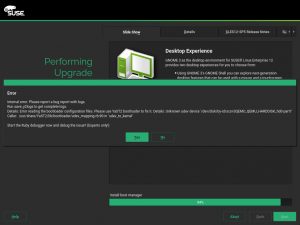
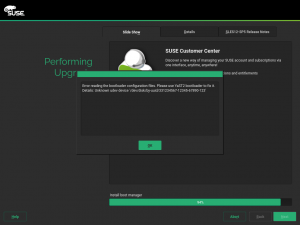
With the current versions of SLE and openSUSE, using the installation media to upgrade a system which contains a badly broken GRUB2 configuration (e.g. contains references to udev links that do not longer exist) can result in an ugly internal error during the process.

The first possible problem could arise in the summary screen. Like shown in this screenshot.

If the error didn’t pop-up or if the user managed to recover from it, it was possible to reach the final phase of the upgrade process. But then the same internal error could still pop up in a different place:

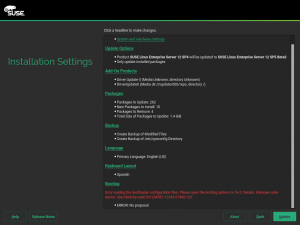
Those errors will be fixed in the upcoming releases of SLE-12-SP5 and SLE-15-SP2 and, of course, in the corresponding openSUSE Leap version and in Tumbleweed. Now if such a broken setup is detected in the summary screen, a proper warning is displayed, including the technical details and a tip on what to do to fix the problem.

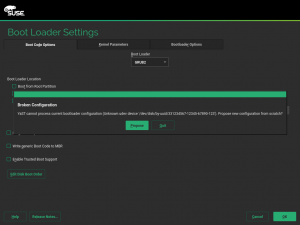
The user can ignore the problem or click on "booting" to fix it. In the latter case, the usual pop-up with instructions will appear.

If the final stage of the upgrade process is reached without fixing the error, the wild internal error is now replaced by an informative message that does not interrupt the process.

Hopefully most of our users will never see these improvements. But users with a broken system will likely appreciate the extra guidance.

Old Storage, New Features

If you are an usual reader of this blog, most likely you already know that YaST has a completely re-implemented Storage stack (a.k.a. storage-ng). That new storage code did its debut with the SLE 15 (and openSUSE Leap 15.0) family. And thanks to this revamped code, our beloved users can enjoy today some new great features in YaST like Bcache, partitionable Software RAIDs or multi-device Btrfs file system (just to mention a few examples). But SLE 12 (openSUSE 42) products are still alive and getting improvements with every maintenance update! Of course, the old Storage stack is not an exception, and now on a new installation scenario is supported.

Thanks to a bug report, we realized that Snapper could not be configured in some cases. More specifically, the reporter was trying to install with AutoYaST over a directly formatted Software RAID by using Btrfs for root and enabling snapper. The installation was perfectly performed, but it turned out that snapper was not correctly enabled in the installed system. After having a deeper look into the problem, we discovered that this was not a bug exactly but a completely missing feature. But no problems, YaST got down to work and now it is nicely supported.

Highlights of YaST Development Sprint 80

July 19th, 2019 by

After our (really long) sprint report, which featured information from 3 different sprints together, we are back to our regular schedule of publishing a blog post after each sprint.

In a nutshell, these are the highlights from the previous one:

  • A new version of yast2-network will be submitted to Tumbleweed shortly, including quite some internal changes as part of the refactoring effort.
  • The support for offline installation of SUSE Linux Enterprise products has been improved to handle modules and extensions dependencies automatically, among other goodies.
  • The partitioning proposal has been adapted to support SUSE Manager special needs.
  • The guided partitioning ignores now the adjust_by_ram parameter in IBM z Systems, where it is basically useless.
  • Some (open)SUSE 15 features have been backported to 5th Service Pack of SUSE Linux Enterprise.

And last but not least, we have some words to say about the feedback we get from you (that we really appreciate!) and the future of YaST.

Shipping Another Round of Network Refactored Code

One of the problems we wanted to avoid while refactoring yast2-network is diverging too much from the version shipped in Tumbleweed. As we mentioned in our last report, we have done quite some work, especially when it comes to the internals of the user interface, and codebases are starting to look quite different.

For that reason, we decided to merge the new code into the master branch so it can be included in Tumbleweed shortly. We are talking about a pull request which contains more than 340 commits, adds 9000 lines, removes 5000 and modifies 197 files. So, what could possibly go wrong? To be honest we did quite some testing but there is a chance that you can find some issues. In that case, please, open a bug report and we will happily fix it.

About the technical details, we put most of our efforts into drawing a clear line between the user interface and the business logic. In parallel, we are still working on the new data model which enables us to read/write the network configuration using different backends, although at this time we are only supporting sysconfig. We have made some progress during this sprint (you can check the pull request if you are interested), but we will not merge this code into our master branch yet. You can find more details in the updated documentation.

After reading this status update about the yast2-network refactoring, you might be wondering about our plans. Basically, we would like to finish the support to read/write network interfaces configuration and start using it through all the code, killing some rather old and buggy modules like LanItems.

Offline Media Support

For SUSE Linux Enterprise 15 products, there are two installation media:

  • The installer media, which contains only basic packages for a minimal system.
  • The so-called Packages DVD, which contains several modules and extensions, like the Development Tools Module or the Server Application Module.

The main use case of the Packages DVD is allowing to install the systems without an Internet connection. However, YaST support for such a scenario is pretty simplistic. For instance, dependencies between modules are not evaluated and the user has to select them manually. This approach is error-prone and user-unfriendly.

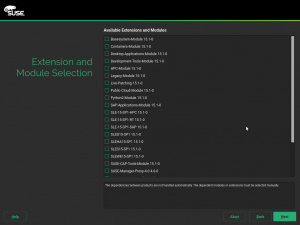
Fortunately, these shortcomings will be addressed in SLE 15 SP2. YaST is now able to solve modules and extensions dependencies, so the user does not have to worry about them anymore. For instance, if you select the Web and Scripting Module, the Basesystem Module and Server Application Module will be automatically selected.

At first, solving dependencies through the 25 repositories which are included in the Packages DVD might be time-consuming, but the current implementation takes advantage of libsolv to reduce it to about 2 seconds in our testing machine.

Improved Extensions and Modules Selection

Additionally, other improvements have been included, like displaying additional information about each module/extension or filtering out base products from the list.

SUSE Manager and the Partitioning Guided Setup

As you know, YaST is a very flexible Linux installer. The creators of each (open)SUSE product or role can define the particular sequence of steps presented to the user and configure many of the options on each of those step. But that was still not enough for the maintainers of SUSE Manager, the purpose-specific distribution to manage software-defined infrastructures.

SUSE Manager follows a pretty specific approach regarding the management of the storage devices. So we had to add some extra configuration options to our partitioning guided proposal to fulfill their needs. We felt the topic deserved its own separate blog post. So follow the link and enjoy the love story of SUSE Manager and the Partitioning Guided Setup.

Taking care of IBM z Systems

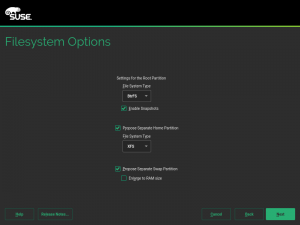
For many reasons, IBM z System architecture (s390) is one of those special cases where YaST flexibility is crucial. One of the many options that YaST offers to products and roles creators is called adjust_by_ram, which instructs YaST to make sure that a given volume size is, at least, as big as the RAM of the system. Obviously, this option is especially useful for the swap volume when we want to be able to suspend the system to disk.

However, on the 64-bits s390 architecture, resuming from a swap device is not supported, which renders this option useless. For that reason, YaST will take this situation into account, and it will not enlarge the swap volume bye default for s390 machines, even if adjust_by_ram was set in the control file. Of course, the user will be able to enlarge the volume by activating the corresponding checkbox in the Guided Setup options.

Guided Partitioning Filesystem Options

Backporting Stuff to SLE 12 SP5

Although most of the development effort is focused on SLE 15 SP2 and openSUSE Leap 15.2, we do not forget about SLE 12. SUSE is working on the 5th Service Pack of this release and the YaST team is no exception.

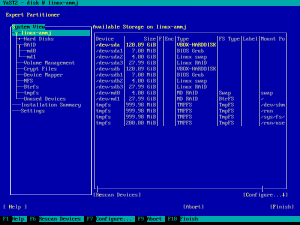
During this sprint, SLE 12 got two interesting features that were backported from SLE 15. The first one is the ability to specify kernel mitigations settings, as you already can do in Tumbleweed. And the second one is the support for PMEM devices, that you can see in the screenshot below.

YaST2 Partitioner PMEM Support

Recently, there was an interesting discussion about the openSUSE installer on Reddit, continued as a thread on our yast-devel mailing list.

This is just a quick heads-up to confirm that we hear you. Some of the issues discussed there were already known to be sore points, some others may need more clarification on why and how things are as they are.

We are taking your feedback and criticism seriously. But we also have to consider all the requirements, and we try to avoid making unrealistic promises. So please bear with us until we had some further discussions first about what we can do and in what time frame.

Conclusions

In addition to what we have described in this report, we have been working on fixing bugs and making other small improvements here and there. And sprint 81th will not be different: part of the team will keep working on yast2-network while the rest squashes as many bugs as possible.

SUSE Manager and the Partitioning Guided Setup

July 16th, 2019 by

Apart from our usual development sprint reports, we (the YaST Team) sometimes publish separate blog posts to summarize a new feature or to present an idea we are working on. Lately, several of those posts have been focused on new features of the YaST Partitioner, like the support for Bcache or the new Btrfs capabilities. But today it’s the turn of another part of yast2-storage-ng: the partitioning proposal, also known as the Guided Setup.

As you may know, YaST is an universal installer used to configure all the (open)SUSE and derivative products. Moreover, the installer options and steps can be refined even further by each of the system roles available for each product. The goal of this blog post is to present some ideas aimed to add new possibilities in the area of the storage guided proposal for those who configure the installer for a certain product or system role. With that we hope to ease the life for the creators of SUSE Manager, the SUSE’s purpose-specific distribution to manage software-defined infrastructures.

Although many of the presented capabilities will land soon in openSUSE Tumbleweed they will not be used by default. Not only because they are not targeted to the openSUSE use-case, but also because so far this is just a prototype. That means all texts are subject to change and most screens will get some adaptations before being used in a final product… or maybe they will even be completely revamped.

One Guided Proposal to Rule them All

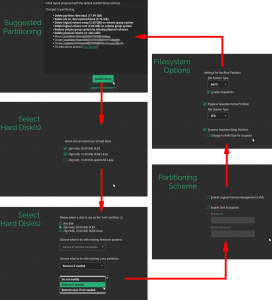
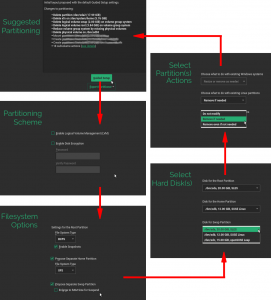
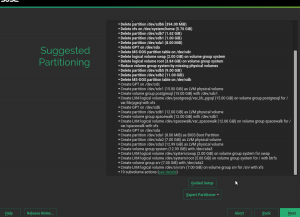
Although the Expert Partitioner can be used to tweak the storage configuration of any SUSE or openSUSE distribution during installation, the installer always tries to offer a reasonable proposal about it. Moreover, the “Guided Setup” button in the “Suggested Partitioning” screen leads to a wizard that can be used to configure some aspects of such a proposal, as shown in the following diagram (some actions have been blurred just to emphasize the fact that the concrete list of actions will change after each execution of the wizard).

Default Guided Setup wizard

The exact behavior of the Guided Setup is different in every product and, potentially, in every system role. Many things can be adjusted by the creators of the product or the role, like the partitions and LVM volumes to be proposed, the options to be offered in the wizard, the default value for every option and much more. But all those possibilities were still not enough in the case of SUSE Manager and its unique approach to organize the storage devices.

The Strange Case of SUSE Manager

First of all, the SUSE Manager documentation suggests to allocate each of several data directories (/var/spacewalk, /var/lib/pgsql, /var/cache and /srv) in its own dedicated disk when installing in a production environment. For such setup to make sense, it’s absolutely crucial to choose the right disk for every data directory taking into account both the size and the speed of the disks.

The documentation also suggests to use LVM in production environments. In order to achieve a clear separation of disks when using LVM, the recommended approach is to set up a separate LVM volume group for each relevant data directory instead of allocating all the logical volumes in the usual single shared “system” group.

So, although it may look overkill when installing SUSE Manager just for evaluation purposes, the preferred setup for a final deployment of the product spreads over up to five disks – one containing an LVM volume group with the usual logical volumes of any Linux system (like the root system and the swap space) and each of the other disks containing additional LVM groups, each one dedicated to a particular data directory.

Last but not least, the SUSE Manager guided setup should never offer the possibility of keeping the preexisting partitions in any of the disks. So the usual questions “Choose what to do with existing Linux/Windows/other partitions” (see the image above) should not even be displayed to the user. The answer is always “remove even if not needed”. Period. 😉

Breaking Down the Problem into Smaller Pieces

We didn’t want to implement a completely different guided proposal for SUSE Manager. Instead, we wanted to merge the main ideas behind its approach into the current configurable system, so other products and roles could use them. We identified three different features that we turned into the corresponding optional configuration settings at disposal of anyone defining a new system role. All the new settings are independent of each other and can be combined in any way to provide a fully customized user experience.

First Piece: Explicit Selection of Disks per Volume

First of all, it was necessary to support letting the user explicitly choose a disk for every partition or LVM volume, unlike the default guided setup which automatically finds the best disk to allocate every partition given the requirements and a set of “candidate disks”. To enable that, now the product or role can choose between two values for the new allocate_volume_mode setting. A value of auto (which is the default to keep backwards compatibility) will result in the already known wizard with up to 4 steps.

  • Select the candidate disks
  • Decide what to do with existing partitions
  • Configure the schema (LVM and/or encryption)
  • Configure each file system

As always, the steps in which there is nothing for the user to decide are skipped so the wizard is usually shorter than four steps.

No surprises so far. But allocate_volume_mode can also be set to device, which will result in the alternative wizard displayed in the following image.

New possible Guided Setup wizard

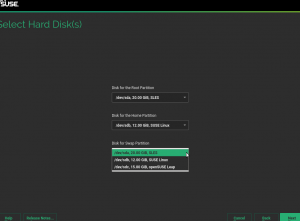
As you can see, there is no initial step to select the set of disks to be used by the system to automatically allocate the needed partitions. Instead, the following screen allows to explicitly assign a disk to every partition or LVM volume group.

New step to assign volumes and partitions to disks

Second Piece: Enforcing a Behavior about Previous Partitions

No matter which allocate mode is configured (auto or device), there is always one step in which the user is asked what to do with the preexisting partitions in the affected disks. So far, the product defined the default answer for those questions, but the user always had the opportunity to change that default option.

Now, the creator of the product or the system role can disable the setting called delete_resize_configurable which is enabled by default in order to prevent the user from modifying the default behavior. The wizard will include no questions about what to do with existing Windows/Linux/other partitions. In most cases, that will imply a whole step of the wizard to be simply skipped.

Third Piece: Separate Volume Groups for some Directories

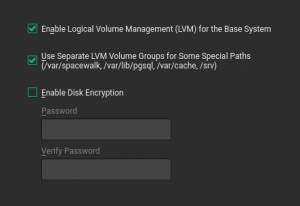
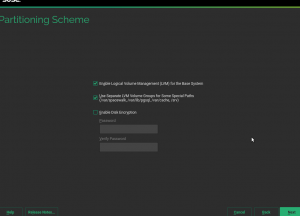
The most important setting configured by every system role is the list of so-called volumes. That list includes all the file systems (both mandatory and optional ones) that the guided setup should create as separate partitions or LVM logical volumes. Now it’s possible to specify that a volume could be created in its very own separate LVM volume group using the new attribute separate_vg_name. If any of the volumes defined for the current product and role contains such attribute, the screen for selecting the schema will contain an extra checkbox below the usual LVM-related one.

New checkbox for directories into their own separate LVM

Putting the Pieces Together for SUSE Manager

With all the above, we expanded the toolbox for anyone wanting to configure the (open)SUSE installation experience. Which means now we can fulfill the requirements of SUSE Manager maintainers by just adding separate_vg_name to some volumes, setting delete_resize_configurable to false and adjusting the allocate_volume_mode. With all that, the new SUSE Manager workflow for the guided setup will look like this.

First of all, the user will be able to specify the creation of separate LVM volume groups as suggested in the product documentation.

SUSE Manager setup - first screen

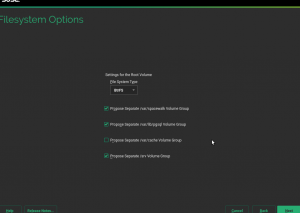
Then a second screen to select which separate file systems should be created and to fine-tune the options for every one of them, if any.

SUSE Manager setup - second screen

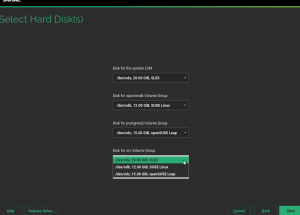
And finally a last step to assign the correct disk for every partition or separate volume group, depending on the selections on previous screens. With this step the user can optimize the performance by distributing the disks as explained in the SUSE Manager documentation, allocating the areas that need intensive processing to the faster disks and the greedy directories to the bigger devices.

SUSE Manager setup - third screen

As usual, the list of actions will reflect the selections of the user creating as many LVM structures as requested.

SUSE Manager setup - result

Beyond SUSE Manager

As already mentioned, all the guided proposal features can be combined within a given product in any way. For example, one product could adopt the approach of creating separate LVM volume groups while still sticking to the traditional auto allocate mode. Or a given system role could enforce to never delete any existing partition without allowing the user to change that.

But beyond the “Guided Setup” button, the availability of two different allocate modes brings back one idea that has been floating around since the introduction of Storage-ng – adding a section “Wizards” to the Expert Partitioner. That would allow to combine some manual steps with the execution of any of the two available allocate modes of the guided proposal… or with any other workflow that can be implemented in the future.

As always, we are looking forward any feedback about the new features or the guided partitioning proposal in general. And stay tuned for more news!

Highlights of the Latest YaST Development Sprints

June 25th, 2019 by

May and June have been, so far, interesting months for the YaST Team. We worked hard to polish the last details of the recently released openSUSE Leap 15.1, we attended the openSUSE Conference 2019 (with many fruitful conversations), we shared quite some time together around a table without computers (most of the time, we are a geographically distributed team), many team members enjoyed vacations (it’s spring time in Europe), we organized a Leap 15.1 launch party with technical talks in Gran Canaria… and we ran out of energy to also publish our traditional sprint reports in this blog.

We will try to fix that with this blog post in which we will try to summarize some highlights from the latest three development sprints, namely the 77th, 78th and 79th. So be warned, this is going to be a loooong post.

Support for Multi-device Btrfs File Systems

We have been working steadily during the three sprints in implementing all the necessary bits to offer a good experience installing and upgrading an (open)SUSE system on top of several block devices by means of Btrfs RAID capabilities. That includes support in the Partitioner, in AutoYaST, in the storage guided setup and more.

We decided that all that deserved a separate blog post. You can find here: Getting Further with Btrfs in YaST.

More Improvements for the Partitioner

That blog post mentions a couple of changes in the Partitioner that, although initially motivated by the introduction of multi-device Btrfs, go beyond that scope and are aimed to make the all the lists of devices more useful and informative.

Traditionally the Partitioner used two separate columns “Type” and “FS Type” to describe the function of every device. That was sometimes hard to understand. Moreover, quite often the important information (like the relationship between a partition and its RAID or LVM) was simply missing in those tables.
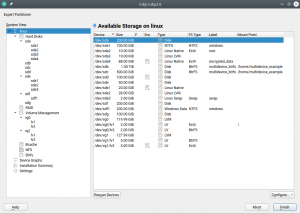
Traditional devices table in the Partitioner

We have merged those columns into a more informative one that identifies the devices and also gives an overview of the relationship between them at first glance. In addition, the table displaying all the system devices now includes multi-device file systems.
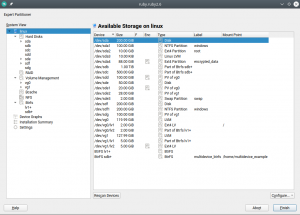
Revamped table of devices

Mitigating CPU vulnerabilities from YaST

If you are interested in security (or simply if you have not been living under a rock) you probably have heard about CPU based attacks like Spectre or Meltdown. The last year has seen a number of these CPU issues, all of them coming along with their own kernel options to change the Linux behavior in order to mitigate the security risks at a price of some performance loss.

However, not all users know what affects their architectures or particular models of CPU and which kernel parameters to use to gain more performance if the security risk is acceptable for them.

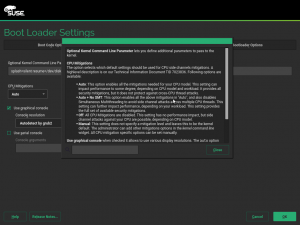
For that purpose, a new meta-option called “mitigations” was added to the Linux kernel. It allows to enable and disable at once several of those mitigations that prevent CPU attacks. See more information at this document published by SUSE.

We find that kernel option very useful, so we decided to provide an easy way for users to adjust it. Now the YaST bootloader screen contains a new setting which offers three pre-defined options and even a fourth one to let the users fine-tune the settings on their own. As you can see in the screenshot below, we have included extensive documentation in the help dialog, so you will not need to search for this blog post in the future.
It is also possible to modify this option directly from the installation summary. For that purpose, the “Firewall” section was renamed to “Security” and it now includes the possibility to tweak the CPU mitigation options, alongside the traditional settings for firewall and opening the SSH port.
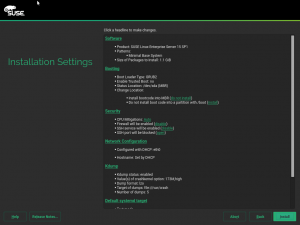
CPU mitigations in the installation summary

Another success story of (open)SUSE offering a promptly solution for our users to easily adapt their systems to ever-changing complex needs.

Memory Optimizations during Installation

While the release of openSUSE Leap 15.1 was approaching, we got several bug reports stating the YaST installer used to freeze when using only 1GB RAM with online repositories (see bug#1136051).

It turned out that at some point YaST loads the details of all available packages. And that needs a lot of memory if you enable the online repositories during installation. For example the OSS Leap repository contains more than 35.000 binary packages!

The problem was in the YaST internal API accessing the package manager library (libzypp). It did not allow to filter the objects, YaST had to read all objects and then do the filtering in the code. And for each object it returned all attributes, even those which were not needed (like the package description, full RPM name, etc…). All that data required a lot of memory.

To fix that we have introduced new API calls that allow specifying more filters (like return all selected packages, packages from specific repository,…) and you can set which attributes should be returned. If you need to know only the name and the version then you will not get the other useless attributes. And to ease the usage of the new API in YaST we provided a nice object oriented wrapper written in Ruby.

This optimization saves a lot of memory, 1GB of RAM should be enough for future installations with the online repositories, even if they grow even more.

Unfortunately, we were only able to diagnose the problem and provide a solution a couple of weeks before the official release of Leap 15.1. Introducing a change in such a sensitive part of the installer was considered too risky (it would have invalidated many of the tests that had been already performed) so the installer included in openSUSE Leap 15.1 is still memory hungry if online repositories are used. For that release, we simply increased the official memory requirements to 1.5 GiB.

Online Migration from openSUSE Leap 15.1 to SLES15-SP1

For openSUSE Leap 15.0 it was only possible to migrate from Leap to SLES (SUSE Linux Enterprise Server) manually (see the documentation). With Leap 15.1 the goal was to also support a migration using YaST. But we got a bug report saying the online migration from openSUSE Leap 15.1 to SLES15-SP1 displayed a wrong migration summary and didn’t work well.

It turned out that YaST needed some small fixes to support this properly. The main problem was that YaST did not expect that the base product or the package vendor can be changed during online migration, so far it was only possible to upgrade to the next SLE service pack level. But that is fixed now.

Wanna try the migration from openSUSE Leap 15.1 to SLES15-SP1? Then follow these steps.

  1. Install the yast2-registration and yast2-migration packages in the Leap 15.1 installation
  2. Make sure the latest online updates are installed (to install the fixes mentioned above)
  3. Start the YaST registration module and register the openSUSE Leap 15.1 product using your registration key
  4. Then start the YaST migration module, select the migration to SLES15-SP1
  5. (There might be reported some package dependency issues in the migration summary, go to the package manager and resolve them. Usually removing the old openSUSE package is the right solution.)
  6. Start the migration, the SLES packages will be downloaded and installed
  7. At the end the system will be rebooted to start the freshly installed SLES, enjoy! 🙂
  8. (It is recommended to review the orphaned packages, leftovers from the Leap installation, with the command zypper packages --orphaned and possibly remove them.)
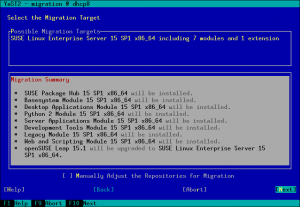
From Leap to SLES via YaST

Please note that only minimal server installations of Leap are supported for upgrade, full installations especially with third party packages might not work correctly.

Why Cannot I Read the Logs?

Long time ago, the logs of any Linux system were spread over several files living under the /var/log subdirectory. YaST offers its “System Log” module to inspect those files in a convenient way. Since the introduction of Systemd and its journal, that information has been gradually moved to this new mechanism by default. And YaST offers its “Systemd Journal” module to inspect and query that journal.

Both YaST modules can be executed by any user in the system, not only by root. That’s intentional because both the Systemd journal and the traditional Linux log files can register information targeted to unprivileged users. But there was some room for improvement in the error message displayed by both modules when such users were trying to access to protected information.

This is how the new more explanatory message looks in the “System Log” module.
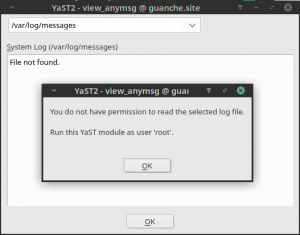
Explanatory pop-up for log viewer

And this is the extended message for “Systemd Journal”, that now mentions the systemd-journal user’s group.
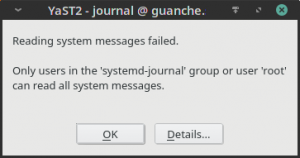
Improved message in the journal viewer

Another Day at the YaST Office: Adapting to Changes

As we usually remark in our blog posts, a significant part of the work of the YaST Team consist in keeping YaST in sync with the constant changes in the underlying system. Of course, these sprints were not an exception in that regard. Without trying to do an exhaustive list, let’s take a look to some of those adaptations since the mentioned underlying changes may be interesting for some readers.

Turns out Systemd developers has decided to change the list of possible states for Systemd services. The systemd-sigabrt state is obsolete and a new systemd-watchdog one was added. In the YaST team we learned some time ago that the list of Systemd states changes more often than what most people would expect. As a consequence we have an automated check to detect these situations. The bell ringed, we adapted the code and everything keeps working.

Systemd is not the only technology that keeps evolving. Quite some time ago, RMT replaced SMT as the default proxy technologies for the SUSE Customer Center. Although both has coexisted for quite some time, from SLE-15 onward only RMT is offered. Thus we have adapted all the references to SMT that still existed in YaST. From now on, only RMT is mentioned to avoid confusion.

Another common adaptation we have to perform in YaST is adjusting some module when the output of the command it runs under the hood has changed. Recently we found out the developers of the command iscsiadm has decided to use more than one exit code to indicate a successful execution (traditionally, only zero should mean that). After a long discussion, we decided to adapt YaST iSCSI to also be happy with the error code 21. What means for you? That future versions of YaST iSCSI should work faster in some situations, since the confusion will not longer result in a timeout.

YaST Firstboot: a Better Example File

Those were just some example of the many adaptations we did lately for changes in the system. But not all adjustments are motivated by external changes. We also realized the example configuration file provided by YaST Firstboot (at /etc/YaST2/firstboot.xml) needed some love. Due to the nature of YaST Firstboot, that file should be customized before using YaST Firstboot. But providing an example file with three different steps about acceptance of licenses (two of them enabled and the third one disabled) and other inconsistencies was definitely not helping anyone to understand how to use the module.

In fact, the status of that default example configuration and of the documentation managed to confuse even SUSE’s quality assurance team. So we improved the example file shipped in the package to make it more realistic and we also updated the YaST Firstboot documentation to clarify how to use that file. Because not all improvements are always done by coding.

Leap 15.1’s Most Annoying Bug: Create Home as Btrfs Subvolume

As all openSUSE users should know, for every Leap release a page is created in the openSUSE wiki listing the so-called Most Annoying Bugs. Leap 15.1 was a very smooth release and this time the corresponding list contains only one bug… and it’s a YaST one. 🙁

In an installed system, when YaST was creating a new user it was always trying to create its home directory as a Btrfs subvolume. Even in cases in which that was impossible. For example, if the directory to be created was not in a Btrfs file system.
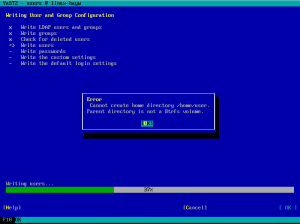
Writing user error

Fortunately, the bug didn’t affect the installation process or AutoYaST. We created a fix that was quickly available as a maintenance update. So make sure your openSUSE system is updated before trying to create new users with YaST.

YaST Network refactoring: status report

Since we submitted the first bits of the yast2-network refactoring by the end of April, we have made quite some progress in this area. Although it is still an ongoing effort, we would like you to give you an update on the current state.

We might say that we have been working on two different areas the user interface implementation and the future data model.

About the user interface, the team has improved the code quite a lot to make it easier to maintain and extend. We have introduced some classes to de-couple the widgets from the data, and it pays off. Additionally, we have fixed some bugs (many of them related to validations), simplified the process of adding new devices and reorganized the hardware tab.
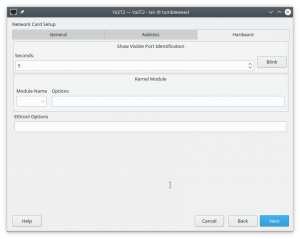
New hardware tab in YaST Network

Regarding the internal data model, we have been thinking about the best way to represent network configuration in an agnostic way so, in the future, we can not only support Wicked but other options too (for the time being, the NetworkManager support is quite limited). If you are curious about the details, we have added a document describing the approach to the repository.

The new data model is already being used to handle DNS and Routing configuration. So if you are using Tumbleweed you have been already using the new network code for some weeks, including the UI enhancements presented in our latest post.
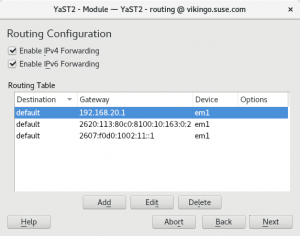
New network routing dialog

Although the data model is so far only used in the mentioned parts, the plan is to submit to Tumbleweed a heavily refactored UI layer during next sprint. So stay tuned.

Added Appstream Metadata to the YaST Packages

The YaST package manager is not the only software manager in the (open)SUSE distributions. There are some more, like Discover in KDE or the GNOME software manager, not to mention the online openSUSE appstore.

While the YaST manager is package oriented, those other software managers are application oriented. That makes a huge difference, especially for the beginner users.

The full list of packages does not only include the applications (basically anything a user can start from the desktop), but also shared libraries, pieces that provide functionality for other applications or basic components needed for the system to work. With so many software packages (the openSUSE OSS repository contains over 35.000 of them!) it’s sometimes hard to find the software you need unless you know what you are looking for.

To offer an application-oriented view on top of all that, the application managers need some special data describing the applications inside the packages. The data are located in the /usr/share/metainfo/*.xml files, if you are interested in the technical details check the AppStream documentation provided by the Freedesktop.org.

Our absolutely awesome community contributor Stasiek Michalski (more famous by his nickname lcp) realized YaST was not offered in those application managers and decided to fix it. So he created an XML generator which collects the data from YaST packages and automagically generates the metainfo XML file needed by the other software managers.
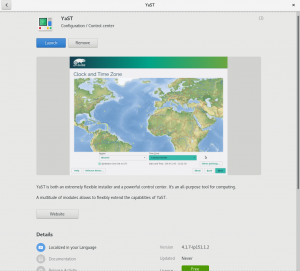
YaST in GNOME Software

As a result, the Gnome Software Manager, Discover and other software managers will offer YaST in Tumbleweed just as any user-oriented application. Thanks lcp!
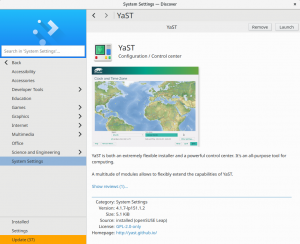
YaST in Discover

AutoYaST Pre-install Scripts & Storage

AutoYaST has a special feature to allow users to customize the installation process and take control in different stages of the installation. For that, the AutoYaST profile offers a section where you can insert your custom scripts. There are four types of scripts: pre-scripts, postpartitioning-scripts, chroot-scripts, post-scripts and init-scripts.

For the particular case of pre-scripts, the documentation states that “It is also possible to change the partitioning in your pre-script“. That means, for example, you could use a script to create a new partition or to configure some kind of technology. Therefore, it would be very convenient to re-analyze the storage devices after running the user pre-scripts. In fact, that was the default behavior in the old storage stack, but the new one was slightly modified to only re-analyze the system under certain conditions.

But turns out some SLE customers were using pre-scripts to configure the behavior of multipath and those changes were not being noticed by AutoYaST.

The solution was quite trivial. We simply decided to always perform a new storage re-analysis after the AutoYaST pre-scripts. We did not find strong reasons to not do it and there should not be significant performance penalty.

And, for the specific case of multipath, YaST now copies some configuration files (e.g., /etc/multipath.conf and /etc/multipath/bindings) to the target system when performing a new installation. Otherwise, the installed system would not contain the configuration applied during the installation.

Clarifying the Usage of Software Management Options

Our software manager is one of the most complex YaST modules, which makes some aspects of its usage not fully obvious for some users. You may have even notice that is the only YaST module in which the interface is clearly different when executed in text and graphical mode. Specially the menu at the top of the interface, which is organized in different sections.

Some users where confused by the fact of some options not being persisted between different executions of the module. Those options are there to modify the current operation of the module, not to change the configuration of package management in the system.

When executed in text mode that was clear because such options where labeled as “temporary change” but the graphical mode didn’t have any indication about it. As you can see in the following screenshot, that’s fixed now.
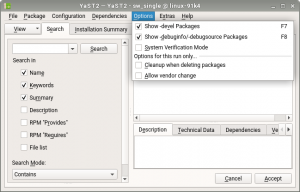
Temporary options in YaST Software

Product License Hard to Understand? Try Another Language!

Some user reported that in the text-mode installation it was impossible to switch the language of a product license. Although during graphical installation everything works flawlessly, in text mode the language switching widget was there… but disabled.

The point is that such behavior was not exactly a bug. It was in fact done on purpose. We decided to prevent such language change some time ago because on the Linux console we’re not able to display the characters of many languages. Hopefully some of our usual reader have just shout “that’s not true!” 😉 Those users remember that in the report of our 67th sprint we explained that now we always use fbiterm when installing in text mode in order to be able to display characters of almost every language.

We are now able to display all languages that currently have license translations, so we have enabled the language switching widget and now both graphical installation and text-based one deliver an equivalent user experience.

More about languages

This is not the only change related to internationalization we did in these sprints. We also added a specific warning message for situations in which YaST is used to change the language of the system but there is no repository containing the needed translation packages. Something that obviously only affects users configuring system in very restricted environments.

As you can see in this and other recent reports, we have to deal relatively often with difficulties related to translation and internationalization. To reduce the effect of those problems on our final users, we also added some extra mechanisms to detect internationalization errors introduced during development. Hopefully that will mean that in future reports the space dedicated to comment language-related problems gets shorter and shorter. 🙂

And that was just a summary!

As long as this post looks, there are many interesting things we have done in these weeks we left out, intentionally or not. We definitely should avoid skipping three reports in a row in the future!

This week it’s Hack Week at SUSE, which means regular YaST development will be put on hold… or will turn into something completely different. You never know what the result of a Hack Week can be!

But in any case we will go back to our sprint-based pace in August. So expect a new blog post in three weeks. See you then!
Getting further with Btrfs in YaST

June 19th, 2019 by

Since the YaST team rewrote the software stack for managing the storage devices, we have been adding and presenting new capabilities in that area regularly. That includes, among other features, the unpaired ability to format and partition all kind of devices and the possibility of creating and managing Bcache devices. Time has come to present another largely awaited feature that is just landing in openSUSE Tumbleweed: support for multi-device Btrfs file systems.

As our usual readers surely know, Btrfs is a modern file system for Linux aimed at implementing advanced features that go beyond the scope and capabilities of traditional file systems. Such capabilities include subvolumes (separate internal file system roots), writable and read-only snapshots, efficient incremental backup and our today’s special: support for distributing a single file system over multiple block devices.

Multi-device Btrfs at a glance

Ok, you got it. YaST now supports multi-device Btrfs file system… but, what that exactly means? Well, as simple as it sounds, it’s possible to create a Btrfs file system over several disks, partitions or any other block devices. Pretty much like a software-defined RAID. In fact, you can use it to completely replace software RAIDs.

Let’s see an example. Imagine you have two disks, /dev/sda and /dev/sdb, and you also have some partitions on the first disk. You can create a Btrfs file system over some devices at the same time, e.g., over /dev/sda2 and /dev/sdb, so you will have a configuration that looks like this.

        /dev/sda                /dev/sdb
            |                       |   
            |                       |   
     ---------------                |   
    |               |               |   
    |               |               |   
/dev/sda1       /dev/sda2           |   
                    |               |   
                    |               |   
                     ---------------
                            |   
                          Btrfs
                            |   
                            |   
                            @ (default subvolume)
                            |   
                            |   
                 -----------------------
                |       |       |       |   
                |       |       |       |   
              @/home  @/log   @/srv    ...

Once you have the file system over several devices, you can configure it to do data striping, mirroring, striping + mirroring, etc. Basically everything that RAID can do. In fact, you can configure how to treat the data and the Btrfs meta-data separately. For example, you could decide to do striping with your data (by setting the data RAID level to the raid0 value) and to do mirroring with the Btrfs meta-data (setting it as raid1 level). For both, data and meta-data, you can use the following levels: single, dup, raid0, raid1, raid10, raid5 and raid6.

The combination of this feature and Btrfs subvolumes opens an almost endless world of possibilities. It basically allows you to manage your whole storage configuration from the file system itself. Usage of separate tools and layers like software-defined RAID or LVM are simply dispensable when using Btrfs in all its glory.

Managing multi-device Btrfs with the YaST Partitioner

Interesting feature indeed, but where to start? As usual, YaST brings you the answer! Let’s see how the YaST version that is currently being integrated in openSUSE Tumbleweed will ease the management of this cool Btrfs feature. SLE and Leap users will have to wait to the next release (15.2) to enjoy all the bells and whistles.

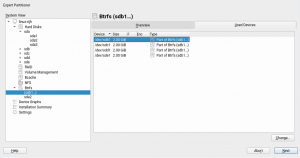
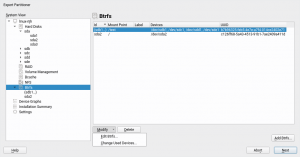
First of all, the Btrfs section of our beloved Expert Partitioner has been revamped as shown in the following picture.

New Btrfs section of the Partitioner

It lists all the Btrfs file systems, single- and multi-device ones. You can distinguish them at first sight by the format of the name. The table contains the most relevant information about the file systems, alongside buttons to add a new file system and to delete and modify the existing ones.

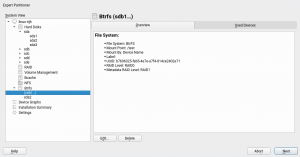
Existing Btrfs file system can be inspected and modified in several ways. The “Overview” tab includes details like the mount point, file system label, UUID, data and meta-data RAID levels, etc. The file system can be edited to modify some aspects like the mount options or the subvolumes.

Overview of a Btrfs file system

In addition, the tab called “Used Devices” contains a detailed list of the block devices being used by the file system. That list can also be modified to add or remove devices. Note such operation can only be done when the file system does not exist on disk yet. Theoretically, Btrfs allows to add and remove devices from an already created file system, but a balancing operation would be needed after that. Such balancing operation could take quite a considerable amount of time. For that reason it has been avoided in the Expert Partitioner.

Devices of a Btrfs file system

Of course, you can still format a single device as Btrfs in the traditional way (using the “edit” button for such device). But let’s see how the new button for adding a Btrfs file system opens new possibilities.

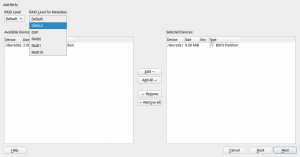
Adding a Btrfs file system

Similar to the RAID dialog, you have the available devices on the left and you can select the devices where you want to create the file system, and also you can indicate the data and meta-data RAID levels. Of course, the admissible RAID levels will depend on the number of selected devices. You will go to the second step of the Btrfs creation by clicking the “Next” button. In this second step, you can select the mount options and define the subvolumes, see the next image.

Options for a new Btrfs file system

And apart of all that, the Expert Partitioner has received several small improvements after including multi-device Btrfs file systems. Now that the multi-device Btrfs file systems are considered first class citizens, they are included in the general list of devices. Note the “Type” column has also been improved to show more useful information, not only for Btrfs but for all kind of devices.

Revamped list of devices

What else works?

But YaST goes far beyond the Partitioner. We have also ensured the storage proposal (i.e. the Guided Setup) can deal with existing multi-device Btrfs configurations when you are performing a new installation. Moreover, the upgrade process is also ready to work with your multi-device Btrfs file system.

Last but not least, AutoYaST can now also be used to specify that kind of Btrfs setups. The official AutoYaST documentation will include a specific section about advanced management of Btrfs file systems on top of several block devices. The content is being reviewed by the SUSE documentation team right now.

What does not work (yet)?

There is still one scenario that is not 100% covered. As described in bug#1137997, is still not possible to use the “Import Mount Points” button in the Partitioner to recreate a multi-device Btrfs layout. But fear not, it’s in our list of things to fix in the short term!

Get it while it’s hot

Free Software development is a collaborative process and now we need YOU to do your part. Please test this new feature and report bugs if something does not work as you expected. And please, come with your ideas and further improvements and use cases. And, of course, don’t forget to have a lot of fun!
Announcing LibYUI Testing Framework

April 26th, 2019 by

The LibYUI framework brings enormous advantage when you need an application which can be used with X and ncurses. But while for Qt, integration testing is a solved problem, meaning there are multiple tools available, the situation is not that rose-colored in case of ncurses. On top, using different tooling would require additional efforts for the framework development. So everything started with openQA, which is using screen comparison with advanced fuzzy logic. This approach kept the costs of the tests development low, but maintenance is still painful when UI changes.

Considering all of the above, Ladislav Slezák and Rodion Iafarov has been working on a proper solution taking Ladislav’s proposal for Hack Week 15 as starting point. The idea is plain simple: provide an HTTP/JSON API which allows interacting with LibYUI by reading and setting different UI properties. Consequently, if some button was moved, resized or got new shortcut key assigned, we do not need to adapt the test code anymore.

Obviously, this functionality is not required in a production system, so we have created separate packages for this purpose. Here you can find GitHub repository containing some documentation.

Demo time!
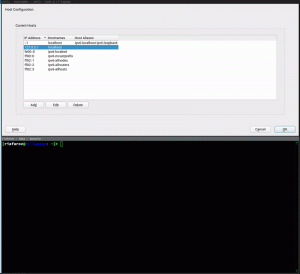
As cool as it sounds, it is even better when you see it in action. In the screencast below you can see how the user can interact with YaST Host module using cURL from the command line.

LibYUI Testing Framework in Action

How to Test the New Packages

If you want to give it a try, you can use the packages we have prepared for you. However, it is recommended to use a virtual machine to not pollute (or accidentally break) your system. You have been warned. 🙂

First of all, you need to get new packages, which are currently available in YaST:Head project in OBS. Navigate to Repositories tab and get the repository which matches the distribution you are running. Afterwards you should be able to install libyui-rest-api package. Also, you need to update related packages and YaST2 modules were recompiled using latest LibYUI. To do that, simply run the following command, where YaST:Head is the repository added in the previous step:

zypper up --allow-vendor-change -r YaST:Head

With the required software in place, you need to start a YaST module setting the environment variable Y2TEST to 1:

xdg-su -c 'Y2TEST=1 YUI_HTTP_PORT=9999 yast2 host' # for Qt
sudo Y2TEST=1 YUI_HTTP_PORT=9999 yast2 host # for ncurses

To allow remote connections you can add YUI_HTTP_REMOTE=1. For security reasons, only connections from localhost are allowed by default.

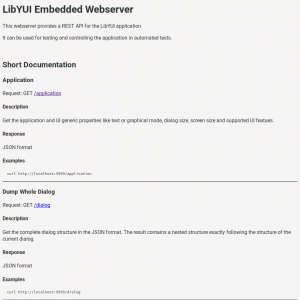
Now you should be able to see something like the screenshot below by navigating with your browser to http://localhost:9999.

LibYUI Testing Framework Browser

Further steps

As you can see, we have not implemented a wrapper for the POST and GET requests to the HTTP server yet, although it will be the next step. We are trying to to find a solution which allows us running tests locally from the terminal, in CI using stable distribution versions, and finally in openQA for development builds.

Other things which are coming:

Security Notice

YaST is usually running with the root permissions, that means everybody who can connect to the HTTP/JSON API can read the values and send button clicks. And because there is no authentication yet, this is a big security problem. In a nutshell: do not use the API in production systems! It has been designed only for testing in a secure environment.

Closing Thoughts

We are pretty excited about this project for several reasons. On the one hand, because we expect it to reduce the maintenance burden of our integration tests. On the other hand, because it is a nice example of Hack Week benefits and cross-team collaboration.

If you are interested, we will try to keep you in the loop by posting information regularly as part of YaST sprints reports.

Highlights of YaST Development Sprint 75

April 10th, 2019 by

With the upcoming releases of openSUSE Leap 15.1 and SLE-15-SP1 approaching, the YaST Team at SUSE is investing a quite significant time in polishing details and fixing small (and not so small) bugs. But fortunately, that still leaves us enough time to also work in our mid term goals.

So welcome to our usual selection of selected bug-fixes (listing them all would be boring) and exciting new stuff. This edition includes:

  • A nice howto for reporting Snapper bugs
  • Tons of fixes for right-to-left languages like Arabic
  • Some adjustments and improvements in the storage area
  • A sneak peak into the future of the yast2-network code
  • Some contributor-oriented content: like our new pull request templates and revamped Docker images for testing

Snapper Bug Reporting Howto

During this sprint we fixed a bug that was causing Snapper to crash under very specific circumstances. The scenario was quite unusual so we had to request quite some information from the reporter of the bug to confirm what was happening. As a nice consequence, in addition to having now a more robust Snapper (one bug killed) you can also enjoy a new page in the openSUSE wiki listing the information you should attach to Bugzilla if you find a bug in Snapper while using (open)SUSE.

Which is also a nice excuse to remind you about the equivalent "Report a YaST bug" page.

YaST around the globe… in all directions

Many of the YaST users and of our blog readers are not native English speakers that surely appreciate the fact that YaST and (open)SUSE in general can be used in several languages. But have you ever thought about the implications of developing a multi-language software? Sure? In all of them? 😉

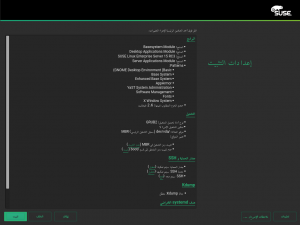
Human languages are so diverse as the human cultures and there are many details to take into account, from the usage of different alphabets to the various ways of dealing with genre or number (in English the words have just one form for singular and another for plural, but that can be way more complex in other languages). In today’s issue we will take a look to one of our favorite translation issues – languages that are written from right to left, like Arabic.

The installer summary in Arabic

Dealing with text that is a mixture of Latin and Arabic script is complex and sometimes we have to deal with interesting bugs. Fortunately we have our own weapon to fight those bugs. If in Star Wars they have protocol droids like C3PO, in the YaST team we have Martin Vidner, which is the closer human equivalent.

He fixed all the reported bugs and even created a tool to help debugging similar problems in the future. You can find the source code of that tool in Github. There is even a hosted instance of the tool to be used by translators or anyone who is curious.

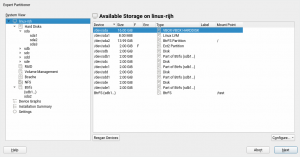
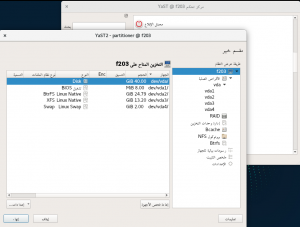
Now, even complex interfaces like our Partitioner look correct enough in right-to-left languages, so we will not have to send mirrors to all our Arabic users.

The YaST Partitioner in Arabic

If you want to know more about this exciting but very complex problem of bidirectional texts, you can start with the following documents.

  • Martin’s great summary of the types problems found in YaST and their respective solutions.
  • Wikipedia: Bi-directional text, an overview of the concepts
  • Unicode Standard Annex #9: Unicode Bidirectional Algorithm, the gory details, 50 pages of them
  • More Arabic YaST

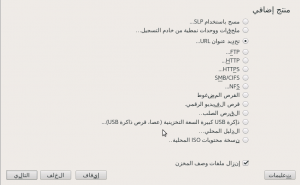
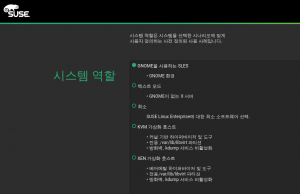
    On related news, we got also some reports about some problems visualizing bullet-points in Korean with the beta versions of the future SLE-15-SP1. But as we could verify, all those problems are gone now.

    SLES installer in Korean

    Storage Fixes

    Other area that has received some attention in this sprint is the storage management. Three related features needed adjustments before the upcoming (open)SUSE releases:

    • Fixed the detection of the boot disk in the Partitioner warnings.
    • The Guided Setup now works better when doing several attempts in different disks.
    • AutoYaST can now install over NFS.

    One of the last storage features that the YaST Team has developed is the support for Bcache devices in the Expert Partitioner. While our QA team was testing it, they found a bug. The Partitioner was complaining because the boot disk did not contain a partition table, which is a mandatory condition for a Legacy (non-UEFI) x86 system. But it was a bogus warning, since they had actually defined a /boot partition in another disk.

    That’s how we found that our Partitioner gets confused if there is a separate partition mounted at /boot and located in a different disk than the root file-system. The Partitioner insisted in considering the disk containing / to be the one that would be using for booting, instead of checking the structure of the disk containing /boot. Now that is fixed and the improvement will be available for the upcoming SLE 15 SP1, Leap 15.1 and, of course, openSUSE Tumbleweed.

    But that was not the only storage bug fixed just in time for the upcoming releases. Some sprints ago, the Storage Proposal algorithm for the initial proposal was modified to try installing on each of the individual disks. If the installation was not possible over a given disk, even after disabling all optional configurations (e.g., snapshots and separate /home), a new proposal is tried over the next disk and so on. The problem was that the disabled options in the previous attempt were not restored back when switching to the next disk. This caused some ugly side effects, for example, if the swap partition was disabled when trying over the first disk, then the proposal did not try to create a swap when it was performing the proposal over the next disk. But now this is also fixed and it will work as expected.

    And last but not least, AutoYaST now supports to install over a Network File System (NFS). This feature was left back when the new YaST storage stack was re-implemented for SLE 15 GA. Actually, this is a non documented feature. That’s why we overlooked that SUSE 12 was able to do it using some hacks and a non-validating AutoYaST profile. But no worries, the feature is available again and such profile will work now in any updated SLE-15 or Leap 15.0. Of course, it will also work while installing SLE-15-SP1 or openSUSE Leap 15.1 and Tumbleweed.

    Nevertheless, we are working on a better and documented way of supporting that scenario in the future, with no need to twist the specification of the AutoYaST profile. Stay tuned for more information.

    Rethinking the Location of Special Boot Partitions

    And now that the storage layer looks sane and healthy for the upcoming releases, we also took some time to think about future improvements. As you know, the storage Guided Setup always proposes to create special boot partitions as needed on each case. That can be a BIOS BOOT (for Legacy x86 systems with GPT), an ESP (for UEFI systems), PReP (for PPC systems) or zipl (for S/390 systems). Strictly speaking those partitions doesn’t have to always be in the same disk than the root partition and in some cases having it on a separate one can have some advantages (like sharing the ESP partition with another operating systems).

    But we have been reconsidering all the cases, the expectations of most users and of the majority of BIOS vendors and the known bugs in other operating systems about sharing boot partitions. We have decided to be more strict in the future about the location of those partitions. Starting today with openSUSE Tumbleweed and in the 15.2 releases of openSUSE Leap and SLE, the Guided Setup will always propose those partitions in the system disk. That is, in the disk containing /boot and the root filesystem.

    The future of YaST Network is here

    Those who follow this blog know that we invested quite some time on the last couple of years rewriting the part of YaST that was more buggy and harder to modify – the storage stack. And surely you have already noticed that since we did it we are introducing new features at a very good pace (like bcache, more powerful Partitioner, Raspberry Pi support, etc.) and fixing the reported bugs in a matter of days or even hours.

    The next in our list of YaST areas to revamp is the networking support. And we are happy to announce that we are starting to have some visible results in that. There is still a very long road ahead and we will provide more information in upcoming reports. But at least we have already a preview of a fully rewritten management of network routes. It’s still not available in openSUSE Tumbleweed. But for those who can’t wait, here you can see the first screenshot. All based in new and clean code backed by automated tests.

    New network routing dialog

    Activating Online Repositories in openSUSE Leap 15.1

    The openSUSE Tumbleweed installer asks at the beginning of the installation whether to activate and use the online repositories when a network connection is available.

    The reason is that the installation DVD does not contain all available packages because of the limited media size. Another advantage is that the installer might directly install newer packages than on the media, this avoids installing the older versions first and then upgrading them to the latest version.

    However, in some case you might not want to use the online repositories, for example if the network connection is slow or is paid.

    We got a bug report that this question was missing in the Leap 15.1. It turned out that the control.xml file which drives the installer did not contain this step. After adding few lines into the file you can now enjoy the online repositories also in Leap 15.1!

    Online repositories in Leap 15.1

    Why are we writing about this? The reason for the missing step in the Leap 15.1 was a bit surprising. Normally all YaST packages are developed in the Git master branch for both Tumbleweed and Leap. However, in this case the Leap 15.1 has been already branched and was developed separately, the changes in the master went only to the Tumbleweed. And we overlooked that small difference when adding this step.

    To avoid this in the future we added a pull request template with a reminder which informs the developers about this difference in the Git setup when opening a pull request.

    If your project also has some unusual setup then the pull request template might a good reminder for you as well.

    Building the Docker Images in OBS

    But the reminders about the correct branches and procedures is not the only news we have for YaST contributors and main developers. As you may remember, few years ago we switched to using Docker at Travis. That works well but we found some disadvantages of that initial setup.

    • You need extra account at the Docker Hub to manage the images.
    • There is no link between OBS and the Docker Hub, we cannot easily trigger image rebuild when a package is updated in OBS.
    • We only blindly triggered the rebuild every 2 hours (in some cases the rebuild is not necessary, in some cases it took too much time).
    • The Docker Hub can use the new OBS packages only after they are published by OBS.
    • The build at the Docker Hub is quite slow (~20 minutes in our case), if an image is currently being built the build is added into the queue and it will start after the previous builds are finished.

    The result is that a new package can be available in Travis several hours after merging the pull request. And even after triggering the build manually it still might take more than one hour.

    We needed a faster cycle and the solution, as usually happens, was in the openSUSE ecosystem. As you may know, the Open Build Service is able of much more than just building packages. So we decided to make use of the OBS capacity of building Docker images.

    Building both our packages and our Docker images in OBS comes with many advantages:

    • The image build is started immediately when the new packages are built, it does not wait for publishing the packages and does not wait for full rebuild (only for the needed packages).
    • No extra accounts/permissions (just use your OBS account).
    • The build in OBS is faster (6-7 minutes).
    • No need for extra Jenkins jobs periodically triggering the image rebuilds.

    This means the new packages should be available in the Docker image in about 10-15 minutes after merging a pull request (for leaf packages, changing a core package which triggers a complete YaST rebuild will of course take more time).

    If you want to learn more about this topic, take a look to the following links:

    And that was not all!

    As usual, the content of this report is just a small subset of all the work the YaST Team does in two weeks. In this sprint, most of that work went to fixing all kind of bugs in preparation for the next releases. Big bugs, small ones, hidden bugs and embarrassingly obvious ones. Hopefully, you got a fix for your reported bug. If not, you can always stay tuned for more news after the next sprint. And don’t forget to have a lot of fun!